
Related Manuals for Endress+Hauser Cleanfit CPA875


Summary of Contents for Endress+Hauser Cleanfit CPA875
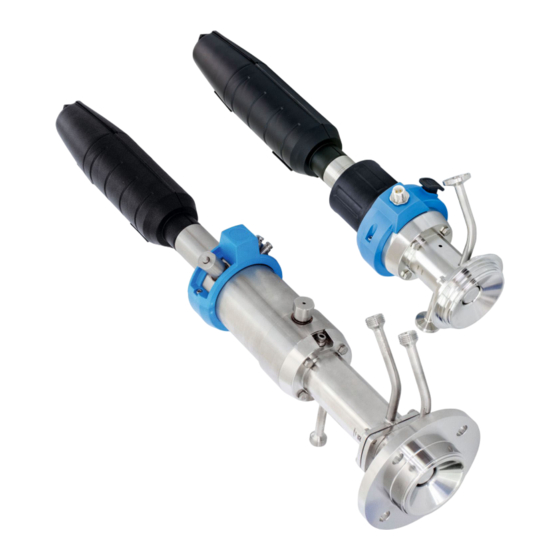
- Page 1 Products Solutions Services BA01279C/07/EN/04.21 71540324 2021-09-01 Operating Instructions Cleanfit CPA875 Retractable process assembly for sterile and hygienic applications...
-
Page 3: Table Of Contents
Cleanfit CPA875 Table of contents Table of contents About this document ....4 Technical data ....67 Warnings . -
Page 4: About This Document
About this document Cleanfit CPA875 About this document Warnings Structure of information Meaning This symbol alerts you to a dangerous situation. DANGER Failure to avoid the dangerous situation will result in a fatal or serious Causes (/consequences) injury. If necessary, Consequences of non-compliance (if applicable) ‣... -
Page 5: Basic Safety Instructions
Intended use The Cleanfit CPA875 retractable assembly, which can be manually or pneumatically operated, is designed for the installation of sensors in vessels and pipes. Thanks to its design, it can be operated in pressurized systems (→ 67). -
Page 6: Operational Safety
Basic safety instructions Cleanfit CPA875 Operational safety Before commissioning the entire measuring point: 1. Verify that all connections are correct. 2. Ensure that electrical cables and hose connections are undamaged. 3. Do not operate damaged products, and protect them against unintentional operation. -
Page 7: Product Description
Cleanfit CPA875 Product description Product description Product design Rinse connection (inlet) Automatic limit position lock, process Connection for limit position switch Automatic limit position lock, service Sensor head Fastening ring for cover Pneumatic connection (move to measuring position) Pneumatic connection (move... - Page 8 Product description Cleanfit CPA875 Process seal A0044088 3 Moving sealing rings, only refers to the double chamber Service position Measuring position "Moving" seals in the double chamber Chamber volume in service position Molded seal Chamber volume in measuring position...
-
Page 9: Incoming Acceptance And Product
Cleanfit CPA875 Incoming acceptance and product identification Incoming acceptance and product identification Incoming acceptance 1. Verify that the packaging is undamaged. Notify the supplier of any damage to the packaging. Keep the damaged packaging until the issue has been resolved. -
Page 10: Product Identification
A new window (Device Viewer) opens. All of the information relating to your device is displayed in this window as well as the product documentation. Product page www.endress.com/CPA875 Manufacturer address Endress+Hauser Conducta GmbH+Co. KG Dieselstraße 24 D-70839 Gerlingen Endress+Hauser... -
Page 11: Mounting
Cleanfit CPA875 Mounting Mounting Mounting requirements 5.1.1 Information regarding hygiene-compliant installation according to EHEDG Easily cleanable installation of equipment according to the criteria of the EHEDG must be free of dead legs. If a dead leg is unavoidable, it shall be kept as short as possible. Under no circumstances shall the length of a dead leg L exceed the pipe’s inner diameter D minus... - Page 12 Mounting Cleanfit CPA875 A0046252 4 Hygienic bores and seals according to 3A Bore, sensor screw-in Bore, rinse chamber Sensor seal Process seal Due to the operating principle, there is a connection between the process and the service chamber during insertion/retraction. This serves a number of purposes: •...
- Page 13 Cleanfit CPA875 Mounting The assembly can be installed in a way that it is self-draining. ‣ 15° A0046174 5 Installation angle for self-draining Rinse Rinse Drain Install the assembly at an angle of 0° to 15° in relation to the horizontal.
- Page 14 Mounting Cleanfit CPA875 5.1.4 Dimensions Short version (2.55) (2.48) (4.61) A0047412 6 Dimensions for short version (36 mm stroke) with manual drive in service position in mm (in) Height of particular process connection (see table below) XA Necessary mounting distance for sensor replacement = 425 mm (16.73")
- Page 15 Cleanfit CPA875 Mounting (2.55) (4.61) (2.68) A0047413 7 Dimensions for short version (36 mm stroke)with pneumatic drive in service position in mm (in) Height of particular process connection (see table below) XA Necessary mounting distance for sensor replacement = 425 mm (16.73")
- Page 16 Mounting Cleanfit CPA875 Long version (2.55) (4.61) (2.68) A0047411 8 Dimensions for long version (78 mm stroke) with pneumatic drive in service position in mm (in) Height of particular process connection (see table below) XA Necessary mounting distance for sensor replacement...
- Page 17 Cleanfit CPA875 Mounting (2.55) (2.48) (4.61) A0047416 9 Dimensions for long version (78 mm stroke) with manual drive in service position in mm (in) Height of particular process connection (see table below) XA Necessary mounting distance for sensor replacement A free path length XA above the drive is required to replace the sensors: XA is 440 mm (17.32") for 225 mm sensors...
- Page 18 Mounting Cleanfit CPA875 Double chamber (2.55) (4.61) (2.68) A0047414 10 Dimensions of double chamber in mm (in) Height of particular process connection (see table below) XA Necessary mounting distance for sensor replacement A free path length XA above the drive is required to replace the sensors: XA is 440 mm (17.32") for 225 mm sensors...
- Page 19 Cleanfit CPA875 Mounting Process connection height Process connection Height XP in mm (in) CA Clamp ISO 2852, ASME BPE-2012, 1½" 14.9 (0.59) A0021866 CB Clamp ISO 2852, ASME BPE-2012, 2" 19.5 (0.77) A0021867 CC Clamp ISO 2852, ASME BPE-2012, 2½"...
- Page 20 Mounting Cleanfit CPA875 9 (0.35) (4X) 56.2 (2.21) 90 (3.54) 110 (4.33) A0046170 12 Dimensions of EB Neumo BioConnect D 50 in mm (in) 11 (0.43) (4X) 72.2 (2.84) 115 (5.51) 140 (5.51) A0046173 13 Dimensions of EF Neumo BioConnect D 65 in mm (in)
- Page 21 Cleanfit CPA875 Mounting 5.1.5 Immersion depths 2 / 3 / 6 4 / 5 A0017745 14 Immersion depths for different service chambers Single chamber/36 mm stroke/225 mm sensor incl. KCI Single chamber/78 mm stroke/225 mm sensor excl. KCl Single chamber/78 mm stroke/360 mm sensor incl. KCI Double chamber/78 mm stroke/225 mm sensor excl.
-
Page 22: Mounting The Assembly
Immersion depth in mm (in) for process connection NA thread ISO228 G1¼ (service chamber 2 and 3) in measuring and service position, mounted on weld-in adapter G1¼" Measuring position Service position Mounting the assembly 5.2.1 Installation Measuring system with single chamber A0017811 16 Measuring system (example) Assembly Cleanfit CPA875 Measuring cable Transmitter Liquiline CM44x Sensor Endress+Hauser... - Page 23 Control unit Control signals (electric/pneumatic) Measuring cable Limit position switch relay signal Transmitter Liquiline CM44x 11/12Inlet/outlet of "inner" service chamber Assembly Cleanfit CPA875 21/22Inlet/outlet of "front" service chamber Sensor 31/32Drive control Manifold Installation recommendation The process seal seals the process in the end position. The assembly is open to the process during insertion/retraction;...
- Page 24 Mounting Cleanfit CPA875 A0039105 18 Example of a sealing system via a bypass. Check valve Valve open/closed, sealing water function Wastewater Shut-off valve open/closed (optional) Water/cleaning agent The seals must be checked and serviced regularly. Therefore measures must be taken to separate the assembly from the process, e.g., by installing a bypass.
- Page 25 Cleanfit CPA875 Mounting Installing/removing the assembly from the process WARNING Risk of injury from high pressure, high temperature or chemical hazards if process medium escapes. ‣ Wear protective gloves, protective goggles and protective clothing. ‣ Mount the assembly only if vessels or pipes are empty and unpressurized.
- Page 26 Mounting Cleanfit CPA875 Pneumatic connection for automatic operation Prerequisites: • Air pressure 4 to 7 bar (absolute pressure) (58 to 102 psi) • Compressed air quality in accordance with ISO 8573-1:2001 Quality class 3.3.3 or 3.4.3 • Solids class 3 (max. 5 μm, max. 5 mg/m , contamination with particles) •...
- Page 27 Cleanfit CPA875 Mounting A0039091 A0039092 21 4/2-way valve 22 5/2-way valve Connection 1 is attached to the compressed air supply. Connections 2 and 4 are used to attach to the pneumatic drive. Connection 3 and, if present, connection 5 are not attached; they are used to vent the drive.
- Page 28 Mounting Cleanfit CPA875 Rinse connections The service chamber connections of the sterile CPA875 retractable assembly make it possible to rinse the chamber (including the sensor) with water or cleaning solution or to sterilize it with steam (SIP) at a maximum pressure of 6 bar (87 psi).
- Page 29 Cleanfit CPA875 Mounting In the "Move from measuring position to service position" state (C), the pressure conditions in the service chamber must be balanced when moving. The inlet and outlet of the service chamber are assigned as follows: • The air is supplied via the inlet (1).
- Page 30 Mounting Cleanfit CPA875 Connecting the limit position switches With limit position detection, you can notify a system located downstream (transmitter, switching amplifier, output interface terminal) whether the assembly is in the measuring or service position (in the case of manual drive, only the measuring position is queried).
- Page 31 Cleanfit CPA875 Mounting A0022163 26 Connecting cable for limit position switch on transmitter, switching amplifier, output interface terminal etc. Measuring position Measuring position Service position Service position Only pins 1 and 2 are assigned for manually activated assemblies with one switch (measuring position).
- Page 32 Mounting Cleanfit CPA875 5.2.2 Sensor installation Preparing the sensor and assembly NOTICE Danger of medium penetrating if a defective sensor is installed. ‣ Inspect the sensor and use a new, intact sensor if necessary. A0030154 28 Sensor installation Thrust collar with O-ring 1.
- Page 33 Cleanfit CPA875 Mounting A0030155 29 Sensor installation options Sensor adapter Retraction pipe Sensor adapter is on top of the retraction pipe Sensor adapter is below the retraction pipe (not visible) Depending on the assembly version, the sensor adapter is either visible (, pos. A) or installed inside the retraction pipe where it is not visible (pos.
- Page 34 Mounting Cleanfit CPA875 Installing and removing sensors if the sensor adapter is visible (item A) A0030186 30 Sensor installation Open-ended wrench (AF 17/19 mm) Cover Dummy plug Sensor Gel and KCl sensors can be installed in this version. Install the sensor as follows: 1.
- Page 35 Cleanfit CPA875 Mounting Installing and removing sensors if the sensor adapter is not visible (item B) A0030187 31 Sensor installation Socket wrench (AF 17/19 mm) Cover Dummy plug (protective cap) Sensor Retraction pipe Gel sensors can be installed in this version. To install KCl sensors, you will need a "Gel - KCl adapter".
- Page 36 Mounting Cleanfit CPA875 7. Mount the cover on the assembly. When doing so, guide the measuring cable through the cable grommet (top of cover). Always mount the cover before you move the assembly to the measuring position. The cover cannot be removed in the measuring position and therefore prevents the removal of the sensor.
- Page 37 Cleanfit CPA875 Mounting 4. Remove the yellow dummy plug (item 3). 5. Screw in the "Gel - KCl adapter" (item 6) in place of the dummy plug and hand-tighten (3 Nm (2.2 lbf ft)). 6. Hand-tighten the lock nut in a clockwise direction, and then use an open-ended wrench (AF 24 mm) to tighten it by ¼...
-
Page 38: Post-Mounting Check
Mounting Cleanfit CPA875 Post-mounting check Put the sensor into operation only if you can answer "yes" to the following questions: • Are the sensor and cable undamaged? • Is the orientation correct? • Is the sensor installed in an assembly and not suspended from the cable? 5.3.1... -
Page 39: Commissioning
Cleanfit CPA875 Commissioning Commissioning Preliminaries Before commissioning, ensure that: • all seals are correctly seated (on the assembly and on the process connection). • the sensor is correctly installed and connected. • the water connection at the rinse connections is correct (if present) or the rinse connections are sealed. -
Page 40: Operation
Operation Cleanfit CPA875 Operation Adapting the assembly to the process conditions CAUTION Due to the operating principle, there is a connection between the process and the service chamber. The service chamber can be pressurized as a result. Process medium may escape during insertion/retraction. - Page 41 Cleanfit CPA875 Operation 7.1.1 Manual operation A0030330 36 Direction of rotation Unlocking button (service position) Unlocking button (measuring position) Moving the assembly from the service position to the measuring position The assembly can only be inserted/retracted if a sensor is installed.
- Page 42 Operation Cleanfit CPA875 Inserting/retracting the assembly if the compressed air supply fails A0046095 37 Failure of compressed air supply Limit position lock for service position Limit position lock for measuring position Normal position (flat side at top) Position for optional sterilization of the seal (flat side is on left)
-
Page 43: Maintenance
Cleanfit CPA875 Maintenance Maintenance WARNING Risk of injury if medium escapes ‣ Before each maintenance task, ensure that the process pipe is empty and rinsed. ‣ Move the assembly to service position. ‣ The assembly may contain residual medium; please rinse thoroughly before commencing work. -
Page 44: Maintenance Tasks
Maintenance Cleanfit CPA875 Interval Maintenance measures When process pressure is applied and cleaning disabled, there should be no discharge of medium from the assembly' s rinse chamber outlet. ‣ Check for defective process seal(s). ‣ Biannually Clean the assembly thoroughly. - Page 45 Cleanfit CPA875 Maintenance ‣ Choose a cleaning agent to suit the degree and type of soiling. Endress+Hauser...
- Page 46 Maintenance Cleanfit CPA875 8.2.2 Cleaning the assembly WARNING Risk of injury if medium escapes ‣ Before each maintenance task, ensure that the process pipe is empty and rinsed. ‣ Move the assembly to service position. ‣ The assembly may contain residual medium; please rinse thoroughly before commencing work.
- Page 47 Cleanfit CPA875 Maintenance Clean the sensor: • Before every calibration • Regularly during operation • Before returning it for repairs You can remove the sensor and clean it manually, or you can clean it in automatic mode using the rinse water connection.
- Page 48 Maintenance Cleanfit CPA875 8.2.4 Replacing seals To replace the seals in the assembly, you must interrupt the process and remove the assembly completely. CAUTION Risk of injury due to residual medium and elevated temperatures ‣ When handling parts that are in contact with the medium, protect against residual medium and elevated temperatures.
- Page 49 Cleanfit CPA875 Maintenance 5. If medium continues to escape, the sealing system is damaged; take the measuring point out of service and perform maintenance on the assembly. Endress+Hauser...
- Page 50 Maintenance Cleanfit CPA875 Molded seal - process connection (A) A0030357 38 Replacing seals, Part 1 Securing screws 1. Release four securing screws (pos. 1). A0030365 39 Replacing seals, Part 2 Process connection Gasket Service chamber Molded seal Immersion tube 2.
- Page 51 Cleanfit CPA875 Maintenance O-rings - single chamber (B) O-rings A0030356 40 Replacing seals, Part 1 Securing screws 1. Release the four securing screws (item 1). 2. Remove the service chamber (item 3) with the process connection (item 2). Process connection...
- Page 52 Maintenance Cleanfit CPA875 Molded seal 1. Remove the molded seal (→ 41, 51 item 5) using a tweezers or long-nosed pliers. 2. Apply a thin layer of grease to the molded seal. 3. Press the molded seal into the guide groove of the immersion tube. Ensure that the molded seal is seated correctly.
- Page 53 Cleanfit CPA875 Maintenance Molded seal - process connection, double chamber (C) A0030358 42 Replacing seals, Part 1 Securing screws 1. Release the four securing screws (pos. 1). A0030359 43 Replacing seals, Part 2 Process connection Gasket Molded seal Immersion tube 2.
- Page 54 Maintenance Cleanfit CPA875 Molded seal - "front" service chamber (D) A0030360 44 Replacing seals, Part 1 Securing screws 1. Release the four securing screws (item 1). A0030366 45 Replacing seals, Part 2 "Front" service chamber with process connection...
- Page 55 Cleanfit CPA875 Maintenance 8. Tighten the four securing screws with a torque of 4 Nm. Endress+Hauser...
- Page 56 Maintenance Cleanfit CPA875 Seals - inner double chamber (E) O-ring in process connection A0030361 46 Replacing seals, Part 1 Securing screws Service chamber with front chamber and process connection 1. Release the four securing screws (item 1). 2. Remove the service chamber with front chamber and process connection (item 2).
- Page 57 Cleanfit CPA875 Maintenance Molded seal A0030362 48 Replacing seals, Part 3 O-rings Molded seal 1. Remove the molded seal (item 5) using a tweezers or long-nosed pliers. 2. Apply a thin layer of grease to the new molded seal (e.g., Klüber Paraliq GTE 703).
-
Page 58: Repair
The product must be returned if repairs or a factory calibration are required, or if the wrong product was ordered or delivered. As an ISO-certified company and also due to legal regulations, Endress+Hauser is obliged to follow certain procedures when handling any returned products that have been in contact with medium. -
Page 59: Disposal
(WEEE), the product is marked with the depicted symbol in order to minimize the disposal of WEEE as unsorted municipal waste. Do not dispose of products bearing this marking as unsorted municipal waste. Instead, return them to Endress+Hauser for disposal under the applicable conditions. -
Page 60: Accessories
Accessories Cleanfit CPA875 Accessories The following are the most important accessories available at the time this documentation was issued. ‣ For accessories not listed here, please contact your Service or Sales Center. The following accessories can be ordered via the product structure or the spare parts structure XPC0001: •... -
Page 61: Device-Specific Accessories
Cleanfit CPA875 Accessories 4+ 5+ 6- 4+ 5+ 6- 1+ 2- 3 1+ 2- 3 A0046169 50 Wiring of output interface terminal with assembly Supply voltage Output interface terminals Output, measuring position Limit position switch Assembly Cable for wiring → 60 Output, service position 10.1... - Page 62 Accessories Cleanfit CPA875 Memosens CPS41E • pH sensor for process technology • With ceramic junction and KCl liquid electrolyte • Digital with Memosens 2.0 technology • Product Configurator on the product page: www.endress.com/cps41e Technical Information TI01495C Ceraliquid CPS41D / CPS41 •...
- Page 63 Cleanfit CPA875 Accessories Orbisint CPS12D / CPS12 • ORP sensor for process technology • Product Configurator on the product page: www.endress.com/cps12d www.endress.com/cps12 Technical Information TI00367C Memosens CPS42E • ORP sensor for process technology • Digital with Memosens 2.0 technology • Product Configurator on the product page: www.endress.com/cps42e...
- Page 64 Accessories Cleanfit CPA875 Memosens CPS16D • Combined pH/ORP sensor for process technology • With dirt-repellent PTFE diaphragm • With Memosens technology • Product Configurator on the product page: www.endress.com/cps16D Technical Information TI00503C The 120 mm version in the CPS16D is not suitable.
-
Page 65: Service-Specific Accessories
Cleanfit CPA875 Accessories Oxygen sensors Oxymax COS22E • Sterilizable sensor for dissolved oxygen • Digital with Memosens 2.0 technology • Product Configurator on the product page: www.endress.com/cos22e Technical Information TI00446C Oxymax COS22D / COS22 • Sterilizable sensor for dissolved oxygen •... -
Page 66: Installation Material For Rinse Connections
Accessories Cleanfit CPA875 10.3 Installation material for rinse connections Kit, water filter • Water filter (dirt trap) 100 µm, complete, incl. angle bracket • Order No. 71390988 Pressure reducer kit • Complete, incl. manometer and angle bracket • Order No. 71390993 Hose connection set G¼, DN 12... - Page 67 Cleanfit CPA875 Technical data Technical data 11.1 Mounting Sensor selection Short version Gel sensors, ISFET 225 mm KCl sensors 225 mm Long version Gel sensors, ISFET 225 mm Gel sensors, ISFET 360 mm KCl sensors 360 mm Special mounting Limit position switches...
- Page 68 Technical data Cleanfit CPA875 Pressure-temperature p[pa] p [psi] p [bar] ratings 1600000 T[°C] T[°F] A0042816 51 Pressure-temperature ratings for pneumatic drive Dynamic range Static range p[pa] p psi] p[bar] 800000 T[°C] T[°F] A0042815 52 Pressure-temperature ratings for manual drive...
- Page 69 Cleanfit CPA875 Technical data 11.4 Mechanical construction Design, dimensions → Section "Installation" Rinse chamber volume Volume cm³ (in³)(max.) Volume cm³ (in³)(min.) Single chamber, short stroke 20.94 (1.28) 10.51 (0.64) Single chamber, long stroke 42.97 (2.62) 20.77 (1.27) Double chamber (front) 18.53 (1.13)
- Page 70 Technical data Cleanfit CPA875 Option Description Clamp D6/D25 Clamp nozzle DIN32676 Pipe internal diameter 6 mm (0.24 in) Outer diameter, clamp 25 mm Ra ≤ 0.4 BioConnect DN6 Neumo BioConnect DN6 with male thread M16 x 1.5 with pipe connection according to DIN11866 8x1 Pipe internal diameter 6 mm (0.24 in)
- Page 71 Cleanfit CPA875 Index Index Accessories ....... . 60 Safety instructions ......5 Scope of delivery .
- Page 72 *71540324* 71540324 www.addresses.endress.com...
Need help?
Do you have a question about the Cleanfit CPA875 and is the answer not in the manual?
Questions and answers