Table of Contents
Advertisement
Quick Links
Advertisement
Table of Contents

Related Manuals for ZyXEL Communications EMG2881-T20A


Summary of Contents for ZyXEL Communications EMG2881-T20A
- Page 1 User’s Guide EMG2881-T20A Dual-Band Wireless AC1300 Gigabit Ethernet Gateway Default Login Details Version 1.00 Edition 1, 01/2018 LAN IP Address http://192.168.1.1 User Name admin Password See the device label Copyright © 2018 Zyxel Communications Corporation...
- Page 2 Related Documentation • Quick Start Guide The Quick Start Guide shows how to connect the EMG2881-T20A and access the Web Configurator. • More Information Go to support.zyxel.com to find other information on the EMG2881-T20A...
-
Page 3: Document Conventions
Log Setting tab to get to that screen. Icons Used in Figures Figures in this user guide may use the following generic icons. The EMG2881-T20A icon is not an exact representation of your device. EMG2881-T20A... -
Page 4: Table Of Contents
Introducing the Web Configurator ..................... 16 Router Mode ............................18 Tutorials ..............................24 Technical Reference ........................34 Monitor ..............................35 WAN ............................... 37 Wireless LAN ............................53 LAN ................................. 70 Applications ............................75 Security ..............................92 Maintenance ............................98 Troubleshooting ..........................106 EMG2881-T20A User’s Guide... -
Page 5: Table Of Contents
1.1.2 Wireless Access ........................10 1.2 Applications ............................ 11 1.3 Ways to Manage the EMG2881-T20A ..................11 1.4 Good Habits for Managing the EMG2881-T20A ................11 1.5 Hardware ............................12 1.5.1 Front Panel ..........................12 1.5.2 Front Panel LEDs (Lights) ....................... 12 1.5.3 Rear Panel .......................... - Page 6 4.2 Set Up a Wireless Network Using WPS ................... 24 4.2.1 Push Button Configuration (PBC) ..................24 4.2.2 PIN Configuration ........................25 4.3 Connect to the EMG2881-T20A’s WiFi Network Manually (No WPS) ........26 4.3.1 Configuring Wireless Security on the EMG2881-T20A ............27 4.3.2 Configure Your Notebook ....................28 4.4 Using Multiple SSIDs on the EMG2881-T20A ..................
- Page 7 Chapter 10 Security ...............................92 10.1 Overview ............................. 92 10.1.1 What You Can Do ....................... 92 10.1.2 What You Need To Know ....................92 10.2 IPv4 Firewall Screen ........................93 10.3 IPv6 Firewall Screen ........................95 Chapter 11 Maintenance............................98 EMG2881-T20A User’s Guide...
- Page 8 12.2 Power, Hardware Connections, and LEDs ................106 12.3 EMG2881-T20A Access and Login .................... 107 12.4 Internet Access ........................... 108 12.5 Resetting the EMG2881-T20A to Its Factory Defaults .............. 109 12.6 Wireless Connections ......................... 110 Appendix A Pop-up Windows, JavaScript and Java Permissions ..........112 Appendix B Setting Up Your Computer’s IP Address..............
-
Page 9: User's Guide
User’s Guide... -
Page 10: Introduction
These devices can connect to the EMG2881-T20A to access network resources and the Internet. Your EMG2881-T20A supports Wi-Fi Protected Setup (WPS), which allows you to quickly set up a wireless network with strong security. You can configure your wireless network using the built-in Web Configurator. -
Page 11: Applications
If you forget your password, you will have to reset the EMG2881-T20A to its factory default settings. If you backed up an earlier configuration file, you would not have to totally re-configure the EMG2881-T20A. You could simply restore your last configuration. -
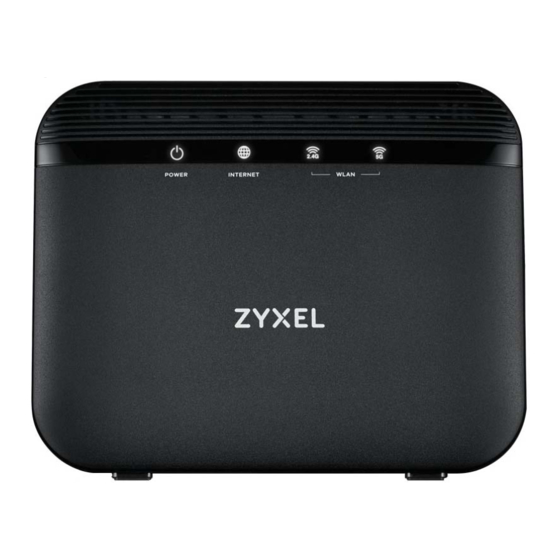
Page 12: Hardware
Blinking The EMG2881-T20A is communicating with 2.4 GHz/5 GHz wireless clients. Amber Blinking The EMG2881-T20A is setting up a WPS connection with a 2.4 GHz/5 GHz wireless client. The wireless LAN is not ready or has failed. EMG2881-T20A User’s Guide... -
Page 13: Rear Panel
Press the WPS button for more than one second to quickly set up a secure wireless connection between the EMG2881-T20A and a WPS-compatible client. Reset Press the button to return the EMG2881-T20A to the factory defaults. LAN1 ~ LAN4 Connect computers or other Ethernet devices to Ethernet ports for Internet access. -
Page 14: Rear Panel Leds (Lights)
Press the WPS button for more than one second and release it. Press the WPS button on another WPS-enabled device within range of the EMG2881-T20A. The WLAN 2.4G and WLAN 5G LEDs flash amber while the EMG2881-T20A sets up a WPS connection with the other wireless device. - Page 15 Chapter 1 Introduction Press the RESET button for longer than five seconds to set the EMG2881-T20A back to its factory-default configurations. EMG2881-T20A User’s Guide...
-
Page 16: Introducing The Web Configurator
Introducing the Web Configurator 2.1 Overview This chapter describes how to access the EMG2881-T20A Web Configurator and provides an overview of its screens. The Web Configurator is an HTML-based management interface that allows easy setup and management of the EMG2881-T20A via Internet browser. Use Internet Explorer 9.0 and later versions, Mozilla Firefox 21 and later versions, Safari 6.0 and later versions or Google Chrome 26.0 and later... - Page 17 Figure 5 Login screen The following table describes the labels in this screen. Table 4 Login screen LABEL DESCRIPTION Username Type "admin" (default) as the user name. Password Type the default password (on the device label). Click Login. EMG2881-T20A User’s Guide...
-
Page 18: Router Mode
Router Mode 3.1 Overview The EMG2881-T20A is set to router mode by default. Routers are used to connect the local network to another network (for example, the Internet). In the figure below, the EMG2881-T20A connects the local network (LAN1 ~ LAN4) to the Internet. - Page 19 Model Number This is the model name of your device. Firmware Version This is the firmware version and the date created. Sys OP Mode This is the device mode to which the EMG2881-T20A is set - Router Mode. EMG2881-T20A User’s Guide...
- Page 20 This shows the IPv6 address of the EMG2881-T20A on the LAN. WLAN 2.4G Information WLAN OP Mode This is the device mode to which the EMG2881-T20A’s wireless LAN is set - Access Point Mode. MAC Address This shows the 2.4GHz wireless adapter MAC Address of your device.
-
Page 21: Navigation Panel
For the 2.4GHz/5GHz WLAN, it displays the maximum transmission rate when the 2.4GHz/5GHz WLAN is enabled and N/A when the WLAN is disabled. 3.2.1 Navigation Panel Use the sub-menus on the navigation panel to configure EMG2881-T20A features. Figure 8 Navigation Panel: Router Mode The following table describes the sub-menus. - Page 22 This screen allows you to assign IP addresses on the LAN to specific individual computers based on their MAC addresses. IPv6 LAN Use this screen to configure the IPv6 address for the EMG2881-T20A on the LAN. Application Bandwidth QoS General Use this screen to enable or disable QoS and set the upstream bandwidth.
- Page 23 Table 7 Navigation Panel: Router Mode (continued) LINK FUNCTION Restart System Restart This screen allows you to reboot the EMG2881-T20A without turning the power off. Use this screen to view the list of activities recorded by your EMG2881-T20A. ROMD ROMD Use this screen to save and/or clean the configuration to/from the ROMD file which can store customized default settings.
-
Page 24: Tutorials
4.2.1 Push Button Configuration (PBC) Make sure that your EMG2881-T20A is turned on and that the device is placed within range of your Android 4.42 smartphone. WPS is enabled by default on the EMG2881-T20A. If not, log into EMG2881-T20A’s Web Configurator and turn it on in the Configuration >... -
Page 25: Pin Configuration
Enter the client’s PIN number to the PIN field in the Configuration > Wireless > WPS screen on the EMG2881-T20A. Click the Start button (or button next to the PIN field) on the EMG2881-T20A’s WPS screen within two minutes. The EMG2881-T20A authenticates the wireless client and sends the proper configuration settings to the wireless client. -
Page 26: Connect To The Emg2881-T20A's Wifi Network Manually (No Wps)
4.3 Connect to the EMG2881-T20A’s WiFi Network Manually (No WPS) In this example, we change the EMG2881-T20A’s wireless settings, and then manually select the EMG2881-T20A’s new SSID and enter the Wi-Fi key to connect a wireless client to the EMG2881-T20A. EMG2881-T20A User’s Guide... -
Page 27: Configuring Wireless Security On The Emg2881-T20A
16). Go to the Configuration > Wireless > Wireless screen to enable the 2.4 GHz wireless network. Enter SSID_Example as the SSID and select Auto Channel Selection to have the EMG2881-T20A scans for and select an available channel automatically. Set security mode to WPA2-PSK and enter ThisismyWPA-PSKpre-sharedkey in the Pre-Shared Key field. -
Page 28: Configure Your Notebook
Note: In this example, we use a Windows 7 laptop that has a built-in wireless adapter as the wireless client. The EMG2881-T20A supports IEEE 802.11a, IEEE 802.11b, IEEE 802.11g, IEEE 802.11n, IEEE 802.11a, IEEE 802.11an, and IEEE 802.11ac wireless clients. Make sure that your notebook or computer’s wireless adapter supports one of these standards. - Page 29 Chapter 4 Tutorials Select SSID_Example and click Connect. The following screen displays if WPS is enabled on the EMG2881-T20A but you didn’t press the WPS button. Click Connect using as security key instead. Type the security key in the following screen. Click OK.
-
Page 30: Using Multiple Ssids On The Emg2881-T20A
Chapter 4 Tutorials Check the status of your wireless connection in the screen below. If the wireless client keeps trying to connect to or acquiring an IP address from the EMG2881-T20A, make sure you entered the correct security key. If the connection has limited or no connectivity, make sure the EMG2881-T20A is connected to a router with the DHCP server enabled. -
Page 31: Configuring Security Settings Of Multiple Ssids
Connect your computer to the LAN port of the EMG2881-T20A using an Ethernet cable. The default IP address of the EMG2881-T20A in router mode is “192.168.1.1”. In this case, your computer must have an IP address in the range between “192.168.1.2” and “192.168.1.254”. - Page 32 Click the Edit icon of the second entry to configure wireless and security settings for SSID_VoIP. 10 Configure the screen as follows. You enable Intra-BSS Traffic for SSID_VoIP to allow wireless clients in the same wireless network to communicate with each other. Click Apply. EMG2881-T20A User’s Guide...
- Page 33 Chapter 4 Tutorials 11 Click the Edit icon of the third entry to configure wireless and security settings for SSID_Guest. 12 Configure the screen as follows. In this example, you disable Intra-BSS Traffic for SSID_Guest. Click Apply. EMG2881-T20A User’s Guide...
-
Page 34: Technical Reference
Technical Reference... -
Page 35: Monitor
DHCP (Dynamic Host Configuration Protocol, RFC 2131 and RFC 2132) allows individual clients to obtain TCP/IP configuration at start-up from a server. You can configure the EMG2881-T20A’s LAN as a DHCP server or disable it. When configured as a server, the EMG2881-T20A provides the TCP/IP configuration for the clients. - Page 36 Reserve Select this if you want to reserve the IP address for this specific MAC address. Apply Click Apply to save your changes back to the EMG2881-T20A. Cancel Click Cancel to reload the previous configuration for this screen. EMG2881-T20A User’s Guide...
-
Page 37: Wan
• Use the Management WAN screen to enter your ISP information and set how the computer acquires its IP, DNS and WAN MAC addresses (Section 6.4 on page 39). • Use the NAT > General screen to enable NAT, set a default server and change your EMG2881-T20A’s port forwarding settings (Section 6.5.1 on page 47). -
Page 38: Configuring Your Internet Connection
(and service name) for user authentication. WAN IP Address The WAN IP address is an IP address for the EMG2881-T20A, which makes it accessible from an outside network. It is used by the EMG2881-T20A to communicate with other devices in other networks. It can be static (fixed) or dynamically assigned by the ISP each time the EMG2881-T20A tries to access the Internet. -
Page 39: Management Wan
A and D. IGMP (Internet Group Multicast Protocol) is a network-layer protocol used to establish membership in a multicast group - it is not used to carry user data. The EMG2881-T20A supports both IGMP version 1 (IGMP-v1) and IGMP version 2 (IGMP-v2). -
Page 40: Edit Wan Connection
This shows the status of the connection. Modify Click the Edit icon to configure the connection. Click the Delete icon to delete this connection from the EMG2881-T20A. A window displays asking you to confirm that you want to delete the connection. 6.4.1 Edit WAN Connection Click the Edit icon next to the connection you want to configure. - Page 41 Select IPv4 Only if you want the EMG2881-T20A to run IPv4 only. Select Dual Stack to allow the EMG2881-T20A to run IPv4 and IPv6 at the same time. Select IPv6 Only if you want the EMG2881-T20A to run IPv6 only.
- Page 42 First DNS Server Select Obtained From ISP if your ISP dynamically assigns DNS server information (and the EMG2881-T20A's WAN IP address). The field to the right displays the (read-only) DNS server IP Second DNS Server address that the ISP assigns.
- Page 43 LABEL DESCRIPTION First DNS Server Select Obtained From ISP to have the EMG2881-T20A get the IPv6 DNS server addresses from the ISP automatically. Second DNS Server Select User-Defined and enter the IPv6 DNS server address assigned by the ISP to have the Third DNS Server EMG2881-T20A use the IPv6 DNS server addresses you configure manually.
- Page 44 Select IPv4 Only if you want the EMG2881-T20A to run IPv4 only. Select Dual Stack to allow the EMG2881-T20A to run IPv4 and IPv6 at the same time. Select IPv6 Only if you want the EMG2881-T20A to run IPv6 only.
- Page 45 First DNS Server Select Obtained From ISP if your ISP dynamically assigns DNS server information (and the EMG2881-T20A's WAN IP address). The field to the right displays the (read-only) DNS server IP Second DNS Server address that the ISP assigns.
- Page 46 LABEL DESCRIPTION First DNS Server Select Obtained From ISP to have the EMG2881-T20A get the IPv6 DNS server addresses from the ISP automatically. Second DNS Server Select User-Defined and enter the IPv6 DNS server address assigned by the ISP to have the Third DNS Server EMG2881-T20A use the IPv6 DNS server addresses you configure manually.
-
Page 47: Nat
Select IPv4 Only if you want the EMG2881-T20A to run IPv4 only. Select Dual Stack to allow the EMG2881-T20A to run IPv4 and IPv6 at the same time. Select IPv6 Only if you want the EMG2881-T20A to run IPv6 only. - Page 48 User define in the Name field, enter an internal port number manually or leave the field blank for port range forwarding. Click to add the rule in the port forwarding summary table. Delete Click to remove a rule. EMG2881-T20A User’s Guide...
-
Page 49: Port Trigger Screen
Type a port number or the ending port number in a range of port numbers. Trigger Port The trigger port is a port (or a range of ports) that causes (or triggers) the EMG2881-T20A to record the IP address of the LAN computer that sent the traffic to a server on the WAN. -
Page 50: Dynamic Dns Screen
PPTP VPN account. If PPTP is disabled, then when a client sends a request to a VPN server, the server will reply to the EMG2881-T20A and the EMG2881-T20A will drop the request. When PPTP is enabled, the EMG2881-T20A will forward the reply from the VPN server to the client that initiated the request, and the connection will establish successfully. -
Page 51: Interface Group Screen
Enter your user name. Password Enter the password assigned to you. Apply Click Apply to save your changes back to the EMG2881-T20A. Cancel Click Cancel to begin configuring this screen afresh. 6.7 Interface Group Screen You can manually add a LAN and/or WLAN interface to a new group. Click Configuration > WAN >... - Page 52 To remove a LAN or wireless LAN interface from the Grouped LAN Interfaces, use the righ-facing arrow. Apply Click this button to save your settings back to the EMG2881-T20A. Cancel Click Cancel to begin configuring this screen afresh. EMG2881-T20A User’s Guide...
-
Page 53: Wireless Lan
This chapter discusses how to configure the wireless network settings in your EMG2881-T20A. The EMG2881-T20A is able to function both 2.4GHz and 5GHz network at the same time. You can have different wireless and wireless security settings for 2.4GHz and 5GHz wireless LANs. Click Configuration >... -
Page 54: What You Can Do
EMG2881-T20A and the wireless clients, and make other basic configuration changes (Section 7.2 on page 57). • Use the More AP screen to set up multiple wireless networks on your EMG2881-T20A (Section 7.4 on page 61). • Use the MAC Filter screen to allow or deny wireless stations based on their MAC addresses from connecting to the EMG2881-T20A (Section 7.5 on page... - Page 55 For example, if the wireless network has a RADIUS server, you can choose WPA or WPA2. If users do not log in to the wireless network, you can choose no encryption, Static WEP, WPA-PSK, or WPA2-PSK. Hexadecimal characters are 0, 1, 2, 3, 4, 5, 6, 7, 8, 9, A, B, C, D, E, and F. EMG2881-T20A User’s Guide...
- Page 56 Guest WLAN allows you to set up a wireless network where users can access to Internet via the EMG2881-T20A (Z), but not other networks connected to the Z. In the following figure, a guest user can access the Internet from the guest wireless network A via Z but not the home or company network N.
-
Page 57: Wireless Lan Screen
Use this screen to configure the SSID and wireless security of the wireless LAN. Note: If you are configuring the EMG2881-T20A from a computer connected to the wireless LAN and you change the EMG2881-T20A’s SSID, channel or security settings, you will lose your wireless connection when you press Apply to confirm. - Page 58 Select Enable to activate the 2.4GHz and/or 5GHz wireless LAN. Select Disable to turn it off. Note: You can enable or disable both 2.4GHz and 5GHz wireless LANs by using the WIFI button located on the side panel of the EMG2881-T20A. Name (SSID) The SSID (Service Set IDentity) identifies the Service Set with which a wireless client is associated.
-
Page 59: Wireless Security
If you are in the Wireless LAN 2.4G > General screen, you can select from the following: • 802.11b: allows either IEEE 802.11b or IEEE 802.11g compliant WLAN devices to associate with the EMG2881-T20A. In this mode, all wireless devices can only transmit at the data rates supported by IEEE 802.11b. •... -
Page 60: No Security
Select No Security to allow wireless clients to communicate with the access points without any data encryption. Note: If you do not enable any wireless security on your EMG2881-T20A, your network is accessible to any wireless networking device that is within range. -
Page 61: More Ap Screen
Timer clients. The default is 3600 seconds (60 minutes). Apply Click Apply to save your changes back to the EMG2881-T20A. Cancel Click Cancel to reload the previous configuration for this screen. 7.4 More AP Screen This screen allows you to enable and configure multiple wireless networks and guest wireless network settings on the EMG2881-T20A. -
Page 62: More Ap Edit
Chapter 7 Wireless LAN You can configure up to four SSIDs to enable multiple BSSs (Basic Service Sets) on the EMG2881-T20A. This allows you to use one access point to provide several BSSs simultaneously. You can then assign varying security types to different SSIDs. Wireless clients can use different SSIDs to associate with the same access point. - Page 63 WMM QoS Check this to have the EMG2881-T20A automatically give a service a priority level according to the ToS value in the IP header of packets it sends. WMM QoS (Wifi MultiMedia Quality of Service) gives high priority to voice and video, which makes them run more smoothly.
-
Page 64: Mac Filter Screen
Click Cancel to reload the previous configuration for this screen. 7.5 MAC Filter Screen The MAC filter screen allows you to configure the EMG2881-T20A to give exclusive access to devices (Allow) or exclude devices from accessing the EMG2881-T20A (Deny). Every Ethernet device has a unique MAC (Media Access Control) address. -
Page 65: Advanced Screen
Data with its frame size larger than this value will perform the RTS (Request To Send)/CTS (Clear To Send) handshake. This field is not configurable and the EMG2881-T20A automatically changes to use the maximum value if you select 802.11a/an, 802.11a/an/ac, 802.11n, 802.11gn or 802.11bgn in the Wireless LAN 2.4G/5G >... -
Page 66: Wps Screen
Tx Power Set the output power of the EMG2881-T20A in this field. If there is a high density of APs in an area, decrease the output power of the EMG2881-T20A to reduce interference with other APs. Select one of the following 100%, 90%, 75%, 50%, 25% or 10%. - Page 67 PIN number. PIN Number This is the WPS PIN (Personal Identification Number) of the EMG2881-T20A. Enter this PIN in the configuration utility of the device you want to connect to the EMG2881-T20A using WPS. The PIN is not necessary when you use WPS push-button method.
-
Page 68: Scheduling Screen
DESCRIPTION Status This displays Configured when the EMG2881-T20A has connected to a wireless network using WPS or when WPS Enable is selected and wireless or wireless security settings have been changed. The current wireless and wireless security settings also appear in the screen. - Page 69 If you click Select All you can not select any specific days and times. Click Clean All to remove all the wireless LAN scheduling. Apply Click Apply to save your changes back to the EMG2881-T20A. Cancel Click Cancel to reload the previous configuration for this screen.
-
Page 70: Lan
The LAN screens can help you configure a manage IP address, and partition your physical network into logical networks. 8.2 What You Can Do • Use the LAN IP screen to configure the IPv4 and IPv6 addresses for your EMG2881-T20A on the LAN (Section 8.4 on page 71). -
Page 71: Lan Ip Screen
These parameters should work for the majority of installations. 8.4 LAN IP Screen Use this screen to change the IP address for your EMG2881-T20A. Click Configuration > LAN > LAN IP. Figure 38 Configuration > LAN > LAN IP The following table describes the labels in this screen. -
Page 72: Static Dhcp Screen
Enable the DHCP server unless your ISP instructs you to do otherwise. Select Disable to stop the EMG2881-T20A acting as a DHCP server. When configured as a server, the EMG2881-T20A provides TCP/IP configuration for the clients. If not, DHCP service is disabled and you must have another DHCP server on your LAN, or else the computers must be manually configured. -
Page 73: Ipv6 Lan Screen
DESCRIPTION LAN IPv6 Address Assignment Enable_DHCPv6-PD Select this option to use DHCPv6 prefix delegation. The EMG2881-T20A will obtain an IPv6 prefix from the ISP or a connected uplink router for the LAN. Autoconfiguration Select SLAAC + RDNSS to enable IPv6 stateless auto-configuration on this interface. The... - Page 74 Enter the valid lifetime for the prefix. Link Local Only Select this option to only use the link local address on the EMG2881-T20A interfaces in the LAN. Select this option to identify a unique local address of the EMG2881-T20A in the LAN.
-
Page 75: Applications
This can cause a reduction in network performance and make the network inadequate for time-critical application such as video-on-demand. Configure QoS on the EMG2881-T20A to group and prioritize application traffic and fine-tune network performance. Setting up QoS involves these steps: Configure classifiers to sort traffic into different flows. -
Page 76: What You Need To Know
Bursty traffic may cause network congestion. Traffic shaping regulates packets to be transmitted with a pre-configured data transmission rate using buffers (or queues). Your EMG2881-T20A uses the Token Bucket algorithm to allow a certain amount of large bursts while keeping a limit at the average rate. - Page 77 (Before Traffic Policing) (After Traffic Policing) The EMG2881-T20A supports three incoming traffic metering algorithms: Token Bucket Filter (TBF), Single Rate Two Color Maker (srTCM), and Two Rate Two Color Marker (trTCM). You can specify actions which are performed on the colored packets. See Section 9.7 on page 83...
-
Page 78: The Qos General Screen
You can also set this number lower than the interfaces’ actual transmission speed. This will cause the EMG2881-T20A to not use some of the interfaces’ available bandwidth. If you leave this field blank, the EMG2881-T20A automatically sets this number to be 95% of the WAN interfaces’ actual upstream transmission speed. -
Page 79: The Queue Setup Screen
A gray bulb signifies that this queue is not active. Name This shows the descriptive name of this queue. Interface This shows the name of the EMG2881-T20A’s interface through which traffic in this queue passes. Priority This shows the priority of this queue. Modify Click the Edit icon to edit the queue. -
Page 80: The Class Setup Screen
(such as Telnet) to form a flow. You can give different priorities to traffic that the EMG2881-T20A forwards out through the WAN interface. Give high priority to voice and video to make them run more smoothly. Similarly, give low priority to many large file downloads so that they do not reduce the quality of other applications. -
Page 81: Add/Edit A Classifier
9.5.1 Add/Edit a Classifier Click Add New Classifier in the Class Setup screen or the Edit icon next to a classifier to open the following screen. Figure 45 Configuration > Applications > Bandwidth Management > Class Setup: Add/Edit new class EMG2881-T20A User’s Guide... - Page 82 You should have configured a queue in the Queue Setup screen already. Back Click this to return to the previous screen. Apply Click this to save your changes. Cancel Click this to exit this screen without saving. EMG2881-T20A User’s Guide...
-
Page 83: Upnp Screen
UPnP Select Enable to activate UPnP. Be aware that anyone could use a UPnP application to open the web configurator's login screen without entering the EMG2881-T20A's IP address (although you must still enter the password to access the web configurator). - Page 84 Automatic Priority Queue Assignment If you enable QoS on the EMG2881-T20A, the EMG2881-T20A can automatically base on the IEEE 802.1p priority level, IP precedence and/or packet length to assign priority to traffic which does not match a class.
- Page 85 Chapter 9 Applications The following table shows you the internal layer-2 and layer-3 QoS mapping on the EMG2881-T20A. On the EMG2881-T20A, traffic assigned to higher priority queues gets through faster while traffic in lower index queues is dropped if the network is congested.
- Page 86 • If there are no tokens in the bucket, the EMG2881-T20A stops transmitting until enough tokens are generated. • If not enough tokens are available, the EMG2881-T20A treats the packet in either one of the following ways: In traffic shaping: •...
-
Page 87: Using Upnp In Windows Xp Example
This section shows you how to use the UPnP feature in Windows XP. You must already have UPnP installed in Windows XP and UPnP activated on the EMG2881-T20A. Make sure the computer is connected to a LAN port of the EMG2881-T20A. Turn on your computer and the EMG2881-T20A. - Page 88 You may edit or delete the port mappings or click Add to manually add port mappings. Figure 49 Internet Connection Properties: Advanced Settings Figure 50 Internet Connection Properties: Advanced Settings: Add Note: When the UPnP-enabled device is disconnected from your computer, all port mappings will be deleted automatically. EMG2881-T20A User’s Guide...
-
Page 89: Web Configurator Easy Access
9.7.2 Web Configurator Easy Access With UPnP, you can access the web-based configurator on the EMG2881-T20A without finding out the IP address of the EMG2881-T20A first. This comes helpful if you do not know the IP address of the EMG2881- T20A. - Page 90 Figure 53 Network Connections An icon with the description for each UPnP-enabled device displays under Local Network. Right-click on the icon for your EMG2881-T20A and select Invoke. The web configurator login screen displays. Figure 54 Network Connections: My Network Places Right-click on the icon for your EMG2881-T20A and select Properties.
- Page 91 Chapter 9 Applications Figure 55 Network Connections: My Network Places: Properties: Example EMG2881-T20A User’s Guide...
-
Page 92: Security
Security 10.1 Overview Use these screens to enable and configure the firewall that protects your EMG2881-T20A and your LAN from unwanted or malicious traffic. Enable the firewall to protect your LAN computers from attacks by hackers on the Internet and control access between the LAN and WAN. -
Page 93: Ipv4 Firewall Screen
(click the IPv4 Firewall or IPv6 Firewall tab under Security and then click the Enable Firewall check box). The EMG2881-T20A's purpose is to allow a private Local Area Network (LAN) to be securely connected to the Internet. The EMG2881-T20A can be used to prevent theft, destruction and modification of data, as well as log events, which may be important to the security of your network. - Page 94 Respond to Ping The EMG2881-T20A will not respond to any incoming Ping requests when Disable is selected. Select LAN to reply to incoming LAN Ping requests. Select WAN to reply to incoming WAN Ping requests. Otherwise select LAN&WAN to reply to all incoming LAN and WAN Ping requests.
-
Page 95: Ipv6 Firewall Screen
Dest IP Address Enter the IP address of the computer to which traffic for the application or service is entering. The EMG2881-T20A applies the firewall rule to traffic initiating from this computer. Source IP Address Enter the IP address of the computer that initializes traffic for the application or service. - Page 96 Enter the IPv6 address of the computer to which traffic for the application or service is entering. The EMG2881-T20A applies the firewall rule to traffic destined for this computer. Source IP Address Enter the IPv6 address of the computer that initializes traffic for the application or service.
- Page 97 This is the port number/range of the source that defines the traffic type, for example TCP port 80 defines web traffic. Delete Click to remove the firewall rule. Apply Click Apply to save the settings. Cancel Click Cancel to restore your previously saved settings. EMG2881-T20A User’s Guide...
-
Page 98: Maintenance
(Section 11.8 on page 104). • Use the Log screen to see the logs for the activity on the EMG2881-T20A (Section 11.9 on page 104). • Use the ROMD screen to save and/or clean the configuration to/from the ROMD file which can store customized default settings. -
Page 99: Password Screen
Click Cancel to exit this screen without saving. 11.4 Password Screen It is strongly recommended that you change your EMG2881-T20A's password. If you forget your EMG2881-T20A's password (or IP address), you will need to reset the device. See Section 11.8 on page 104 for details. -
Page 100: Time Screen
Chapter 11 Maintenance 11.5 Time Screen Use this screen to configure the EMG2881-T20A’s time based on your local time zone. To change your EMG2881-T20A’s time and date, click Maintenance > Time. The screen appears as shown. Figure 61 Maintenance > Time The following table describes the labels in this screen. -
Page 101: Firmware Upgrade Screen
(usually) uses the system model name with a “*.bin” extension, e.g., “EMG2881-T20A.bin”. The upload process uses HTTP (Hypertext Transfer Protocol) and may take up to two minutes. After a successful upload, the system will reboot. -
Page 102: Configuration Backup/Restore Screen
If the upload was not successful, an error message appears. 11.7 Configuration Backup/Restore Screen Backup configuration allows you to back up (save) the EMG2881-T20A’s current configuration to a file on your computer. Once your EMG2881-T20A is configured and functioning properly, it is highly recommended that you back up your configuration file before making configuration changes. - Page 103 RESET button. Note: If you uploaded the default configuration file you may need to change the IP address of your computer to be in the same subnet as that of the default EMG2881-T20A IP address (192.168.1.1). See...
-
Page 104: Restart Screen
Apply to save your settings. Click Cancel to start the screen afresh. Use this screen to see the logged messages for the EMG2881-T20A. The log wraps around and deletes the old entries after it fills. Select what logs you want to see from the Display drop list. The log choices depend on your settings above this screen. - Page 105 Chapter 11 Maintenance Figure 67 Maintenance > ROMD Click Save to save the EMG2881-T20A’s current configuration to the ROM-D file. Click Clear to reset the customized settings in the ROM-D file to factory defaults. EMG2881-T20A User’s Guide...
-
Page 106: Troubleshooting
Make sure you are using the power adaptor or cord included with the EMG2881-T20A. Make sure the power adaptor or cord is connected to the EMG2881-T20A and plugged in to an appropriate power source. Make sure the power source is turned on. -
Page 107: Emg2881-T20A Access And Login
The default IP address of the EMG2881-T20A in Router Mode is 192.168.1.1. If you changed the IP address and have forgotten it, you might get the IP address of the EMG2881-T20A in Router Mode by looking up the IP address of the default gateway for your computer. To do this in most Windows computers, click Start >... -
Page 108: Internet Access
Chapter 12 Troubleshooting Reset the device to its factory defaults, and try to access the EMG2881-T20A with the default IP address. Section 1.5.6 on page If the problem continues, contact the network administrator or vendor, or try one of the advanced suggestions. -
Page 109: Resetting The Emg2881-T20A To Its Factory Defaults
Internet, especially peer-to-peer applications. Check the signal strength. If the signal strength is low, try moving the EMG2881-T20A closer to the AP if possible, and look around to see if there are any devices that might be interfering with the wireless network (for example, microwaves, other wireless networks, and so on). -
Page 110: Wireless Connections
Check that both the EMG2881-T20A and the wireless adapter on your computer are using the same wireless and wireless security settings. Make sure traffic between the WLAN and the LAN is not blocked by the firewall on the EMG2881-T20A. Make sure you allow the EMG2881-T20A to be remotely accessed through the WLAN interface. Check your remote management settings. - Page 111 • Position the antennas for best reception. If the AP is placed on a table or floor, point the antennas upwards. If the AP is placed at a high position, point the antennas downwards. Try pointing the antennas in different directions and check which provides the strongest signal to the wireless clients. EMG2881-T20A User’s Guide...
-
Page 112: Appendix A Pop-Up Windows, Javascript And Java Permissions
You can also check if pop-up blocking is disabled in the Pop-up Blocker section in the Privacy tab. In Internet Explorer, select Tools, Internet Options, Privacy. Clear the Block pop-ups check box in the Pop-up Blocker section of the screen. This disables any web pop-up blockers you may have enabled. EMG2881-T20A User’s Guide... - Page 113 Enable Pop-up Blockers with Exceptions Alternatively, if you only want to allow pop-up windows from your device, see the following steps. In Internet Explorer, select Tools, Internet Options and then the Privacy tab. Select Settings…to open the Pop-up Blocker Settings screen. EMG2881-T20A User’s Guide...
- Page 114 Type the IP address of your device (the web page that you do not want to have blocked) with the prefix “http://”. For example, http://192.168.167.1. Click Add to move the IP address to the list of Allowed sites. Figure 71 Pop-up Blocker Settings EMG2881-T20A User’s Guide...
- Page 115 Click the Custom Level... button. Scroll down to Scripting. Under Active scripting make sure that Enable is selected (the default). Under Scripting of Java applets make sure that Enable is selected (the default). Click OK to close the window. EMG2881-T20A User’s Guide...
- Page 116 From Internet Explorer, click Tools, Internet Options and then the Security tab. Click the Custom Level... button. Scroll down to Microsoft VM. Under Java permissions make sure that a safety level is selected. Click OK to close the window. EMG2881-T20A User’s Guide...
- Page 117 JAVA (Sun) From Internet Explorer, click Tools, Internet Options and then the Advanced tab. Make sure that Use Java 2 for <applet> under Java (Sun) is selected. Click OK to close the window. Figure 75 Java (Sun) EMG2881-T20A User’s Guide...
- Page 118 You can enable Java, Javascript and pop-ups in one screen. Click Tools, then click Options in the screen that appears. Figure 76 Mozilla Firefox: TOOLS > Options Click Content to show the screen below. Select the check boxes as shown in the following screen. Figure 77 Mozilla Firefox Content Security EMG2881-T20A User’s Guide...
- Page 119 Open all pop-ups. Figure 78 Opera: Allowing Pop-Ups Enabling Java From Opera, click Tools, then Preferences. In the Advanced tab, select Content from the left-side menu. Select the check boxes as shown in the following screen. EMG2881-T20A User’s Guide...
- Page 120 Appendix A Pop-up Windows, JavaScript and Java Permissions Figure 79 Opera: Enabling Java To customize JavaScript behavior in the Opera browser, click JavaScript Options. Figure 80 Opera: JavaScript Options Select the items you want Opera’s JavaScript to apply. EMG2881-T20A User’s Guide...
-
Page 121: Appendix B Setting Up Your Computer's Ip Address
P P E N D I X Setting Up Your Computer’s IP Address Note: Your specific EMG2881-T20A may not support all of the operating systems described in this appendix. See the product specifications for more information about which operating systems are supported. - Page 122 Appendix B Setting Up Your Computer’s IP Address In the Control Panel, click the Network Connections icon. Right-click Local Area Connection and then select Properties. On the General tab, select Internet Protocol (TCP/IP) and then click Properties. EMG2881-T20A User’s Guide...
- Page 123 Appendix B Setting Up Your Computer’s IP Address The Internet Protocol TCP/IP Properties window opens. EMG2881-T20A User’s Guide...
- Page 124 You can also go to Start > Control Panel > Network Connections, right-click a network connection, click Status and then click the Support tab to view your IP address and connection information. Windows Vista This section shows screens from Windows Vista Professional. EMG2881-T20A User’s Guide...
- Page 125 Appendix B Setting Up Your Computer’s IP Address Click Start > Control Panel. In the Control Panel, click the Network and Internet icon. Click the Network and Sharing Center icon. Click Manage network connections. Right-click Local Area Connection and then select Properties. EMG2881-T20A User’s Guide...
- Page 126 Note: During this procedure, click Continue whenever Windows displays a screen saying that it needs your permission to continue. Select Internet Protocol Version 4 (TCP/IPv4) and then select Properties. The Internet Protocol Version 4 (TCP/IPv4) Properties window opens. EMG2881-T20A User’s Guide...
- Page 127 You can also go to Start > Control Panel > Network Connections, right-click a network connection, click Status and then click the Support tab to view your IP address and connection information. Windows 7 This section shows screens from Windows 7 Enterprise. EMG2881-T20A User’s Guide...
- Page 128 Appendix B Setting Up Your Computer’s IP Address Click Start > Control Panel. In the Control Panel, click View network status and tasks under the Network and Internet category. Click Change adapter settings. Double click Local Area Connection and then select Properties. EMG2881-T20A User’s Guide...
- Page 129 Appendix B Setting Up Your Computer’s IP Address Note: During this procedure, click Continue whenever Windows displays a screen saying that it needs your permission to continue. Select Internet Protocol Version 4 (TCP/IPv4) and then select Properties. EMG2881-T20A User’s Guide...
- Page 130 Appendix B Setting Up Your Computer’s IP Address The Internet Protocol Version 4 (TCP/IPv4) Properties window opens. EMG2881-T20A User’s Guide...
- Page 131 Click OK to close the Local Area Connection Properties window. Verifying Settings Click Start > All Programs > Accessories > Command Prompt. In the Command Prompt window, type "ipconfig" and then press [ENTER]. The IP settings are displayed as follows. EMG2881-T20A User’s Guide...
- Page 132 Mac OS X: 10.3 and 10.4 The screens in this section are from Mac OS X 10.4 but can also apply to 10.3. Click Apple > System Preferences. In the System Preferences window, click the Network icon. EMG2881-T20A User’s Guide...
- Page 133 Appendix B Setting Up Your Computer’s IP Address When the Network preferences pane opens, select Built-in Ethernet from the network connection type list, and then click Configure. For dynamically assigned settings, select Using DHCP from the Configure IPv4 list in the TCP/IP tab. EMG2881-T20A User’s Guide...
- Page 134 • In the Router field, type the IP address of your device. Click Apply Now and close the window. Verifying Settings Check your TCP/IP properties by clicking Applications > Utilities > Network Utilities, and then selecting the appropriate Network Interface from the Info tab. EMG2881-T20A User’s Guide...
- Page 135 Figure 81 Mac OS X 10.4: Network Utility Mac OS X: 10.5 and 10.6 The screens in this section are from Mac OS X 10.5 but can also apply to 10.6. Click Apple > System Preferences. In System Preferences, click the Network icon. EMG2881-T20A User’s Guide...
- Page 136 Appendix B Setting Up Your Computer’s IP Address When the Network preferences pane opens, select Ethernet from the list of available connection types. From the Configure list, select Using DHCP for dynamically assigned settings. EMG2881-T20A User’s Guide...
- Page 137 • In the IP Address field, enter your IP address. • In the Subnet Mask field, enter your subnet mask. • In the Router field, enter the IP address of your EMG2881-T20A. Click Apply and close the window. Verifying Settings Check your TCP/IP properties by clicking Applications >...
- Page 138 When the Network Settings window opens, click Unlock to open the Authenticate window. (By default, the Unlock button is greyed out until clicked.) You cannot make changes to your configuration unless you first enter your admin password. EMG2881-T20A User’s Guide...
- Page 139 Appendix B Setting Up Your Computer’s IP Address In the Authenticate window, enter your admin account name and password then click the Authenticate button. In the Network Settings window, select the connection that you want to configure, then click Properties. EMG2881-T20A User’s Guide...
- Page 140 Click OK to save the changes and close the Properties dialog box and return to the Network Settings screen. If you know your DNS server IP address(es), click the DNS tab in the Network Settings window and then enter the DNS server information in the fields provided. EMG2881-T20A User’s Guide...
- Page 141 Verifying Settings Check your TCP/IP properties by clicking System > Administration > Network Tools, and then selecting the appropriate Network device from the Devices tab. The Interface Statistics column shows data if your connection is working properly. EMG2881-T20A User’s Guide...
- Page 142 10.3 installation. Note: Make sure you are logged in as the root administrator. Follow the steps below to configure your computer IP address in the KDE: Click K Menu > Computer > Administrator Settings (YaST). EMG2881-T20A User’s Guide...
- Page 143 Appendix B Setting Up Your Computer’s IP Address When the Run as Root - KDE su dialog opens, enter the admin password and click OK. When the YaST Control Center window opens, select Network Devices and then click the Network Card icon. EMG2881-T20A User’s Guide...
- Page 144 Appendix B Setting Up Your Computer’s IP Address When the Network Settings window opens, click the Overview tab, select the appropriate connection Name from the list, and then click the Configure button. When the Network Card Setup window opens, click the Address tab EMG2881-T20A User’s Guide...
- Page 145 Click Next to save the changes and close the Network Card Setup window. If you know your DNS server IP address(es), click the Hostname/DNS tab in Network Settings and then enter the DNS server information in the fields provided. EMG2881-T20A User’s Guide...
- Page 146 Click the KNetwork Manager icon on the Task bar to check your TCP/IP properties. From the Options sub- menu, select Show Connection Information. Figure 85 openSUSE 10.3: KNetwork Manager When the Connection Status - KNetwork Manager window opens, click the Statistics tab to see if your connection is working properly. EMG2881-T20A User’s Guide...
- Page 147 Appendix B Setting Up Your Computer’s IP Address Figure 86 openSUSE: Connection Status - KNetwork Manager EMG2881-T20A User’s Guide...
-
Page 148: Appendix C Common Services
H.323 1720 NetMeeting uses this protocol. HTTP Hyper Text Transfer Protocol - a client/server protocol for the world wide web. HTTPS HTTPS is a secured http session often used in e- commerce. EMG2881-T20A User’s Guide... - Page 149 Simple Network Management Program. SNMP-TRAPS TCP/UDP Traps for use with the SNMP (RFC:1215). SQL-NET 1521 Structured Query Language is an interface to access data on many different types of database systems, including mainframes, midrange systems, UNIX systems and network servers. EMG2881-T20A User’s Guide...
- Page 150 TFTP Trivial File Transfer Protocol is an Internet file transfer protocol similar to FTP, but uses the UDP (User Datagram Protocol) rather than TCP (Transmission Control Protocol). VDOLIVE 7000 Another videoconferencing solution. EMG2881-T20A User’s Guide...
-
Page 151: Appendix D Customer Support
• Brief description of the problem and the steps you took to solve it. Corporate Headquarters (Worldwide) Taiwan • Zyxel Communications Corporation • http://www.zyxel.com Asia China • Zyxel Communications (Shanghai) Corp. Zyxel Communications (Beijing) Corp. Zyxel Communications (Tianjin) Corp. • http://www.zyxel.cn India • Zyxel Technology India Pvt Ltd • http://www.zyxel.in Kazakhstan •... - Page 152 • Zyxel Singapore Pte Ltd. • http://www.zyxel.com.sg Taiwan • Zyxel Communications Corporation • http://www.zyxel.com/tw/zh/ Thailand • Zyxel Thailand Co., Ltd • http://www.zyxel.co.th Vietnam • Zyxel Communications Corporation-Vietnam Office • http://www.zyxel.com/vn/vi Europe Austria • Zyxel Deutschland GmbH • http://www.zyxel.de Belarus • Zyxel BY • http://www.zyxel.by...
- Page 153 Appendix D Customer Support Belgium • Zyxel Communications B.V. • http://www.zyxel.com/be/nl/ • http://www.zyxel.com/be/fr/ Bulgaria • Zyxel България • http://www.zyxel.com/bg/bg/ Czech Republic • Zyxel Communications Czech s.r.o • http://www.zyxel.cz Denmark • Zyxel Communications A/S • http://www.zyxel.dk Estonia • Zyxel Estonia • http://www.zyxel.com/ee/et/ Finland •...
- Page 154 • Zyxel Communications Poland • http://www.zyxel.pl Romania • Zyxel Romania • http://www.zyxel.com/ro/ro Russia • Zyxel Russia • http://www.zyxel.ru Slovakia • Zyxel Communications Czech s.r.o. organizacna zlozka • http://www.zyxel.sk Spain • Zyxel Communications ES Ltd • http://www.zyxel.es Sweden • Zyxel Communications • http://www.zyxel.se Switzerland •...
- Page 155 Appendix D Customer Support • http://www.zyxel.ch/ Turkey • Zyxel Turkey A.S. • http://www.zyxel.com.tr • Zyxel Communications UK Ltd. • http://www.zyxel.co.uk Ukraine • Zyxel Ukraine • http://www.ua.zyxel.com Latin America Argentina • Zyxel Communication Corporation • http://www.zyxel.com/ec/es/ Brazil • Zyxel Communications Brasil Ltda.
- Page 156 Appendix D Customer Support North America • Zyxel Communications, Inc. - North America Headquarters • http://www.zyxel.com/us/en/ Oceania Australia • Zyxel Communications Corporation • http://www.zyxel.com/au/en/ Africa South Africa • Nology (Pty) Ltd. • http://www.zyxel.co.za EMG2881-T20A User’s Guide...
-
Page 157: Appendix E Legal Information
The contents of this publication may not be reproduced in any part or as a whole, transcribed, stored in a retrieval system, translated into any language, or transmitted in any form or by any means, electronic, mechanical, magnetic, optical, chemical, photocopying, manual, or otherwise, without the prior written permission of Zyxel Communications Corporation. Published by Zyxel Communications Corporation. All rights reserved. - Page 158 Cet équipement est conforme aux limites d’exposition aux rayonnements IC établies pour un environnement non contrôlé. Cet équipement doit être installé et utilisé avec un minimum de 25 cm de distance entre la source de rayonnement et votre corps. EMG2881-T20A User’s Guide...
- Page 159 Questo prodotto è conforme alla specifiche di Interfaccia Radio Nazionali e rispetta il Piano Nazionale di ripartizione delle frequenze in Italia. Se non viene installato all 'interno del proprio fondo, l'utilizzo di prodotti Wireless LAN richiede una “Autorizzazione Generale”. Consultare http://www.sviluppoeconomico.gov.it/ per maggiori dettagli. EMG2881-T20A User’s Guide...
- Page 160 The regulatory limits for maximum output power are specified in EIRP. The EIRP level (in dBm) of a device can be calculated by adding the gain of the antenna used (specified in dBi) to the output power available at the connector (specified in dBm). EMG2881-T20A User’s Guide...
- Page 161 If this product is end of life, take it to a recycling station designated by local authorities. At the time of disposal, the separate collection of your product and/or its battery will help save natural resources and ensure that the environment is sustainable development. EMG2881-T20A User’s Guide...
- Page 162 • 避免設備接觸 : - 任何液體 - 切勿讓設備接觸水、雨水、高濕度、污水腐蝕性的液體或其他水份。 - 灰塵及污物 - 切勿接觸灰塵、污物、沙土、食物或其他不合適的材料。 • 雷雨天氣時,不要安裝,使用或維修此設備。有遭受電擊的風險。 • 切勿重摔或撞擊設備,並勿使用不正確的電源變壓器。 • 若接上不正確的電源變壓器會有爆炸的風險。 • 請勿隨意更換產品內的電池。 • 如果更換不正確之電池型式,會有爆炸的風險,請依製造商說明書處理使用過之電池。 • 請將廢電池丟棄在適當的電器或電子設備回收處。 • 請勿將設備解體。 • 請勿阻礙設備的散熱孔,空氣對流不足將會造成設備損害。 • 請插在正確的電壓供給插座 ( 如 : 北美 / 台灣電壓 110V AC,歐洲是 230V AC)。 EMG2881-T20A User’s Guide...
- Page 163 This product contains in part some free software distributed under GPL license terms and/or GPL like licenses. Open source licenses are provided with the firmware package. You can download the latest firmware at www.zyxel.com. To obtain the source code covered under those Licenses, please contact support@zyxel.com.tw to get it. EMG2881-T20A User’s Guide...
-
Page 164: Index
Firmware upload file extension using HTTP firmware version DDNS service providers DHCP DHCP server General wireless LAN screen see also Dynamic Host Configuration Protocol Guest WLAN DHCP server Guest WLAN Bandwidth Differentiated Services, see DiffServ EMG2881-T20A User’s Guide... - Page 165 See web configurator. using the WPS. See WPS. MBSSID Media access control RADIUS server Memory usage Reset button mode Reset the device Multicast Restore configuration IGMP Roaming Router Mode status screen RTS/CTS Threshold 54, 65 EMG2881-T20A User’s Guide...
- Page 166 Two Rate Three Color Marker, see trTCM type wireless security Wireless tutorial WPA compatible push button Universal Plug and Play Application Security issues user authentication local (user) database RADIUS server VPN Passthrough WAN (Wide Area Network) EMG2881-T20A User’s Guide...
Need help?
Do you have a question about the EMG2881-T20A and is the answer not in the manual?
Questions and answers