Siemens C65 User Manual
Siemens c65: user guide
Hide thumbs
Also See for C65:
- User manual (73 pages) ,
- User manual (146 pages) ,
- Service repair documentation (13 pages)
Table of Contents
Advertisement
Quick Links
Advertisement
Table of Contents

Related Manuals for Siemens C65


Summary of Contents for Siemens C65
- Page 1 Issued by Information and Communication mobile Haidenauplatz 1 D-81667 Munich © Siemens AG 2004 All rights reserved. Subject to availability. Rights of modification reserved. Siemens Aktiengesellschaft www.siemens-mobile.com obile Designed for life CV65 CT65...
-
Page 2: Table Of Contents
Safety precautions ...3 Overview of phone (schematic) ...5 Display symbols ...7 Getting started ...9 Insert SIM card/battery ...9 Charge battery ...10 Changing CLIPIt™ covers ...12 Switch on/off, PIN entry ...13 Entering the PIN ...13 Emergency number (SOS) ...13 General instructions ...15 Standby mode ...15 Signal strength ...15 Digital Rights Mgmt. - Page 3 Table of Contents CB services ... 67 Surf & fun ... 68 Internet ... 68 Bookmarks ... 70 Games and Applications ... 71 Downl. assist..72 Setup ... 74 Profiles ... 74 Themes ... 76 Display ... 77 Ringtones ... 79 Call setup ...
-
Page 4: Safety Precautions
(p. 28). Otherwise you risk serious permanent damage to your hearing. Safety precautions Only use original Siemens bat- teries (100 % mercury-free) and charging devices. Otherwise you risk serious damage to health and property. The battery could explode, for instance. - Page 5 The phone may cause interfer- ence in the vicinity of TV sets, radios and PCs. Use only Siemens original accessories. This will avoid potential risks to health or prop- erty and ensure compliance with all relevant regulations.
-
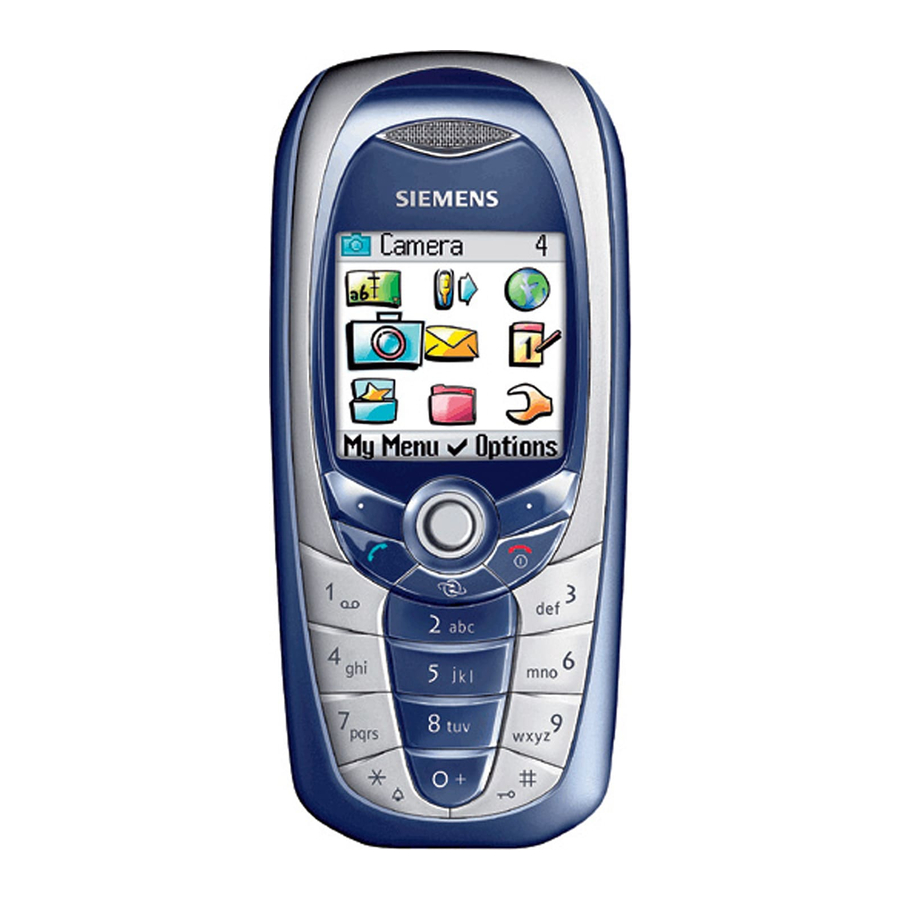
Page 6: Overview Of Phone (Schematic)
Overview of phone (schematic) Call key Dial displayed/highlighted phone num- bers/names, take calls. Show last phone numbers dialled in standby mode. On/Off/End key • Switched off: press and hold to switch • During a conversation or in an appli- cation: press briefly to finish. •... - Page 7 Overview of phone (schematic) Integrated antenna Do not obstruct the phone above the battery cover unnecessarily. This reduces the signal quality. Loudspeaker Display Infrared interface (IrDA) Access to the Internet portal Input keys Ringtone • Press and hold in standby mode: Switch all audible signals on/off (except alarm).
-
Page 8: Display Symbols
Display symbols Display symbols (selection) Signal strength Charging Battery charge level, e.g. 50 % Phonebook Call records Surf & fun/ Service provider portal Organiser Messages Camera Extras My stuff Setup All calls are diverted Ç Ringer off ¿ Short ring (beep) only ¾... - Page 9 Display symbols Camera symbols Brightness Ù Zoom factor Ú White balance Û Flash connected × Joystick symbols Camera î Delete ñ Make call/accept call ð Menu í Zoom ï ì...
-
Page 10: Getting Started
Getting started Insert SIM card/battery The service provider supplies you with a SIM card on which all the important data for your line is stored. If the SIM card has been delivered in credit-card size, snap the smaller segment out and remove any rough edges. -
Page 11: Charge Battery
Getting started • Push the battery cover onto the side hooks , until it clicks into position. Additional information Please switch off your phone before removing the battery! Only 3V SIM cards are supported. Please contact your service provider if you have an older card. -
Page 12: Operating Times
Operating times The operating time depends upon the respective conditions of use. Extreme temperatures considerably reduce the phone’s standby time. Avoid placing the phone in the sun or on a heater. Talktime: 100 to 300 minutes Standby time: 60 to 250 hours Charge icon not visible If the battery has been discharged fully, the charge icon is not immedi-... -
Page 13: Changing Clipit™ Covers
Getting started Changing CLIPIt™ covers You can use CLIPIt™ covers (accesso- ries) to personalise the appearance of your phone as you wish. Before changing the keypad or faceplate, switch the phone off. Dismantle the phone Take off the battery cover and remove the battery (see p. -
Page 14: Switch On/Off, Pin Entry
Switch on/off, PIN entry Switching phone on/off Press and hold the On/Off/End key. Entering the PIN The SIM card can be protected with a 4 to 8-digit PIN. Enter the PIN using the number keys. The charac- ters **** ensure nobody can read your PIN on the display. -
Page 15: Copy Sim Addresses
Switch on/off, PIN entry Time zones Set the time zone for your area. Select the city in the desired time zone from the list ..and set it. §Set§ Copy SIM addresses The first time the SIM card is inserted, the entries on it can be cop- ied to the Addressbook. -
Page 16: General Instructions
General instructions Standby mode The phone is in standby mode and is ready for use when the name of the service provider appears on the dis- play. Press and hold the On/Off/End key to return to standby mode from any situation. Signal strength Strong receiving signal. -
Page 17: Operating Instructions
General instructions Main menu options §Options§ Open menu. Different functions are available depending on the context. Big letters Select between two font sizes. Illumination Set display illumination to brighter/darker. Help Display a help text. Operating instructions Menu controls The steps needed to reach a function are shown in a condensed form in this user guide, e. -
Page 18: Standard Functions
Standard functions Option menus Functions which appear repeatedly in the options menu are listed here. Open menu. §Options§ Edit Open the entry to edit. View Display entry. Delete/ Delete entry / delete all Delete all entries after confirmation. New entry Create new entry. -
Page 19: Highlighting Mode
Standard functions Highlighting mode With some applications (e.g. Phone- book/Addressbook) one or more entries in a list can be highlighted to carry out a function jointly. §Options§ Open menu. Mark Activate highlighting mode. If a non-highlighted entry is selected, this can be highlighted: §Mark§... -
Page 20: Security
Security The phone and SIM card are pro- tected against misuse by several security codes. Keep these security codes in a safe place where you can access them again if required. Codes Protects your SIM card (personal identification number). PIN2 This is needed to set the charge detail display and to access additional functions on special... -
Page 21: Clear Sim Card Barring
If this occurs, contact the Siemens Service (p. 117). Clear SIM card barring If the PIN is entered incorrectly three times, the SIM card is barred. Enter... -
Page 22: Special Characters
Text entry Text entry without T9 Press number key repeatedly until the required letter appears. After a brief interval the cursor will advance. Example: Press once briefly to write the letter a, twice to write b etc. Press and hold to write the number. -
Page 23: Text Entry With T9
Text entry Input menu With text input: Press and hold. The input menu is displayed: Text format Input language Mark Copy/Insert Text entry with T9 "T9" deduces the correct word from the individual key entries by making comparisons with an extensive dictionary. -
Page 24: T9 Word Suggestions
T9 word suggestions If several options are found in the dictionary for a key sequence (a word), the most probable is dis- played first. If the word you want has not been recognised, the next sug- gestion from T9 may be correct. The word must be shown §highlighted§. -
Page 25: Text Modules
Text entry Text modules can be stored in the Text modules phone for adding to your messages (SMS, MMS). Write Text modules ¢ ¢ Text modules Select §Options§ Write Text modules. Open menu and select §Options§ Save. Accept the specified name or allocate a new one. -
Page 26: My Phone
Where do I get what? You can purchase additional ring- tones, logos, animations and Java applications from your service pro- vider or directly from Siemens. Service provider portal Depending on your service provider, you will find direct access to his por- tal on your telephone via menu items or bookmarks. -
Page 27: Calling
Calling Calling Dialling with number keys The phone must be switched on (standby mode). Enter the number (always with dialling code / inter- national dialling code). A short press clears the last digit, a long press clears the entire phone number. -
Page 28: If The Number Is Busy
If the number is busy If the called number is busy or can- not be reached because of network problems several options are availa- ble (depending on the service pro- vider). An incoming call or any other use of the phone interrupts these functions. -
Page 29: Accept Call
Calling Accept call The phone must be switched on. An incoming call will interrupt any other use of the phone. Press. Press. A phone number transmitted by the network is displayed, along with the associated name (where applicable with picture) if this is stored in the Phonebook/Addressbook (p. -
Page 30: Incoming Calls During A Call
When the new connection is established: Swapping between calls. §Swap§ Incoming calls during a call You may need to register for this service with your service provider and set your phone accordingly (p. 81). During a call, you may be advised that there is another call waiting. -
Page 31: Call Options
Calling Conference Call up to 5 parties one by one and link them together in a multiparty call. Some of the functions described may not be supported by your serv- ice provider or may have to be ena- bled specially. A connection has already been established: Open menu and select... -
Page 32: Direct Call
Direct call If this is active, only one number can be dialled. Switch on ¢ ¢ Security ¢ Direct call Confirm selection. Enter phone code. When first prompted you define and enter the phone code (4 - 8 digits). Confirm selection. Please do not forget this code (p. -
Page 33: Default Book
Default book Default book ¢ ¢ Select function. Show entries The entries in the default book (Addressbook or Phonebook) are shown. Select a name with the first letter and/or scroll. New entry Create new entry. Addressbook (see also p. 33) Phonebook (see also p. -
Page 34: Addressbook
Addressbook The Addressbook can store up to 1000 entries, each with a variety of phone numbers and additional address details. These entries are managed separately from those in the Phonebook in the phone mem- ory. However, you can exchange data between the Addressbook and the Phonebook on the SIM card. -
Page 35: Display Options
Synchronisation You can use the mobile phone manager (p. 111) to synchronise your Addressbook with Outlook ® and other Siemens telephones. Using Remote syncr. you can synchronise your mobile with an organiser stored on the Internet (see also p. 107). -
Page 36: Change Entry
Change entry Open Addressbook (in standby mode). Select required entry. Press. §Edit§ Select input field. Open entry if necessary. §Edit§ Make changes. Save. §Save§ Call entry Open Addressbook (in standby mode). Select a name with the first letter and/or scroll. The number is dialled. -
Page 37: Groups
Addressbook Groups Nine groups are specified in your phone to enable you to arrange your Addressbook entries clearly. You can rename seven groups. Open Addressbook (in standby mode). Select (the number of <Groups> entries is listed behind the group name). Select group. -
Page 38: Phonebook
Phonebook Entries in the Phonebook (on the SIM card) are managed separately from the Addressbook. You can, how- ever, exchange data between the Phonebook and the Addressbook. New entry If the Phonebook has been selected as standard: Open Phonebook (in standby mode). Select <New Display input fields. -
Page 39: Call (Search For An Entry)
Phonebook Call (search for an entry) Open Phonebook. Select a name with the first letter and/or scroll. Phone number is dialled. Call using record no. A record number is automatically assigned to every new entry in the Phonebook. Enter record number. Press. -
Page 40: Special Books
<Special books> Open Addressbook (in standby mode). <Special books> Select. <Own numbers> Enter "own" phone numbers in Phonebook (e.g., fax) for informa- tion. These numbers can be changed, deleted and also sent as an SMS message. <VIP numbers> Display the phone numbers saved in group. -
Page 41: Call Records
Call records Call records The phone number of a caller is dis- played if • the caller has switched off the Incognito function and • the network supports the "Caller Identity" function. Alternatively, a caller’s name is dis- played if it is stored in the Phone- book/Addressbook. -
Page 42: Time/Charge
Time/charge You can display the charges and duration during a call. You can set a unit limitation for outgoing calls. ¢ ¢ Time/charge Select: Last call: Incoming calls: Outgoing calls: All calls: Remaining units: Scroll through the display. Open menu. Reset the selected setting. -
Page 43: Camera
Camera Camera You can view photos/videos recorded on the integrated camera immediately and • use the photo as a background image, logo, a switch on/off animation or a screensaver. • send the photo via MMS. Switch on ¢ Start camera in standby mode. -
Page 44: Camera Options
Image resolution It is possible to set the quality of the image regardless of the preview image resolution, e.g.: Premium Medium Wallpaper The resolution may decrease depending on the selected digital zoom. Flash (accessories) If the flash is active, this is shown by a symbol in the display. -
Page 45: Inbox
Inbox Inbox The inbox folder offers immediate access to the messages just received. This means that you no longer have to look through all inbox folders for the various message types. The entries are marked with a symbol to indicate their type and status. You will find a list of the symbols on p. -
Page 46: Sms
You can transmit and receive very long messages (up to 760 charac- ters) on your phone. They are auto- matically composed of several "nor- mal" SMS messages (note higher charges). You can also insert simple pictures and sounds in an SMS. Write/send ¢... -
Page 47: Picture And Sound
Picture&sound Send simple pictures and tones with or without accompanying text. Remember that these may be pro- tected (DRM, p. 15). With the text input field open: Open menu. §Options§ Select Picture&sound. The menu contains: Fix animations Fix sounds Own animat. Own pictures Own sounds Select list. -
Page 48: Read
Read Arrival of a new SMS announced in the display. Open Inbox the soft key positioned beneath it. Reading the SMS. Scroll through message line by line. ç SMS 10.05.2004 + 12398765431 SMS text . . . Reply í Reply You can answer the currently open SMS immediately. - Page 49 Lists All SMS messages are archived in dif- ferent lists, according to their status. (For overview of message symbols, see p. 7): Inbox ¢ ¢ ¢ Inbox The list of received SMS messages is displayed. Draft ¢ ¢ ¢ Draft The list of not yet transmitted SMS messages is displayed.
-
Page 50: Setting
Setting SMS signature ¢ ¢ Message setup ¢ ¢ SMS signature You can enter a "signature" with a maximum of 16 characters. This sig- nature will then be attached to each SMS except for a §Reply§ changes are made to an existing SMS. - Page 51 More information on SMS SMS status report If the message cannot be transmit- ted to the service centre you are offered the chance to repeat the transmission. If this also fails, con- tact your service provider. Message sent! message only indi- cates transmission to the service centre.
-
Page 52: Mms
The Multimedia Messaging Service enables you to send texts, pictures and sounds in a combined message to another mobile phone. All ele- ments of an MMS message are merged to form a "slide show". Depending on your phone's settings, you will receive either the complete message automatically or notifica- tion that an MMS has been saved in the network, giving sender and size... - Page 53 Delete Delete inserted picture. Save Store picture for use later on. Msg. details Display properties, incl. any user right restrictions (p. 15). Sounds Select. <Sound> Display sound functions: Insert sound Open list to select a sound. Record Activate sound recording to record sounds (p.
-
Page 54: Templates
Generation options Open menu. §Options§ Send MMS Send MMS. Play Play back entire MMS on the display. Picture... See p. 51. Sound... See p. 52. Text... See p. 52. Page page: Insert new page behind current one. Delete page: Delete cur- rent page. -
Page 55: Send
Send The page(s) of the new MMS is (are) already created and the MMS is dis- played. Open address entry. ç MMS Subject: Greetings from Munich Send to: +1234567654321 | Size: 85 KB Subject: Enter a brief description. Enter one or more phone Send to: number(s). -
Page 56: Sending Options
Sending options Open menu. §Options§ Send MMS Send MMS. Play Play back entire MMS on the display. Edit Display object selection to change an object. Add recipient from the cur- recipient rent address directory. Delete Delete individual recipient. recip. Add attachment: attachm. -
Page 57: Read
Read An MMS has been received in full. Select the MMS. Start automatic playing of the MMS. Key functions for playback: To the next page. Press briefly once to return to the start of the current page; press briefly twice to return to the start of the previous page. -
Page 58: List Options
List options Different functions are offered depending on the list/situation. Open menu. §Options§ Play Play MMS on the display. Edit Display MMS for processing. View Display MMS for viewing only (write-protected). Send MMS Send MMS. Reply MMS Reply to MMS immediately. Forward Enter recipient(s) for for- warding. -
Page 59: User Settings
User settings Set the MMS dispatch to suit your requirements: Delivery Request delivery confirma- report: tion for sent messages. Read reply: Request confirmation that the MMS has been read. Default pri- Send priority: ority: Normal, High, Validity: Select the period in which the service centre is to try to deliver the message: Manual,... -
Page 60: Voice Message/Mailbox
Voice message/mailbox ¢ ¢ Setup ¢ Voice message Most service providers provide a mailbox in which a caller can leave a voice mail for you • if your phone is switched off or not ready to receive, • if you do not want to answer, •... -
Page 61: Inst. Message
Inst. message Inst. message With this function you can transfer text, audio clips, pictures and files straight to and from one or more ter- minals (mobile phone, PC). This function is not offered by all service providers. Please ask your service provider about this. -
Page 62: Login
Login ¢ ¢ Inst. message Select the last access to be used (see also Automatic login: Contact lists When the connection has been established, the contact list or the list of the contact lists is shown for selection. In the contact list, you will find a list of the most recently used contacts. - Page 63 Inst. message Managing the groups Select one of the groups you set up yourself. Open menu. §Options§ Manage Select. Manage group Different functions are offered depending on the selection: Add member Add a new group member, see also Search Search for group member. memb.
-
Page 64: Contact List Options
Creating a new contact list The current contact list is displayed. Open menu. §Options§ Contact lists Available contact lists are displayed. Open menu. §Options§ Select. Create Contact list ID: Give the contact list its own, specific name. Allocate self-explanatory Name: names. -
Page 65: Start Chat
Inst. message Start chat A contact list must be displayed. Select a contact or a group. Start communication with the contact. The page is displayed. During Inst. Message with a group, the name of the sender is placed in front of each contribution. -
Page 66: Msg. History
Options (group contact) Open menu. §Options§ Leave group Exit group. Details Information about the group: Group ID:, Name:, Topic:, Owner: Clear all Delete all texts in the cur- rent Inst. Message. Receiving objects You will be informed in the display if sounds or pictures are sent to you during a dialogue. - Page 67 Inst. message My settings Information on your current per- sonal status: Alias: Your own alias by which you can be found on the server. AIM screen Name to be displayed in name: the group. Mood: Information about your own mood, e.g. Happy, Sad, Sleepy, etc.
-
Page 68: Cb Services
CB services ¢ ¢ Setup ¢ CB services Some service providers offer infor- mation services (info channels, Cell Broadcast). If reception is activated, you will receive messages on the activated topics in your CB messages are displayed in standby mode; longer messages are scrolled automatically. -
Page 69: Surf & Fun
• Bookmark site The current page is saved as a bookmark. Go to... Enter URL for direct dial to an Internet address, e.g. wap.siemens- mobile.com Reload Reload current page. Show URL Display the URL of the page currently loaded for sending via SMS/MMS/e-mail. -
Page 70: Enter Special Characters
End connection Press and hold to clear down the connection and close the browser. Navigation in the browser • Select a link. • Settings, status on/off. • Press briefly: back a page. • One input field/link forward/back. • Scroll one line. Display symbols in the browser (selection) Connect... -
Page 71: Bookmarks
Surf & fun Profiles Preparation of the phone for Internet access depends on the service pro- vider concerned: Profile pre-set In most cases, access profiles have already been created for one or more service provider(s). Select profile. Activate profile. Set profile manually If necessary, contact your service provider. -
Page 72: Games And Applications
Most applications include instructions. Some applications and games are already pre-installed on your phone. You will find these listed here: www.siemens-mobile.com/c65 Requirements Browser profile (p. 70) and the access (p. 86) must be configured. Download Select the correct access depending... -
Page 73: Downl. Assist
Surf & fun Downl. assist. ¢ ¢ Downl. assist. You will not be left on your own dur- ing the download! Additional information You can control games with the joystick or by using the following keypad controls: Games and applications – options Processing and managing your appli- cations and folders:... -
Page 74: Additional Information
Java™-enabled mobile phone. Siemens excludes all warranty and liability claims in respect of or in connection with any applica- tions subsequently installed by the customer and any software not included in the original delivery package. -
Page 75: Setup
Setup Setup Profiles ¢ ¢ Profiles Several settings can be stored in a phone profile in order, for example, to adapt the phone to the surround- ing level of noise. • Five standard profiles are provided with default settings. They can be changed however: Normal environment Quiet environment... -
Page 76: Aircraft Mode
Rename Change personal profile (except default profiles). Car Kit If an original Siemens Car Kit is used, the profile is switched on automati- cally when the phone is inserted into the cradle (also see accessories). Headset The profile is only switched on auto-... -
Page 77: Themes
Setup Themes ¢ ¢ Themes Load a completely new visual presentation onto your phone. At the press of a key, various functions are re-organised on a theme basis, e. g. switch on/off animation, back- ground image, screensaver, switch on/off melody, additional anima- tions. -
Page 78: Display
Display ¢ ¢ Display ¢ Select function. Language Set the language for the display text. When "automatic" is set, the lan- guage of your home service provider is used. If a language that you do not under- stand happens to be set, the phone can be reset to the language of your home service provider with the fol- lowing input (in standby mode):... -
Page 79: Own Greeting
Setup Timeout Set period after which the screen- saver starts. Security The phone code is requested to stop the screensaver. Auto key lock Automatic keypad locking if no key has been pressed for one minute in standby mode. Unlocking: Press and hold. Note The "picture"... -
Page 80: Ringtones
Ringtones ¢ ¢ Ringtones ¢ Select function. Set the signal tones on the phone to suit your requirements. Ringer setting On/off Activate/deactivate all tones. Beep Reduce ringtone to a short signal (beep). Silent alert To avoid the disturbance caused by a ringing phone, you can activate the silent alert function as an alterna- tive. -
Page 81: Assign Ringtone
Setup Assign ringtone A ringtone which has already been selected will be played or the list of possible ringtones will be displayed for selection. d Calls Assign a single ringtone to all phone numbers in the Addressbook. Group calls Assign a different ringtone to each group. -
Page 82: Call Setup
Call setup ¢ ¢ Call setup ¢ Select function. Hide ID When you make a call, your phone number can be displayed on the recipient's display (depending on the service providers). To suppress this display, you can enable the "Hide ID" mode for all sub- sequent calls or just for the next call. -
Page 83: Minute Beep
Setup All calls All calls are diverted. Icon in the top line of the display in standby mode. Ç Not reachable Divert occurs if the phone is switched off or is out of range. No reply A call is only diverted after a delay that is determined by the network. -
Page 84: Phone Setup
Phone setup ¢ ¢ Phone setup ¢ Select function. Key tones Set the type of acoustic key acknowledgement. Info tones Set service and alarm tones: Activate/deactivate tones. On/off Extended If switched on, a wider range of service tones is available, e.g.: end of menu reached, network connection interrupted. -
Page 85: File System
Setup Memory assis. The delete assistant will help you if there is insufficient phone memory. It is also started automatically from applications if necessary. After capacity has been checked, all files and folders are displayed along with their size and may be opened/ viewed and deleted if applicable. -
Page 86: Clock
Clock ¢ ¢ Clock ¢ Select function. Time/date The clock must be set correctly once at start-up. Press. §Change§ First enter the date (day/month/year), then the time (hours/minutes/seconds). Additional information If the battery is removed for longer than 30 seconds, the clock must be reset. Time zones The time zone can be selected in the world map or a city list:... -
Page 87: Connectivity
Setup Connectivity ¢ ¢ Connectivity ¢ Select function. GPRS (General Packet Radio Service) Switch GPRS on/off GPRS is a method for transmitting data faster in the mobile network. Use GPRS and, if the network has suf- ficient capacity, you can be con- nected to the Internet permanently. - Page 88 If necessary, check with your service provider for details. You will also find the current settings for the service provider on the Internet at this address: www.siemens-mobile.com/customercare in the FAQ section. Select profile. Select the profile. Confirm selection. Set profile Select the profile.
-
Page 89: Security
Setup Security ¢ ¢ Security ¢ Select function. Auto key lock The keypad is locked automatically if no key has been pressed for one minute in standby mode. This pre- vents the phone from being used accidentally. However, you can still be called and you can still make an emergency call. - Page 90 Barrings Barring restricts the use of your SIM card (not supported by all serv- ice providers). You need a 4-digit network password for network bar- ring. Your service provider will give you this password. You may need to be registered separately for each barring.
-
Page 91: Network
Setup Network ¢ ¢ Network ¢ Select function. Line This function is only displayed if it is supported by the service provider. Two separate phone numbers must be registered on the phone. Select line Select the currently used phone number. Display current phone number in standby mode. -
Page 92: Band Selection
Your service provider is displayed: Display list of preferred §List§ networks. Create/change entry: or select an existing entry, <Empty> then select a new service provider in the list and confirm. Record new service provider (last entry in the list): Furth.network Select, enter the provider data and save it. -
Page 93: Accessories
• Auto. activation of car kit profile when the phone is inserted. Headset Only in conjunction with an original Siemens headset (see accessories). If an original Siemens headset is used the profile is activated automatically when the headset is plugged in. Auto answer (factory default: off) -
Page 94: Reset All
My menu Press. Press. §My menu§ Create your own menu with frequently used functions, phone numbers or Browser pages. The list of 10 entries is preset. You can, however, change it as you wish. Select the required entry. Confirm. If the entry selected is a phone number, you can also call it with the Call key. -
Page 95: Fast Access
Fast access Fast access You can assign one important phone number or a function to each one of the two soft keys and number keys 2 to 9 (speed-dial numbers). The phone number can then be dialled or the function started at the touch of a button. -
Page 96: Speed Dialling Keys
Speed dialling keys Number keys 2 to 9 can be used as speed dialling numbers for fast access. Number key 1 is reserved for the mailbox phone number (p. 59) and number key 0 is reserved for switching over two connections dur- ing use(p. -
Page 97: Organiser
Organiser Organiser Calendar ¢ ¢ Calendar You can enter appointments in the calendar. Time and date must be set for the calendar to work correctly. The calendar offers you three views: Monthly view Special colour coding: Day with entries for appointments, day of the week, weekend. -
Page 98: Appointments
Appointments ¢ ¢ Appointments Appointments are displayed in chronological order in a list. Enter new appointment <New entry> Select. Types: Memo Text input for description. Voice memo Enter voice memo. Shown with alarm. Call Enter phone number to be displayed with the alarm. - Page 99 Organiser Alarm time: On/off Silent alert. Enter the period of time before the appointment and select the time unit: Minutes, Hours, Days. Reoccurrence: Select a timeframe for repeating the appointment: No, Daily, Weekly, Monthly, Yearly. Enter a parameter for repeating: Forever, Until, Occurrences is selected, certain week-...
-
Page 100: Tasks
Tasks ¢ ¢ Tasks A task is displayed like an appoint- ment in the agenda of the selected day. However, unlike an appoint- ment it does not require a time. When no time is entered the task appears at the top of the list every day until it is marked as completed. -
Page 101: Organiser Options
Organiser Organiser options Depending on the application used (Calendar, Appointments, and the current situation, different functions are offered. Open menu. §Options§ Delete Delete entry. Delete until Delete all entries prior to a certain date. Delete all Delete all entries after confirmation. -
Page 102: New Recording
New recording <New entry> Select. The remaining time avail- able, as well as the record- ing time, are shown in the display. A brief tone sounds when the recording starts. Now say the text. Alternate between pause/record. End recording. The recording is automat- ically saved with a time stamp. -
Page 103: Media Player
Media player Media player When you are viewing a picture or listening to a melody, the applica- tion starts a media playback. Browse to the next media file. – Switch on display illumi- nation. Pictures The following functions can be applied to a displayed picture: Zoom function if the dis- played picture has a... -
Page 104: Extras
Extras SIM services (optional) ¢ ¢ SIM services Your service provider may offer spe- cial applications such as mobile banking, share prices, etc. via the SIM card. If you have such a SIM card, the SIM services will appear in the main menu under "Extras"... -
Page 105: Sound Recorder
Extras Sound recorder Use the Sound recorder noises or sounds for use as ring- tones. The Sound recorder started from other applications/func- tions such as assigning a ringtone. New recording Start from main menu: ¢ ¢ Sound recorder <New entry> Select. -
Page 106: Calc
Calc. ¢ ¢ Calc. The calculator can be used in a basic version and with an advanced range of functions. The input line and two calculation lines (including the matrix with the calculation func- tions) are located in the top half of the display. -
Page 107: Converting The Units/Currency
Extras Example using Velocity Type Units Velocity Kilometres/h, Metres/sec, Miles/h, Miles/sec, Knots, Mach Converting the units/currency Select the source unit/ currency. Switch to the input field. Enter the quantity to be converted. Switch to the selection field. Select the target meas- urement unit/currency. -
Page 108: Stopwatch Options
(addresses, calendar, etc.) and syn- chronise these with the data on your phone. The data can, for example, be saved on a company computer or the Internet, e. g.: www.siemens-mobile.com/syncml Synchronise The computer is selected §Sync§ and synchronisation started. When completed,... - Page 109 Extras Set profile §Edit§ Server sett. Providers Display the current serv- ice provider. Homepage: Set the homepage Port: Enter port number. e.g. 80. Login: Enter user name (login name). Password: Enter password (shown as a series of asterisks). Calendar path e.g., events Contacts path e.g., contacts...
-
Page 110: My Stuff
My stuff To organise your files, you can use the file system like a PC file manager. There are some folders for the various data types in purpose. ¢ The list of the folders and files is dis- played. Navigation Select file/folder in lists. -
Page 111: Index Structure
My stuff Index structure Some folders have already been cre- ated for different data types in stuff. These folders cannot be changed. Folder Description Pictures Pictures Anima- Switch on/off tions animations Sounds Melodies Themes Loaded theme (zipped) Theme configura- tion (unzipped) Skins Loaded user inter- faces... -
Page 112: Mobile Phone Manager
You can compare and copy contacts between your phone, Microsoft Outlook® and other Siemens phones (including Gigaset). SMS and MMS management (messages) You can create MMS and SMS mes- sages conveniently using your PC. -
Page 113: Backup And Restore
Mobile Phone Manager Backup and restore You can use the backup function to save backup copies of your phone data regularly to your PC. If you should lose the data you have in your phone or change your phone you can quickly re-instate all the data using the restore function. - Page 114 Processing pictures and photos (images) Picture/photo processing offers the user the opportunity to conveniently create, edit and manage pictures and photos. Filters and effects are offered with which to create attrac- tive graphics. The user-friendly inter- face makes it easy to transfer pic- tures from and into the mobile phone and to change their graphic settings (e.g.
-
Page 115: Questions & Answers
Questions & Answers Questions & Answers If you have any questions on the use of your phone, you can contact us at www.siemens-mobile.com/customercare around the clock. As further help we have listed below some frequently asked questions and answers. Problem... - Page 116 Problem Possible causes No network Weak signal. connection. Outside GSM range. Invalid SIM card. New network not authorised. Network call barring is set. Network overloaded. Phone loses Signal too weak. network. Calls not possible. Second line set. New SIM card inserted. Charge limit reached.
- Page 117 Enter the PUK (MASTER PIN) supplied with the SIM card according to the instructions. If the PUK (MASTER PIN) has been lost, contact your service provider. Contact Siemens Service (p. 117). Check with your service provider. Contact your service provider. # 9 9 9 9 #...
-
Page 118: Customer Care
You can also get personal advice about our range of products on our Premium Hotline: United Kingdom...0906 9597500 (0.75 £ per minute) Qualified Siemens employees are waiting to offer you expert information about our prod- ucts and installation. In some countries repair and replace serv- ices are impossible where the products are not sold through our authorised dealers. - Page 119 When calling customer service, please have ready your receipt and the phone identity number (IMEI, to display press # 0 6 #), the software version (to display, press # 0 6 #, then §Info§) and if available, your Siemens Service customer number.
-
Page 120: Care And Maintenance
Care and maintenance Your phone has been designed and crafted with great care and attention and should also be treated with care. The suggestions below will help you to enjoy your phone for many years. • Protect your phone from moisture and humidity! Precipitation, humidity and liquids contain min- erals that will corrode electronic... -
Page 121: Product Data
Product data Product data Declaration of conformity Siemens Information and Communi- cation mobile hereby declares that the phone described in this user guide is in compliance with the essential requirements and other rel- evant provisions of European Direc- tive 1999/5/EC (R&TTE). The declara- tion of conformity (DoC) concerned has been signed. -
Page 122: Accessories
Alterna- tively, you can visit our online shop. Carrying Cases A range of carrying cases is available at spe- cialist shops or you can visit the Siemens Mobile Store online: Original Siemens Accessories www.siemens-mobile.com/ shop... -
Page 123: Car Solutions
The power is sup- plied via the cigarette lighter socket. Optional Car Kit accessories Car Data Adapter HKO-690 Phone-in Adapter HKO-570 Products can be obtained in specialist shops or you can visit the Siemens Mobile Store online: Original Siemens Accessories www.siemens-mobile.com/ shop... -
Page 124: Quality
After six months, if the battery is clearly suffering from loss of performance, we recommend that you replace it. Please buy only Siemens original batteries. Display quality statement For technological reasons, some small dots in other colours may appear in the display in rare cases. -
Page 125: Guarantee Certificate (Uk)
• In the case of new devices and their com- ponents exhibiting defects resulting from manufacturing and/or material faults within 24 months of purchase, Siemens shall, at its own option and free of charge, either replace the device with another device reflecting the current state of the art, or repair the said device. -
Page 126: Guarantee Certificate (Irl)
• In the case of new devices and their com- ponents exhibiting defects resulting from manufacturing and/or material faults within 24 months of purchase, Siemens shall, at its own option and free of charge, either replace the device with another device reflecting the current state of the art, or repair the said device. -
Page 127: European Union (Rtte)
Siemens web site at www.siemens-mobile.com While there may be differences between the SAR levels of various phones and at various positions, all Siemens products meet the legal requirements. The World Health Organization (WHO, CH-1211 Geneva 27, Switzerland) states that present scientific information... -
Page 128: International (Icnirp)
The highest SAR value for this model phone when tested for use at the ear is 0,73 W/kg***. SAR information can also be found at www.siemens-mobil.com While there may be differences between the SAR levels of various phones and at various positions, they all meet the international guidelines for safe RF exposure. -
Page 129: Menu Tree
Menu tree Menu tree > Show entries Default book <New entry> Business card Groups Default book <Info numbers> > Call records Calls missed Calls received Calls dialled Delete records Time/charge > Surf & fun URL/service provider Games Applications Downl. assist. Bookmarks Internet Camera... -
Page 130: Messages Inbox
> Inbox Messages Draft Unsent Sentbox MMS templates SMS archive Text modules Message setup > Organiser Calendar Appointments Tasks Notes Missed appts. > WAP push CB messages > > > > Text zoom SMS setup MMS setup WAP push set. Voice message CB services Menu tree... - Page 131 Menu tree > Dictat.machine Organiser Time zones Calendar setup > SIM services Extras Alarm clock Sound recorder Calc. Unit converter Stopwatch Countdown Remote syncr. My stuff > Setup Profiles Themes Display Ringtones > Language Text input Wallpaper Logo Colour skin Screensaver Start up anim.
- Page 132 > Ringtones Setup Call setup Phone setup > Volume Calls Group calls Other calls More melodies > Hide ID Call waiting Divert Call screening Any key answ. Minute beep > Key tones Info tones Automatic switch off Phone identity Memory assis. File system Master reset Menu tree...
- Page 133 Menu tree > Clock Setup Connectivity Security > Time/date Time zones Date format Time format Buddhist year Show clock Auto time zone > GPRS GPRS info IrDA Data services HTTP profile Authentication > Auto key lock Direct call ‚ Only Codes This SIM only Barrings...
- Page 134 > Setup Network Accessories > Line Network info Choose netwrk Auto network Pref. network Band selection Fast search User group > Car Kit Headset Menu tree > Select line Protected > Active Select group Outgo. access Pref. group > Auto answer Automatic switch off Car loudspk.
-
Page 135: Index
Index Index Accessories ...121 Addressbook Dial entry ...35 Groups ...36 New entry ...33 Read entry...35 Aircraft mode ...75 Alarm Alarm clock ...103 Type...98 Alarm clock ...103 All calls (call time/charge) ...41 All calls (diversion) ...82 All incoming (barrings) ...89 Answering service (external)...59 Any to answer ...82 Appointments ...97... - Page 136 Charge rate ...41 Charges ...41 Charging the battery ...10 CLIPIt™ covers ...12 Clock...85 Colour skin...77 Conference ...30 Connection profiles ...86 Connectivity...86 Contact list...61 Control code (DTMF) ...31 Countdown ...107 Credit limit ...41 CSD settings...87 Currency ...106 Customer care...117 Date format ...85 Default book ...32 Delete assistant...84 Dialling code ...26...
- Page 137 Index Joystick ...5 Key tones ...83 Language...77 Limit (call time/charge)...41 Logo ...77 Loss of phone, SIM card...120 Mailbox...59 Maintenance of phone ...119 Master reset ...84 Media player ...102 Menu Controls ...16 My menu...93 Speed dialling...19 Menu speed dialling ...18 Menu tree ...128 Message CB ...67 MMS ...51...
- Page 138 Set time/date ...85 Settings ...74 Short message (SMS) ... 45 Shown in the display... 7 Shut down animation ... 78 Siemens City Portal ... 25 Signal strength ... 15 Silent alert ... 79 SIM card Clear barring ... 20 Insert ... 9 Phonebook ...
- Page 139 Index Switch off phone Automatic ...83 Manually ...13 Switch on phone ...13 Symbols ...7 Synchronisation ...107 T9 text input ...22 Tasks...99 Technical data...120 Text entry With T9 ...22 Without T9 ...21 Text modules ...24 Themes...76 This SIM only...88 Time zones... 14, 85, 101 Unanswered...81 Unit converter ...105 Upper and lowercase...
Need help?
Do you have a question about the C65 and is the answer not in the manual?
Questions and answers