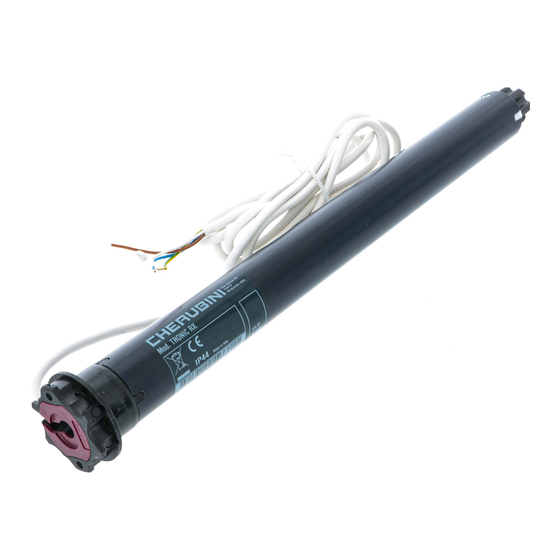
Summary of Contents for CHERUBINI TRONIC RX
- Page 1 TRONIC RX PROGRAMMAZIONE FILARE WIRE PROGRAMMING DRAHTGEBUNDENE PROGRAMMIERUNG PROGRAMMATION FILAIRE PROGRAMACIÓN DESDE EL PULSADOR ISTRUZIONI - INSTRUCTIONS - EINSTELLANLEITUNGEN INSTRUCTIONS - INSTRUCCIONES...
-
Page 2: Table Of Contents
Activating/deactivating the super-sensitivity function (only for Ø 35 motors) ..p. 29 Deleting the opening and closing limit switch ............p. 29 EU DECLARATION OF CONFORMITY CHERUBINI S.p.A. declares that the product is in conformity with the relevant Union harmonisation legislation: Directive 2014/53/EU, Directive 2011/65/EU. -
Page 3: Important Safety Instructions
- The supply cord of this motor can be replaced only by the same type of cable supplied by Cherubini S.p.A. - The acoustic emission level of Cherubini S.p.A. motors is lower than 70dBA: LpA < 70dB(A). - The choice of the motor, based on its application requirements, shall be compatible with the data written on the motor label. - Page 4 - If the motor is used to move sun awnings, keep a safety horizontal distance of at least 40 cm between the fully opened awning and any permanent object. - If the supply cord is damaged, it must be replaced by Cherubini Service in order to prevent any risk.
-
Page 5: How To Prepare The Motor
HOW TO PREPARE THE MOTOR STOP RING NUT ADAPTOR DRIVING PULLEY STOP RING NUT 1. Insert the adaptor in the nut mating the groove with the reference notch and push till they touch. 2. Fix the driving pulley on the motor pin until the stop pin clicks. -
Page 6: Electrical Connections
ELECTRICAL CONNECTIONS - In order to prevent dangerous situations or malfunctioning, the electrical command elements wired to the motor must be sized according to the motor’s electrical features. - Means for disconnection must be incorporated in the fixed wiring in accordance with the national installation standards. -
Page 7: Choice Of The Programming Modes
To activate/deactivate the remote control function, follow the sequence shown below: PLEASE NOTE: To deactivate the remote function it is first necessary to totally delete the remote controls from the memory of the motor (page 40 Tronic RX manual). Activation/deactivation from the OPENING position:... -
Page 8: Key To Symbols
KEY TO SYMBOLS Press the Press the UP-button DOWN-button DOWN down short motor DOWN DOWN rotation in one direction Press the buttons quickly according to the sequence indicated long motor rotation in other direction DOWN DOWN Press the buttons quickly according to the sequence indicated. The motor will carry out a movement to confirm your settings. -
Page 9: Motor Programming From The White Wire
MOTOR PROGRAMMING FROM THE WHITE WIRE PLEASE NOTE. If the motor is programmed from the white wire without first having memorised at least one remote control, the remote function will be deactivated automatically (to reactivate it, see page 21 - ACTIVATION/DEACTIVATION OF THE REMOTE CONTROL MOTOR FUNCTION). -
Page 10: Example 1: Setting First The Opening Position
EXAMPLE N. 1 Setting first the opening position SETTING THE OPENING POSITION If the rolling shutter is completely open, you have first to drive it down by around 20 cm. Bring the rolling shutter to the opening position using the UP or DOWN button. (Open position). -
Page 11: Example 2: Setting First The Closing Position
EXAMPLE N. 2 Setting first the closing position SETTING THE CLOSING POSITION If the rolling shutter is completely closed, you have first to drive it up by around 20 cm. Bring the rolling shutter to the closing position using the UP or DOWN button. (Closed position). -
Page 12: Mode 2: Limit Switch Setting (Semi-Automatic)
MODE 2: LIMIT SWITCH SETTING (semi-automatic) To do the settings in this mode the rolling shutter has to be equipped with lockdown hangers in the closing position, but the rolling shutter does not need to have physical stops in the opening position. This mode of setting is helpful in cases where the factory will set the opening position and the closing position will be set automatically during the normal use. -
Page 13: Setting/Deleting A Middle Position
SETTING/DELETING A MIDDLE POSITION MOVEMENT TO MIDDLE POSITION From the OPENING position From the CLOSING position After the sequence the motor will go into “Dead Man” mode so as to enable the exact adjustment of the middle position desired. To memorise the position chosen, confirm with this sequence: MOVEMENT TO MIDDLE POSITION To move the shutter to the... -
Page 14: Closing Force Adjustment
The Tronic RX is factory set to a closing force of 20 % of the nominal torque. This force can be changed very easily using the up-down button. It can be reduced by 10 % or increased up to 40 %, depending on the desired result. -
Page 15: Activating/Deactivating The Super-Sensitivity Function (Only For Ø 35 Motors)
ACTIVATION/DEACTIVATION SUPER-SENSITIVITY FUNCTION (only for Ø 35 motors) From the OPENING position From the CLOSING position DELETING THE OPENING AND CLOSING LIMIT SWITCH From the OPENING position DOWN From the CLOSING position DOWN DOWN DOWN DOWN DOWN After deletion of the limit switches the radio function automatically resets. - Page 16 CHERUBINI S.p.A. Via Adige 55 25081 Bedizzole (BS) - Italy Tel. +39 030 6872.039 | Fax +39 030 6872.040 info@cherubini.it | www.cherubini.it CHERUBINI Iberia S.L. Avda. Unión Europea 11-H Apdo. 283 - P. I. El Castillo 03630 Sax Alicante - Spain Tel.


Need help?
Do you have a question about the TRONIC RX and is the answer not in the manual?
Questions and answers