
Subscribe to Our Youtube Channel
Related Manuals for SMC Networks FieldServer FS-ROUTER-BAC2


Summary of Contents for SMC Networks FieldServer FS-ROUTER-BAC2
- Page 1 FieldServer BACnet Router FS-ROUTER-BAC2 Start-up Guide BAS Router (BACnet Multi-Network Router) APPLICABILITY & EFFECTIVITY The instructions are effective for the above as of July 2019. Document Revision: 1.B T18625...
- Page 2 BACnet Router Start-up Guide Technical Support Please call us for any technical support needs related to the FieldServer product. Sierra Monitor Corporation 1991 Tarob Court Milpitas, CA 95035 Website: www.sierramonitor.com U.S. Support Information: +1 408 964-4443 +1 800 727-4377 Email: support@sierramonitor.com EMEA Support Information: +31 33 808 0590...
-
Page 3: Table Of Contents
BACnet Router Start-up Guide TABLE OF CONTENTS BACnet Router Description ........................ 5 Equipment Setup ..........................6 Mounting ............................6 Installing the BACnet Router ......................7 Connecting the R1 and R2 Ports ....................7 3.1.1 Wiring ............................7 10/100 Ethernet Connection Port ....................8 Power Up the Device ........................... - Page 4 BACnet Router Start-up Guide LIST OF FIGURES Figure 1: DIN Rail Bracket ..........................6 Figure 2: DIN Rail Mounted........................... 6 Figure 3: R1 & R2 Connection Ports ......................7 Figure 4: Ethernet Connection ........................8 Figure 5: Required Current Draw for the Gateway ..................9 Figure 6: Power Connections ........................
-
Page 5: Bacnet Router Description
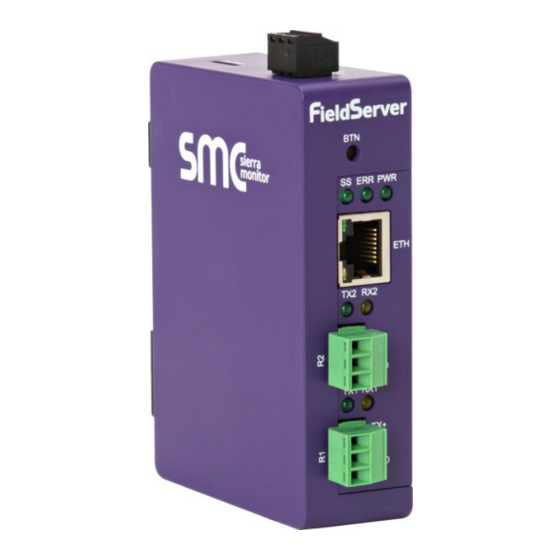
BACnet Router Start-up Guide BACNET ROUTER DESCRIPTION The BACnet Router provides stand-alone routing between BACnet networks such as BACnet/IP, BACnet Ethernet, and BACnet MS/TP – thereby allowing the system integrator to mix BACnet network technologies within a single BACnet internetwork. There are three physical communication ports on the BAS Router. -
Page 6: Equipment Setup
BACnet Router Start-up Guide EQUIPMENT SETUP Mounting The BACnet Router can be mounted using the DIN rail mounting bracket on the back of the unit. Din Rail Bracket Figure 1: DIN Rail Bracket NOTE: For dimension details see Appendix B.2. Figure 2: DIN Rail Mounted Page 6 of 32... -
Page 7: Installing The Bacnet Router
BACnet Router Start-up Guide INSTALLING THE BACNET ROUTER Connecting the R1 and R2 Ports The R1 and R2 Ports are RS-485. NOTE: For the R1 Port, ensure RS-485 is selected by checking that the number 4 DIP Switch is set to the left side. -
Page 8: 10/100 Ethernet Connection Port
BACnet Router Start-up Guide 10/100 Ethernet Connection Port Ethernet Port Figure 4: Ethernet Connection The Ethernet Port is used both for BACnet/IP communications and for configuring the BACnet Router via the Web App. To connect the BACnet Router, either connect the PC to the Router’s Ethernet port or connect the Router and PC to an Ethernet switch. -
Page 9: Power Up The Device
BACnet Router Start-up Guide POWER UP THE DEVICE Check power requirements in the table below: Power Requirement for External Gateway Current Draw Type BACnet Router Family 12VDC 24V DC/AC FS-EXPLORER-BAC2 (Typical) 250mA 125mA NOTE: These values are ‘nominal’ and a safety margin should be added to the power supply of the host system. -
Page 10: Connecting To The Bacnet Router
BACnet Router Start-up Guide CONNECTING TO THE BACNET ROUTER The FieldServer Toolbox Application can be used to discover and connect to the BACnet Router on a local area network. To connect to the BACnet Router over the Internet using Toolbox, add the Internet exposed IP Address of the Router by clicking on the button, or alternatively enter the Internet exposed IP Address in a web browser directly. -
Page 11: Using A Web Browser Directly
BACnet Router Start-up Guide Using a Web Browser Directly • Open a Web Browser and connect to the BACnet Router’s Default IP Address. The Default IP Address of the BACnet Router is 192.168.2.101, Subnet Mask is 255.255.255.0 • If the PC and the BACnet Router are on different IP Networks, assign a Static IP Address to the PC on the 192.168.2.X network. -
Page 12: Configuring The Bacnet Router
BACnet Router Start-up Guide CONFIGURING THE BACNET ROUTER Settings 6.1.1 Button Functions • Save – write the currently displayed settings to the device. A restart will be required to apply the updated settings. • Reload – discard the currently displayed settings and reload the settings stored on the device. -
Page 13: Bacnet/Ip
BACnet Router Start-up Guide 6.1.4 BACnet/IP • IP Port – the BACnet/IP default is 47808 (0xBAC0), but a different port number may be specified here. • IP Port – this MUST be different to the IP Port used on the BACnet/IP Primary connection. Default is 47809 (0xBAC1). -
Page 14: Bacnet Ms/Tp, Bacnet Ethernet And Bacnet Explorer
BACnet Router Start-up Guide 6.1.5 BACnet MS/TP, BACnet Ethernet and BACnet Explorer • Max Info Frames – the number of transactions the Router may initiate while it has the MS/TP token. Default is 50. • Max Master – the highest MAC address to scan for other MS/TP master devices. -
Page 15: Network Settings
BACnet Router Start-up Guide Network Settings The IP Settings for the BACnet Router are used by BACnet/IP. The IP Settings can be edited in the Network Settings section as shown. Figure 8: Network Settings Page 15 of 32... -
Page 16: Router Diagnostics
BACnet Router Start-up Guide Router Diagnostics By clicking on the Router Diagnostics tab all the connection communication details can be viewed to ensure the BACnet Router is working correctly. Figure 9: BACnet Router Diagnostics Page Page 16 of 32... -
Page 17: Bacnet Explorer
BACnet Router Start-up Guide BACNET EXPLORER The Bacnet Explorer tab allows installers to validate that their equipment is working on Bacnet without having to ask the BMS integrator to test the unit. • To access the embedded BACnet Explorer click the BACnet Explorer tab. Figure 10: FS-GUI BACnet Explorer Button •... -
Page 18: Discover Device List
BACnet Router Start-up Guide Discover Device List • From the BACnet Explorer landing page, click on the BACnet Explorer button on the left side of the screen to go to the BACnet Explorer page. Figure 12: BACnet Explorer Page • To discover the devices connected to the same subnet as the BACnet Explorer, click the Discover button (binocular icon). -
Page 19: View Device Details And Explore Points/Parameters
BACnet Router Start-up Guide NOTE: Allow the devices to populate before interacting with the device list for optimal performance. Any discovery or explore process will cause a green message to appear in the upper right corner of the browser to confirm that the action is complete. Figure 14: Device List View Device Details and Explore Points/Parameter s •... -
Page 20: Figure 16: Full Device Sub-Items
BACnet Router Start-up Guide • “1991 To view the full details of a device, go back to highlighting the device directly (in Figure 16 WeatherLink_1”) and click the Explore button ( ) that appears to the right of the highlited device as a magnifying glass icon or double-click the highlighted device. -
Page 21: Figure 18: Additional Device Details
BACnet Router Start-up Guide • Then click on the Explore button or double-click the device object. Figure 18: Additional Device Details A full list of the device details will appear on the right side window. If changes are expected since the last explore, simply press the Refresh button ( ) that appears to right of individual properties to refresh the value. -
Page 22: Edit The Present Value Field
BACnet Router Start-up Guide 7.2.1 Edit the Present Value Field The only recommended field to edit via BACnet Explorer is the device’s present value field. NOTE: Other BACnet properties are editable (such as object name, object description, etc.); however, this is not recommended because the BACnet Explorer is a discovery tool not a Building Management System (BMS). -
Page 23: Figure 21: Updated Present Value
BACnet Router Start-up Guide • Enter the appropriate change and click write. The window will close. When the BACnet Explorer page appears, the present value will be changed as specified. Figure 21: Updated Present Value Page 23 of 32... -
Page 24: Appendix A Useful Features
BACnet Router Start-up Guide APPENDIX A USEFUL FEATURES Appendix A.1. Tooltips Tooltips appear when the mouse pointer hovers over the corresponding settings field. A balloon will appear giving a description of that input field. This applies to all input fields. Figure 22: Settings Tooltips Page 24 of 32... -
Page 25: Appendix A.2. Take A Diagnostic Capture
BACnet Router Start-up Guide Appendix A.2. Take a Diagnostic Capture When there is a problem on-site that cannot easily be resolved, perform a diagnostic capture before contacting support so that support can quickly solve the problem. There are two methods for taking diagnostic captures: •... - Page 26 BACnet Router Start-up Guide • Step 1: Take a Log Click on the diagnose icon of the desired device Ensure “Full Diagnostic" is selected (this is the default) NOTE: If desired, the default capture period can be changed. Page 26 of 32...
- Page 27 BACnet Router Start-up Guide Click on “Start Diagnostic” Wait for Capture period to finish, then the Diagnostic Test Complete window will appear • Step 2: Send Log Once the Diagnostic test is complete, a .zip file will be saved on the PC Choose “Open”...
-
Page 28: Appendix A.2.2. Using Fs-Gui
BACnet Router Start-up Guide Appendix A.2.2. Using FS-GUI Diagnostic Capture with FS-GUI is only available on FieldServers with a bios updated/released on November 2017 or later. Completing a Diagnostic Capture through the FieldServer allows network connections (such as Ethernet) to be captured. Once the Diagnostic Capture is complete, email it to technical support. -
Page 29: Appendix A.3. Factory Reset Instructions
BACnet Router Start-up Guide Appendix A.3. Factory Reset Instructions For instructions on how to reset a FieldServer back to its factory released state, see ENOTE - FieldServer Next Gen Recovery. Page 29 of 32... -
Page 30: Appendix B Reference
BACnet Router Start-up Guide APPENDIX B REFERENCE Appendix B.1. Specifications FS-ROUTER-BAC2 One 3-pin Phoenix connector with: RS-485 (Tx+ / Rx- / gnd) One 3-pin Phoenix connector with: RS-485 (Tx+ / Rx- / gnd) Electrical Connections One 3-pin Phoenix connector with: Power port (+ / - / Frame-gnd) One Ethernet 10/100 BaseT port Input Voltage: 12-24VDC or 24VAC Current draw: 24VAC 125mA... -
Page 31: Appendix B.2. Fs-Router-Bac2 Dimension Drawing
BACnet Router Start-up Guide Appendix B.2. FS-ROUTER-BAC2 Dimension Drawing Power Port R1 Serial Port R2 Serial Port Figure 25: BACnet Router Dimensions Page 31 of 32... -
Page 32: Appendix C Limited 2 Year Warranty
BACnet Router Start-up Guide APPENDIX C LIMITED 2 YEAR WARRANTY Sierra Monitor Corporation warrants its products to be free from defects in workmanship or material under normal use and service for two years after date of shipment. Sierra Monitor Corporation will repair or replace any equipment found to be defective during the warranty period.
Need help?
Do you have a question about the FieldServer FS-ROUTER-BAC2 and is the answer not in the manual?
Questions and answers