Advertisement
Q
S
H
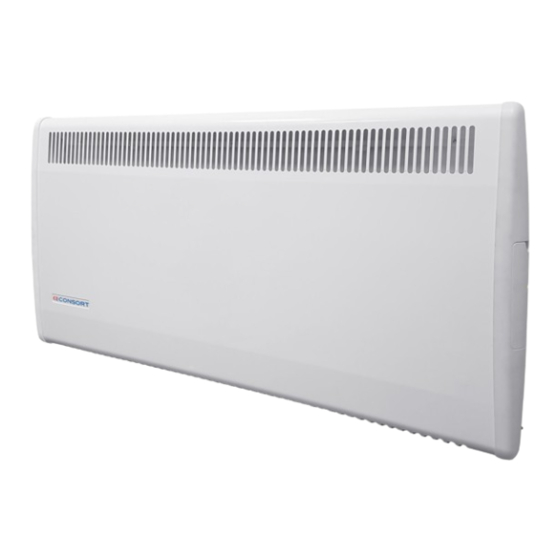
Installa on & Control Guide for Slimline Low Surface
Temperature Wall Mounted Fan Heater
with Intelligent Fan Control & Electronic 7-Day Timer
Models
PLSTi050E, PLSTi075E, PLSTi100E, PLSTi150E, PLSTi150SSE
Please note:
'SS' suffix added to model number denotes Stainless Steel deriva ve
All electrical appliances produced by the Company are guaranteed for one year against faulty
materials or workmanship.
This applies only if the appliance has been used for purposes in
accordance with the instructions provided and has not been connected to an unsuitable
electricity supply, or subject to misuse, neglect, damage or modified or repaired by any person
not authorised by us. This guarantee is offered to you as an extra benefit and does not affect your
legal rights.
The correct electricity supply voltage is shown on the rating label attached to the appliance.
Reasonable care has been taken to ensure that this guide is accurate at the time of printing.
In the interest of progress the Company reserve the right to vary specifications from time to time
without notice.
66000940 Iss 09
Advertisement
Table of Contents

Summary of Contents for Consort PLSTi050E
- Page 1 Temperature Wall Mounted Fan Heater with Intelligent Fan Control & Electronic 7-Day Timer Models PLSTi050E, PLSTi075E, PLSTi100E, PLSTi150E, PLSTi150SSE Please note: ‘SS’ suffix added to model number denotes Stainless Steel deriva ve All electrical appliances produced by the Company are guaranteed for one year against faulty materials or workmanship.
-
Page 2: Safety And Care
Overview switches the heater off if, for any reason, the appliance overheats. The TOC can only be re-set Please read this guide carefully and retain after the appliance has cooled down. In order to re-set the TOC, proceed as follows: for future use and maintenance. -
Page 3: General Safety
General Safety Our Low Surface Temperature heaters 1. Mounting have been designed and built to the NHS requirement for safe surface temperatures which is that no surface This unit is for wall mounting only. It is designed to be which can be touched by the user will be very quiet in operation if mounted correctly. -
Page 4: Installation
This means the securing screws can simply be loosened to view behind the heater. This allows the rating label to be viewed easily and also makes it easier to clean the unit. ILLIMETRES ATTS PLSTi050E/PLSTi075E 500/750 PLSTi100E 1000 PLSTi150E/SSE... - Page 5 MODE/MENU INCREASE VALUE STANDBY DECREASE VALUE 3. Basic Operation When the room temperature reaches the set temperature, the heating is disabled. PLSTi has 4 standard operating modes: BOOST, MANUAL, SETB and PROG. Each mode can be selected by pressing the MENU button to cycle through the options.
- Page 6 8. Heat symbol The system has been factory set to default time and temperature values. If necessary, all Every time there is a demand for heat, the dis- values can be adjusted. When the heating is play will show the heat icon. on, open window detection sensor will auto- matically switch the heater off when it detects a fall in temperature of 2°C in less than 10...
- Page 7 15. Setting the automatic program schedule An example of one day program on PLSTiE PROGRAM 1 PROGRAM 2 PROGRAM 5 PROGRAM 6 ºC PROGRAM PROGRAM 19ºC 22ºC 22ºC 16ºC 10ºC 4ºC 06:00 08:00 12:00 14:00 16:00 22:00 Step 4: Press the MENU button. The temperature should flash.
- Page 8 16. Overview of program mode Alternatively, it is possible to copy a program from one day to another. The PLSTi has a 7-day, 5-day + 2-day and a 24 To do this, follow the steps below; hour timer available. This can be chosen in the setup menu.
- Page 9 1 - Temperature calibration 7 - Temperature drop in open window detection time The temperature reading is factory calibrated but if for any reason it needs adjusting (better accuracy required, to suit different position in the room etc.), the reading can be recalibrat- ed in 0.5 degree steps.
-
Page 10: Declaration Of Conformity
BSEN55014 (2006) · BSEN301 489.1 & .3 · BSEN300 220.1 & .2 · BSEN60 730.2.9 · BSEN 60335.1 (2012 ) · BS EN 60335.2.30 (2009) · PLSTi050E, PLSTi075E, PLSTi100E, UMBER ESCRIPTION PPLIANCE PLSTi150E,PLSTi150SSE ESPONSIBLE ERSON RIFFITHS OSITION RODUCTION AND UALITY ANAGER...


Need help?
Do you have a question about the PLSTi050E and is the answer not in the manual?
Questions and answers