Table of Contents
Advertisement
Quick Links
TRC-190/2190 Series
Quick Installation Guide
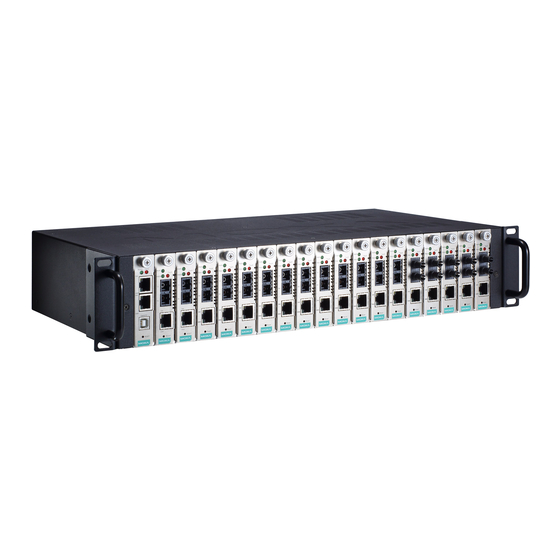
Rackmount chassis for the NRack System™
Moxa Americas:
Toll-free: 1-888-669-2872
Tel:
1-714-528-6777
Fax:
1-714-528-6778
Moxa Europe:
Tel:
+49-89-3 70 03 99-0
Fax:
+49-89-3 70 03 99-99
Moxa India:
Tel:
+91-80-4172-9088
Fax:
+91-80-4132-1045
Edition 5.1, May 2017
Technical Support Contact Information
www.moxa.com/support
2017 Moxa Inc. All rights reserved.
Moxa China (Shanghai office):
Toll-free: 800-820-5036
Tel:
+86-21-5258-9955
Fax:
+86-21-5258-5505
Moxa Asia-Pacific:
Tel:
+886-2-8919-1230
Fax:
+886-2-8919-1231
P/N: 1802001900013
*1802001900013*
Advertisement
Table of Contents

Subscribe to Our Youtube Channel
Related Manuals for Moxa Technologies TRC-2190 Series


Summary of Contents for Moxa Technologies TRC-2190 Series
- Page 1 TRC-190/2190 Series Quick Installation Guide Rackmount chassis for the NRack System™ Edition 5.1, May 2017 Technical Support Contact Information www.moxa.com/support Moxa Americas: Moxa China (Shanghai office): Toll-free: 1-888-669-2872 Toll-free: 800-820-5036 Tel: 1-714-528-6777 Tel: +86-21-5258-9955 Fax: 1-714-528-6778 Fax: +86-21-5258-5505 Moxa Europe: Moxa Asia-Pacific: Tel: +49-89-3 70 03 99-0...
-
Page 2: Package Checklist
Introduction Overview Moxa’s NRack System includes the TRC-190/2190 Series, which is a 19-inch, rack-mountable chassis for selected Moxa media converter slide-in modules. The TRC-190/2190 Series allows the network administrator to connect various copper and fiber-optic network media over protocols that include RS-232, RS-422, and RS-485. Support for additional protocols will be available in the future. -
Page 3: Installing The Media Converter Slide-In Modules
Slide-in Modules Installation Installing or Removing Chassis Face Plate Install a chassis face plate over any unused slot by aligning the hole in the face plate with a threaded hole in the chassis. Secure the face plate with the enclosed screw. ATTENTION Each slot in the TRC-190/2190 Series chassis without a slide-in module installed MUST have a chassis face plate covering the... -
Page 4: Replacing The Media Converter Slide-In Modules
2. Before installing the slide-in module, make sure the front plate has been removed. Please refer to the previous Installing or Removing Chassis Face Plate section. 3. Align the slide-in module with the chassis installation slot so that the panel fastener screw is at the top of the module. 4. -
Page 5: Dc Power Supply Modules
TRC-190/2190-AC chassis. The PWR-190/2190-AC and PWR-190/2190-DC-48 power modules can be installed at the same time. Powering the AC Power Supply Module ATTENTION Ensure that the ON/OFF switch is set to “O” before connecting to the external power source. Failure to observe this caution could result in damage to, and subsequent failure of, the AC power supply module and human life. -
Page 6: Power Supply Module Installation
Optional Power Supply Modules An extra space is available at the right side of the back of the chassis to install an optional power module, the PWR-190/2190-DC-xx. The specification is the same as the one that comes with the TRC-190/2190-DC-xx chassis. The PWR-190/2190-AC and PWR-190/2190-DC-48 power modules can be installed at the same time. -
Page 7: Power Supply Module Replacement
1. Install the AC power supply module and DC power supply module the same way. The default power supply module will be at power module Slot A. We can install an additional power supply module in Slot B. You can install the power supply module or remove it from Slot A or Slot B in the same manner. -
Page 8: Power Supply Fuse Replacement
4. Slide the power supply module smoothly. 5. Install another new power supply module following the instructions in the previous section. Power Supply Fuse Replacement (TRC-190/2190-AC, power supply module only) To replace a fuse on the power supply module does not require to pull the power supply module out of the chassis. - Page 9 ATTENTION Select mounting bracket locations on the chassis that will keep the chassis balanced when mounted to the rack. Failure to observe this warning could allow the chassis to fall, resulting in equipment damage and/or possible injury to personnel. To install the TRC-190/2190 chassis into a standard 19-inch rack: 1.
-
Page 10: General Troubleshooting
Grounding Grounding and wire routing help limit the effects of noise due to electromagnetic interference (EMI). Run the ground connection from the ground screw to the grounding surface prior to connecting devices. Attach the grounding wire (12 AWG copper wire gauge or larger) to the chassis grounding lug carefully. -
Page 11: Warranty
Environmental Limits Operating TRC-190 : 0 to 60 °C (32 to 140 °F) Temperature TRC-2190 : -20 to 55 °C (-4 to 131 °F) Storage TRC-190 : -20 to 75 °C (-4 to 167 °F) Temperature TRC-2190 : -40 to 85 °C (-40 to 185 °F) Ambient Relative 5 to 95% (non-condensing) Humidity...
Need help?
Do you have a question about the TRC-2190 Series and is the answer not in the manual?
Questions and answers