Table of Contents
Advertisement
Quick Links
Advertisement
Table of Contents

Related Manuals for HIKVISION DS-1600KI(B)


Summary of Contents for HIKVISION DS-1600KI(B)
- Page 1 DS-1600KI Keyboard User Manual...
- Page 2 INTERRUPTION, OR LOSS OF DATA, CORRUPTION OF SYSTEMS, OR LOSS OF DOCUMENTATION, WHETHER BASED ON BREACH OF CONTRACT, TORT (INCLUDING NEGLIGENCE), PRODUCT LIABILITY, OR OTHERWISE, IN CONNECTION WITH THE USE OF THE PRODUCT, EVEN IF HIKVISION HAS BEEN ADVISED OF THE POSSIBILITY OF SUCH DAMAGES OR LOSS.
- Page 3 DS-1600KI Keyboard • User Manual PRODUCTION OF CHEMICAL OR BIOLOGICAL WEAPONS, ANY ACTIVITIES IN THE CONTEXT RELATED TO ANY NUCLEAR EXPLOSIVE OR UNSAFE NUCLEAR FUEL-CYCLE, OR IN SUPPORT OF HUMAN RIGHTS ABUSES. IN THE EVENT OF ANY CONFLICTS BETWEEN THIS MANUAL AND THE APPLICABLE LAW, THE LATTER PREVAILS.
- Page 4 DS-1600KI Keyboard • User Manual Preface Applicable Models This manual is applicable to the models listed in the following table. Series Model Network Keyboard DS-1600KI Symbol Conventions The symbols that may be found in this document are defined as follows. Symbol Description Indicates a hazardous situation which, if not avoided, will or could...
-
Page 5: Table Of Contents
DS-1600KI Keyboard • User Manual Contents Chapter 1 Product Description ....................1 1.1 Product Overview ........................1 1.2 Appearance ..........................2 Chapter 2 Start-up ........................5 2.1 Activate Keyboard ......................... 5 2.2 Change Password ........................5 2.3 Login and Logout ........................7 Chapter 3 Configure Network ..................... - Page 6 DS-1600KI Keyboard • User Manual 4.5 Control DVR ......................... 28 4.6 Manage User ........................30 4.6.1 Add New Users with Admin Account ..............30 4.6.2 Edit User Accounts by Administrator ..............31 Chapter 5 Control Platform ...................... 33 5.1 Control iSecure ........................33 5.1.1 Login ..........................
- Page 7 DS-1600KI Keyboard • User Manual 6.5.6 View Open Source Software Licenses ..............53 Chapter 7 Configure System ..................... 54 7.1 Set Language ........................54 7.2 Set Date and Time ....................... 54 7.3 Set Storage ........................... 54 7.4 Maintenance ........................55 7.5 Set Others ..........................
-
Page 8: Chapter 1 Product Description
In addition to displaying images, the 10.1" capacitive touchscreen supports DVI and HDMI video outputs. The software system runs on Android 6.0. It is compatible with all series of Hikvision IP cameras, NVRs/DVRs, and control center platform such as HikCentral. It supports recording, picture capturing and two-way audio, as well as the video wall control and scene switch of platform and decoding devices. -
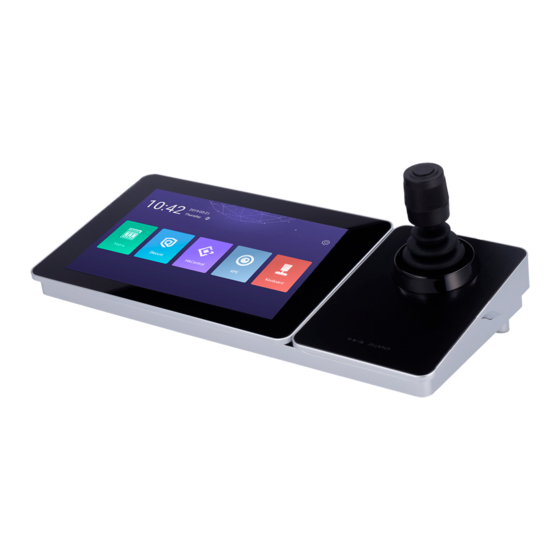
Page 9: Appearance
DS-1600KI Keyboard • User Manual 1.2 Appearance The DS-1600KI keyboard consists of a touchscreen and a joystick panel. The joystick panel is detachable and can be separated from the keyboard. Refer to the following figure for keyboard appearance. Figure 1-1 DS-1600KI Keyboard Appearance Front Panel Refer to the following table for description of keyboard appearance. - Page 10 DS-1600KI Keyboard • User Manual Operation Function Upper right PTZ control mode: Move the PTZ upper right. Lower left PTZ control mode: Move the PTZ lower left. Lower right PTZ control mode: Move the PTZ lower right. Rotate anticlockwise Zoom out (ZOOM-) Rotate clockwise Zoom in (ZOOM+) Interfaces...
- Page 11 DS-1600KI Keyboard • User Manual Number Name Description Press to wake up the touchscreen, or turn the keyboard into sleeping mode. Power Switch Hold (for 3 s) to power on/off, or reboot the device.
-
Page 12: Chapter 2 Start-Up
DS-1600KI Keyboard • User Manual Chapter 2 Start-up 2.1 Activate Keyboard The network keyboard is inactive by default. You should activate it before performing other operations. Then you can log in and log out of the keyboard. Here we introduce the local operation. - Page 13 DS-1600KI Keyboard • User Manual Figure 2-1 Reset the Password 3. Click Export to download the key request file. 4. Set the file path in the pop-up window. 5. Click Select Folder to save the device key request file on your PC. Note The exported key request file is XML file which is named as Device Serial No.-System Time.
-
Page 14: Login And Logout
DS-1600KI Keyboard • User Manual 2.3 Login and Logout Log in the keyboard to operate it. Log out to lock your operation. Steps 1. Click Keyboard on the menu. 2. Select the account and enter the password to login. Figure 2-2 Login Interface 3. -
Page 15: Chapter 3 Configure Network
DS-1600KI Keyboard • User Manual Chapter 3 Configure Network 3.1 Set Wired Network Setting the wired network parameters to connect to the network. Before You Start Make sure the network cable is appropriately connected. Steps 1. Click on the home page and choose Ethernet. 2. -
Page 16: Chapter 4 Manage Keyboard
DS-1600KI Keyboard • User Manual Chapter 4 Manage Keyboard 4.1 Manage Device 4.1.1 Add and Edit Device Add Device Manually You can add devices manually by inputting device parameters. Up to 8,000 devices can be added by the admin. Steps 1. - Page 17 DS-1600KI Keyboard • User Manual ● In Protocol, you can select Default for same brand devices, or select ONVIF for devices from other manufacturers. Figure 4-2 Add Device Manually 6. Click Save to finish adding. Add Device by Searching Online Devices You can also add devices by online searching Steps 1.
- Page 18 DS-1600KI Keyboard • User Manual Figure 4-3 Auto Search Result 5. Select the device(s) as you desired. 6. Enter User Name, and Password. 7. Click Save. Note If you want to add multiple devices, all device user names and passwords must be the same. Add Device by Importing from USB Flash Drive You can add devices in batch by importing device information from USB flash drive.
- Page 19 DS-1600KI Keyboard • User Manual 5. Click 6. Enter the admin password. 7. Select the import file from the USB flash drive. 8. Click Confirm. Find Added Devices In the device/camera management interface, you can quickly search the added device/camera by IP address, keywords, or name.
-
Page 20: Manage Connected Cameras
DS-1600KI Keyboard • User Manual 4. Click on the name of the added device to view device details. 5. Modify the device parameters on the pop-up window. Note Only Name, User Name, and Password are editable. Figure 4-5 Edit the Device 6. - Page 21 DS-1600KI Keyboard • User Manual Name The camera name. Channel ID The camera serial number according to the added sequence. Protocol The transfer protocol. Stream The stream type. Device The device name. Address The IP address and port of the corresponding device. Channel No.
-
Page 22: Manage Auto-Switch Group
DS-1600KI Keyboard • User Manual 4.1.3 Manage Auto-switch Group Create Auto-switch Group It would be easier to manage your devices by adding relevant cameras into a group. For example, you can add all the underground garage cameras into one auto-switch group, so you can view the group to view the cameras in it. - Page 23 DS-1600KI Keyboard • User Manual Figure 4-8 Add Camera(s) to the New Group 7. Select the camera(s). 8. Click Save to finish creating auto-switch group. Edit Auto-switch Group You can view and modify auto-switch group details in Auto-switch Group interface. Before You Start Ensure you have groups added.
-
Page 24: Live View On Screen
DS-1600KI Keyboard • User Manual Figure 4-9 Edit the Group 5. Edit group parameters of Name, No., and Time. 6. Click Edit to edit channel(s) in the group. 7. Click Save to confirm the modification. 4.2 Live View on Screen 4.2.1 View Video with Keyboard After device is successfully added, you can view the live video of the added network cameras or video encoders. -
Page 25: Ptz Control
DS-1600KI Keyboard • User Manual ● Hold down the title bar to move the channel selection panel. ● Click to delete the entered information if you entered incorrectly. ● Click to preview the previous or next camera or group. ● Enter 0 in the numeric panel and click to stop the live view. - Page 26 DS-1600KI Keyboard • User Manual 2. Use the joystick to move the camera to the desired scene. 3. Click to set the preset. Note Up to 300 presets can be configured. What to do next You can click a preset from the list to call the preset. Call a Patrol A patrol is a scanning track specified by a group of user-defined presets, with the scanning speed between two presets and the dwell time at the preset separately programmable.
-
Page 27: Manage Video Wall
DS-1600KI Keyboard • User Manual 4.3 Manage Video Wall 4.3.1 Edit Video Wall Layout You can edit the layout of the video wall, including the name, row and column. Steps 1. Click Keyboard. 2. Click 3. Click Video Wall. 4. Click 5. -
Page 28: Configure Video Channels On Video Wall
DS-1600KI Keyboard • User Manual 4.3.2 Configure Video Channels on Video Wall You can select and configure the output channel for each video wall window. For some other video wall devices, you can get the output channels automatically. Steps 1. Click Keyboard. 2. -
Page 29: Play Video On Video Wall
DS-1600KI Keyboard • User Manual Figure 4-13 Delete the Output Channel What to do next You can log in the keyboard and operate it now. 4.3.3 Play Video on Video Wall You can play live video on video wall window. Steps 1. -
Page 30: Configure Display Window
DS-1600KI Keyboard • User Manual 4.3.4 Configure Display Window For the devices supporting window roaming (e.g., DS-96000NI-I/H, DS-B20), you can move the playing window within the video wall as desired, close the window and adjust the window to match it with the boarders. Before You Start Ensure the connected decoding device supports window roaming function. -
Page 31: Enable Video Wall Playback Local Decoding
DS-1600KI Keyboard • User Manual 5. Click to expand the toolbar. 6. Click Scene to access the scene list. 7. Select the scene in the list. 8. Click Save to save the current video wall scene. 4.3.6 Enable Video Wall Playback Local Decoding Click →... - Page 32 DS-1600KI Keyboard • User Manual 6. Select the date as you desired. Figure 4-16 Video Wall Playback 7. Optional: You can switch channel by two ways. In keyboard panel Enter the serial number in the numeric panel, and click In the list 1.
-
Page 33: Smart Scaling On Video Wall
DS-1600KI Keyboard • User Manual Stop 4.3.8 Smart Scaling on Video Wall For the large-scale video wall layout, you can use the smart scaling function to select and zoom in the required windows area. Steps 1. Click Keyboard. 2. Click 3. -
Page 34: Video Playback
DS-1600KI Keyboard • User Manual 4.4 Video Playback The videos stored in the encoding device within 24 hours can be played back on the keyboard. Steps 1. Click Keyboard. 2. Click 3. Click Playback on the menu to enter the play back interface. 4. -
Page 35: Control Dvr
DS-1600KI Keyboard • User Manual 4.5 Control DVR The keyboard can operate the added DVR/NVR and achieve PTZ control operation. Steps 1. Click Keyboard. 2. Click 3. Click Operate DVR. 4. Select the NVR/DVR from the right list as you desired. 5. - Page 36 DS-1600KI Keyboard • User Manual Figure 4-20 Enable PTZ Table 4-1 Panel Description Name Function Description Returns to the previous menu. Presses for arming/disarming the device in live view mode. Enters the Manual Record settings menu. Presses this button followed by a numeric button to call a PTZ REC/SHOT preset in PTZ control settings.
-
Page 37: Manage User
DS-1600KI Keyboard • User Manual Name Function Description Switches between main and spot output. MAIN/SPOT/ZOOM- Zooms out the image in PTZ control mode. Selects all items on the list when used in a list field. F1/ LIGHT Turns on/off PTZ light (if applicable) in PTZ control mode. Switches between play and reverse play in playback mode. -
Page 38: Edit User Accounts By Administrator
DS-1600KI Keyboard • User Manual Caution STRONG PASSWORD RECOMMENDED-We highly recommend you create a strong password of your own choosing (using a minimum of 8 characters, including upper case letters, lower case letters, numbers, and special characters) in order to increase the security of your product. And we recommend you reset your password regularly, especially in the high security system, resetting the password monthly or weekly can better protect your product. - Page 39 DS-1600KI Keyboard • User Manual 2. Click 3. Click User. 4. Select a user account as you desired. 5. You can change password or assign device permission to the user account. Edit password 1. Click Edit. 2. Enter new password twice. 3.
-
Page 40: Chapter 5 Control Platform
DS-1600KI Keyboard • User Manual Chapter 5 Control Platform You can connect the keyboard to platforms to play live video on video wall or watch live video on the local keyboard interface. 5.1 Control iSecure You can connect the keyboard to iSecure platform to play live video on video wall, watch live video or watch video playback on the local keyboard interface. -
Page 41: Display A Camera On Video Wall
DS-1600KI Keyboard • User Manual Figure 5-2 Login 5. Optional: Check Remember Password to log in with no need to enter password next time. 6. Tap Login. 5.1.2 Display a Camera on Video Wall Steps 1. Tap on the iSecure main page, and select Video Wall. 2. -
Page 42: Local Live View
DS-1600KI Keyboard • User Manual Tap Shortcut, and enter the serial number in the numeric panel, and tap .Tap List, and select a camera to display. You can also perform the following operations: ● Enter 0+ to stop playing the live video of corresponding camera on the window. ●... -
Page 43: Video Wall Playback
DS-1600KI Keyboard • User Manual Tap Shortcut, and enter the serial number in the numeric panel, and tap .Tap List, and select a channel to preview. 5. Optional: Switch the channel. Enter 0+ to stop previewing. Tap to preview the live video of the previous input camera channel on the selected output monitor. -
Page 44: Control Hikcentral
DS-1600KI Keyboard • User Manual Figure 5-5 Video Wall Playback 3. Select the date. 4. Select the channel. You can choose one of the following ways. ● Tap Shortcut, and enter the serial number in the numeric panel, and tap ●... -
Page 45: Display A Camera On Video Wall
DS-1600KI Keyboard • User Manual Figure 5-6 IP Configuration 4. Enter the server's user name and password. Figure 5-7 Login 5. Optional: Check Remember Password to log in with no need to enter password next time. 6. Tap Login. 5.2.2 Display a Camera on Video Wall Steps 1. -
Page 46: Local Live View
DS-1600KI Keyboard • User Manual Figure 5-8 Video Wall 3. Optional: Tap to select desired scene from Scene list. 4. Optional: Tap and select Split to split the output window. 5. Tap to play the live video of corresponding camera on the window. You can choose one of the following ways: ●... - Page 47 DS-1600KI Keyboard • User Manual Figure 5-9 Live View 2. Optional: Tap to select the window division mode. Note You can also preview the window first and then split the window. In this situation, the previewed window in on the upper-left by default. 3.
-
Page 48: Video Wall Playback
DS-1600KI Keyboard • User Manual Record Select a window and tap Record to save records to a USB flash drive or FTP server. View Tap View to view parameters of the camera on live view. Note If you perform operations of capturing pictures or recording videos, make sure to connect the keyboard with a USB flash drive, or provide a valid and correct network connection between PC (running FTP server) and the keyboard, and set the FTP parameters of keyboard correctly. -
Page 49: Control Kps
DS-1600KI Keyboard • User Manual Icon Description Pause/Start Fast forward speed; you can also move the joystick right to fast forward the video. Slow forward speed; you can also move the joystick left to slow forward the video. Stop 5.3 Control KPS You can connect the keyboard to KPS platform to play live videos on the video wall. - Page 50 DS-1600KI Keyboard • User Manual Note All video wall resources from the platform will be listed in Video Wall. 5. Click Shortcut, enter the serial number of window and click to select the window. 6. Select a camera to play on video wall. 1) Select an output window on the video wall to play the camera.
-
Page 51: Chapter 6 Configure Web
DS-1600KI Keyboard • User Manual Chapter 6 Configure Web You can add devices, manage channels or configure basic parameters through the web interface of the network keyboard. It is convenient to remotely configure and maintain the network keyboard. 6.1 Login Before You Start Ensure that the network keyboard is connected to the network and the IP address of the network keyboard is obtained. -
Page 52: Add Devices
DS-1600KI Keyboard • User Manual 6.2 Add Devices 6.2.1 Manually Add You can add devices to the network keyboard on Web. Steps 1. In Device Management interface, click Add. 2. Enter IP Address, Port, User Name and Password, and select protocol type. Figure 6-2 Add Device by IP Address 3. -
Page 53: Import Input Channels In Batches
DS-1600KI Keyboard • User Manual Figure 6-3 Add SADP Note ● SADP search can only add devices in the same network segment. ● After adding devices in batches by SADP, you need to refresh manually to get the added devices. 6.2.2 Import Input Channels in Batches Before You Start 1. -
Page 54: Channel Management
DS-1600KI Keyboard • User Manual 2. Click Import. Figure 6-4 Import Input Channel in Batches 3. Click Browse and select the imported template. 4. Enter password and click OK. The channels in the template will be added into network keyboards. 6.3 Channel Management 6.3.1 Edit Channel Steps... -
Page 55: Camera Group
DS-1600KI Keyboard • User Manual live view. Stream Type Code stream for local live view and video wall preview. Transmission Protocol Available for video wall preview. 4. Click OK. 6.3.2 Camera Group Camera group enables you to preview a group of cameras (input channels) in sequence. Steps 1. -
Page 56: Network
DS-1600KI Keyboard • User Manual edit their own camera groups. 5. Click Edit in Camera Group interface, uncheck input channels to be unlinked and click OK to unlink the input channel. 6.4 Network Steps 1. Select Network Management at the main interface. 2. -
Page 57: System Settings
DS-1600KI Keyboard • User Manual 6.5 System Settings 6.5.1 Version Go to System Management → Version to view system version information. Figure 6-8 Version 6.5.2 User Management Administrator can add operator and allocate devices to the operator. Operators can operate the allocated devices, but cannot add, edit, or delete devices. - Page 58 DS-1600KI Keyboard • User Manual Figure 6-9 Add User 3. Enter user name and password for an operator, and click OK. Caution We highly recommend you create a strong password of your own choosing (Using a minimum of 8 characters, including at least three of the following categories: upper case letters, lower case letters, numbers, and special characters.) in order to increase the security of your product.
-
Page 59: System Maintenance
DS-1600KI Keyboard • User Manual 5. Optional: Click Edit, uncheck the devices to be unlinked and click OK to unlink the devices. 6.5.3 System Maintenance Go to System Management → System Maintenance to restart the device, restore defaults, export/import configuration file, etc. Note Restoring default settings, importing/exporting configuration files, and remote upgrades require the administrator password to be verified. -
Page 60: Log Management
DS-1600KI Keyboard • User Manual 6.5.4 Log Management Go to System Management → System Maintenance → Log, select the major and minor types and start and end time of the log, and then search and export the log. Figure 6-10 View Logs 6.5.5 Security Settings Go to System Management →... -
Page 61: Chapter 7 Configure System
DS-1600KI Keyboard • User Manual Chapter 7 Configure System For Ethernet and WLAN configuration, refer to Set Wired Networkand Set Wireless Network. 7.1 Set Language You can choose the device language. Steps 1. Click System Settings → Language. 2. Select the system language as you desired. 7.2 Set Date and Time You can set date and time and select time zone by configuring the parameters. -
Page 62: Maintenance
DS-1600KI Keyboard • User Manual 2. Switch on FTP server. 3. Enter Address, Folder, User Name, and Password of the FTP server. Note A new folder will be created in the directory. 4. Click Save. 7.4 Maintenance For the admin user account, you can import and export the configuration files, and restore the defaults of local configurations. -
Page 63: Set Others
DS-1600KI Keyboard • User Manual 7.5 Set Others You can adjust screen brightness, lock screen time, enable/disable alarm sound, and choose the resolution of external monitor. Steps 1. Click System Settings → Others. 2. Perform the following operations as demand. Brightness You can drag brightness slider to set it as you desired.
Need help?
Do you have a question about the DS-1600KI(B) and is the answer not in the manual?
Questions and answers