HIKVISION DS-1600KI User Manual
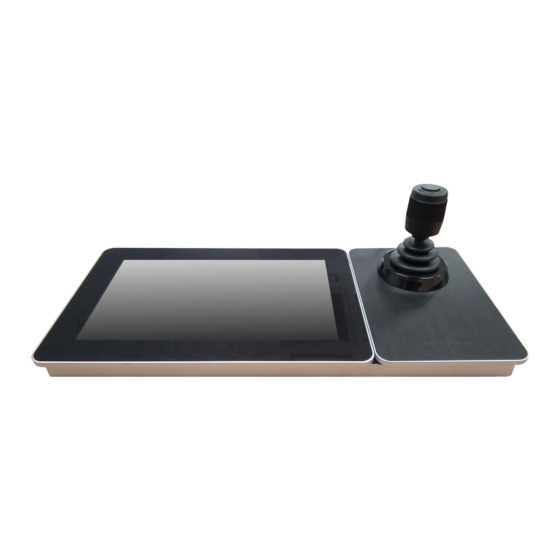
Network keyboard
Hide thumbs
Also See for DS-1600KI:
- User manual (88 pages) ,
- Quick start manual (43 pages) ,
- User manual (47 pages)
Table of Contents
Advertisement
Quick Links
Advertisement
Table of Contents

Subscribe to Our Youtube Channel
Related Manuals for HIKVISION DS-1600KI


Summary of Contents for HIKVISION DS-1600KI
- Page 1 DS-1600KI Network Keyboard User Manual...
- Page 2 INDIRECT DAMAGES, INCLUDING, AMONG OTHERS, DAMAGES FOR LOSS OF BUSINESS PROFITS, BUSINESS INTERRUPTION, OR LOSS OF DATA OR DOCUMENTATION, IN CONNECTION WITH THE USE OF THIS PRODUCT, EVEN IF HIKVISION HAS BEEN ADVISED OF THE POSSIBILITY OF SUCH DAMAGES. REGARDING TO THE PRODUCT WITH INTERNET ACCESS, THE USE OF PRODUCT SHALL BE WHOLLY AT YOUR OWN RISKS.
- Page 3 User Manual of DS-1600KI Network Keyboard Regulatory Information FCC Information Please take attention that changes or modification not expressly approved by the party responsible for compliance could void the user’s authority to operate the equipment. FCC compliance: This equipment has been tested and found to comply with the limits for a Class B digital device, pursuant to part 15 of the FCC Rules.
- Page 4 User Manual of DS-1600KI Network Keyboard Applicable Models This manual is applicable to the models listed in the following table. Series Model Network Keyboard DS-1600KI Symbol Conventions The symbols that may be found in this document are defined as follows.
- Page 5 User Manual of DS-1600KI Network Keyboard Press a numeric button and MON button to select an output channel. Number represents output channel ID. Go to Keyboard > Channel > Output Channel for the ID. Press Number + CAM Keyboard mode: ...
- Page 6 User Manual of DS-1600KI Network Keyboard Safety Instructions Proper configuration of all passwords and other security settings is the responsibility of the installer and/or end-user. In the use of the product, you must be in strict compliance with the electrical safety regulations of the nation and region.
-
Page 7: Table Of Contents
User Manual of DS-1600KI Network Keyboard TABLE OF CONTENTS Chapter 1 Activation ........................1 1.1 Local Menu Activation ......................1 1.2 SADP Activation ........................1 Chapter 2 Network ........................3 Chapter 3 Keyboard ........................4 3.1 Login ............................4 3.2 Add Device ..........................4 3.2.1 Manual Add ........................ - Page 8 User Manual of DS-1600KI Network Keyboard 5.3.1 Video Wall Control ......................24 5.3.2 PTZ Operation........................ 24 Chapter 6 System ........................25 6.1 Hardware ..........................25 6.2 Storage ........................... 25 6.2.1 FTP Storage ........................25 6.2.2 USB Storage ........................25 6.3 Upgrade ..........................25 6.3.1 FTP Upgrade ........................
-
Page 9: Chapter 1 Activation
User Manual of DS-1600KI Network Keyboard Chapter 1 Activation You can activate network keyboard via local menu or SADP client. 1.1 Local Menu Activation Purpose For the first-time access, you need to activate the network keyboard by setting an admin password. - Page 10 User Manual of DS-1600KI Network Keyboard Select inactive device. Input and confirm password. Figure 1-1 SADP Interface Step 4 Create and input the new password in the password field, and confirm the password. STRONG PASSWORD RECOMMENDED– We highly recommend you create a strong password of your own choosing (using a minimum of 8 characters, including upper case letters, lower case letters, numbers, and special characters) in order to increase the security of your product.
-
Page 11: Chapter 2 Network
User Manual of DS-1600KI Network Keyboard Chapter 2 Network Purpose Network parameters must be properly configured before you can add network devices and operate the network keyboard over network. Step 1 Go to System > Network. Step 2 Configure network parameters. -
Page 12: Chapter 3 Keyboard
User Manual of DS-1600KI Network Keyboard Chapter 3 Keyboard Purpose Keyboard mode is mainly applied to small-sized surveillance projects. Network keyboard works as a control center and manages surveillance devices added in it. 3.1 Login Step 1 Tap Keyboard at home page. -
Page 13: Add In Batch
User Manual of DS-1600KI Network Keyboard Figure 3-1 Add Center Device Figure 3-2 Add Network Camera 3.2.2 Add in Batch Add by SADP Search Purpose Add devices with the same user name and password in batch. Step 1 Go to Keyboard > Device. -
Page 14: Local Live View
User Manual of DS-1600KI Network Keyboard Connect an USB flash drive to the network keyboard. Step 1 Go to Keyboard > Channel. Step 2 Export input channel template. 1) Tap to export an excel file. 2) Edit the file on your computer, like adding or deleting input channels 3) Copy the file to an USB flash drive and connect it to your network keyboard. -
Page 15: Ptz Control
User Manual of DS-1600KI Network Keyboard If you want to control PTZ without previewing speed dome image, press Num + CAM. Captured pictures and clipped videos will be saved in FTP server or USB flash drive. For detailed steps, refer to 6.2 Storage. - Page 16 User Manual of DS-1600KI Network Keyboard Set and Call Patrol Purpose Have the PTZ moving among several presets. PTZ will stay in a preset for a duration before moving on to the next preset. Step 1 Preview speed dome image. For detailed steps, refer to 3.3.1 Preview by Operating Touchscreen and 3.3.2 Preview by Operating Keyboard Shortcut.
-
Page 17: Video Wall
User Manual of DS-1600KI Network Keyboard Set and Call Pattern Purpose Pattern records the movement of the PTZ. You can call the pattern to automatically move the PTZ according to the predefined path. Step 1 Preview speed dome image. For detailed steps, refer to 3.3.1 Preview by Operating Touchscreen and 3.3.2 Preview by Operating Keyboard Shortcut. -
Page 18: Video Wall Control
User Manual of DS-1600KI Network Keyboard Step 3 Select a decoding device and select its output channel. Step 4 Tap OK to finish setting. Region output channel layout should be the same with the actual video wall. Figure 3-4 Add Output 3.4.2 Video Wall Control... - Page 19 User Manual of DS-1600KI Network Keyboard Window Operation Purpose Display an input channel or input group on a monitor. Step 1 Select a monitor to display. Three methods are provided. You are recommended to use the first one. Num + REGION: Select a monitor on a region.
-
Page 20: Ptz Control
User Manual of DS-1600KI Network Keyboard Scene Operation Purpose Switch the scene for a region or video wall. Step 1 Press Num + REGION, or press Num + WALL. Step 2 Select a monitor or window on touchscreen. Step 3 Press Num + SCENE. -
Page 21: Playback
User Manual of DS-1600KI Network Keyboard 3.5 Playback 3.5.1 Local Playback Play videos on the touchscreen. Instant Playback Play videos in 3/5/10/15 minutes. Step 1 Start local live view. For detailed steps, refer to 3.3.1 Preview by Operating Touchscreen and 3.3.2 Preview by Operating Keyboard Shortcut. -
Page 22: Video Wall Playback
User Manual of DS-1600KI Network Keyboard Button Description Button Description clipping. Inner Reserved. Outer Rotate it clockwise to speed up. shuttle shuttle Rotate it anticlockwise to slow down. Time Drag time bar to quickly locate on a certain time to play. -
Page 23: Output Channel
User Manual of DS-1600KI Network Keyboard Figure 3-5 Modify Input Channel Step 3 Edit parameters. ID: The unique identification for input channel. It is valid in local and video wall live view mode. Stream: The stream to preview in local and video wall live view mode. -
Page 24: User
User Manual of DS-1600KI Network Keyboard 2) Tap of input channel to link. Or check input channels and tap Up to 32 input channel groups can be added. One input group can link up to 64 input channels. -
Page 25: Video Recorder
User Manual of DS-1600KI Network Keyboard Keyboard supports up to 32 users: 1 administrator and 31 operators. 3.8 Video Recorder Control video recorder (DVR/NVR/XVR) by operating video record remote panel. 3.8.1 Remote Panel Press Num + DEVICE to show video recorder remote panel. Num refers to video recorder ID. Go to Device for video recorder ID. - Page 26 User Manual of DS-1600KI Network Keyboard EDIT In editing mode, tap it to delete the content before the cursor. Check/uncheck a checkbox. MENU Enter main menu interface. In second-level menu, tap it to go back to live view interface.
- Page 27 User Manual of DS-1600KI Network Keyboard Figure 3-7 Remote Panel (Disable PTZ) Table 3-4 Button Description Button Description Disable PTZ Exit PTZ control mode. Numeric Button Switch to corresponding channel. PRESET Tap PRESET + Num to call the preset. AUTO Enter auto-scan mode.
-
Page 28: Live View
User Manual of DS-1600KI Network Keyboard 3.8.2 Live View Video Recorder (Version before 4.0) Whatever interface the video recorder is in, tap ESC till you enter the live view mode. Video Recorder (Version: 4.0 and above) Whatever interface the video recorder is in, tap directional button to enter the live view mode. -
Page 29: Chapter 4 Hikcentral Mode
User Manual of DS-1600KI Network Keyboard Chapter 4 HikCentral Mode 4.1 Login Step 1 Tap HikCentral at home page. Step 2 Tap IP Config at upper right corner. Step 3 Enter server IP and port, and save. IP: The server IP address of HikCentral platform. -
Page 30: Video Wall Operation
User Manual of DS-1600KI Network Keyboard Figure 4-1 Modify Camera ID 4.3 Video Wall Operation 4.3.1 Video Wall Control Select a monitor to open, close, resize, and divide windows. Select a video wall and switch its scene. Display a camera on video wall monitor or sub-window. -
Page 31: Chapter 5 Kps Mode
User Manual of DS-1600KI Network Keyboard Chapter 5 KPS Mode 5.1 Login Step 1 Tap KPS at home page. Step 2 Tap IP Config at upper right corner. Step 3 Enter server IP and port, and save. IP: The server IP address of KPS platform. -
Page 32: Video Wall Operation
User Manual of DS-1600KI Network Keyboard Figure 5-1 Modify Keyboard Control Code 5.3 Video Wall Operation 5.3.1 Video Wall Control Does not support Num + REGION and Num + WALL operation. You can only select monitor by pressing Num + MON. -
Page 33: Chapter 6 System
User Manual of DS-1600KI Network Keyboard Chapter 6 System Tap System at home page to enter system interface. You can configure keyboard network, hardware, time, etc. 6.1 Hardware Transparency: Select menu transparency. Only valid in local live view. Alarm: Keyboard alarms when network disconnected or IP conflicted. -
Page 34: Ftp Upgrade
User Manual of DS-1600KI Network Keyboard 6.3.1 FTP Upgrade Step 1 Configure FTP server. For detailed steps, refer to 6.2 Storage. Step 2 Turn on FTP server and input upgrade file into FTP root folder. Step 3 Go to System > Maintenance and select FTP upgrade. -
Page 35: Lock Keyboard
User Manual of DS-1600KI Network Keyboard 6.6 Lock Keyboard Step 1 Hold LOCK for 3 seconds to exit to home page and lock keyboard. Step 2 Press LOCK again to unlock keyboard. - Page 36 UD13888B...
Need help?
Do you have a question about the DS-1600KI and is the answer not in the manual?
Questions and answers