HIKVISION DS-1600KI User Manual
Hide thumbs
Also See for DS-1600KI:
- User manual (88 pages) ,
- Quick start manual (43 pages) ,
- User manual (64 pages)
Table of Contents
Advertisement
Quick Links
Advertisement
Table of Contents

Related Manuals for HIKVISION DS-1600KI


Summary of Contents for HIKVISION DS-1600KI
- Page 1 DS-1600KI Keyboard User Manual UD06114B...
- Page 2 SURVEILLANCE LAWS VARY BY JURISDICTION. PLEASE CHECK ALL RELEVANT LAWS IN YOUR JURISDICTION BEFORE USING THIS PRODUCT IN ORDER TO ENSURE THAT YOUR USE CONFORMS THE APPLICABLE LAW. HIKVISION SHALL NOT BE LIABLE IN THE EVENT THAT THIS PRODUCT IS USED WITH ILLEGITIMATE PURPOSES.
-
Page 3: Regulatory Information
DS-1600KI Network Keyboard User Manual Regulatory information FCC information compliance: This equipment has been tested and found to comply with the limits for a digital device, pursuant to part 15 of the FCC Rules. These limits are designed to provide reasonable protection against harmful interference when the equipment is operated in a commercial environment. - Page 4 DS-1600KI Network Keyboard User Manual Preventive and Cautionary Tips Before connecting and operating your keyboard, please be advised of the following tips: Ensure unit is placed in a well-ventilated, dust-free environment. Keep all liquids away from the keyboard.
-
Page 5: Table Of Contents
DS-1600KI Network Keyboard User Manual TABLE OF CONTENTS Chapter 1 Product Overview .................... 6 Introduction ......................... 6 Key Features ......................... 6 Appearance ........................7 1.3.1 Front Panel ......................7 1.3.2 Interfaces ......................8 Chapter 2 Getting Started ....................11 Activating the Keyboard ..................... 11 2.1 Resetting the Keyboard Password ................ - Page 6 DS-1600KI Network Keyboard User Manual System Configuration ....................63 4.6.1 User Management ................... 63 4.6.2 Storage Management ..................68 4.6.3 System Maintenance ..................69 Chapter 5 Access to iVMS Platform ................71 5.1 Configuring iVMS-5200 Integrated Surveillance Management System ....71 5.1.1...
-
Page 7: Chapter 1 Product Overview
DVI and HDMI video outputs. It runs on Android 4.4 and has the brand new UI design. It is compatible with all series of front-end and back-end devices of Hikvision and control center platform such as iVMS. It supports recording, picture capturing and two-way audio, as well as the video wall control and scene switch of iVMS and decoding devices. -
Page 8: Appearance
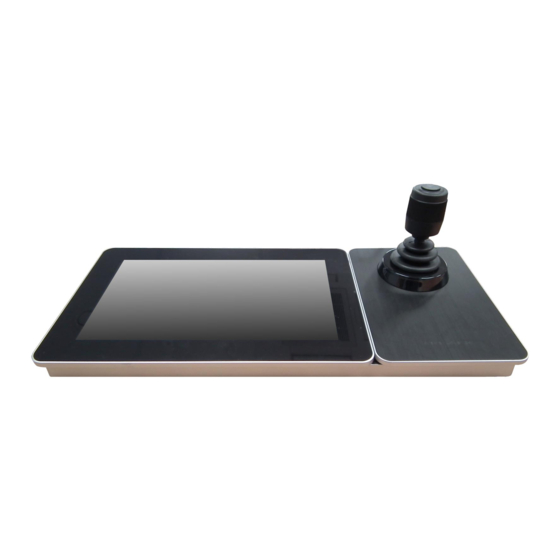
DS-1600KI Network Keyboard User Manual Appearance Figure 1-1 Appearance of DS-1600KI Keyboard The DS-1600KI keyboard consists of a touchscreen and a joystick panel. The joystick panel is detachable and can be separated from the keyboard. 1.3.1 Front Panel Refer to Table 1-1 for the description of the keyboard appearance. -
Page 9: Interfaces
PTZ control mode: Move the PTZ right. Rotate anticlockwise Zoom out (ZOOM-) Rotate clockwise Zoom in (ZOOM+) 1.3.2 Interfaces Eight interfaces and one button are provided on the rear panel of DS-1600KI keyboard. 4 5 6 7 LIN E AUDIO 12 VDC POWER Figure 1-2 Rear Panel of DS-1600KI Refer to Table 1-3 for the description of the interfaces. - Page 10 DS-1600KI Network Keyboard User Manual Table 1-3 Description of Intefaces Number Name Description One for connecting to the USB device. One for connecting USB Interface to the joystick. DVI video output connector. HDMI HDMI video output connector. LINE IN 3.5 mm connector for audio input.
-
Page 11: Chapter 2 Getting Started
DS-1600KI Network Keyboard User Manual Chapter 2 Getting Started The network keyboard is in inactive status when it leaves factory. You should activate it before performing other operations. Then you can log in to and log out of the keyboard. -
Page 12: Resetting The Keyboard Password
DS-1600KI Network Keyboard User Manual 2.1 Resetting the Keyboard Password You can reset the keyboard password by SADP. Step 1 Select the checkbox before the ID of the DS-1600KI keyboard. Step 2 Click to enter the Reset Password interface. Figure 2-2... -
Page 13: Login And Logout
DS-1600KI Network Keyboard User Manual 2.2 Login and Logout Logging in to the Keyboard Before you operate the keyboard application, you need to log in to the keyboard. Step 1 Click to enter the Login interface. Figure 2-3 Login Interface... -
Page 14: Home Page
DS-1600KI Network Keyboard User Manual Logging out of the Keyboard After login, you can log out of the keyboard. Step 1 Click on the upper-right corner. The window box pops up as follows. Figure 2-5 Logout Interface Step 2 Click Confirm to log out. -
Page 15: Chapter 3 General Settings
DS-1600KI Network Keyboard User Manual Chapter 3 General Settings You can configure the general settings of the keyboard including network, language, time and other settings. Click General on the home page for the general configuration of the keyboard to enter the General Configuration interface as shown in Figure 3.3, including Ethernet, WLAN, Language, Date &... -
Page 16: Ethernet Settings
Adjust the Brightness of the screen, enable/disable the alarm Others sound, etc. About Show the detailed information of the DS-1600KI. Ethernet Settings You can configure Ethernet settings to connect to the network. Step 1 Click the Ethernet button on the right of the General interface to enter the Ethernet Configuration interface. -
Page 17: Wlan Settings
DS-1600KI Network Keyboard User Manual 1) Click the DHCP enable button to enable DHCP. 2) Click Details to check the IP parameters. Figure 3-3 Details of DHCP You cannot enable Static IP and DHCP at the same time. WLAN Settings Step 1 Go to General >... -
Page 18: Language Settings
DS-1600KI Network Keyboard User Manual Step 3 Connect to the network in two ways: Connect to the available network in the list 1) Click the Wi-Fi hotspot in the Wi-Fi list. 2) Enter the password and connect to the network. -
Page 19: Date And Time Settings
DS-1600KI Network Keyboard User Manual Step 1 Click the Language button on the right of the General interface to enter the Language Configuration interface. Step 2 Click the radio button to select the Chinese or English language. Figure 3-8 Language Configuration Interface Date and Time Settings You can set date and time and select time zone by configuring the parameters. - Page 20 DS-1600KI Network Keyboard User Manual Figure 3-9 Date and Time Configuration Interface Step 2 Set the date and time in two ways. Task 1: Automatic mode Enable the automatic mode by switching to enable the automatic time adjustment. Task 2: Manual mode 1) Click to set the date.
-
Page 21: Others
DS-1600KI Network Keyboard User Manual Figure 3-11 Select Time Zone Others You can adjust the brightness of the screen, enable/disable the alarm sound and choose the resolution of the external monitor. 3.5.1 Setting the Brighntess Step 1 Click the Others button on the right navigation bar. - Page 22 DS-1600KI Network Keyboard User Manual The alarm is supported in network disconnected, IP conflicted, USB error and FTP error conditions...
-
Page 23: Keyboard Operation And Management
DS-1600KI Network Keyboard User Manual Chapter 4 Keyboard Operation and Management Main Menu Step 1 On the home page, click to enter the keyboard operation interface. Step 2 Click to expand the main menu shown in the left navigation area. -
Page 24: Device Management
DS-1600KI Network Keyboard User Manual Table 4-1 Description of Main Menu Menu Description Local view/video wall, including the operations of PTZ control, Live View recording, picture , two-way audio, etc. capturing Playback Play the video of the selected camera. Display device list, manage the device/camera/group/video wall, Device view device information, etc. - Page 25 DS-1600KI Network Keyboard User Manual Figure 4-2 Device Management Interface of the Admin Step 2 Enter the parameters of the device to add. Name: Edit a name for the device as desired. The name length is 32 characters at the most.
- Page 26 DS-1600KI Network Keyboard User Manual Figure 4-3 Manual Adding Device Step 3 Click to confirm and finish the adding of device. Related Operation: you can click to cancel adding. If the entered parameters are wrong, an exception window will pop up to remind you.
- Page 27 DS-1600KI Network Keyboard User Manual Figure 4-4 Auto Search Result Step 2 Check to select device (s) to add. Step 3 Click Step 4 Enter the login user name and password of the device. Figure 4-5 Auto Adding Device Step 5 Click Confirm.
- Page 28 DS-1600KI Network Keyboard User Manual Searching the Device In the device/camera management interface, you can search the device by IP address, keywords or name to quickly search the added device/camera from the list. Step 1 Enter the device/camera management interface.
- Page 29 DS-1600KI Network Keyboard User Manual Step 2 Click Details to view the detailed information of the added devices including IP address, port, etc. The details of the added devices. Step 3 Click to modify the details of the added devices. Only Name, User Name and Password are editable.
-
Page 30: Managing The Cameras
DS-1600KI Network Keyboard User Manual Step 2 Select Control to enter the Remote Panel. Figure 4-10 DVR/NVR Remote Panel Step 3 Click the buttons on the control panel to control the front panel of the added DVR/NVR. Related Operation: click to exit from the DVR/NVR Control Panel. - Page 31 DS-1600KI Network Keyboard User Manual In the search field, you can enter the keywords/name/IP address of the device and click quickly search the required device. Viewing the Camera Step 1 Click the camera tab to view the details. Figure 4-12...
- Page 32 DS-1600KI Network Keyboard User Manual Figure 4-13 Edit the Camera When editing Name and Channel ID, you can click to delete the original information. The range of the Channel ID is from 1 to 999999, and the ID cannot be repeated.
-
Page 33: Managing The Groups
DS-1600KI Network Keyboard User Manual Related Operation: you can click to cancel the modification. 4.2.3 Managing the Groups You can add the relevant cameras into the same group to make them easy to manage. E.g., you can add all the cameras of the underground garage into one group. - Page 34 DS-1600KI Network Keyboard User Manual Figure 4-17 Create a New Group Name: Edit a name for the group as desired. Special characters are not allowed to enter in the Name text field. The longest length of the name is 32 characters long.
- Page 35 DS-1600KI Network Keyboard User Manual Step 3 Select the camera(s) by clicking You can also click All to select all cameras. To deselect all cameras, click the Cancel option. Step 4 Click to go back to the New Group dialog box.
-
Page 36: Live View
DS-1600KI Network Keyboard User Manual Figure 4-20 Modify the Group Step 4 If you want to delete an added camera, click Step 5 Click Add Camera to add camera(s) to the group. Step 6 Click to confirm the modification. Live View After the device is successfully added, you can view the live video of the added network cameras or video encoders. - Page 37 DS-1600KI Network Keyboard User Manual Figure 4-21 Select Window Division Mode Step 4 Select a display window. Step 5 Select the camera to display. The following two ways are selectable: Option 1: 1) Click Keyboard. 2) Enter the camera/group No. in the numeric panel.
- Page 38 DS-1600KI Network Keyboard User Manual You can hold down the title bar to move the channel selection panel. Related Operations: Click to delete the entered information if you entered incorrectly. Click to preview the previous or next camera or group.
-
Page 39: Capturing The Picture
DS-1600KI Network Keyboard User Manual Table 4-3 Description of Live View Icons Icon Description Select the 1/4/9/16 window division. The screen will be displayed in 1-division mode by default. Stop all the live view. Capture picture of the selected live view window, and save the picture to the USB disk or upload it to the FTP server. - Page 40 DS-1600KI Network Keyboard User Manual Figure 4-24 PTZ Control Panel The PTZ control should be supported by the added device. You can hold down the title bar to move the PTZ control panel. Step 2 Perform the pan/tilt movement; zoom in/out, wiper on/off, etc. Refer to the following table...
-
Page 41: Calling A Patrol
DS-1600KI Network Keyboard User Manual Table 4-4 Description of PTZ Control Panel Icons Icon Description Preset Set and call the preset. Patrol Call the patrol. Pattern Set and call the pattern. Start/stop the auto-scan. Light on/off Wiper on/off Focus control:... - Page 42 DS-1600KI Network Keyboard User Manual Before you start Set the patrol for the camera through Web Browser, client software, etc. Step 1 In the PTZ control mode, click the Patrol tab. Step 2 Select a patrol from the list. Step 3 Double click to call the patrol.
-
Page 43: Video Wall
Video Wall You can view and operate the live video of the added decoding devices via video wall. The DS-1600KI keyboard supports the DS-6300DI-T, DS-6400HDI-T, DS-6500DI, DS-6900UDI, DS-B20/B21, DS-C10S, etc.. It supports the local output from DS-9000NI-I/H super NVR and window roaming on the video wall. - Page 44 DS-1600KI Network Keyboard User Manual Editing the Video Wall Layout You can edit the details of the video wall, including the name, row and column. Step 1 Click on the upper-right corner. Figure 4-27 Edit the Video Wall Name: Edit a name for the video wall as desired.
-
Page 45: Playing Video On Video Wall
DS-1600KI Network Keyboard User Manual Figure 4-28 Select the Output Channel Step 2 Select the output channel from the list to link to the selected window. Related Operation: Hold down the configured window and click on the upper-right corner to delete the output channel. - Page 46 DS-1600KI Network Keyboard User Manual The name of the video wall can be edited in Device > Video Wall. Step 2 Select a playing window. Step 3 Click to expand the channel list panel. Step 4 Select the camera to play it on the selected window. The following two ways are selectable: Option 1: 1) Click Keyboard.
-
Page 47: Smart Scaling Of Video Wall
DS-1600KI Network Keyboard User Manual 4.4.3 Smart Scaling of Video Wall For the large-scale video wall layout, you can use the smart scaling function to select and zoom in the required windows area in a convenient way. Step 1 Enter the video wall screen. -
Page 48: Setting The Scene
DS-1600KI Network Keyboard User Manual Figure 4-31 Smart Scaling 4.4.4 Setting the Scene Step 1 Start playing the video on the configured video wall layout. Step 2 Click to expand the toolbar. Step 3 Click to access the scene list. -
Page 49: Playback
DS-1600KI Network Keyboard User Manual Figure 4-33 Match the Window Playback The video files stored in the encoding device within 24 hours can be played back in the keyboard. Step 1 Click on the menu to enter the playback interface. - Page 50 DS-1600KI Network Keyboard User Manual Figure 4-35 Playback Step 5 You can drag the time bar to play the video of the required time. Step 6 User the toolbar to perform the following operations: You can hold down the title bar to move the toolbar.
-
Page 51: System Configuration
DS-1600KI Network Keyboard User Manual Table 4-5 Description of Playback Toolbar Icon Description Stop playing the video. Start/pause playing the video. Slow forward at 1/2 X or 1/4 X speed. Fast forward at 2X or 4X speed. System Configuration For the admin, you can configure the system parameters including user management, storage management and system maintenance of the keyboard. - Page 52 DS-1600KI Network Keyboard User Manual Figure 4-36 User Management Step 2 Click to enter New User interface. Step 3 Enter the user name and passwords. Figure 4-37 Add a New User STRONG PASSWORD RECOMMENDED–We highly recommend you create a strong password of your own choosing (Using a minimum of 8 characters, including at least three of the following categories: upper case letters, lower case letters, numbers, and special characters.) in order to...
- Page 53 DS-1600KI Network Keyboard User Manual Step 4 Click Add Device to add device(s) to the new user. Figure 4-38 Add Device(s) to the New User Step 5 Check to select the camera(s) from the device list. You can also click All to select all devices.
- Page 54 DS-1600KI Network Keyboard User Manual Figure 4-39 Edit the Admin Account Step 2 You can change the old password by entering the Old Password, New Password and confirming the password. Step 3 Click to confirm the editing. Editing the Normal User Accounts Step 1 Click the normal user account on the User Management interface for admin.
- Page 55 DS-1600KI Network Keyboard User Manual Step 3 Click Set Password to set the password Figure 4-42 Set the Password Step 4 Enter the New Password and confirm the password. Step 5 Click Submit. Step 6 Back to the User Details interface and click Add Device to add device(s) to the selected user.
-
Page 56: Storage Management
DS-1600KI Network Keyboard User Manual Step 9 Click to save the settings. Logout Step 1 Click on the upper-right corner of the User Management interface for the user to logout. Figure 4-44 Logout Interface Step 2 Click Confirm to log out of the system. -
Page 57: System Maintenance
DS-1600KI Network Keyboard User Manual Figure 4-45 Storage Management Step 2 Switch on the upper-right corner to Step 3 Enter the Address, Folder, User Name and Password of the FTP server. Figure 4-46 Configure FTP Server You can create a new folder in the root directory of the user. - Page 58 DS-1600KI Network Keyboard User Manual Figure 4-47 System Maintenance Interface Step 2 Perform the following operations as demand. Upgrade: Click Browse to select the upgrade file from the USB storage device to update the system. Configure File Import: Import the configuration file from the USB storage device.
-
Page 59: Chapter 5 Access To Ivms Platform
DS-1600KI Network Keyboard User Manual Chapter 5 Access to iVMS Platform DS-1600KI Network Keyboard can be accessed by iVMS-5200 Integrated Surveillance Management System. . You should make proper configuration on the iVMS platform before connecting the keyboard to the iVMS server. Refer to the user manual of corresponding iVMS platform for instructions. -
Page 60: Managing The Resources
DS-1600KI Network Keyboard User Manual Figure 5-2 Main Menu of Platform Configuration 5.1.2 Managing the Resources Step 1 Click on the left navigation bar to enter the resource list interface. The resource list contains the resources configured in iVMS-5200, including the video inputs, video outputs, etc. -
Page 61: Managing The Input Channel
DS-1600KI Network Keyboard User Manual Figure 5-4 Scene List Step 3 Check to select a scene and use it to the keyboard video wall. Step 4 Log in to the iVMS platform, and click Logical View->Camera to enter the following interface. - Page 62 DS-1600KI Network Keyboard User Manual Figure 5-7 Resource List of Input Channel The input channel list of each level contains at most 512 input channels. Step 2 Click to return to the resource list. Step 3 You can modify the serial number of the input channel via the iVMS-5200.
-
Page 63: Displaying Video On Video Wall
DS-1600KI Network Keyboard User Manual Figure 5-9 Edit Camera Interface If you do not configure the serial number, you can not operate on the keyboard. The configuration method varies with different platforms. 5.2 Displaying Video on Video Wall You have two ways to display video on the video wall. - Page 64 DS-1600KI Network Keyboard User Manual Step 1 Click on the main menu to enter the video wall interface. Figure 5-11 Video Wall Interface Step 2 Enter the serial number of the output monitor in the numeric panel, and click Step 3...
- Page 65 DS-1600KI Network Keyboard User Manual You need to drag the output monitor to the input channel layer on the video wall via the iVMS platform first. Then the operation of displaying video on the video wall via the keyboard can...
-
Page 66: Chapter 6 Access To Matrix
DS-1600KI Network Keyboard User Manual Chapter 6 Access to Matrix You can get access to the matrix access gateway, realize unified management of the monitors, switch the live video on the video wall and set PTZ control on the Matrix module. - Page 67 DS-1600KI Network Keyboard User Manual Step 2 Select a sub-window. Enter the serial number of the input channel in the numeric panel, and click . The information of the output window and the input channel appears on the Video Wall interface.
-
Page 68: Chapter 7 Appendix
DS-1600KI Network Keyboard User Manual Chapter 7 Appendix 7.1 Specifications Model DS-1600KI Operating System Android 4.4 10.1" capacitive touchscreen Touchscreen Resolution: 1024 × 600 Joystick 4-axis joystick Local decoding 2-ch at up to 1080p resolution , and up to 16-division window... -
Page 69: Summary Of Changes
DS-1600KI Network Keyboard User Manual 7.2 Summary of Changes Version 2.1 Added: Flexible and floating control panels in live view, video wall or playback mode; Smart scale control of video wall layout; Supports DS-96000NI-I/H series NVR; Search function in device management; channel list management and live view;... - Page 70 DS-1600KI Network Keyboard User Manual...
Need help?
Do you have a question about the DS-1600KI and is the answer not in the manual?
Questions and answers
I want know how to reset a hikvsion keyboard DS 1006KI without a network port