
Subscribe to Our Youtube Channel
Related Manuals for RFXCOM RFXtrxLAN 433


Summary of Contents for RFXCOM RFXtrxLAN 433
- Page 1 RFXtrxLAN 433 RFXtrxLAN 868 www.rfxcom.com RFXtrxLAN 433/868 Rev. 0.0 page 1 / 11 Copyright, RFXCOM 2023...
-
Page 2: Table Of Contents
Table of Contents Introduction ............................3 Contents............................3 Installation of the RFXtrxLAN 433/868 ..................... 4 LAN version ............................4 4.1. Configure the LAN controller ....................4 4.2. Configure the Serial Port ......................5 4.3. Configure the TCP communication..................6 Restore factory settings ........................ -
Page 3: Introduction
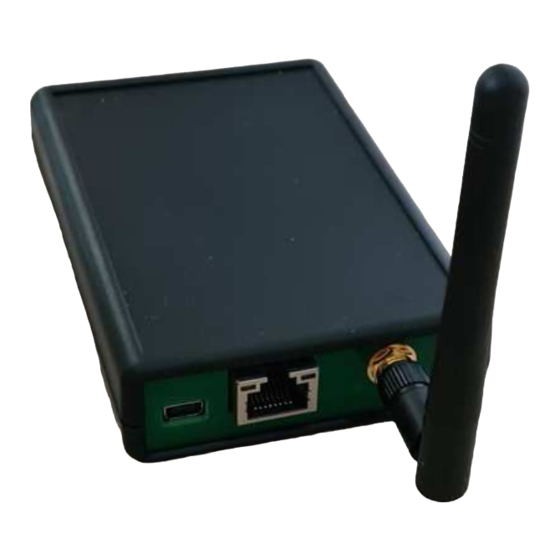
1. Introduction The RFXtrxLAN 433 contains the RFX433 transceiver. The RFXtrxLAN 868 contains the RFX868 transceiver. The transceiver is accessed using TCP/IP. The default settings are: TCP port 10001 and DHCP Username/Password: admin / admin Important: The USB connection of the RFXtrx cannot be used as USB port and is only used to power the module!! 2. -
Page 4: Installation Of The Rfxtrxlan 433/868
3. Installation of the RFXtrxLAN 433/868 Connect the antenna. Connect the 5V/1Amp DC power supply and the Ethernet cable. The red LED of the RFXtrx should be on for about 3 seconds followed by a short blink of the green/yellow LED. And the right LED on the Ethernet connector should blink and the left LED should be on. -
Page 5: Configure The Serial Port
4.2. Configure the Serial Port The COM port is delivered with the correct settings. RFXtrxLAN 433/868 Rev. 0.0 page 5 / 11 Copyright, RFXCOM 2023... -
Page 6: Configure The Tcp Communication
The RFXtrxLAN is delivered with the correct configured TCP Server with port 10001 You can change the Local Port and Max Accept if required. Set Max Accept to 1 unless you want to connect the RFXtrxLAN with multiple applications RFXtrxLAN 433/868 Rev. 0.0 page 6 / 11 Copyright, RFXCOM 2023... -
Page 7: Restore Factory Settings
The reload button is behind the very small hole in the front panel next to the antenna connector. To restore the module to factory settings, press the reload button with a needle for at least 3 seconds. RFXtrxLAN 433/868 Rev. 0.0 page 7 / 11... -
Page 8: Configure The Transceiver
No need to select protocols for transmit! Note that you can only select 1 protocol for receive in the RFX868 because each protocol uses different frequencies and modulation!!! RFX433 settings: RFX868 settings: RFXtrxLAN 433/868 Rev. 0.0 page 8 / 11 Copyright, RFXCOM 2023... -
Page 9: Update Transceiver Firmware
Start the RFXflash program, select the IP address and select the port (normally 10001). Click the connect button: Click the Open HEX file and select the correct firmware file. RFXtrxLAN 433/868 Rev. 0.0 page 9 / 11 Copyright, RFXCOM 2023... - Page 10 Click the Write device button. The firmware will be flashed in about one minute: At the end of the flash proceure click the Normal Execution Mode button: Test the RFXtrx with RFXmngr. RFXtrxLAN 433/868 Rev. 0.0 page 10 / 11 Copyright, RFXCOM 2023...
-
Page 11: Warning
RFXCOM software or RFXtrx protocols or Written Materials unless expressly authorized in writing by RFXCOM. • You may not use any RFXCOM device, software or protocol as part of an exclusive or patented product without the express prior written permission of RFXCOM. •...
Need help?
Do you have a question about the RFXtrxLAN 433 and is the answer not in the manual?
Questions and answers