Advertisement
Quick Links
WARRANTY
DO NOT RETURN YOUR PRODUCT TO THE STORE. PLEASE CONTACT BABY TREND
FOR REPLACEMENT PARTS, SERVICE AND REPAIR.
The Baby Trend
warranty covers workmanship defects within the first 180 days of
®
purchase. Any product which has been subjected to misuse, abuse, abnormal use,
excessive wear and tear, improper assembly, negligence, environmental exposure, alteration
or accident, or has had its serial number altered or removed invalidates all claims against the
manufacturer. Any damage to property during installation is the sole responsibility of the end
user. The Customer Service Department can be contacted at 1 (800) 328-7363
Monday through Friday between 8:00am and 4:30pm (PST). Return Authorizations are
required prior to returning product(s) to Baby Trend
GARANTIA
NO DEVUELVA SU PRODUCTO A LA TIENDA. POR FAVOR CONTACTE A BABY TREND
PARA PIEZAS DE REPUESTO, SERVICIO Y REPARACION.
La garantía de Baby Trend
cubre defectos de fábrica dentro de los primeros 180 días de
®
la compra.Cualquier producto que haya sido sometido a uso indebido, abuso, uso anormal,
desgaste excesivo, montaje incorrecto, negligencia, exposición ambiental, alteración o
accidente, o que ha tenido su número de serie alterado o removido anula todos los reclamos
contra el fabricante. Cualquier daño a la propiedad durante la instalación es de la exclusiva
responsabilidad del usuario final. El Departamento de Servicio al Cliente puede ser
contactado a 1 (800) 328-7363 Lunes a viernes entre 8:00am y 4:30pm (PST).Un numero
de autorizacion es requerido antes de la devolución de los producto(s) a Baby Trend
GARANTIE
NE PAS RETOURNER VOTRE PRODUIT AU MAGASIN. VEUILLEZ CONTACTER BABY
TREND POUR DES PIÈCES DE RECHANGE, ENTRETIEN ET RÉPARATION.
La garantie Baby Trend
®
couvre les vices de fabrication dans les 180 jours suivant l'achat du
produit. Tout produit qui a été soumis à un usage abusif, une utilisation anormale, une usure
excessive, un montage incorrect, de la négligence, de l'exposition environnementale, de la
modification ou un accident, ou a eu son numéro de série modifié ou supprimé annule toutes
les réclamations contre le fabricant. Tout dommage à la propriété lors de l'installation est de
la seule responsabilité de l'utilisateur final. Le service client peut être contacté au
1 (800) 328-7363 du lundi au vendredi 8 h – 16 h 30 (PST). Une autorisation sera
nécessaire avant de retourner le produit à Baby Trend
www.babytrend.com
www.babytrend.com
Baby Trend, Inc.
13048 Valley Blvd.
Fontana CA 92335
.
®
.
®
.
®
1-800-328-7363
(8:00am ~ 4:30pm PST)
www.babytrend.com
Read all instructions BEFORE assembly and USE of product.
KEEP INSTRUCTIONS FOR FUTURE USE.
Lea todas las instrucciones ANTES de armar y USAR el producto.
CONSERVE LAS INSTRUCCIONES PARA USO FUTURO.
Lisez toutes les instructions du manuel AVANT l'assemblage
ou L'UTILISATION de ce produit. CONSERVEZ CES
INSTRUCTIONS POUR RÉFÉRENCE ULTÉRIEURE.
JG94XXXM / JC94XXXM
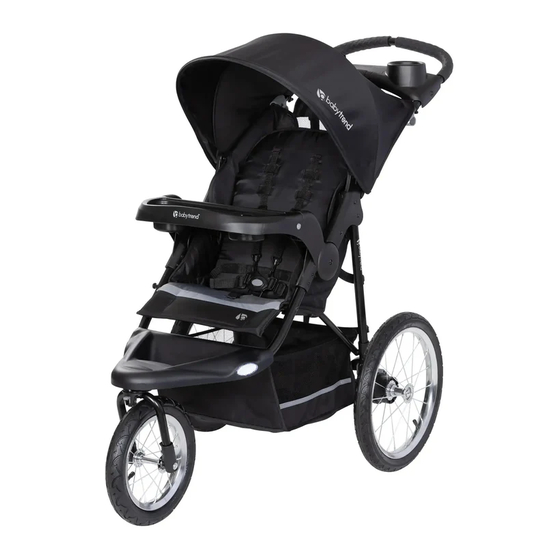
Quick Step™ Jogger
Instruction Manual
Manual de Instrucciones
Manuel d'instruction
JG94XXXM_JG94XXXM_3L_120920
Advertisement

Related Manuals for BABYTREND Quick Step JG94 M Series


Summary of Contents for BABYTREND Quick Step JG94 M Series
- Page 1 JG94XXXM / JC94XXXM nécessaire avant de retourner le produit à Baby Trend ® Quick Step™ Jogger Instruction Manual Manual de Instrucciones Manuel d’instruction www.babytrend.com www.babytrend.com Baby Trend, Inc. 1-800-328-7363 13048 Valley Blvd. (8:00am ~ 4:30pm PST) Fontana CA 92335 www.babytrend.com...
-
Page 2: Fall Hazard
PARTS PIEZAS PIÈCES WARNING WARNING: Check that you have all the parts for this model before assembling the stroller. Please follow all of these Verifique que tenga todas las piezas para este modelo antes de montar el carrito. instructions to ensure the safety of your child. Keep Vérifiez que vous avez bien toutes les pièces pour ce modèle avant de monter la poussette. -
Page 3: Peligro De Caída
ADVERTENCIA WARNING ADVERTENCIA: • NEVER use the stroller on stairways or escalators. Por favor, siga todas estas • NEVER use the stroller with roller skates, in-line skates, skateboards or instrucciones para garantizar la seguridad de su hijo. bicycles. Conserve estas instrucciones para referencia futura. •... - Page 4 ADVERTENCIA AVERTISSEMENT AVERTISSEMENT : • Procure que el carrito esté completamente erguido y con el pestillo en la Veuillez suivre posición abierta antes de permitir que los niños se acerquen al carrito. toutes les instructions afin d’assurer la sûreté de votre •...
- Page 5 ASSEMBLY MONTAJE ASSEMBLEE AVERTISSEMENT IMPORTANT! • Le poids maximum qui peut être transporté dans le panier est 2,26 kg (5 To ensure safe operation of your stroller, please livres) et sur le plateau parents et enfant est 1,36 kg (3 livres) chaque. Si follow these instructions carefully.
- Page 6 ASSEMBLY MONTAJE ASSEMBLEE ASSEMBLY MONTAJE ASSEMBLEE The front wheel, rear wheels, fender, and parent tray need to be installed • Unlock the release lever (Fig. 1a). Unfold prior to use. stroller frame by pulling backward on the stroller handle. Lean the stroller Antes del uso se deben instalar la rueda delantera, las ruedas traseras, el guardabarros y la bandeja para padres.
- Page 7 ASSEMBLY MONTAJE ASSEMBLEE ASSEMBLY MONTAJE ASSEMBLEE • Slide the retainer plate onto the front wheel. Be sure that the raised lip is REAR WHEEL pointing toward the fork and insert it into the slot on the fork. The tab on the RUEDA TRASERA retainer plate must be lined up with the slot before tightening the wheel ROUES ARRIÈRES...
- Page 8 ASSEMBLY MONTAJE ASSEMBLEE ASSEMBLY MONTAJE ASSEMBLEE CHILD TRAY Gire la bandeja hacia abajo hasta que se sujete bien en el apoyabrazos izquierdo. Por favor, verifique que el botón a presión atraviese por completo y BANDEJA PARA NIÑOS trabe la bandeja de manera segura (Fig. 6b). PLATEAU ENFANT •...
- Page 9 ASSEMBLY MONTAJE ASSEMBLEE ASSEMBLY MONTAJE ASSEMBLEE • Pour attacher le plateau parents, aligner les raccords sur les extrémités du PARENT TRAY plateau avec les raccords sur l’extérieur de la poignée. Tirez vers l’extérieur BANDEJA PARA PADRES les bords du plateau tout en poussant vers le bas pour insérer les broches du PLATEAU PARENTS manche dans les trous du plateau.
- Page 10 ASSEMBLY MONTAJE ASSEMBLEE ASSEMBLY MONTAJE ASSEMBLEE Compatible with the following Baby Trend ® Car Seats: CANOPY Flex-Loc, EZ Flex-Loc, EZ Loc, INERTIA, SECURE and Canada: EZ Flex-Loc 32. CUBIERTA Open Abra Compatible con las siguientes sillitas para automóviles Baby Trend ® : Ouvrir AUVENT Flex-Loc, EZ Flex-Loc, EZ Loc, INERTIA, SECURE y Canada: EZ Flex-Loc 32.
- Page 11 ASSEMBLY MONTAJE ASSEMBLEE ASSEMBLY MONTAJE ASSEMBLEE • Coloque el asiento del carrito en la • Verifique que la sillita para el automóvil posición completamente reclinada , Vea esté firmemente trabada en la bandeja (Fig. 22). Luego gire las lengüetas del para niños, luego fije la sillita infantil armazón del carrito (Fig.12a).
- Page 12 SAFETY SEGURIDAD LA SÉCURITÉ SAFETY SEGURIDAD LA SÉCURITÉ BRAKES • To engage brakes, apply light downward pressure to the brake lever located on each rear wheel. The stroller may require slight forward or rearward FRENOS movement in order to line up the teeth on the brake with each wheel brake LES FREINS cluster (Fig.
- Page 13 SAFETY SEGURIDAD LA SÉCURITÉ SAFETY SEGURIDAD LA SÉCURITÉ FRONT WHEEL LOCK TESTING FOR PROPER WHEEL INSTALLATION BLOQUEO DE LAS RUEDA DELANTERAS PARA VERIFICAR LA INSTALACION DE LAS RUEDAS BLOCAGE DES ROUES AVANT TEST POUR VÉRIFIER SI LA ROUE EST BIEN FIXÉE WARNING: WARNING: FALL HAZARD:...
- Page 14 SAFETY SEGURIDAD LA SÉCURITÉ SAFETY SEGURIDAD LA SÉCURITÉ • If you experience front wheel wobble that FENDER is beyond what is normal for use while GUARDABARROS walking or jogging you may have to adjust PARE-CHOCS the front wheel housing nut. This nut is located under the Fender located at the To secure the fender to the frame, use front of the jogger (Fig.
- Page 15 SAFETY SEGURIDAD LA SÉCURITÉ SAFETY SEGURIDAD LA SÉCURITÉ • The shoulder straps of the 5-point TO SECURE THE CHILD harness have 3 attachment positions. PARA SUJETAR AL NIÑO Select the position that places the POUR ATTACHER L’ENFANT shoulder strap level with, or below the top of the child’s shoulder (Fig.
- Page 16 SAFETY SEGURIDAD LA SÉCURITÉ SAFETY SEGURIDAD LA SÉCURITÉ TO RELEASE THE CHILD SEATBACK POSITIONING PARA SOLTARLAS AL NIÑO POSICIONED DEL RESPALDO POUR LIBÉRER L’ENFANT POSITION DU SIÈGE •To recline the seat, press the adjustment • To release, push Red Button on Center tabs and pull down while holding the hoop.
- Page 17 SAFETY SEGURIDAD LA SÉCURITÉ ASSEMBLY MONTAJE ASSEMBLEE When you are jogging with your child, use the JOGGING WITH YOUR STROLLER following safety features: TROTAR CON SU CARRITO LE JOGGING AVEC VOTRE POUSSETTE Al trotar con su hijo, use las siguientes características de seguridad: Lorsque vous faites du jogging avec votre enfant, utilisez les dispositifs de sécurité...
- Page 18 ASSEMBLY MONTAJE ASSEMBLEE SAFETY SEGURIDAD LA SÉCURITÉ TO FOLD STROLLER • DRAGONNE DE SÉCURITÉ : Toujours attacher au poignet la sangle de sécurité PARA DESPLEGAR EL CARRITO en faisant du jogging. Cette sangle PLIER LA POUSSETTE retiendra la Poussette, dans le cas où vous tombez à...
- Page 19 SAFETY SEGURIDAD LA SÉCURITÉ SAFETY SEGURIDAD LA SÉCURITÉ TO UNFOLD STROLLER • Cierre la cubierta como se describe en la PARA DESPLEGAR EL CARRITO sección de la cubierta. Suelte la hebilla DÉPLIER LA POUSSETTE para reclinar el asiento como se describe en la sección sobre las posiciones del WARNING: respaldo.
- Page 20 SAFETY SEGURIDAD LA SÉCURITÉ • Stand the stroller on the ground with all three wheels touching the ground. Release the folding latch, which is located on the right side (Fig. 26a). • Lift up on the stroller handle with both hands until the stroller frame is erected ®...
- Page 21 MAINTENANCE MANTENIMIENTO D’ENTRETIEN MAINTENANCE MANTENIMIENTO D’ENTRETIEN MAINTENANCE FLAT TIRE: NEUMÁTICO DESINFLADO: MANTENIMIENTO PNEUS A PLAT: D’ENTRETIEN • The jogging stroller features bicycle tires to allow for extended wear and ease WHEEL ADJUSTMENT: of pushing. Just like a bicycle tire, the jogging stroller can suffer from flat tires. AJUSTE DE RUEDAS: If you have a flat tire, you can use a standard bicycle tire repair kit to repair AJUSTEMENT DE LA ROUE :...
- Page 22 Copyright © 2020, Baby Trend Inc., All Rights Reserved. Todos los derechos reservados. Tous droits réservés. Copyright © 2020, Baby Trend Inc., All Rights Reserved. Todos los derechos reservados. Tous droits réservés.
Need help?
Do you have a question about the Quick Step JG94 M Series and is the answer not in the manual?
Questions and answers