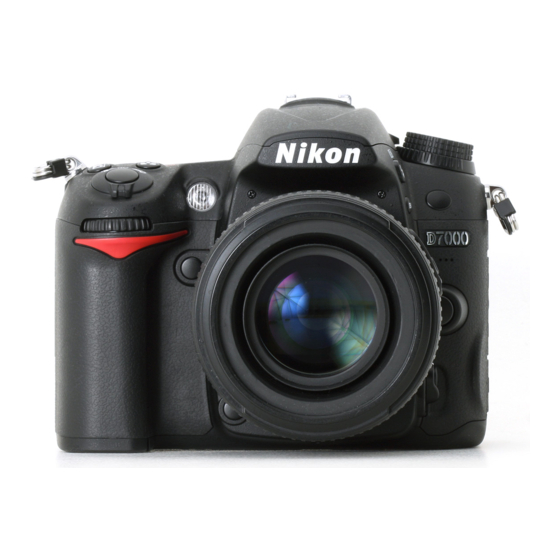
Nikon D7000 Repair Manual
Hide thumbs
Also See for D7000:
- Manual del usuario (348 pages) ,
- User manual (348 pages) ,
- Checklist and operations manual (30 pages)

Related Manuals for Nikon D7000


Summary of Contents for Nikon D7000
- Page 1 VBA29001-R.3814.A 作成承認印 配布許可印 サービス 計画課 M VBA29001 logo_Q0750 100617_Gdesign_ito REPAIR MANUAL Copyright © 2010 by Nikon Corporation. All Rights Reserved. 無断転載を禁ず !! Printed in Japan October 2010 NICS...
-
Page 2: Table Of Contents
TOGO.PCB.unit...........................D12 Image.sensor.unit..........................D13 4..Top.Cover...............................D15 I/F.cover.unit............................D15 Grip.cover.unit.............................D16 Top.cover.unit............................D16 LCD.window............................D18 SB.PCB.unit............................D19 Command.dial.unit..........................D20 AF.assist.lamp.unit..........................D21 Top.LCD.unit............................D21 Power.dial.............................D22 Shoe.base..............................D24 SB.lower.case.unit..........................D25 Top.cover.FPC.unit..........................D28 Release.mode.dial.lock.button......................D30 Eyelet..............................D30 5..Separation.of.Front.Body.from.Rear.Body....................D31 6..Rear.Body..............................D33 IF.PCB.unit............................D33 - D7000 - NICS... - Page 3 Lens.contact.FPC.unit..........................D55 Lens.release.button.unit........................D57 Mirror.driving.unit..........................D57 Mirror.box.unit.............................D58 9..Prixm.Box..............................D59 Metering.FPC.unit..........................D59 Penta.FPC.unit............................D59 LCD.unit...............................D60 Screen.BOX.unit..........................D60 Eyepiece.block.unit..........................D61 Assembly/Adjustment......................A1 1..Prism.Box..............................A1 Eyepiece.block.unit..........................A1 Penta.prism.............................A1 Screen.BOX.unit............................A3 LCD.unit..............................A3 Penta.FPC.unit............................A4 Metering.FPC.unit..........................A5 2..Front.Body...............................A6 Mirror.box.unit............................A6 - D7000 - NICS...
- Page 4 PD.PCB.unit............................A33 Connector.PCB.unit..........................A34 DCDC.ISC.PCB.unit..........................A36 Relay-PCB............................A38 IF.PCB.unit............................A39 5..Mounting.of.Front.Body.on.Rear.Body....................A42 Inspection and adjustment of flange-back (body-back)...............A44 6..Top.Cover...............................A45 Eyelet..............................A45 Release.mode.dial.lock.button......................A45 Drip-proof.sponge..........................A46 Top.cover.FPC.unit..........................A48 SB.lower.case.unit..........................A50 Shoe.base..............................A55 Power.dial.............................A55 - D7000 - NICS...
- Page 5 9..External.Appearance..........................A85 Front.cover.unit............................A85 SD.cover.unit............................A86 Rear.cover.unit.............................A86 Necessary.inspection.and.adjustment.of.camara.body.(except.imaging).when.parts.are. replaced..........................A88 Firmware.update............................A88 Inspection.and.adjustment.for.AE.accuracy....................A88 X-delay.adjustment............................A89 Inspection.and.adjustment.for.AF.accuracy....................A90 Inspection.and.adjustment.of.X-position....................A91 Confirmation of data..........................A94 Switch.information.monitor........................A94 Inspection.of.sequence.operation.......................A94 Inspection.of.sequence.error........................A94 CPU.version,.number.of.release.times.......................A94 Inspection.of.LCD.light-up........................A94 Inspection.of.motor.operation........................A94 - D7000 - NICS...
- Page 6 Factory.default.setting..........................A103 Confirmation of data..........................A103 Version.no../Serial.no..........................A103 Inspection and adjustment of "∞ (infinity)" focus..................A104 Measurement.of.consumption.current.value....................A104 Operation.check.of.image.sensor.cleaning....................A106 Charts..........................C1 Size.of.D7000.parallax.chart........................C1 Size.of.D7000.X-chart..........................C1 Size.of.D7000.Y-chart..........................C2 D7000.Parallax.chart............................ C3 D7000.X-chart............................. C4 D7000.Y-chart.............................. C5 Gradient-sensor.chart........................... C6 Inspection.standards......................R1...
-
Page 7: Disassembly
③ In disassembling, be sure to memorize the processing state of wires and FPCs, screws to be fixed and their.types,.etc. ④ The low-pass filter of the image CCD PCB is easily damaged. Handle it very carefully.. ref...In.this.manual,.the.application.of.grease.and.adhesive.is.indicated.by.coloring. CFD-409Z EDB0011 (grease:.yellow/adhesive:.red).or.J-number.. Note:. ①.What.are.used.in.this.manual.may.differ.from.the.actual.products.in.forms,.etc. Points.to.notice.for.Lead-free.solder.products • Lead-free.solder.is.used.for.this.product. • For.soldering.work,.the.special.solder.and.soldering.iron.are.required. • Do.not.mix.the.lead-free.solder.with.the.conventional.solder. • Use.the.special.soldering.iron.respectively.for.lead-free.solder.and.lead.solder..They.cannot. be.used.in.common. - D1・D7000 - NICS... -
Page 8: External.appearance
VBA29001-R.3814.A 1. External.Appearance Battery.cover.unit ・ Remove the battery cover unit (#B151) at the below angle. #B151 35° External.part ・ Remove the power back contact cover (#69). ・ Remove the cover (#549). #549 - D2・D7000 - NICS... -
Page 9: Bottom.cover.unit
VBA29001-R.3814.A Bottom.cover.unit ・ Take out the screw (#620). ・ Take out the seven screws (#657). ・ Remove.the.bottom.cover.unit. #620 #657×7 Bottom.cover.unit #476 #711×2 #784 #786 #477 #475 #783 #785 #810 - D3・D7000 - NICS... -
Page 10: Rear.cover
・ Take out the screw (#614). #613×2 #614 ・ Peel off the rear rubber unit (#B407). ・ Take out the two screws (#614). ・ Take out the screw (#675). #614×2 #675 #B407 ・ Lift.the.rear.cover.unit. ・ Disconnect.the.two.FPCs. Rear.cover.unit - D4・D7000 - NICS... -
Page 11: Tft.monitor.window
VBA29001-R.3814.A TFT.monitor.window ・ Remove the TFT monitor window (#402). #402 Rear.FPC.unit ・ Peel off the tape (#733). ・ Peel off the two gaskets (#833). ・ Unsolder.the.two.wires. ・ Disconnect.the.FPC. #733 #833 [Blue] [Red] - D5・D7000 - NICS... - Page 12 VBA29001-R.3814.A ・ Take out the fourteen screws (#675). ・ Remove the each retainer plate (#415, #422, and #424). = #675×14 #422 #424 #415 ・ Remove the rear FPC unit (#B1016). #B1016 - D6・D7000 - NICS...
-
Page 13: Rear.button
VBA29001-R.3814.A Rear.button #413 #421 #414 #427 #428 #412 #429 Selector.lock.lever ・ Take out the screw (#671). ・ Remove the selector SW unit (#B420). ・ Remove the selector lock lever (#416). #671 #B420 #416 - D7・D7000 - NICS... -
Page 14: Tft.monitor
#723 ・ Take out the two screws (#610). ・ Remove the holder plate (#485) and live-view lever FPC unit (#1026). ・ Remove the button (#482), spring (#483), LV lever (#481). #610×2 #485 #481 #1026 #483 #482 - D8・D7000 - NICS... -
Page 15: Togo.pcb/Image.sensor
You must discharge the main condenser according to the instruction of this repair manual after you remove the cover. ・ Peel off the tape [TA-0015 (8.5×17)]. ・ Discharge.the.main.condenser. TA-0015 (8.5×17) 2KΩ/5W - D9・D7000 - NICS... -
Page 16: Front.cover.unit
VBA29001-R.3814.A Front.cover.unit ・ . I nsert.a.lumirror.sheet,.etc,.into.the.gap.of.the.top.cover.pop-up.section.as.below...Then.raise.the.section.by. sliding.the.sheet.in.the.direction.of.the.arrow. Approx.. Approx.. 4.cm Lumirror.sheet ・ Take out the two screws (#611). #611×2 ・ Take out the two screws (#614). ・ Remove.the.front.cover.unit. #616 #394 #614×2 #397 #389×2 Front.cover.unit #390×2 #B24RP - D10・D7000 - NICS... -
Page 17: Shield.plate
・ Take out the screw (#683). ・ Take out the screw (#617). ・ Remove the shield plate (#78). #683 = Unhook.×2 #617 ・ Take out the screw (#683). ・ Remove the shield plate (#79). = Unhook.×2 #683 - D11・D7000 - NICS... -
Page 18: Togo.pcb.unit
VBA29001-R.3814.A TOGO.PCB.unit ・ Remove.the.six.FPCs.and.the.harness. Inside Inside ・ Take out the four screws (#683). - D12・D7000 - NICS... -
Page 19: Image.sensor.unit
VBA29001-R.3814.A ・ Remove the TOGO PCB unit (#B1001RP). #B1001RP The.three.terminals.are.being.assembled.into.the. I/F.cover.unit,.so.remove.[#B1001RP].by.sliding.it. in.the.direction.of.the.arrow. Image.sensor.unit ・ Disconnect the both ends of the connection-FPC (#1041). #1041 - D13・D7000 - NICS... - Page 20 VBA29001-R.3814.A ・ Peel off the three pieces of the tape [TA-0016 (8×8)], and remove the harness. TA-0016 (8×8)×3 ・ Take out the three screws (#678). ・ Remove the image sensor unit (#B20051). Caution:.Some.bodies.have.the.washers.that.are.already.put.on.the.mounting.surface.of.the.image.sensor.unit. #678×3 #B20051 - D14・D7000 - NICS...
-
Page 21: Top.cover
VBA29001-R.3814.A 4..Top.Cover I/F.cover.unit ・ Remove.the.harness. ・ Take out the two screws (#629). ・ Remove.the.I/F.cover.unit. #629×2 I/F.cover.unit B28RP #781 #779×2 #731 #603 #782 #777 #603×2 #778 #780 #1053 - D15・D7000 - NICS... -
Page 22: Grip.cover.unit
VBA29001-R.3814.A Grip.cover.unit ・ Take out the each screw (#622 and #613). ・ Remove.the.grip.cover.unit. #613 #622 Grip.cover.unit Top.cover.unit ・ Unsolder.the.two.wires. Black - D16・D7000 - NICS... - Page 23 VBA29001-R.3814.A ・ Take out the screw (#557). ・ Remove the diopter adjustment knob (#551) and roller (#550). #557 #551 #550 ・ Take out the two screws (#613). #613 #613 ・ Lift.the.top.cover.unit.and.remove.the.harness. ・ Remove.the.top.cover.unit. Top.cover.unit - D17・D7000 - NICS...
-
Page 24: Lcd.window
VBA29001-R.3814.A ・ Take out the two screws (#623). ・ Remove the eyepiece mold unit (#B378). #623×2 #B378 LCD.window ・ Remove the (external) LCD window (#335). #335 - D18・D7000 - NICS... -
Page 25: Sb.pcb.unit
VBA29001-R.3814.A SB.PCB.unit ・ Unsolder.the.eight.wires. [Black] [Black] [Green] [Blue] [Yellow] [White] [Gray] [Orange] ・ Disconnect.the.two.FPCs. ・ Remove.the.top.cover.FPC.by.releasing.from.the.bosses. #635×3 ・ Take out the three screws (#635). ○= Boss - D19・D7000 - NICS... -
Page 26: Command.dial.unit
・ Take out the three screws (#635), and remove the front command dial unit (#B362). #635×3 #B362 ・ Unsolder the.three.contacts. ・ Take out the three screws (#635), and remove the rear command dial unit (#B363). #635×3 #B363 - D20・D7000 - NICS... -
Page 27: Af.assist.lamp.unit
・ Take out the screw (#629). ・ Remove the AF assist lamp unit (#B325). #629 #B325 Top.LCD.unit ・ Take out the screw (#700). ・ Remove the spring (#357). ・ Take out the two screws (#701). #701×2 #700 #357 - D21・D7000 - NICS... -
Page 28: Power.dial
VBA29001-R.3814.A ・ Take out the four screws (#635). ・ Remove.the.top.LCD.unit. Top.LCD.unit #635×4 Power.dial ・ Remove the button (#339). ・ Take out the two screws (#696). ・ Remove the two ON-OFF SW brushes (#355). #696×2 #355×2 #339 - D22・D7000 - NICS... - Page 29 ・ Remove the button (#340), rubber (#341), and spring (#342). #340 #341 #342 #722 ・ Take out the two screws (#693). ・ Remove the click plate unit (#B348). ・ Remove the power dial (#350). #693×2 #350 #B348 ・ Remove the roller (#358). #358 - D23・D7000 - NICS...
-
Page 30: Shoe.base
・ Take out the screw (#650). ・ Take out the four screws (#654). ・ Unsolder.the.four.contacts. #654×4 #650 Remove.solder.×4 ・ Remove the hot shoe spring (#321), shot shoe (#319), and hot shoe mold unit (#B320). #321 #319 #B320 - D24・D7000 - NICS... -
Page 31: Sb.lower.case.unit
・ Push the lever in the direction of the arrow, and raise the SB (flash unit) as below. ・ Take out the four screws (#629). #629×4 ・ Remove the SB upper cover (#301). ・ Pull.the.wires.out.from.the.hole. #301 - D25・D7000 - NICS... - Page 32 VBA29001-R.3814.A ・ Remove the roller (#312). #312 ・ Unhook the spring (#305). ・ Take out the screw (#650), and remove the spring (#305). #305 #305 #650 ・ Remove the SB rotating shaft (#B306). #B306 - D26・D7000 - NICS...
- Page 33 #B302 ・ Remove the collar (#307). ・ Take out the screw (#630), and remove the flash pop-up arm (#317). ・ Take out the screw (#630), and remove the flash pop-up arm (#318). #630×2 #317 #318 #307 - D27・D7000 - NICS...
-
Page 34: Top.cover.fpc.unit
・ Unsolder.the.two.wires. ・ Take out the two screws (#635). ・ Pull.up.the.FPC.in.the.direction.of.the.arrow. [Red] #635×2 [Black] ・ Take out the screw (#699). ・ Remove the contact brush unit (#B454). ・ Remove the mode dial (#451). #699 #B454 #451 - D28・D7000 - NICS... - Page 35 ・ Remove the each click spring (#453 and #468). ・ Remove the release mode dial unit (#B464). #602 #B464 #453 #468 ・ Take out the three screws (#635). ・ Remove the top cover FPC unit (#B1007RP). #635×3 ○= Boss #B1007RP - D29・D7000 - NICS...
-
Page 36: Release.mode.dial.lock.button
#635×2 #471 #470 #469 Eyelet ・ Remove the adhesive (C-8008B) that is attached to the two nuts (#715). ・ Remove the two nuts (#715). ・ Remove the two eyelets (#B145). #B145 #B145 #715 #715 C-8008B C-8008B - D30・D7000 - NICS... -
Page 37: Separation.of.front.body.from.rear.body
VBA29001-R.3814.A 5..Separation.of.Front.Body.from.Rear.Body ・ Remove.the.three.harnesses. ・ Disconnect.the.FPC. [Red].[Black].[Blue] [Black].[Yellow].[Red] [Green].[Red].[Gray] ・ Release.the.FPC.from.the.bosses. ・ Take out the two screws (#706). #706×2 ○= Boss - D31・D7000 - NICS... - Page 38 VBA29001-R.3814.A ・ Take out the four screws (#706). #706×4 ・ Take out the screw (#697). #697 ・ Remove.the.front.body.unit. Front.body.unit - D32・D7000 - NICS...
-
Page 39: Rear.body
VBA29001-R.3814.A 6..Rear.Body IF.PCB.unit ・ Take out the two screws (#706). #706×2 ・ Take out the two screws (#675). #675×2 - D33・D7000 - NICS... - Page 40 VBA29001-R.3814.A ・ Remove the GND plate (#107). Unhook. #107 ・ Remove.the.IF.PCB.unit. #666×2 IF.PCB.unit #83×2 #1039 #1037 TA-0026 (4×8) - D34・D7000 - NICS...
-
Page 41: Relay-Pcb
VBA29001-R.3814.A ・ Remove the GND plate (#106). #106 Relay-PCB ・ Unsolder.the.two.wires. ・ Take out the screw (#683). ・ Remove the relay-PCB (#1012). #683 #1012 [Red] [Black] - D35・D7000 - NICS... -
Page 42: Dcdc Isc.pcb.unit
・ Peel off the tape (#747). #747 ・ Take out the screw (#603). ・ Remove the GND plate (#109). ・ Take out the screw (#683). ・ Remove the GND plate (#148). Slacken.the.FPC.of.the.PD.PCB.(#1004). and.remove.it. #603 #683 #109 #1004 #148 - D36・D7000 - NICS... - Page 43 #745 ・ Unsolder.the.two.wires. ・ Peel off the tape [TA-0016 (8×8)]. ・ Disconnect.the.FPC. ・ Take out the one screw (#694) and three screws (#683). ・ Remove.the.DCDC ISC PCB unit (#B1002). TA-0016 [Green] (8×8) [Blue] #694 #B1002 #683×3 - D37・D7000 - NICS...
-
Page 44: Connector.pcb.unit
VBA29001-R.3814.A Connector.PCB.unit ・ Take out the screw (#604). ・ Remove the GND plate (#141). #604 #141 ・ Take out the two screws (#604). ・ Remove the battery pack connector cover (#474). #604×2 #474 - D38・D7000 - NICS... - Page 45 VBA29001-R.3814.A ・ Take out the two screws (#683). ・ Pull.out.the.arranged.wires. #683×2 ・ Remove the connector PCB unit (#1035) by sliding it. #1035 ・ Unsolder.the.two.wires. ・ Disconnect.the.FPC. [Gray] [Yellow] #1035 - D39・D7000 - NICS...
-
Page 46: Pd.pcb.unit
・ Unsolder.the.three.wires. ・ Take out the three screws (#683). ・ Remove the PD PCB unit (#1004). #1004 #683×3 [Gray] [Green] #1004 [Orange] GND.plate/Shield.plate ・ Remove the each GND plate (#110, #143, and #108). #110 #108 #143 - D40・D7000 - NICS... -
Page 47: Bottom.base.unit
・ Remove the shield plate (#90). Bottom.base.unit ・ Take out the two screws (#706). ・ Remove the bottom base unit (#B67). ・ Take out the two screws (#617). ・ Remove the GND plate (#140). #617×2 #706×2 #140 #B67 #B67 - D41・D7000 - NICS... -
Page 48: Main.condenser.unit
VBA29001-R.3814.A Main.condenser.unit ・ Remove the GND plate (#144). #144 ・ Release.the.two.wires.from.the.guides. ・ Remove the main condenser unit (#B1043). ○= Guide #B1043 ○= Guide - D42・D7000 - NICS... -
Page 49: Battery.contact
・ Take out the three screws (#604). ・ Remove the battery-eject-spring plate (#158). ・ Remove the battery contact unit (#1011). ・ Remove the battery-eject spring (#159). #1011 #604×3 #604×3 #158 #158 #159 7..Front.Body Shutter.unit ・ Remove.the.solder.briges. ・ Unsolder.the.two.wires. [Red] [Black] Remove.solder. bridges. - D43・D7000 - NICS... - Page 50 VBA29001-R.3814.A ・ Disconnect.the.FPC. ・ Slacken the FPC, and take out the screw (#638). #638 ・ Take out the two screws (#635). ・ Remove the shutter unit (#B10223). #635×2 #B10223 - D44・D7000 - NICS...
-
Page 51: Af.sensor.unit
VBA29001-R.3814.A AF.sensor.unit ・ Disconnect.the.FPC. ・ Take out the three screws (#161). ・ Remove the AF sensor unit (#B2163). #161×3 #B2163 ・ Remove the three springs (#162). #162×3 - D45・D7000 - NICS... -
Page 52: Separation.of.prism.box.from.front.body
VBA29001-R.3814.A 8..Separation.of.Prism.Box.from.Front.Body ・ Disconnect.the.two.FPCs. ・ Release.the.FPC.from.the.bosses. ・ Take out the three screws (#697). ・ Remove.the.prism.box.unit. #697×3 Prism.box.unit ○= Boss - D46・D7000 - NICS... -
Page 53: Aperture.control.unit
VBA29001-R.3814.A Aperture.control.unit ・ Peel off the tape [TA-0015 (8.5×17)]. ・ Unsolder.the.two.wires. ・ Release.the.FPC.from.the.bosses. TA-0015 (8.5×17) [Black] [Red] ○= Boss ・ Take out the four screws (#621). ・ Remove the aperture control unit (#B242). #B242 #621×4 - D47・D7000 - NICS... -
Page 54: Connection-Fpc
VBA29001-R.3814.A Connection-FPC ・ Disconnect the conneciton-FPC (#1039). #1039 AF-M.lever.unit ・ Take out the screw (#638). ・ Remove.the.AF-M.lever.unit. #788 #638 AF-M.lever.unit #723 #602×2 #789 - D48・D7000 - NICS... -
Page 55: Md.pcb.unit
VBA29001-R.3814.A MD.PCB.unit ・ Unsolder.the.four.wires. ・ Remove.the.solder.bridges.at.two.places. [Yellow] [Black] Remove.solder.bridges.×2 [Black] [Red] ・ Take out the two screws (#683). #683×2 ・ Remove the MD PCB unit (#1005). #1005 - D49・D7000 - NICS... -
Page 56: Mirror.driving.unit
#674 #673 Horizontal.lever/Vertical.lever ・ Unhook the spring (#195). #195 ・ Take out the spring (#680). ・ Remove the horizontal lever (#193) from the coupling shaft (#185). ・ Remove the coupling shaft (#185). #185 #680 #185 #193 - D50・D7000 - NICS... - Page 57 VBA29001-R.3814.A ・ Remove the spring (#195). #195 ・ Take out the screw (#680). ・ Remove the vertical lever (#191). ・ Remove the spring (#194). #680 #191 #194 - D51・D7000 - NICS...
-
Page 58: Af.motor.unit
AF.motor.unit ・ Release.the.FPC.from.the.bosses. ・ Take out the two screws (#637). ・ Remove the AF motor unit (#B171). #637×2 #B171. ○= Boss Double-stick.tape ・ Take out the screw (#711). ・ Remove the gear stopper (#136). #711 #136 - D52・D7000 - NICS... -
Page 59: Bayonet
VBA29001-R.3814.A Bayonet ・ Take out the four screws (#661). ・ Take out the screw (#660). ・ Remove the bayonet mount (#111). #661×4 #111 #660 ・ Remove the bayonet spring (#112). #112. - D53・D7000 - NICS... -
Page 60: Apertrue.couping.ring.unit
・ Remove the GND plate (#121). #122 #121 ・ Take out the two screws (#635). ・ Remove the retainer plate (#137). ・ Remove the aperture coupling ring unit (#B131). ・ Remove.the.gear.unit. #635×2 Gear.unit #137 #B131 #133 Unhook #135 Gear.unit #134 - D54・D7000 - NICS... -
Page 61: Lens.contact.fpc.unit
・ Remove the solder bridges that joint the F-F0 PCB unit (#B1024). ・ Unsolder the three contacts from the lens contact FPC unit (#B1018). #B1018 #B1024 Remove.solder. bridges. ・ Remove the F-F0 PCB unit (#B1024). #B1024 - D55・D7000 - NICS... - Page 62 VBA29001-R.3814.A ・ Unsolder.the.three.wires. ・ Take out the screw (#606). #606 [Black] [Red] Front [Blue] Lateral.side ・ Remove the lens contact FPC unit (#B1018). ・ Remove the GND plate (#114). #B1018 #114 - D56・D7000 - NICS...
-
Page 63: Lens.release.button.unit
・ Remove the adhesive (C-8008B) that is attached to the pin (#297). ・ Raise the main mirror (to become mirror-up status), remove the pin (#297). ・ Take out the two screws (#669). ・ Remove the main mirror measuring unit (#B296) and spring (#292). #669×2 #297 #B296 #292 - D57・D7000 - NICS... -
Page 64: Mirror.box.unit
・ Remove the adhesive (C-8008B) that is attached to the main mirror shaft (#293). ・ Remove the main mirror shaft (#293). ・ Remove the mirror unit (#B10231). #B10231 #293 Mirror.box.unit #199 #197 #198 #196 TA-0027 (1.5×5)×4 #B120 #216 #604×2 #215 - D58・D7000 - NICS... -
Page 65: Prixm.box
・ Take out the two screws (#683). ・ Remove the light measuring base plate unit (#B513). #515×3 #683×2 #B513 Remove.solder. bridges. Penta.FPC.unit ・ Disconnect.the.two.FPCs. ・ Remove the penta FPC unit (#B1020). ・ Remove the metering aperture (#518). #B1020 #518 - D59・D7000 - NICS... -
Page 66: Lcd.unit
・ Take out the two screws (#656). ・ Remove the LCD unit (#B1010). #B1010 #656×2 Screen.BOX.unit ・ Remove the spring (#501). ・ Remove the screen BOX unit (#B520RP). #B520RP #501 ・ Remove the spring (white) and spring (black). Spring (white) Spring (black) - D60・D7000 - NICS... -
Page 67: Eyepiece.block.unit
VBA29001-R.3814.A ・ Remove.the.retainer.plate. ・ Remove.the.protection.sheet. ・ Remove the penta prism (#4). ・ Remove.the.F-mask.plate. Retainer.plate Protection.sheet F-mask.plate Eyepiece.block.unit ・ Take out the two screws (#635). ・ Remove the eyepiece block unit (#B540). #635×2 #B540 - D61・D7000 - NICS... -
Page 68: Assembly/Adjustment
・ Mount the eyepiece block unit (#B540). ・ Tighten the two screws (#635). #635×2 #B540 Penta.prism ・ Attach the tape (#510) to the penta prism (#4). ・ Put.the.F-mask.plate. ・ Mount the penta prism (#4). #510 F-mask.plate - A1 ・ D7000 - NICS... - Page 69 VBA29001-R.3814.A ・ Put.the.protection.sheet. ・ Mount.the.retainer.plate. Retainer.plate Protection.sheet ・ Hook the spring (black) and spring (white). Spring (black) Spring (white) = Hook. - A2 ・ D7000 - NICS...
-
Page 70: Screen.box.unit
VBA29001-R.3814.A Screen.BOX.unit ・ Mount the screen BOX unit (#B520RP). ・ Attach the spring (#501). #501 #B520RP LCD.unit ・ Mount the LCD unit (#B1010). ・ Tighten the two screws (#656). #B1010 #656×2 - A3 ・ D7000 - NICS... -
Page 71: Penta.fpc.unit
・ Put the metering aperture (#518). #518 ・ Mount the penta FPC unit (#B1020). ・ Connect.the.two.FPCs. #B1020 Fit.the.hook. ・ Attach the FPC by fitting the boss in the hole. ・ Make.solder.bridges. Make.solder. bridges. ○= Boss - A4 ・ D7000 - NICS... -
Page 72: Metering.fpc.unit
・ Mount the metering FPC unit (#B1008). ・ Tighten the three screws (#514). After.tightening.the.screws.clockwise,.give.them.two.turns.counterclockwise. #514×3 #B1008 #515×3 #683×2 B513 ・ Bend the FPC towards the direction of the arrow, and fit the bosses in the holes. ○= Boss - A5 ・ D7000 - NICS... -
Page 73: Front.body
VBA29001-R.3814.A 2..Front.Body Mirror.box.unit Reference.position.for.attachment - #199 #198 #197 #199 -.Reference.position. for.attachment #197 #198 #196 TA-0027 (1.5×5)×4 #B120 #215 #216 #216 #215 #604×2 - A6 ・ D7000 - NICS... -
Page 74: Mirror.driving.unit
・ Attach the spring (#292) and main mirror measuring unit (#B296). ・ Tighten the two screws (#669). ・ Raise the main mirror (to become mirror-up status), and insert the pin (#297). #669×2 #B296 #297 #292 - A7 ・ D7000 - NICS... -
Page 75: Lens.release.button.unit
・ Apply the adhesive (C-8008B) to the pin (#297) and main mirror shaft (#293). #297 C-8008B #293 Lens.release.button.unit ・ Mount.the.lens.release.button.unit. ・ Tighten the two screws (#635). #635×2 #683 #124 TA-0026 (4×8) #127 #125 #192 #683 #126 #115 #119 TNG-87 #B116 - A8 ・ D7000 - NICS... -
Page 76: Lens.contact.fpc.unit
・ Position the lens contact FPC unit (#B1018) in the direction of the arrow, and tighten the screw (#606). ・ Solder.the.three.wires. [Black] #606 [Red] #B1018. Front.side ・ Mount the F-F0 PCB unit (#B1024). #B1024 [Blue] Lateral.side - A9 ・ D7000 - NICS... -
Page 77: Aperture.coupling.ring.unit
・ Attach the spring (#135) to the gear (#134). ・ Put the other gear (#133) on the above gear (#134). ・ Hook the spring (#135) to the each gear (#134 and #133). #133 Spring-hooking.position #135 #134 ・ Put.the.gear.unit. Gear.unit - A10 ・ D7000 - NICS... - Page 78 ・ Mount the aperture coupling ring unit (#B131). ・ Mount the retainer plate (#137). ・ Tighten the two screws (#635). Mounting.position #635×2 #137 #B131 ・ Mount the GND plate (#121). ・ Attach the rubber (#122). #121 #122 - A11 ・ D7000 - NICS...
-
Page 79: Bayonet
・ Mount the bayonet spring (#112). #112. TNG-87 Back.side ・ Put the bayonet mount (#111). ・ Position [#111] in the direction of the arrow, and tighten the screw (#660). ・ Tighten the four screws (#661). #661×4 #111 #660 - A12 ・ D7000 - NICS... -
Page 80: Adjustment.of.aperture.coupling.ring
VBA29001-R.3814.A Adjustment.of.aperture.coupling.ring ・ Set.the.aperture.coupling.ring.to.the.initial.position. ・ Attach the gear stopper (#136). ・ Tighten the screw (#711). #711 #136 Initial.position ・ Give the gear (#134) three turns in the direction of the arrow. #134. Move.the.aperture.coupling.ring.back.and.forth.slowly,.and. check.operations. - A13 ・ D7000 - NICS... -
Page 81: Af.motor.unit
・ Mount the AF motor unit (#B171). ・ Tighten the two screws (#637). #637×2 #B171 ・ Attach the FPC by fitting the bosses in the holes, and secure it with the double-stick tape. ○= Boss Double-stick.tape - A14 ・ D7000 - NICS... -
Page 82: Horizontal.lever/Vertical.lever
・ Attach the spring (#194). ・ Mount the vertical lever (#191). ・ Tighten the screw (#680). Apply.to.the.inside. CFD-409Z #680 #191 TNG-87 #194 TNG-87 ・ Hook the spring (#194). #194 #194 ・ Insert the coupling shaft (#185). #185 - A15 ・ D7000 - NICS... - Page 83 ・ Attach the spring (#195). ・ Mount the horizontal lever (#193). ・ Tighten the screw (#680). #185 #680 #193 #193 #195 TNG-87 Fit.the.U-groove.of.[#193]. with.the.shape.of.[#185]. ・ Hook the spring (#195). #195 ・ Tighten the screw (#652). #652 - A16 ・ D7000 - NICS...
-
Page 84: Mirror.driving.unit
・ Turn.the.cam.all.the.way.in.the.direction.of.the.arrow. ・ Raise the main mirror (to become mirror-up status), mount the mirror driving unit (#B280). #B280 The.spring.must.be.in. the.groove.of.the.main. mirror.shaft. TNG-87 ・ Tighten the two screws (#674) and one screw (#673). #674 #673 - A17 ・ D7000 - NICS... -
Page 85: Md.pcb.unit
・ Tighten the two screws (#683). ・ Make solder bridges at two places to joint the MD PCB unit (#1005). #683×2 Make.solder.bridges.× 2.places ・ Solder.the.four.wires. ・ Arrange.the.wires.as.shown.in.the.below.right.picture. Arrange.the.wires.inside. Arrange.the.wires. the.guide. along.the.guide. [Yellow] [Black] [Black] [Red] - A18 ・ D7000 - NICS... -
Page 86: Af-M.lever.unit
・ Tighten the screw (#638). #788 #638 #723 AF-M.lever.unit #602×2 #789 TNG-87 Connection-FPC ・ Attach the connection-FPC (#1039). ・ Secure [#1039] with the double-stick tape [TA-0026 (4×8)] of the lens release button unit. #1039 TA-0026 (4×8) Lens.release. button.unit - A19 ・ D7000 - NICS... -
Page 87: Aperture.control.unit
・ Mount the aperture control unit (#B242). ・ Tighten the four screws (#621). #B242 #621×4 ・ Attach the FPC by fitting the bosses in the holes. ・ Solder.the.two.wires. ・ Attach the tape [TA-0015 (8.5×17)]. [Black] [Red] ○= Boss TA-0015 (8.5×17) - A20 ・ D7000 - NICS... -
Page 88: Height.adjustment.of.af.coupling.shaft
VBA29001-R.3814.A Height.adjustment.of.AF.coupling.shaft • Refer.to."Height.adjustment.of.AF.coupling.shaft".of."D/SLR.ADJUSTMENT.Separate.Volume.① ".for. details. Standard:.1.7.±.0.2.mm If.the.result.does.not.meet.the.standard,.turn.the.below.adj..screw.for.the.adjustment. #652 EDB0011 Height.adjustment.of.aperture.lever • Refer.to." ①.Models.WITHOUT.adjusting.mechanism.of.the.aperture.lever".of."Height.adjustment.of. aperture.lever".of.D/SLR.ADJUSTMENT.Separate.Volume.①.for.details. Standard:.3.3.-.3.6.mm Tool (Device) J18004 Aperture.lever.positioning.gauge - A21 ・ D7000 - NICS... -
Page 89: Mounting.of.prism.box.on.front.body
VBA29001-R.3814.A 3..Mounting.of.Prism.Box.on.Front.Body ・ Mount.the.prism.box.unit. ・ Tighten the three screws (#697). ・ Attach the FPC by fitting the bosses in the holes. #697×3 Prism.box.unit ○=.Boss ・ Connect.the.two.FPCs. - A22 ・ D7000 - NICS... -
Page 90: Af.sensor.unit
AF.sensor.unit ・ Attach the three springs (#162). ・ Mount the AF sensor unit (#B2163). ・ With the hex. key ( 1.5 mm), tighten the three screws (#161). φ After.tightening.the.screws.clockwise,.give.them.1.5-turn.counterclockwise. #162×3 #161×3 #B2163 ・ Connect.the.FPC. - A23 ・ D7000 - NICS... -
Page 91: Adjustment.of.af-Sensor.mounting.base
・ Insert the red-circled section of AF X-positioning tool (J63120) (2.8mm) into the below green-colored gap. ・ Position the AF sensor unit (#B2163) in the direction of the arrow, and tighten the screw. J63120 #B2163 Screw - A24 ・ D7000 - NICS... -
Page 92: Adjustment.of.main.mirror.and.sub-Mirror
VBA29001-R.3814.A Adjustment.of.main.mirror.and.sub-mirror • .Refer.to."Angle.adjustment.of.main.mirror.and.sub-mirror"..of.D/SLR.ADJUSTMENT.Separate. Volume.①.for.details. Standard.value.of.main.mirror Up-down.deviation 0±5′ Left-right.deviation 0±10′ If.the.result.does.not.meet.the.standard,.make.the.adjustment.by.turning.the.below.eccentric.pin.with.the. hex. key wrench (φ1.5mm). Screw (#669)×2 Eccentric.pin.for.left-right.adjustment.of.main.mirror Loosen.the.two.screws.(#669),.and.turn.this.eccentric. pin.for.left-right.adjustment.of.the.main.mirror. Eccentric.pin.for.up-down.adjustment.of.main.mirror - A25 ・ D7000 - NICS... - Page 93 ....(59°angle.[for.D200/D300]) Up-down.deviation .. 0±5′ Left-right.deviation .. - ※ .Height.indication.position.of.measurement-use.sub-mirror If.the.result.does.not.meet.the.standard,.make.the.adjustment.by.turning.the.below.eccentric.pin.with.the.hex..key. wrench (φ1.5mm). Eccentric.pin.for.up-down.adjustment.of. sub-mirror Tool (device) J19132 J19132B J18389 59° ° Main/Sub.mirror.angle.inspection. .measurement-use.mirror Reflection mirror Hex..key.wrench wrench .(φ 1.5 mm) tool 59 ゜ (for D300/D200) - A26 ・ D7000 - NICS...
-
Page 94: Shutter.unit
Shutter.unit ・ Turn.the.gear.in.the.direction.of.the.arrow,.and.align.the.indexes. Gear #B10223 ・ Mount the shutter unit (#B10223). #635×2 ・ Tighten the two screws (#635). When.mounting,.be. #B10223 careful.NOT.to.pinch. the.FPC. ・ Slacken the FPC, and tighten the screw (#638). ・ Connect.the.FPC. #638 - A27 ・ D7000 - NICS... -
Page 95: X-Delay.adjustment.value
VBA29001-R.3814.A ・ Make solder bridges to joint the MD PCB unit (#1005). ・ Solder.the.two.wires. [Red] [Black] Make.solder.bridges X-delay.adjustment.value Take.a.note.of.the.data.(A/B.value).that.are.imprinted.on.the.shutter.(see.below),.because.they.will.be.necessary. to.be.input.when.the.camera.body.(except.imaging).adjustment.is.made. - A28 ・ D7000 - NICS... -
Page 96: Rear.body
#1011 #604×3 #604×3 #158 #158 #159 #730×2 ・ Attach the each double-stick tape [TA-0026 (8×50), (7.5×17), and (4.5×37.5)]. ・ Attach the shield sheet (#873). Reference.position.for.attaching.[#873] #873 Reference.position.for. Reference.position.for. attaching.[TA-0026. attaching.[TA-0026.(8 (7.5×17)] ×50)] Reference.position.for.attaching. [TA-0026.(4.5×37.5)] - A29 ・ D7000 - NICS... -
Page 97: Main.condenser.unit
VBA29001-R.3814.A Main.condenser.unit ・ Mount the main condenser unit (#B1043), and attach the two pieces of the double-stick tape (#730). ・ Arrange.the.wires.as.below. B1043 ○= Guide #730×2 ○= Guide ・ Mount the GND plate (#144). #144 - A30 ・ D7000 - NICS... -
Page 98: Bottom.base.unit
・ Mount the GND plate (#140) on the bottom base unit (#B67). ・ Tighten the two screws (#617). #617×2 #140 #B67 ・ Mount the bottom base unit (#B67). ・ Tighten the two screws (#706). #706×2 #B67 - A31 ・ D7000 - NICS... -
Page 99: Shield.plate/Gnd.plate
TA-0026 (4.5×4.5) ・ Attach the shield sheet (#800) to the shield plate (#90). ・ Mount the shield plate (#90). #800 Without.running.off.the.edge.of.[#90] ・ Mount the each GND plate (#110, #143, and #108). #110 #108 #143 - A32 ・ D7000 - NICS... -
Page 100: Pd.pcb.unit
VBA29001-R.3814.A PD.PCB.unit ・ Mount the PD PCB unit (#1004). ・ Tighten the three screws (#683). #683×3 #1004 ・ Solder.the.three.wires. #1004 [Gray] [Green] [Orange] - A33 ・ D7000 - NICS... -
Page 101: Connector.pcb.unit
・ Connect the FPC of the connector PCB unit (#1035). #851 [Gray] [Yellow] #1035 #1035 • Mount the connector PCB unit (#1035) by sliding it. #1035 ・ Arrange.the.wires.as.below. ・ Tighten the two screws (#683). ○= Boss #683×2 - A34 ・ D7000 - NICS... - Page 102 ・ Mount the battery pack connector cover (#474). ・ Tighten two screws (#604). #604×2 #474 ・ Attach the tape (#823) to the GND plate (#141), and mount them. ・ Tighten the screw (#604). #823 #604 #141 Reference.position. - for.attachment - A35 ・ D7000 - NICS...
-
Page 103: Dcdc.isc.pcb.unit
・ Tighten the screw (#694). ・ Connect.the.FPC. ・ Attach the tape [TA-0016 (8×8)]. ・ Solder.the.two.wires. TA-0016 (8×8) [Green] [Blue] #694 #B1002 #683×3 ・ Attach the sheet (#745). #745 #745 Fold.toward.the. direction.of.the. arrow,.and.attach. Reference.position. - for.attachment - A36 ・ D7000 - NICS... - Page 104 While.slackening.the.FPC.of.the.PD.PCB. unit.(#1004),.mount.[#148]. #683 #1004 TA-0026 (4.5×4.5) #148 #148 ・ Attach the gasket (#858) to the GND plate (#109). ・ Mount the GND plate (#109). ・ Tighten the screw (#603). #603 #109 #858 #109 Reference.position.for.attaching.[#858] - A37 ・ D7000 - NICS...
-
Page 105: Relay-Pcb
VBA29001-R.3814.A ・ Attach the tape (#747). #747 Relay-PCB ・ Mount the relay-PCB (#1012). ・ Tighten the screw (#683). ・ Solder.the.two.wires. #683 #1012 [Red] [Black] - A38 ・ D7000 - NICS... -
Page 106: If.pcb.unit
VBA29001-R.3814.A IF.PCB.unit ・ Mount the GND plate (#106). #106 ・ Mount the IF PCB unit (#B1019). ○= Boss #666×2 IF.PCB.unit #83×2 #1019 #1037 TA-0026 (4×8) - A39 ・ D7000 - NICS... - Page 107 VBA29001-R.3814.A ・ Mount the GND plate (#107). Hook #107 ・ Tighten the two screws (#675). #675×2 - A40 ・ D7000 - NICS...
- Page 108 ・ Tighten the two screws (#706). ・ Attach the double-stick tape (#734). ・ Attach the gasket (#860). #706×2 #734 #860 Reference.position.for. attachment ・ Attach the shield sheet (#871). Attach.so.that.there.is.no.slackness. at.the.corner. Reference.position.for. attaching.[#871] #871 #871 - A41 ・ D7000 - NICS...
-
Page 109: Mounting.of.front.body.on.rear.body
VBA29001-R.3814.A 5..Mounting.of.Front.Body.on.Rear.Body ・ Mount.the.front.body.unit. ○= Boss Front.body.unit ・ Tighten the screw (#697). ・ Tighten the four screws (#706). #706×4 #697 - A42 ・ D7000 - NICS... - Page 110 VBA29001-R.3814.A ・ Tighten the two screws (#706). ・ Attach the connection-FPC (#1039) by fitting the bosses. #706×2 #1039 ○= Boss ・ Connect.the.FPC. ・ Connect.the.three.harnesses. [Red].[Black].[Blue] [Black].[Yellow].[Red] [Green].[Red].[Gray] - A43 ・ D7000 - NICS...
-
Page 111: Inspection And Adjustment Of Flange-Back (Body-Back)
(2)The attaching face of image sensor unit: To adjust the height of the image sensor unit ※.Remove.the.wahsers.when.the.image.sensor.unit.must.be.replaced. Marking position Color.of. Sub- Thickness.of. Part.No. mark washer (mm) Blue 6K050-084 T=0.02 6K050-085-1 T=0.1 Green 6K050-086 T=0.06 Tool (device) J19004-1 J18001-1 Dial.indicator.and.stand Body-back.focus.gauge - A44 ・ D7000 - NICS... -
Page 112: Top.cover
・ Attach the two eyelets (#B145), and tighten the two nuts (#715). Threaded portion L-271 #B145 Threaded.portion L-271 #B145 #715 #715 ・ Apply the adhesive (C-8008B) around the nut (#715) entirely. C-8008B C-8008B Release.mode.dial.lock.button ・ Attach the button (#469) and spring (#470). #470 #469 LEN317A - A45 ・ D7000 - NICS... -
Page 113: Drip-Proof.sponge
・ Tighten the two screws (#635). #635×2 #471 #758 Drip-proof.sponge ・ Attach the sheet (#44) and sponge (#46). ・ Attach the each sponge (#757 and #756). ・ Attach the four pieces of the tape (#770). #770×4 #756 #757 - A46 ・ D7000 - NICS... - Page 114 ・ Attach the each sponge (#765, #766, and #767). #338 #765 #766 #767 ・ Attach the sponge (#762). ・ Attach the each sponge (#769 and #768). ・ Attach the sponge (#764). #762 #764 #769 #768 - A47 ・ D7000 - NICS...
-
Page 115: Top.cover.fpc.unit
・ Apply the grease (CFD-409Z) to the pattern surface of the top cover FPC unit (#B1007RP). CFD-409Z CFD-409Z ・ Mount the top cover FPC unit (#B1007RP). #B1007RP ○= Boss Tip.of.lever Put.the.tip.of.the.lever.into.the.hole.of.the.top.cover. ・ Tighten the three screws (#635). #635×3 - A48 ・ D7000 - NICS... - Page 116 ・ Tighten the screw (#602). #602 Attach.with.the.projection.facing.upwards. #453 #468 ・ Mount the mode dial (#451). ・ Mount the contact brush unit (#B454). ・ Tighten the screw (#699). ・ Attach.the.FPC.by.putting.in.the.direction.of.the.arrow. #699 #B454 LEN317A ○= Boss #451 - A49 ・ D7000 - NICS...
-
Page 117: Sb.lower.case.unit
・ Apply the grease (CFD-409Z) to the top cover FPC unit (#B1007). CFD-409Z ・ Mount the each flash pop-up arm (#317 and #318), and tighten the two screws (#630). Viewed.from.above #317 #318 CFD-409Z #630×2 CFD-409Z - A50 ・ D7000 - NICS... - Page 118 ・ Apply the grease (CFD-409Z) to the SB lower cover unit (#B302). CFD-409Z CFD-409Z #B302 ・ Spread the SB lower cover unit (#B302) as indicated by the arrow, and mount it. ・ Attach the collar (#308). #B302 #308 - A51 ・ D7000 - NICS...
- Page 119 ・ Tighten the screw (#650). #650 ・ Put the tip of the spring (#305) into the groove. ・ Attach the spring (#305) by spreading it. ・ Hook the spring (#305). #305 #305 #650 groove - A52 ・ D7000 - NICS...
- Page 120 ・ Arrange the wires as below, and tighten the screw (#650). Place the wires in the guide in the following order: [Blue] [Green] [Gray] #650 Place the wires between the guides in the following order: [Yellow] [White].[Orange] - A53 ・ D7000 - NICS...
- Page 121 VBA29001-R.3814.A ・ Mount the SB upper cover (#301). ・ Push the lever in the direction of the arrow to raise the SB (flash unit). #301 ・ Tighten the four screws (#629). #629×4 - A54 ・ D7000 - NICS...
-
Page 122: Shoe.base
・ Attach the hot shoe mold unit (#B320), hot shoe (#319), and hot shoe spring (#321). #321 #319 #B320 ・ Tighten the four screws (#654). ・ Solder.the.four.contacts. #654×4 Make.solder×4 Power.dial ・ Attach the double-stick tape (#360) to the roller (#358). ・ Put the roller (#358). LEN317A #358 #358 #360 - A55 ・ D7000 - NICS... - Page 123 ・ Attach the click plate unit (#B348). ・ Tighten the two screws (#693). #693×2 #B348 LEN317A ・ Attach the button (#340), rubber (#341), and spring (#342). ・ Attach the E-ring (#722). #340 LEN317A #341 #342 LEN317A #722 - A56 ・ D7000 - NICS...
- Page 124 ・ Attach the two ON-OFF SW brushes (#355). ・ Tighten the two screws (#696). ・ Turn.the.power.dial.in.the.direction.of.the.arrow. ・ Attach the button (#339). #696×2 #355×2 #339 Top.LCD.unit ・ Mount.the.top.LCD.unit. ・ Tighten the four screws (#635). Be.careful.NOT.to.pinch.the.wires. ○= Boss Top.LCD.unit Assembled #635×4 - A57 ・ D7000 - NICS...
- Page 125 ・ Tighten the two screws (#701). #701×2 ・ Attach the spring (#357). ・ Tighten the screw (#700). Spring-hooking.position #700 #357 AF.assist.lamp.unit ・ Mount the AF assist lamp unit (#B325). ・ Tighten the screw (#629). #629 #B325 - A58 ・ D7000 - NICS...
- Page 126 ・ Mount the front command dial unit (#B362), and tighten the three screws (#635). ・ Solder.the.three.contacts. #635×3 #B362 SB.PCB.unit ・ Mount the SB shield plate unit (#B80). ・ Mount the SB PCB unit (#B1013). ○= Boss #B1013 #B80 - A59 ・ D7000 - NICS...
- Page 127 VBA29001-R.3814.A ・ Tighten the three screws (#635). ・ Solder.the.eight.wires. [Black] [Black] [Green] [Blue] [Yellow] [White] #635×3 [Gray] [Orange] ・ Fit.the.bosses.in.the.holes.of.the.FPC. ・ Connect.the.two.FPCs. ○= Boss - A60 ・ D7000 - NICS...
- Page 128 LCD.window ・ Mount the (external) LCD window (#335). #335 Top.cover.unit ・ Attach the sponge (#774) and mount the eyepiece mold unit (#B378). ・ Tighten the two screws (#623). ・ Connect.the.harness.to.the.top.cover.unit. #623×2 [Black].[Green].[Yellow] #B378 #774 - A61 ・ D7000 - NICS...
- Page 129 VBA29001-R.3814.A ・ Mount.the.top.cover.unit. ・ Tighten the screw (#613). #613 Top.cover.unit ・ Tighten the screw (#613). #613 ・ Solder.the.two.wires. ・ Attach the tape [TA-0015 (8.5×17)]. Black TA-0015 (8.5×17) - A62 ・ D7000 - NICS...
- Page 130 ・ Attach the roller (#550) and mount the above diopter knob (#551). ・ Tighten the screws (#557). #556 #557 #551 #550 #551 CFD-409Z Apply.to.the.overall. Grip.cover.unit ・ Mount.the.grip.cover.unit. ・ Tighten the each screw (#613 and #622). #613 Grip.cover.unit #622 - A63 ・ D7000 - NICS...
- Page 131 #782 #777 #603×2 #778 #780 #1053 ・ Arrange.the.wires.as.below. ・ Apply the adhesive (C-8008B), and fix the wires. ○= Guide C-8008B ・ Mount.the.I/F.cover.unit. ・ Tighten the two screws (#629). ・ Connect.the.harness. #629×2 The.two.wires.must.be.placed. under.the.GND.plate. I/F.cover.unit - A64 ・ D7000 - NICS...
- Page 132 #492 ・ Mount the E-ring (#723). ・ Hook the spring (#486). #723 #486 TFT.monitor ・ Mount the TFT monitor (#1049) and retainer plate (#406). ・ Tighten the four screws (#672). #672×4 #406 Direction.for.positioning #1049 - A65 ・ D7000 - NICS...
- Page 133 VBA29001-R.3814.A Selector.lock.lever ・ Mount the selector lock lever (#416). ・ Mount the selector SW unit (#B420). ・ Tighten the screw (#671). #671 #B420 #416 LEN317A Rear.button #413 #421 #414 #427 #428 #412 #429 - A66 ・ D7000 - NICS...
- Page 134 ・ Mount the rear FPC unit (#B1016). ○= Boss ○=ボス #B1016 CFD-409Z Back.side ・ Mount the each retainer plate (#415, #422, and #424). ・ Tighten the fourteen screws (#675). Position.for.pulling. wires = #675×14 #422 #424 #415 - A67 ・ D7000 - NICS...
- Page 135 VBA29001-R.3814.A ・ Connect.the.FPC. ・ Solder.the.two.wires. ・ Attach the tape (#733). ・ Attach the two gaskets (#833). #733 #833 [Blue] [Red] Attach.based.on. the.center.of.the. retainer.plate. TFT.monitor.window ・ Attach the TFT monitor window (#402). #402 - A68 ・ D7000 - NICS...
- Page 136 ・ Mount the image sensor unit (#B20051). ・ Tighten the three screws (#678). Caution:.For.some.camera.bodies,.washers.are.already.attached.on.the.face.that.is.for.mounting. the.image.sensor.unit. #678×3 #B20051 Direction.for.positioning ・ Arrange the wires as below, and secure them with the three pieces of the tape [TA-0016 (8×8)]. ・ Connect.the.harness. TA-0016 (8×8)×3 - A69 ・ D7000 - NICS...
- Page 137 VBA29001-R.3814.A ・ Connect the connection-FPC (#1041). #1041 TOGO.PCB.unit ・ Connect.the.FPC.of.the.PD.PCB.unit. Put.inside.the.TOGO.PCB.unit.for. arrangement. ・ Mount the TOGO PCB unit (#B1001RP). #B1001RP Mount.by.sliding.towards.the.direction.of.the. arrow and attach the three terminals first. - A70 ・ D7000 - NICS...
- Page 138 VBA29001-R.3814.A ・ Tighten the four screws (#683). ・ Connect the five FPCs and harness. Inside - A71 ・ D7000 - NICS...
- Page 139 Refer to "How to install inspection and adjustment software for camera body (except imaging)" of ADJUSTMENT.Separate.Volume.②.for.details. Tool (Device) J65155 Adj..Soft.For.Camera.Body Inspection.and.adjustment.for.AE-CCD.positioning Caution.1:.. I n.case.of.running.out.of.the.secondary.rechargeable.battery.of.the.TOGO.PCB,.communications. with.PC.may.become.impossible...In.this.case,.mount.the.rear.cover.and.set.the.settings.of."Time. zone.and.date".on.the.menu. Caution.2:.Before.the.inspection.and.adjustment,.set.the.shooting.mode.dial.of.the.top.cover.unit.to."P". • Take out the screw (#557), diopter adjustment knob (#551), and roller (#550). #557 #551 #550 - A72 ・ D7000 - NICS...
- Page 140 Peel off the tape [TA-0015 (8.5×17)], and unsolder the two wires of the main condenser unit. • In.order.to.prevent.short-circuit,.insulate.the.two.wires.with.the.tape. TA-0015 (8.5×17) [Red] [Black] • Take out the two screws (#629) and one screw (#613). #613 #629×2 - A73 ・ D7000 - NICS...
- Page 141 VBA29001-R.3814.A • Take out the screw (#622). #622 • Slacken the I/F cover unit by pulling in the direction of the arrow, and take out the screw (#613). • Disconnect.the.FPC. #613 I/F.cover.unit - A74 ・ D7000 - NICS...
- Page 142 #657×3 #B25 Temporary.attachment.at.3.places Bottom.cover.unit • Disconnect.the.FPC.of.the.top.cover.unit. • With.the.top.cover.unit.being.pulled.up.as.indicated.by.the.arrow,.make.the.inspection.and.adjustment. for.AE-CCD.positioning. Be.careful.of.connected.FPCs.and.wiring. • Refer.to."Inspection.and.adjustment.for.AE-CCD.positioning".of.D/SLR.ADJUSTMENT.Separate. Volume.②.for.details. Tool (Device) J63119 J63070 J18267 J15443 J15444 Use.Nikon.comm.. product. AE/CCD.use. Color.viewer Lens 2way.level 2way.stage Power.connector. Hex..key.wrench (φ1.5 mm) chart.board AF50/1.4D EP-5B - A75 ・ D7000 - NICS...
- Page 143 VBA29001-R.3814.A Inspection.and.adjustment.of.parallax • Put.the.top.cover.unit.back.to.the.original.position. Top.cover.unit • With.the.rear.cover.unit.being.lifted,.connect.the.two.FPCs. • Mount.the.rear.cover.unit. Rear.cover.unit - A76 ・ D7000 - NICS...
- Page 144 Attach the rear cover unit (#B401) temporarily with the screw (#614). #614 • Mount.the.MB-D11. MB-D11 • Refer.to."Inspection.and.adjustment.of.parallax".of.D/SLR.ADJUSTMENT.Separate.Volume.①.for. details. • For.shutter.release,.use.the.release.button.for.vertical.position.of.MB-D11. • Set.the.distance.between.the.D7000.parallax.chart and the focal plane mark () to "0.7m", and set the focus.ring.of.the.lens.to."0.7m". - A77 ・ D7000 - NICS...
- Page 145 VBA29001-R.3814.A • If.the.result.does.not.meet.the.standard,.make.the.adjustment.with.the.top.cover.unit.being.lifted.as. indicated.by.the.arrow. Be.careful.of.the.connected.FPCs.and.wiring. X-axis.direction 100% Y-axis direction D7000 Parallax chart AF50/1.4D 0.7m D7000.parallax.chart X-axis.direction Y-axis.direction Make.adjustment.with.hex..key.(1.5mm). • After.the.adjustment,.remove.MB-D11. MB-D11 - A78 ・ D7000 - NICS...
- Page 146 VBA29001-R.3814.A • Take out the screw (#614). #614 • Remove.the.rear.cover.unit. Rear.cover.unit - A79 ・ D7000 - NICS...
- Page 147 VBA29001-R.3814.A • Connect.the.FPC.of.the.top.cover.unit. • Take out the three screws (#657), and remove the bottom cover unit. #657×3 Bottom.cover.unit - A80 ・ D7000 - NICS...
- Page 148 VBA29001-R.3814.A • Slacken the IF cover unit by pulling in the direction of the arrow, and tighten the screw (#613). • Connect.the.FPC. #613 IF.cover.unit • Tighten the screw (#622). #622 - A81 ・ D7000 - NICS...
- Page 149 VBA29001-R.3814.A • Tighten the two screws (#629) and one screw (#613). #613 #629×2 • Solder.the.two.wires.of.the.main.condenser.unit. • Attach the tape [TA-0015 (8.5×17)]. TA-0015 (8.5×17) [Red] [Black] - A82 ・ D7000 - NICS...
- Page 150 Attach the roller (#550) and diopter adjustment knob (#551), and tighten the screw (#557). #551 #557 #550 Tool (Device) J18267 J15443 J15444 Use.Nikon.comm.. Use.Nikon. comm..product product. 100% D7000 Parallax chart AF50/1.4D 0.7m Parallax.chart Lens 2way.level 2way.stage Power.connector. Hex..key.wrench MB-D11 (φ1.5mm) AF50/1.4D EP-5B ※ Print.out."parallax.chart.on.Page.C3".in.A4.size.without.zooming.in/out,.and.use.them. - A83 ・ D7000 - NICS...
- Page 151 ・ Mount the shield plate (#79). ・ Tighten the screw (#683). = Hook.×2 #683 ・ Mount the shield plate (#78). ・ Tighten the screw (#617). ・ Tighten the screw (#683). #683 = Hook.×2 #617 - A84 ・ D7000 - NICS...
- Page 152 9..External.Appearance Front.cover.unit ・ . I nsert.a.lumirror.sheet,.etc,.into.the.gap.of.the.top.cover.pop-up.section.as.below...Then.raise.the.section.by. sliding.the.sheet.in.the.direction.of.the.arrow. Approx..2cm Approx.. Lumirror.sheet ・ Mount.the.front.cover.unit. ・ Tighten the two screws (#614). ・ Tighten the two screws (#611). #616 #394 #614×2 #397 #389×2 #390×2 Front.cover.unit #B24RP #611×2 After.mounting.the.front.cover.unit.(#B24),.check.operations.of.the.aperture.coupling.ring.and.each.button. - A85 ・ D7000 - NICS...
- Page 153 VBA29001-R.3814.A SD.cover.unit ・ Mount.the.SD.cover.unit. ・ Tighten the four screws (#614). #440 #B431 #614×4 #436 SD.cover.unit #435 #859 Rear.cover.unit ・ Connect.the.two.FPCs. ・ Mount.the.rear.cover.unit. Rear.cover.unit Rear.cover.unit Valley-fold - A86 ・ D7000 - NICS...
- Page 154 VBA29001-R.3814.A ・ Tighten the three screws (#614). ・ Tighten the screw (#675). #614×2 #614 #675 ・ Attach the rear rubber unit (#B407). #B407 ・ Tighten the two screws (#613). #613×2 - A87 ・ D7000 - NICS...
- Page 155 SB.PCB.unit ○ DC/DC.ISC. ○ PCB.unit SB.lower.cover. ○ unit AF.sensor.unit ○ Prism.box.unit ○ ○ Aperture.control. ○ unit Metering.FPC. ○ ○ unit Front.body.unit ○ ○ ○ ○ Firmware.update • Refer.to."Firmware.update".of.ADJUSTMENT.Separate.Volume.②.for.details. Inspection.and.adjustment.for.AE.accuracy • Refer.to." Inspection.and.adjustment.for.AE.accuracy".of.ADJUSTMENT.Separate.Volume.②.for. ① details. - A88 ・ D7000 - NICS...
- Page 156 J18499 Use.Nikon.product. EF-1 EF-8000 Lens.AF50/1.4D Lens.AF.28/2.8D .Lens.AF-S.VR. Lens.AF. 70-300/4.5-5.6 70-300/4-5.6D Shutter.tester 70-300.mm.lens J18360 Power.supply. Digital.meter Flashmeter Power.connector Standard reflector (10V 5A) converted.EP-5B J63119 J15443 J15444 J63070 Use.Nikon.product. AE.CCD.use.chart. Two-way.level Two-way.stage Color.viewer Power.connector board EP-5B - A89 ・ D7000 - NICS...
- Page 157 VBA29001-R.3814.A Inspection.and.adjustment.for.AF.accuracy • Refer.to." ②.Inspection.and.adjustment.for.AF.accuracy".of.ADJUSTMENT.Separate.Volume.②.for. details. • Insert a paper, etc, into the battery box, in order to secure the power connector (EP-5B). Then, confirm that.the.power.can.be.ON. Insert.a.paper,..etc. Power.connector.EP-5B - A90 ・ D7000 - NICS...
- Page 158 ④ Insert the tip section of the chosen AF X-positioning tool into the below (green-colored) gap. ⑤ Position the AF sensor unit (#B2163) in the direction of the arrow, and tighten the screw. ⑥.Mount.the.rear.body,.and.restore.to.the.former.state. ⑦.Check.the.X-position. J63120 #B2163 Screw - A91 ・ D7000 - NICS...
- Page 159 In case the value of the adjustment software shows "-60μm":. Use the tool with 2.6 mm in the width. (Narrow the gap.) e.g. In case the value of the adjustment software shows "+60μm": ..Use.the.tool.with.3.0.mm.in.the.width...(Widen.the.gap.) - A92 ・ D7000 - NICS...
- Page 160 (BM-3000) J19123 RJ.is.unavailable. J18230 J63120 EF-1 EF-8000 YAW/PITCH. Hex..Key.wrench. AF.X-positioning.tool (φ1.5mm) adjustment.tool Shutter.tester J19124 J18393 J15443 J15444 Z-light×2 Slant.chart 2way.level 2way.stage Reference.lens.or. *Equivalent fluorescent: sub-reference.lens flicker-less Af.50/1.4D ."Inverter".lighting. Use.Nikon.product. Power.connector X.&.Y.charts EP-5B ※ Print.out."X.&.Y.charts.on.Page.C4.and.C5".in.A3.size.without.zooming.in/out,.and.use.them. - A93 ・ D7000 - NICS...
- Page 161 Refer.to." ④.Switch.information.monitor".of.ADJUSTMENT.Separate.Volume.②.for.details. Inspection.of.sequence.operation • Refer.to." ⑤.Inspection.of.sequence.operation".of.ADJUSTMENT.Separate.Volume.②.for.details. Inspection.of.sequence.error • Refer.to." ⑥.Inspection.of.sequence.error".of.ADJUSTMENT.Separate.Volume.②.for.details. CPU.version,.number.of.release.times • Refer.to." ⑦.CPU.version,.number.of.release.times".of.ADJUSTMENT.Separate.Volume.②.for.details. • "Flash.count".is.also.indicated.on.D7000. Inspection.of.LCD.light-up • Refer.to." ⑧.Inspection.of.LCD.light-up".of.ADJUSTMENT.Separate.Volume.②.for.details. Inspection.of.motor.operation • Refer.to." ⑨.Inspection.of.motor.operation".of.ADJUSTMENT.Separate.Volume.②.for.details. Reset.of.compensated.AF.defocus.amount • Refer.to." ⑪.Reset.of.compensated.AF.defocus.amount".of.ADJUSTMENT.Separate.Volume.②.for. details. Rewriting.of.offset.value.of.AF.adj..lens • Refer.to." ⑫.Rewriting.of.offset.value.of.AF.adj..lens".of.ADJUSTMENT.Separate.Volume.②.for. details. - A94 ・ D7000 - NICS...
- Page 162 VBA29001-R.3814.A Bottom.cover.unit Bottom.cover.unit #476 #711×2 #784 #786 #477 #475 #783 #785 #810 ・ Mount.the.bottom.cover.unit. ・ Tighten the seven screws (#657). ・ Tighten the screw (#620). #620 #657×7 Bottom.cover.unit - A95 ・ D7000 - NICS...
- Page 163 VBA29001-R.3814.A External.part ・ Attach the cover (#549). ・ Attach the power back contact cover (#69). #549 Battery.cover.unit ・ Mount the battery cover unit (#B151) at the below angle. MZ-800SEL Bottom.cover.unit #B151 35° MZ-800SEL - A96 ・ D7000 - NICS...
- Page 164 ○ ○ ○ ○ ○ ○ ○ PCB.unit Image.sensor. ○ ○ ○ ○ ○ ○ ○ △ unit DC/DC.ISC. △ PCB.unit Prism.box. unit PD.PCB.unit △ LCD.monitor. ○ unit License. ○ sheet * In.other.cases.than.replacements.of.the.parts,.if.users.point.out.the.problems,.perform.the.image.sensor. cleaning.operations/inspections. - A97 ・ D7000 - NICS...
- Page 165 J63070 J18191 J61185 J63068 Color.viewer ND filter 8× Imaging.adj..tool.lens Luminance.meter (BM-3000) Image.adjustment.3 • Adjustment item: Sensitivity ratio adjustment • Refer.to."Sensitivity.ratio.adjustment".of." ①.Imaging.adjustment".of.ADJUSTMENT.Separate.Volume. ③.for.details.. Tool (Device) J19123 RJ.is.unavailable. J61185 J63068 EF-1 EF-8000 Imaging.adj..tool.lens Luminance.meter (BM-3000) Shutter.tester - A98 ・ D7000 - NICS...
- Page 166 Color.adj..body.for.D3100 Image.of.this.time; captured.by.color.adj..body Compare.differences.in. image.data Cause of NG (Not Good) ① Check light source (re. varia- tion.of.brightness,.lamp.deterio- ration, etc). Image.when.the.color. ② Check SG chart (re. deteriora- reference.value.was.obtained;. tion, etc). captured.by.color.adj..body Check/replace Reacquire.the.color.reference. value.by.color.adj..body. Check-completion - A99 ・ D7000 - NICS...
- Page 167 (Suspected body needing repair) Make.adjustments.so.that.the.same.color. can.be.reproduced.as.that.of.the.image. captured.by.D7000.reference.body. Image.captured.by.D7000.reference.body Adjustment-completion Tool (Device) J11374 J61244 J63112 J63113 Jack D3100. Color.adjusting. SG.chart 200×200.mm color.adj..body device J18498 J63066 J63114 J61247 Lens.AF.28/2.8D D1 filter holder Filter.LB120 Software.for. checking.col..adj.. device (DX) - A100 ・ D7000 - NICS...
- Page 168 Refer.to."Inspection.and.adjustment.of.shutter.via.shot.image".of." ①.Imaging.adjustment".of.. ADJUSTMENT.Separate.Volume.③.for.details.. Tool (Device) J19123 RJ.is.unavailable J61185 J63068 EF-1 EF-8000 Imaging.adj..tool.lens Luminance.meter (BM-3000) Shutter.tester .Inspection.and.adjustment.of.gradient.sensor • Refer.to." ②.Inspection.and.adjustment.of.gradient.sensor".of.ADJUSTMENT.Separate.Volume.③.for. details. Standard:.fm.-1 ° .to.+1 ° Tool (Device) J18267 J15443 J15444 Gradient-sensor.chart Lens.AF50/1.4D 2way.level 2way.stage ※ Print.out."gradient-sensor.chart.on.Page.C6".in.A3.size,.and.use.it. - A101 ・ D7000 - NICS...
- Page 169 Obtaining.of.reference.value • Reference value to be obtained for: Sensitivity and Sensitivity ratio/Sensitivity ratio/color adjustment. • Refer.to." ④ Obtaining.of.reference.value".of.ADJUSTMENT.Separate.Volume.③.for.details... ※.. B efore.obtaining.reference.values,.be.sure.to.check.the.color.adj..device.with.the.software.for. checking.color.adj..device.(DX)[J61247]..W ith.the.color.adj..body.for.D3100.(J61244).and.software.for.checking.color.adj..device.(DX)[J61247],. obtain.the.color.reference.values.(for.checking.color.adj..device). • Start.the.software.DX.for.checking.color.adj..device. • Click."Obtain.color.reference.value"...By.following.the.instructions.of.the.software,.obtain.the.color. reference.values. - A102 ・ D7000 - NICS...
- Page 170 Color.viewer ND filter 8× Imaging.adj..tool.lens. Shutter.tester Inspection.and.adjustment.of.TFT • Refer.to." ③.Inspection.and.adjustment.of.TFT".of.ADJUSTMENT.Separate.Volume.③.for.details. Factory.default.setting • Refer.to." ⑤ Factory.default.setting".of.ADJUSTMENT.Separate.Volume.③.for.details... Confirmation of data • Refer.to." ⑥ Confirmation of data" of ADJUSTMENT Separate Volume ③.for.details... Version.no../Serial.no. • Refer.to." ⑦ Version.number/Serial.number".of.ADJUSTMENT.Separate.Volume.③.for.details... - A103 ・ D7000 - NICS...
- Page 171 50/1.8 Measurement.of.consumption.current.value • Refer.to."Measurement.of.consumption.current.value".of.D/SLR.ADJUSTMENT.Separate.Volume.①. for.details. Standard:. Main.SW/OFF.(Any.operational.button.is.not.pressed.)..200μA or less �ain �W�O� (Half-release timer: OFF)....... 200μA or less �ain �W�O� (Half-release timer: O�)......... 210mA.or.less Main.SW/ON.(TFT.monitor:.ON)......... 310mA.or.less During.LV.(live.view).............. 690mA.or.less During.recording.movie............720mA.or.less - A104 ・ D7000 - NICS...
- Page 172 VBA29001-R.3814.A • How.to.convert.MS-D11 Soldering.position.for. .terminal MS-D11 Back.side MS-D11 Front.side Soldering.position.for. .terminal Bore.a.hole.in.the.cover,.and.pull.out. the.two.wires.from.inside. Tool (Device) Use.Nikon.product. Use.Nikon.product. MB-D11 MS-D11 Power.supply Digital.mult-meter converted (10V 5A) - A105 ・ D7000 - NICS...
- Page 173 FILTER(Smooth) TIME/DIV 500ms/div V/DIV 200mv/div Adjust.position.so. Power.connector CH1 OFFSET that.wavy.line.is. EP-5B easily.visible. Standard Sweep4 Sweep1 Sweep2 Sweep3 Max. Max. Max. Max. 200mV 600mV 800mV 1000mV Min. Min. Min. Min. 80mV 40mV 200mV 250mV - A106 ・ D7000 - NICS...
- Page 174 Charts VBA29001-R.3814.A Size.of.D7000.parallax.chart ※.Set.the.sheet.size.to.A4.by.printer,.and.print.this.out.without.zooming.in/out. Size.of.D7000.X-chart ※.Set.the.sheet.size.to.A3.by.printer,.and.print.this.out.without.zooming.in/out. approx 210mm approx 297mm - C1 ・ D7000 - NICS...
- Page 175 VBA29001-R.3814.A Size.of.D7000.Y-chart ※.※.Set.the.sheet.size.to.A3.by.printer,.and.print.out.without.zooming.in/out. approx 210mm approx 297mm - C2 ・ D7000 - NICS...
- Page 176 D7000.Parallax.chart NICS...
- Page 177 D7000.X-chart - C4 ・ D7000 - NICS...
- Page 178 D7000.Y-chart - C5 ・ D7000 - NICS...
- Page 179 - C6 ・ D7000 - Gradient-sensor.chart NICS...
- Page 180 Distortion: 6' or less Feeling.in.hand Gap of up-mirror in mirror box: None Sub-mirror 59° up-down angle: Up-down 0 ± 20' Sub-mirror.tool Distortion: 8’ or less ∞ Infinity focus ± 80 μm Collimator ∞ Focus lens - R1 ・ D7000 - NICS...
- Page 181 Black/white bound (within frame): None Synchronization Time lag: Fm - 0.11 to 0.15 ms AE.accuracy LV16,.ISO200,.F2.8 : ±0.60EV LV12,.ISO200,.F4 : ±0.50EV Shutter.tester LV6,.ISO200,.F8 : ±0.50EV AF50/1.4D Variation 0.3.EV.or.less AE.mode.difference 0.4.EV.or.less Metering.mode. 0.5.EV.or.less difference Variation.in.continuous. 0.5.EV.or.less shooting - R2 ・ D7000 - NICS...
- Page 182 Operating time: 1000 ms or less Luminance: EV12 Lens: AF50/1.8 accumulated Consumption current accumulated: 500 mAsec or less Measure.by.digital. multi-meter. Release.without.SD.card. Operating time: 180ms or less Consumption current accumulated: 200 mAsec or less - R3 ・ D7000 - NICS...
- Page 183 �� Release shutter 6 times continuously ��Playback on Release shutter 6 times continuously ��Playback on ��Playback on Playback.on. TFT for 5 sec. �� Wait until half-release timer becomes �� Wait until half-release timer becomes .Wait.until.half-release.timer.becomes. OFF: 6 sec. - R4 ・ D7000 - NICS...
- Page 184 ・ Temperature: 23℃ ± 2℃ ・ Humidity: 50% ± 20% more ・ < Operation > Repeat the following cycle: ・ Start LV (live view) ・ .AF.lens.scan.cycled.once. ・ Start.and.record.movie.for.5.mins. ・ Stop.recording.and.LV,.5.min.pause. ・ Delete movie file - R5 ・ D7000 - NICS...
- Page 185 Allowable quantity: 10 dusts or less Any.shutter.speed Size, maximum contrast: Image size: L ・19.pixels.or.less,.11%.or.less ・ 23.pixels.or.less,.9%.or.less ・ 29.pixels.or.less,.7.5%.or.less Distance btwn dusts: 215 pixel or more separation 4928 1232 2464 1232 Zone.I Zone.II 1632 3264 - R6 ・ D7000 - NICS...
- Page 186 各試験で確認 DCFディレクトリ 異常ないこと ′ 年 月 日 × 承認 ′ 年 月 日 × 承認 ′ 年 月 日 × 承認 - R7 ・ D7000 - ′ 年 月 日 × 承認 株 式 会 社 ニ コ ン NICS...
- Page 187 1039 motor motor Mirrup F inside LCD 1045 1119 1120 Pressure bonding 1029 1024 1016 4pin 61pin Shutter monitor 1026 Blue TFT monitor 1049 1022 1008 1114 1020 1112 1115 1113 1046 1023 Black - E1 ・ D7000 - NICS...
- Page 188 LCDFPC unit Metering PCB unit #1026 CN1001 #1022 unit Lever unit #1050 SI-LCD SI-LEDFPC unit CN101 CN102 #1032 2pin 2pin #1030 Mirror UPPIFPC #1016 AFPIFPC unit Rear unit Microphone Speaker unit unit #1053 #1054 - E2 ・ D7000 - NICS...
- Page 189 VBA29001-R.3814.A FUSE.arrangement PD PCB UNIT (Back side) 1S460-012 Phenomenon.when.FUSE.has.blown.out The power is turned on NOT by a rechargeable battery (EN-EL15)/ power connector (EP-5B), but by battery pack (MB-D11). - E3 ・ D7000 - NICS...
- Page 190 ネジロッ� (赤) 1401C SCREWLOCK.1401C TNG-87 サ�コール TNG-87 ★ SANKOL.TNG-87 L-271 ロッ�タイト L-271 LOCTITE.L-271 LEN317A グリース LEN317A GREASE.LEN317A 汎用品 パーソナルコ�ピュータ USE.MARKETED. PERSONAL.COMPUTER PRODUCT. J65155 カメ�部調整用ソフト ★ ADJ..SOFT.FOR.CAMERA.BODY J65156 撮像部調整用ソフト ★ ADJ..SOFT.FOR.IMAGING J61247 色調整装置確認ソフト ★ SOFT.FOR.COLOR.ADJ.DEVICE. CHECK.. - T1 ・ D7000 - NICS...
- Page 191 APERTURE.LEVER.POSITIONING. GAUGE J18004-1 J18004 用基準ゲージ REFERENCE.GAUGE.FOR.J18004 J19132 メイ� ・ サブミ�ー角度検査機 MAIN/SUB.MIRROR.ANGLE. INSPECTION.TOOL J19132G ミ�ー角度基準工具 ( 原器) MIRROR.ANGLE.REFERENCE.TOOL (of ACCURACY OBTAINED) J19132B 59 ゜測定用ミ�ー (D300/D200 対応) 59° ° 59° ° D200.D300 MEASUR. USE MIRROR 59(D300/D200) - T2 ・ D7000 - NICS...
- Page 192 J19004-1 イ�ジケータ及びスタ�ド DIAL.INDICATOR.AND.STAND J18001-1 ボディバッ�出し工具 BODY-BACK.FOCUS.GAUGE J19001 ∞合致コリメーターF=600mm INFINITY-FOCUS.COLLIMATOR. F=600mm J18394 無限合致調整用ス�リー� INFINITY.FOCUS.ADJUSTMENT. SCREEN J18010 無限大合致基準レ�ズ50/1.8 INFINITY.STANDARD.LENS.50/1.8 J63119 AE CCD用チャートボード ★ AE/CCD-USE.CHART.BOARD. USBケーブルUC-E4 製品転用 USB.CABLE.UC-E4 USE.NIKON.PRODUT J15445 マルチカム 4800DX AFチャート ★ MULTI-CAM.4800DX.AF.CHART J15409 チャートボード CHART.BOARD - T3 ・ D7000 - NICS...
- Page 193 2 枚使用 ND.FILTER.8x USE.TWO.FILTERS. J18266 AF調整用Zレ�ズ (1m用) ADJUSTMENT Z-LENS (FOR 1m) J15259 AF調整工具台 AF.ADJUSTING.TOOL J15280 Zレ�ズ用支持ホルダー LENS.HOLDER J18230 YAW ・ PITCH工具 YAW/PITCH.ADJUSTMENT.TOOL J63120 AF X 位置出し工具 ★ AF.X-POSITIONING.TOOL J18267 AF50/1.4D LENS.AF50/1.4D J18498 AF28/2.8D LENS.AF28/2.8D - T4 ・ D7000 - NICS...
- Page 194 ※フリッカレス (イ�バーター) 蛍光灯器具 Z-light×2 ※ Equivalent fluorescent: Flicker-less “Inverter“.lighting. J18393 斜めチャート SLANT.CHART J61185 撮像調整用工具レ�ズ IMAGING.ADJ..TOOL.LENS J63085 フィルター SP1 FILTER.SP1 J63086 フィルター SP2 FILTER.SP2 J63087 フィルター SP3 FILTER.SP3 J61246 D7000 工具ボディ (撮像用基準ボディ) ★ D7000 TOOL BODY (FOR IMAGING) - T5 ・ D7000 - NICS...
- Page 195 (REF. TIE-07036) 汎用品 オシロスコープ USE.MARKETED. OSCILLOSCOPE PRODUCT. 3 出力安定化電源 汎用品 3-OUTPUT.STABILIZED.POWER. USE.MARKETED. PRODUCT. SUPPLY J61232 イメージセ�サー�リーニ �グ機能搭載ボディ 電流検出治具 IMAGE.SENSOR. CURRENT.DETECTOR CLEANING.FUNCTION. BUILT-IN.BODY J61244 D3100 色調整ボディ COLOR.ADJUSTMENT.BODY.FOR. D3100 D3100. J11374 ジャッキ 200 × 200 mm JACK.200×200mm - T6 ・ D7000 - NICS...
- Page 196 新規工具 工具番号 RJ��� ��� 名 称 備 考 New.tool Tool.No. RJ.rank Name.of.tool Others J63114 フィルターLB120 Filter.LB120 J63066 D1用フィルターホルダー FILTER.HOLDER.FOR.D1 J63113 SG チャート SG.CHART J63112 色調整装置 付属のフードを使用 COLOR.ADJUSTING.DEVICE USE.SUPPLIED.HOOD. J15443 2 ウェイ水準器 2WAY.LEVEL J15444 2 ウェイステージ 2WAY.STAGE - T7 ・ D7000 - NICS...
- Page 197 #700 #701 #635 #696 #693 #650 #654 #629 #650 #630 QUANTITY ASSEMBLY Top.cover.FPC.unit Release.mode.dial.lock.button Separation.of.Front.Body.from.Rear.Body IF.PCB.unit PARTS NAME DISASSEMBLY TYPE OF SCREW #635 #699 #602 #635 #635 #706 #706 #697 #706 #675 QUANTITY ASSEMBLY - S1 ・ D7000 - NICS...
- Page 198 TYPE OF SCREW #674 #673 #680 #680 #637 #711 #661 #660 #635 #606 QUANTITY ASSEMBLY PARTS NAME Lens.release.button.unit Mirror.driving.unit Metering.FPC.unit LCD.unit Eyepiece.block.unit DISASSEMBLY TYPE OF SCREW #635 #669 #514 #683 #656 #635 QUANTITY ASSEMBLY - S2 ・ D7000 - NICS...
Need help?
Do you have a question about the D7000 and is the answer not in the manual?
Questions and answers