
Subscribe to Our Youtube Channel
Related Manuals for Candy CATL 6108 GVSI


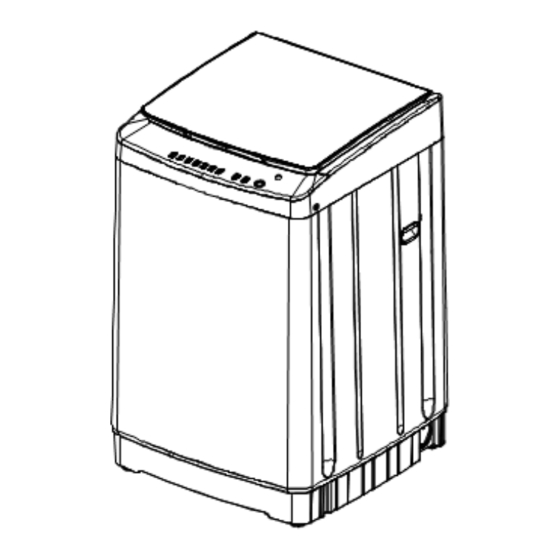
Summary of Contents for Candy CATL 6108 GVSI
- Page 1 FUZZY LOGIC CONTROL FULLY AUTOMATIC WASHING MACHINE Model: CATL 6108 GVSI INSTRUCTION MANUAL ------------------------------------------- Please read instructions carefully before using...
- Page 2 .IMPORTANT SAFEGUARDS………… 。 。 ……………… … 1. This product belongs to Class I appliances. Please pay attention to electricity safety when using: This machine uses a single-phase two-pole grounded power outlet, the outlet must be reliably grounded, and the grounding terminal should not be connected with gas pipelines, water pipes and other utilities.
- Page 3 9. Please avoid direct sunlight to the washing machine, do not be near heat sources such as heating. 10. Do not place the machine on a carpet. Do not place the machine with a drain function on a place where there is no floor drain. 11.
- Page 4 avoid danger. 20. Never disassemble, repair, or modify this unit by yourself. 21. User manual must have such below warning. a). This appliance is not intended for use by persons (including children) with reduced physical, sensory or mental capabilities, or lack of experience and knowledge, unless they have been given supervision or instruction concerning use of the appliance by a person responsible for their safety.
-
Page 5: Parts Description
PARTS DESCRIPTION AND LOADING LIST 1. Parts description 1.Toplidcomponent 9.Adjustmentfoot 2.Washingpowderbox 10.Controlpanelholder 3.Filter 11.Inletvalve 4.Innerdrum 12.Housing... - Page 6 2.Loading list(Follow export sales actual requirement) Packing list Quantity Remarks Automatic washing machine Inlet pipe Bottom lid board User manual Some models have been Drain pipe parts installed randomly Self-tapping screws USING ADVICE 1. Low-bubble detergent is recommended during the use of this machine. 2.
- Page 7 o as not t to splash during th he washin ng proces STALLAT TION ME THOD 1、 ation note 、Installa Choose to place the wash hing mac hine in a dry place e without t direct su unlight. There sh hould be a floor dr rain at the...
-
Page 8: Install The Bottom Cover
adjust the supporting feet (adjustment feet) on the front of the washing machine to keep the washing machine level. (1) (2)、 Check the level of the If you have a spirit level, set the bubble in the spirit level. washing machine visually. 2、Install the bottom cover: The bottom cover is placed between the top of the washing machine box and ... - Page 9 3.Connection of the inlet/drain hose 1) Connection between water inlet and tap (Please select according to the actual water inlet pipe) Common water inlet pipe Double thread water inlet a. To ensure that there is a sealing pad in the joint of the water inlet and the installation is smooth.
-
Page 10: Connection Of The Drain Hose
b. According to the diagram, the water inlet is aligned with the tap and the nut on the water inlet is tightened. Sealing gasket 2) Connection between water inlet and Washing machine a. Before connecting, please check whether the Gasket sealing gasket in the water inlet nut has fallen Inlet valve joint... - Page 11 BEFORE WASHING INSTRUCTIONS 1. Check before washing: Is the inlet pipe connected? Is the faucet valve open? Is the power cable plugged in? Is the power outlet grounded reliably? Is the washing machine stable? Is the drain put down? And no entanglement? ...
-
Page 12: Control Panel
CONTROL PANEL Power on off 1. INDICATOR STATUS MEANING Aflashinglightindicatesthattheprogramisrunning. Thelightisontoshowthestatustoberunorselected. Faultcodeisdisplayedincaseoffailure,e.g.E4. Whentheprogramisset,thedigitaldisplayshowsthetotalrunningtime. Thedigitaldisplayshowsthetotaltimeofpresetduringtheprocedure. Thedigitaldisplayshowsremainingtimeaftertheprogramstart. Digitaldisplayshowsinintelligentfuzzydetectionis — —. 2. BUTTON INSTRUCTIONS 1) “ON/OFF” BUTTON Press the “ON/OFF” button to turn on the power or cut off the power. 2). - Page 13 Intelligent: automatically adjusts the standard washing procedure to suit the water level according to the amount of clothing. Normal: routine washing procedure. Heavy: washing of larger, thicker clothes. Gentle: wool or underwear wash. Speedy: to wash the slight dirty clothes. Eco: washing procedure of saving water and electricity.
-
Page 14: Operation Method
The preset time can be set. OPERATION METHOD 1. General operation method 1) Press the ON/OFF button to turn on the power. 2) Press the Program button to select the appropriate fully automatic program. After turn on the power, the washing machine is automatically set to "Normal" program. If you need to select other full-automatic programs, you can press the "Program"... -
Page 15: Maintenance
2) Press the "Wash", "Rinse" and "Spin", "Water level" and "Preset" function buttons to set the appropriate washing time, rinsing times, spinning time, appropriate water level and appropriate appointment time, and whether there is "water retention" function. 3) Press the “Start/Pause” button to boot the system. 4) Close the top cover and the washing machine enters the running state. -
Page 16: Troubleshooting
Pull the filter out by Turn the filter bag Reinstall the Remove the filter pressing and holding the hook. from filter from inside out, filter cover. and wash in water to remove the lint. 2. Clean the inlet valve filter. The inlet valve filter is easy to be blocked by impurities and hinders water intake. - Page 17 amount of water flowing out of the drain pipe. This is the residual water when the factory performance is tested. In the process of washing or rinsing, water inflow sometimes occurs. This is due to the automatic replenishment of the water level. Washing machine setup When the rinsing program is started, no water is ...
- Page 18 There is no The voltage is too low or too Unplug the power plug and wait display when high. until the voltage is normal the voltage is too low, or the fuse may be open when the voltage is too high.
-
Page 19: Specification Sheet
Note: After you check the items and remove the trouble, restart the washing machine. If there is still an abnormality, please unplug the power plug and call our customer service phone as soon as possible. SPECIFICATION SHEET Model CATL 6108 GVSI Power 220~240V/50Hz Rated washing / dehydration 9.0kg volume(kg)... -
Page 20: Wiring Diagram
WIRING DIAGRAM 6 5 3 2 1 GND VCC H1 H2 H3 Drain Softener Drain Pump valve Water motor... - Page 21 PROGRAM TIMETABLE Rinse Total Program Washing Spinning time The first rinsing The second rinsing The third rinsing Washing14 spinni Washi spinnin spinni about Water Draina Draina Washing3m Draina Intelli mins 45mi inlet gent mins 4mins inlet 3mins inlet 4 mins Washing Spinni spinnin...
Need help?
Do you have a question about the CATL 6108 GVSI and is the answer not in the manual?
Questions and answers