Chapters
Table of Contents

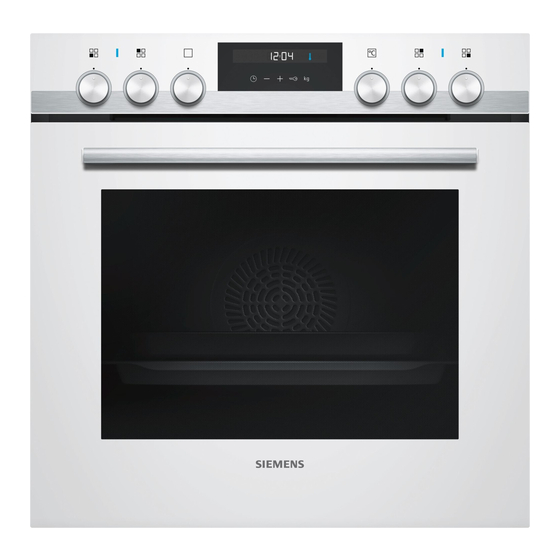
Related Manuals for Siemens HE517AB 0 Series


Summary of Contents for Siemens HE517AB 0 Series
- Page 1 Built-in cooker HE517AB.0 User manual and installation instructions Register your product on My Siemens and discover exclusive ser- vices and offers. siemens-home.bsh-group.com/welcome The future moving in. Siemens Home Appliances...
-
Page 2: Table Of Contents
en Safety 1.2 Intended use Table of contents This appliance is designed only to be built into kitchen units. Read the special installation instructions. USER MANUAL Only a licensed professional may connect ap- Safety .............. 2 pliances without plugs. Damage caused by in- correct connection is not covered under the Preventing material damage ....... -
Page 3: Safety
Safety en Opening the appliance door creates a The appliance and its parts that can be draught. Greaseproof paper may come into touched may have sharp edges. contact with the heating element and catch ▶ Take care when handling and cleaning fire. -
Page 4: Preventing Material Damage
en Preventing material damage Children may breathe in or swallow small WARNING ‒ Risk of electric shock! parts, causing them to suffocate. When changing the bulb, the bulb socket con- ▶ Keep small parts away from children. tacts are live. ▶ Do not let children play with small parts. ▶... -
Page 5: Familiarising Yourself With Your Appliance
Familiarising yourself with your appliance en 3.2 Saving energy If the cooking time is relatively long, you can switch the appliance off 10 minutes before the cooking time If you follow these instructions, your appliance will use ends. less power. ¡ There will be enough residual heat to finish cooking Only preheat the appliance if the recipe or the recom- the dish. -
Page 6: Rapid Heating
en Familiarising yourself with your appliance 4.2 Buttons and display You can use the buttons to set various functions for your appliance. The display shows the settings. If a function is active, the corresponding symbol lights up in the display. The clock symbol only lights up when you change the time. -
Page 7: Shelf Supports
Familiarising yourself with your appliance en Symbol Function Oven light Illuminate the cooking compartment without heating. → "Lighting", Page 7 Programme Use programmed setting values for various types of food. → "Programme", Page 12 4.4 Temperature and setting levels There are different settings for the types of heating and functions. Note: For temperature settings above 250 °C, the appliance reduces the temperature to approx. -
Page 8: Appliance Door
en Accessories Appliance door If you open the appliance door during operation, the operation continues. 5 Accessories Use original accessories. These have been made espe- The accessories supplied may differ depending on the cially for your appliance. appliance model. Note: Accessories may become deformed if they get hot. - Page 9 You will find a comprehensive range of products for Wire rack your appliance in our brochures and online: on univer- siemens-home.bsh-group.com sal pan Accessories vary from one appliance to another. When purchasing accessories, always quote the exact product number (E no.) of your appliance.
- Page 10 en Rapid heating ¡ You can also set a cooking time and end time on Use the function selector to set the required type of ▶ the appliance. heating. → "Time-setting options", Page 10 Changing the temperature Changing the type of heating You can change the temperature at any time. You can change the type of heating at any time.
- Page 11 Time-setting options en Press the button repeatedly until is highlighted 9.3 Setting the cooking time in the display. You can set a cooking time for operation of up to 23 Press the or button. hours 59 minutes.
- Page 12 en Programme 10 Programme The programmes help you to use your appliance to Cookware made from the following material is not prepare different dishes by selecting the optimum set- suitable: tings automatically. ¡ Bright, shiny aluminium ¡ Unglazed clay ¡ Plastic or plastic handles 10.1 Cookware for programmes You should therefore use heat-resistant cookware that is suitable for temperatures up to 300 °C.
- Page 13 Childproof lock en No. Food Cookware Weight setting Add liquid Shelf Information posi- tion Roasting dish with Weight of meat Cover the Do not sear the meat 08 Leg of lamb, well- bottom of the beforehand done Boned, seasoned roasting dish, and add up to 250 g ve- getables if re-...
- Page 14 en Basic settings 12 Basic settings You can configure the basic settings for your appliance to meet your needs. 12.1 Overview of the basic settings Here you can find an overview of the basic settings and factory settings. The basic settings depend on the features of your appliance.
- Page 15 Cleaning and servicing en Using oven cleaner in a hot cooking compartment New sponge cloths contain residues from production. damages the enamel. Wash new sponge cloths thoroughly before use. ▶ Never use oven cleaner in the cooking compartment ▶ when it is still warm. Remove all food remnants from the cooking com- ▶...
- Page 16 en cleaning assistance humidClean Area Suitable cleaning agents Information Rails ¡ Hot soapy water Soak any heavily soiled areas and use a brush or steel wool. Tip: Remove the shelf supports for cleaning. → "Shelf supports", Page 17 AccessorIes ¡ Hot soapy water Soak any heavily soiled areas and use a brush or steel wool. Enamelled accessories are dishwasher-safe.
- Page 17 Shelf supports en 15 Shelf supports To clean the rails and the cooking compartment, or to 15.2 Attaching the shelf supports replace the rails, you can remove these. Notes ¡ The rails only fit on the right or left. 15.1 Detaching the shelf supports ¡...
- Page 18 en Appliance door Slide the appliance door straight onto the two WARNING ‒ Risk of injury! hinges . Slide the appliance door on as far as it When the hinges are not secured, they can snap will go. shut with great force. Open the appliance door fully.
- Page 19 Appliance door en Remove the door cover . 16.4 Fitting the door panes WARNING ‒ Risk of injury! The hinges on the appliance door move when the door is opened and closed, which could trap your fingers. Keep your hands away from the hinges. ▶...
-
Page 20: Troubleshooting
en Troubleshooting Close the locking levers on the left- and right-hand Close the appliance door. hinges . Note: Do not use the cooking compartment again until the door panes have been correctly fitted. a The locking levers are closed. The appliance door is secured and cannot be detached. -
Page 21: Disposal
Disposal en Fault Cause and troubleshooting Electronics fault A message with appears in the dis- Press the button. play, e.g. - . If required, reset the time. ‒... -
Page 22: Baking Tray
en Customer Service 19 Customer Service If you have any queries on use, are unable to rectify 19.1 Product number (E-Nr.) and production faults on the appliance yourself or if your appliance number (FD) needs to be repaired, contact Customer Service. You can find the product number (E-Nr.) and the pro- Detailed information on the warranty period and terms duction number (FD) on the appliance's rating plate. -
Page 23: How It Works
How it works en ¡ Place the food to be grilled on the wire rack. In ad- Cookware with lid dition, slide the universal pan in at least one shelf ¡ Place the cookware onto the wire rack. position lower, with the slanted edge facing the ap- ¡... - Page 24 en How it works Food Accessories/cookware Shelf pos- Type of Temperature Cooking ition heating in °C/grill time in mins setting Fillet of beef, medium, 1 kg Wire rack 210-220 40-50 Universal pan Pot-roasted beef, 1.5 kg Cookware with lid 200-220 140-160 Sirloin, medium, 1.5 kg...
-
Page 25: Diameter 26 Cm Springform Cake Tin
Installation instructions en Position baking tins/dishes either next to one another or offset on different shelves so that they are not dir- ectly one above the other in the cooking compartment. Recommended settings for baking Food Accessories/cookware Shelf pos- Type of Temperature in Cook- ition... -
Page 26: 21.2 General Installation Instructions
en Installation instructions 21.1 Appliance combination The hob and oven must be made by the same manu- facturer and be designed to work in combination. The combination points must be the same. Comply with the dimensions indicated in the hob's in- stallation instructions. ¡... - Page 27 Installation instructions en Connecting the appliance to the electricity 21.4 Installation below a worktop supply Observe the installation dimensions and the installation Note: Only a licensed professional may connect the ap- instructions when installing below a worktop. pliance. Damage caused by incorrect connection is not covered under the warranty.
- Page 28 en Installation instructions For handleless kitchens with vertical bar handle strips: Attach a suitable filling piece in order to cover ‒ any sharp edges and to guarantee a safe install- ation. Pre-drill aluminium profiles to establish a screw ‒ connection ...
- Page 32 Valid within Great Britain: Imported to Great Britain by BSH Home Appliances Ltd. Grand Union House Old Wolverton Road Wolverton, Milton Keynes MK12 5PT United Kingdom Manufactured by BSH Hausgeräte GmbH under the trademark licence of Siemens AG *9001734468* 9001734468 (020329) ...
Need help?
Do you have a question about the HE517AB 0 Series and is the answer not in the manual?
Questions and answers