Hilti DX 9 HSN Manual
Hide thumbs
Also See for DX 9 HSN:
- Original operating instructions (72 pages) ,
- Quick start manual - supplement (21 pages) ,
- Quick start manual (16 pages)
Table of Contents
Advertisement
Quick Links
Advertisement
Table of Contents

Subscribe to Our Youtube Channel
Related Manuals for Hilti DX 9 HSN


Summary of Contents for Hilti DX 9 HSN
- Page 1 DX 9–HSN English Printed: 28.06.2017 | Doc-Nr: PUB / 5359693 / 000 / 00...
- Page 2 Printed: 28.06.2017 | Doc-Nr: PUB / 5359693 / 000 / 00...
-
Page 3: Table Of Contents
Contents Information about the documentation ........About this documentation . -
Page 4: Information About The Documentation
Troubleshooting ..........Remedying malfunctions after misfiring . -
Page 5: Product Information
The tool may be operated, serviced and maintained only by trained, authorized personnel who have received special instruction regarding the hazards that may be encountered. ▶ Use the tool for the first time only after you have been trained by a Hilti specialist on how to use it safely. Personal safety ▶... - Page 6 ▶ Store unused cartridges in a dry place, where they are locked away or high up and out of reach of children. ▶ Do not operate the tool when parts are damaged or when the controls do not function correctly. Have the tool repaired by Hilti Service. Safety at the workplace ▶ Ensure that the working area is well lit.
-
Page 7: Description
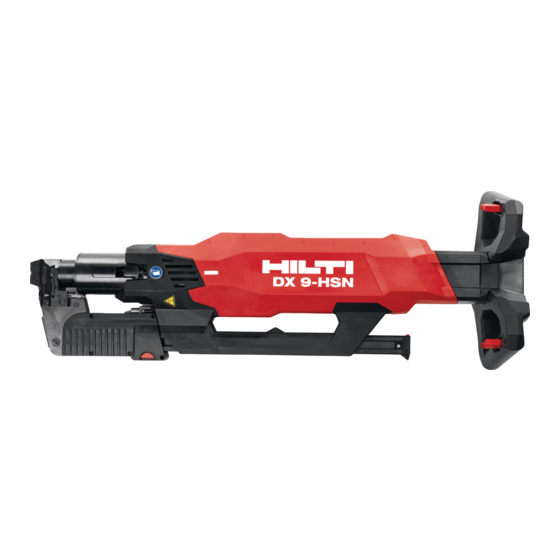
3 Description 3.1 Overview of the product English Printed: 28.06.2017 | Doc-Nr: PUB / 5359693 / 000 / 00... -
Page 8: Intended Use
(e.g. the serial number of the tool, the number of fasteners driven since the last tool service, etc.), can be read by the Hilti Connect smartphone app. After cleaning, the number of fasteners driven before cleaning is again due can be reset by pressing the reset button. -
Page 9: Information Shown On The Display
The service indicator and the built-in counter for the number of nails that can be driven before the next service is due are reset by Hilti Service when the tool is serviced. The smartphone app can be used to activate demo mode in which the various messages indicated by the service interface over a period of 48 fasteners driven, up to and including the need for maintenance, are presented. -
Page 10: Items Supplied
3.7 Items supplied Fastening tool, toolbox, cleaning set, scraper, ramrod, Hilti lubricant spray, operating instructions. Note You can find other system products approved for use with this product at your local Hilti Center or online at: www.hilti.com 4 Technical data 4.1 Technical data... -
Page 11: Vibration
1. Check the fastening tool for visible signs of damage, especially to the components shown in the illustra- tion. Result Visible signs of damage are found. ▶ Have the tool repaired by Hilti Service. Catch Pressure pin Slider and pivoting plate Nosepiece 2. -
Page 12: Loading Fastener Strips
The slider and pivoting plate may be jammed. The tool should be cleaned again and the test repeated. If the problem persists, the tool must be repaired by Hilti Service. 4. Release any pressure on the tool. -
Page 13: Loading Cartridge Strips
5.1.4 Loading cartridge strips 1. Insert the cartridge strips from above in the cartridge loading channel. Materials 6.8/11 M40 red or other cartridges of a type approved for use with the tool (please refer to the car- tridge recommendations printed in the instructions for use of the fasteners) 2. -
Page 14: Closing The Rotating Sleeve
5.1.6 Closing the rotating sleeve ▶ Turn the rotating sleeve as far as it will go. Use the scraper or some other tool as an aid, if necessary. Note If the rotating sleeve is not fully closed it will not be possible to press the fastening tool fully against the working surface and, accordingly, the tool cannot be operated. -
Page 15: Checking The Nail Stand-Off
3. Position the tool at the point where the next fastener is to be driven and repeat the steps described. In doing so, observe the information shown in the display. → page 7 Note Nail stand-off should be checked immediately after driving the first fasteners and subsequently at regular intervals so that the driving power of the tool can be set to the right value in order to ensure that fasteners are driven correctly. -
Page 16: Removing Cartridges From The Tool
5.2.4 Removing cartridges from the tool 1. Press the cartridge strips forward, as far as possible, in the direction of advance. 2. Pull the cartridge strips out of the tool at the cartridge strip exit aperture. 5.2.5 Removing fasteners from the tool Note The fasteners can normally remain in the tool. -
Page 17: Disassembling The Base Plate
2. Pull out the catch and hold it in this position. Pull the piston out of the piston guide and then release the catch. 3. Pull the piston brake out of the base plate. 4. Check the piston and piston brake for damage. Check the piston for straightness by rolling it on a smooth surface. -
Page 18: Fitting The Base Plate
DANGER Risk of burns! Parts of the tool may be very hot after the tool has been in use. ▶ If it is necessary to carry out maintenance without first allowing the tool to cool down, it is essential that protective gloves are worn. 1. - Page 19 2. Pull out the catch and hold it in this position. Pull the piston out of the piston guide and then release the catch. 3. Pull the piston brake out of the base plate. English Printed: 28.06.2017 | Doc-Nr: PUB / 5359693 / 000 / 00...
-
Page 20: Wear Criteria For Important Parts Of The Tool
7. Use the small round brush to clean the cartridge chamber and the adjoining holes for the power regulation pin. 8. Use the narrow round brush to clean the cartridge guideway. 9. Use Hilti lubricant spray to lubricate the moving parts of the fastener strip guides and the fastener strip guides in the base plate. Note Use of other lubricants may damage the rubber parts, especially the piston brake. - Page 21 New condition Worn Obvious signs of chipping. Have it replaced by Hilti Service 7 Troubleshooting 7.1 Remedying malfunctions after misfiring ▶ Press the nose of the tool against the working surface and pull the trigger. ▽ The cartridge doesn’t fire.
- Page 22 5. Close the rotating sleeve. → page 12 7.3 Troubleshooting If the trouble you are experiencing is not listed in this table or you are unable to remedy the problem by yourself, please contact Hilti Service. Trouble or fault Possible cause...
- Page 23 ▶ Clean the base plate and remove all foreign objects. Take care to ensure adequate lubrication of the fastener strip guides with Hilti lubricant spray. Part of the nail detector is broken. ▶ Check for correct operation of the nail detector by checking that the tool is ready for use →...
- Page 24 Most of the materials from which Hilti tools and appliances are manufactured can be recycled. The materials must be correctly separated before they can be recycled. In many countries, your old tools, machines or appliances can be returned to Hilti for recycling. Ask Hilti Service or your Hilti representative for further information.
- Page 25 Printed: 28.06.2017 | Doc-Nr: PUB / 5359693 / 000 / 00...
- Page 26 Hilti = registered trademark of Hilti Corp., Schaan 20170612 Printed: 28.06.2017 | Doc-Nr: PUB / 5359693 / 000 / 00...
Need help?
Do you have a question about the DX 9 HSN and is the answer not in the manual?
Questions and answers