Table of Contents
Advertisement
Available languages
Available languages
Quick Links
DO22301C
Handleiding
Mode d'emploi
Gebrauchsanleitung
Instruction booklet
Manual de instrucciones
Istruzioni per l'uso
Návod k použití
Návod na použitie
Combi microgolfoven
Four à micro-ondes combiné
Kombi Mikrowelle
Combi microwave oven
Microondas combi
Forno a microonde combinato
Kombinovaná mikrovlnná trouba s horkovzduchem a grilem
Kombinovaná mikrovlnná rúra s teplovzduchom a grilom
PRODUCT OF
Advertisement
Table of Contents

Related Manuals for Linea 2000 DOMO DO22301C


Summary of Contents for Linea 2000 DOMO DO22301C
- Page 1 DO22301C Handleiding Combi microgolfoven Mode d’emploi Four à micro-ondes combiné Gebrauchsanleitung Kombi Mikrowelle Instruction booklet Combi microwave oven Manual de instrucciones Microondas combi Istruzioni per l’uso Forno a microonde combinato Návod k použití Kombinovaná mikrovlnná trouba s horkovzduchem a grilem Návod na použitie Kombinovaná...
- Page 2 Required for R32/R290 Refrigerant only CAUTION RISK OF FIRE Lees aandachtig alle instructies - bewaar deze handleiding voor latere raadpleging. Lisez attentivement les instructions - gardez le mode d’emploi pour utilisation ultérieure. Lesen Sie genau die Anweisungen - bewahren Sie die Gebrauchsanleitung für spätere Referenz auf.
-
Page 3: Garantie
GARANTIE Geachte klant, Al onze producten ondergaan steeds een strenge kwaliteitscontrole, alvorens ze aan je worden aangeboden. Mocht je desondanks toch nog problemen hebben met jouw toestel, dan betreuren wij dit ten zeerste. In dat geval verzoeken wij je contact op te nemen met onze klantendienst. Onze medewerkers zullen je met plezier verder helpen. - Page 4 · Boerderijen · Hotel- en motelkamers en andere omgevingen met een residentieel karakter · Gastenkamers, of gelijkaardige · Dit toestel mag gebruikt worden door kinderen vanaf 16 jaar en personen met een fysieke of sensoriële beperking of mensen met een beperkte mentale capaciteit of gebrek aan ervaring of kennis, op voorwaarde dat deze personen toezicht krijgen of instructies hebben gekregen over het gebruik van het toestel op een veilige manier en dat ze ook de gevaren...
- Page 5 · Laat het snoer niet op een heet oppervlak of over de rand van een tafel of aanrecht hangen. · Houd het snoer uit de buurt van scherpe randen en hete onderdelen of andere warmtebronnen. Dek het toestel niet af. ·...
- Page 6 I REINIGING EN ONDERHOUD · Dompel het toestel, de voedingskabel of de stekker nooit onder in water of een andere vloeistof. Dit om elektrische schokken of brand te voorkomen. · Als het toestel niet goed onderhouden wordt, kan dit de levensduur van het toestel drastisch verminderen en een gevaarlijke situatie veroorzaken.
- Page 7 · De inhoud van babyflessen en babyvoeding moet altijd geschud of geroerd worden voor consumptie. Ook de temperatuur moet gecontroleerd worden alvorens het voedsel te gebruiken, om brandwonden te voorkomen. · Het opwarmen van vloeistoffen in de oven kan resulteren in een verlate kookreactie van de vloeistof.
- Page 8 · Het toestel is voorzien van een kort elektrisch snoer, ter voorkoming van struikelen of verstrikt raken in het snoer. BEWAAR DEZE INSTRUCTIES OM LATER TE RAADPLEGEN MATERIALEN DIE KUNNEN GEBRUIKT WORDEN IN DE MICROGOLFOVEN Hieronder vind je een lijst van voorwerpen die al dan niet in het toestel kunnen gebruikt worden. Indien je het voorwerp dat je wilt gebruiken niet terugvindt in deze lijst, kan je via volgende handeling nagaan of het voorwerp geschikt is voor de microgolf: Vul een microgolfveilige container met 250 ml koud water en plaats dit samen met het te testen voorwerp...
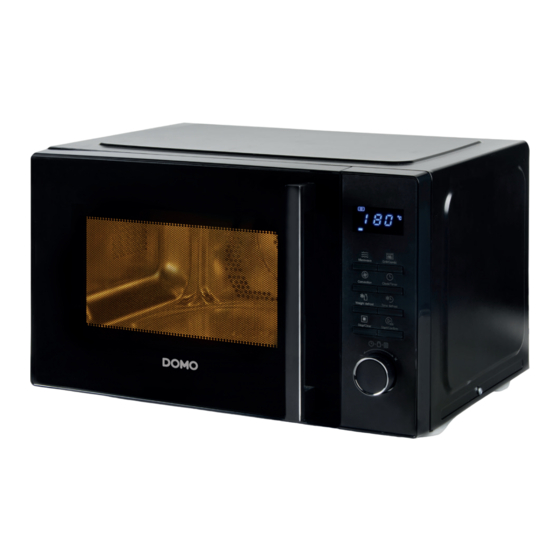
- Page 9 ONDERDELEN Kijkvenster Veiligheidsslot Glazen draaiplateau Draaiplateausteun Controlepaneel Microwave Grill/Combi. Grillrekje Beschermingsplaatje microgolfgeleider - verwijder dit nooit! Clock/Timer Convection Microgolf Convectie Weight defrost Time defrost Ontdooien volgens gewicht Stopknop Stop/Clear Start/Confirm Grill/combi Klok/timer Ontdooien volgens tijd (Snel)startknop 16. Draaiknop Waveguide Cover ...
-
Page 10: Voor Het Eerste Gebruik
VOOR HET EERSTE GEBRUIK INSTALLATIE · Controleer de oven op eventuele schade, zoals deuken of een beschadigde deur. Gebruik de oven niet wanneer hij beschadigd is. · Verwijder de beschermende film rond het toestel, deze werd aangebracht om krassen te voorkomen. ·... -
Page 11: Klok Instellen
KLOK INSTELLEN Om de klok in te stellen op het toestel volg je de volgende stappen: Steek de stekker in het stopcontact, op de display verschijnt “0:00”. Druk 2x op de knop klok/timer om de tijd in te stellen. Je kan de tijd instellen van “0:00” tot “23:59”. - Page 12 Druk op start om de gekozen instelling in werking te laten gaan. ! Opgelet: wanneer de ingestelde tijd voor de helft verstreken is, zal je een signaal horen. Het is aangeraden om het voedsel om te draaien. Wanneer je de deur opent en terug sluit en daarna op start drukt, zal het kookproces vervolgen.
- Page 13 Convectiefunctie zonder voorverwarmfunctie Druk op de knop convectie. “110°C” verschijnt op de display. Druk meermaals op deze knop of draai aan de draaiknop tot de gewenste temperatuur op de display verschijnt. Je kan de temperatuur instellen van 110°C tot 200°C. Druk op de startknop om deze instelling te bevestigen.
- Page 14 ONTDOOIEN VOLGENS TIJD Druk op de knop ontdooien volgens tijd. Op de display verschijnt “d-2“. Draai aan de draaiknop om de gewenste tijd in te stellen. De maximum in te stellen tijd is 95 minuten. Druk op start om de gewenste instelling in werking te laten gaan. Als het voedsel ontdooid is, hoor je een signaal.
-
Page 15: Stage Cooking
A5 - Vis 150 g 250 g 350 g 450 g 650 g A6 - Pasta 50 g (met 450 ml koud water) 100 g (met 800 ml koud water) 150 g (met 1200 ml koud water) A7 - Soep 200 ml 400 ml 600 ml... -
Page 16: Reiniging En Onderhoud
Druk op de knop microgolf om de gewenste vermogensinstelling te kiezen. Druk meermaals op de toets om het vermogen aan te passen of draai aan de draaiknop tot op de display P80 verschijnt. Druk op de startknop om de gewenste instelling te bevestigen. Draai aan de draaiknop tot 7 minuten op de display verschijnt. -
Page 17: Probleem En Oplossing
PROBLEEM EN OPLOSSING Wanneer je vermoedt dat de microgolfoven niet naar behoren werkt, kan je eerst de instructies hieronder raadplegen alvorens contact op te nemen met een service center. PROBLEEM OPLOSSING De microgolfoven veroorzaakt storing op Dit is normaal. De ontvangst kan verstoord worden door radio of tv. -
Page 18: Garantie
GARANTIE Chère cliente, cher client, Tous nos produits sont soumis à des contrôles qualité stricts avant d’être proposés à la vente. Si vous deviez toutefois rencontrer un problème avec votre appareil, nous le déplorons vivement. Dans ce cas, nous vous invitons à prendre contact avec notre service clientèle. Nos collaboratrices se feront un plaisir de vous aider ! +32 14 21 71 91 info@linea2000.be... - Page 19 · Chambres d’hôtel ou de motel et autres environnements à caractère résidentiel · Chambres d’hôtes ou comparables · Cet appareil peut être utilisé par des enfants âgés de 16 ans ou plus et par des personnes présentant un handicap physique ou sensoriel, une capacité mentale limitée ou un manque d’expérience ou de connaissances, à...
- Page 20 · Ne laissez pas le cordon d’alimentation pendre sur une surface chaude, ni sur le rebord d’une table ou d’un plan de travail. · Tenez le cordon électrique à distance de parties chaudes et ne couvrez pas l’appareil. · Déroulez complètement le cordon d’alimentation. Ne laissez pas le cordon d’alimentation se coincer sous l’appareil ou pendre autour de celui-ci.
- Page 21 I NETTOYAGE ET ENTRETIEN · N’immergez jamais l’appareil, le cordon d’alimentation ou la fiche dans l’eau ou tout autre liquide. Ceci afin d’éviter des chocs électriques ou un incendie. · Si l’appareil n’est pas correctement entretenu, sa durée de vie peut en être fortement diminuée et une situation de danger en résulter.
- Page 22 · N’utilisez cet appareil que conformément à la description de ce mode d’emploi. N’utilisez pas de produits chimiques ou des vapeurs dans cet appareil. Ce four est uniquement destiné à réchauffer. L’appareil n’est pas adapté à un usage industriel ou en laboratoire.
- Page 23 I AFIN D’EVITER LE RISQUE DE LESIONS · Attention: Ne touchez pas des pièces à l’intérieur du four. Ceci peut provoquer des lésions graves ou la mort. Ne démontez pas l’appareil. · Un usage incorrect de l’appareil et de la fiche mise à la terre peut provoquer l’électrocution.
-
Page 24: Control Panel
· Emballage en plastique: Uniquement le plastique approprié à l’usage au micro-ondes. Peut être utilisé pour couvrir les aliments, pour ne pas dessécher les aliments. Faites en sorte que le plastique ne rentre pas en contact avec les aliments. · Thermomètre: uniquement les thermomètres résistants au micro-ondes. -
Page 25: Avant La Première Utilisation
Waveguide Cover AVANT LA PREMIÈRE UTILISATION INSTALLATION · Vérifiez la présence de dommages éventuels sur le four, notamment des coups dans les parois ou des anomalies sur la porte. N’utilisez pas le four s’il est endommagé. Enlevez le film de protection enveloppant l’appareil. -
Page 26: Installation Du Plateau Tournant
INSTALLATION DU PLATEAU TOURNANT Placez d’abord le support du plateau tournant au centre du four à micro-ondes. Assurez-vous que ce support est bien positionné au-dessus de l’axe. Placez le plateau tournant sur le soutien, et faites attention que le milieu du plateau se place dans le support du plateau tournant. - Page 27 Appuyez sur le bouton de démarrage pour confirmer la sélection souhaitée. Tournez le bouton rotatif pour régler le temps de cuisson. Le temps maximum qu’on peut sélectionner est de 95 min. Appuyez sur le bouton de démarrage pour mettre en marche la sélection souhaitée. CUISSON PAR LA FONCTION GRILL On peut utiliser le four à...
- Page 28 Fonction air chaud avec fonction de préchauffage Appuyez sur le bouton air chaud. Ensuite « 110°C » apparaîtra sur l’écran. Appuyez sur cette touche à plusieurs reprises ou tournez le bouton jusqu’à ce que la température souhaitée apparaisse à l’écran. Vous pouvez régler la température de 110°C jusqu’à 200°C. Appuyez sur la touche de démarrage pour confirmer ce réglage.
-
Page 29: Décongélation Selon Le Poids
Tournez le bouton rotatif pour régler le temps souhaité. Le temps maximum qu’on peut sélectionner est de 95 min. Appuyez sur le bouton de démarrage pour mettre en marche la minuterie. Quand le temps s’est écoulé, vous entendrez un signal sonore. DÉCONGÉLATION SELON LE POIDS Appuyez sur le bouton décongélation selon le poids. - Page 30 MENU POIDS A1 - Chauffer 150 g 250 g 350 g 450 g 600 g A2 - Pommes de terre 1 = 230 g 2= 460 g 3= 690 g A3 - Viande 150 g 300 g 450 g 600 g A4 - Légumes 150 g 350 g...
-
Page 31: Stage Cooking
Attention : si vous sélectionnez le programme A10 - poulet rôti, vous entendrez un signal lorsque la durée réglée est arrivée aux 1/3 . Pour obtenir un meilleur effet de grillade sur l’aliment à préparer, il est recommandé de le retourner. Si vous ouvrez la porte et la refermez, puis appuyez sur démarrage, le programme de cuisson se poursuivra. -
Page 32: Nettoyage Et Entretien
· Si l’appareil fonctionne, vous pouvez afficher l’heure actuelle. Cliquez sur le bouton horloge/minuterie. L’heure actuelle est indiquée pendant quelques secondes sur l’affichage. · Si l’appareil n’est pas utilisé pendant 10 minutes, l’écran s’éteint pour économiser de l’énergie. Vous entendez alors un signal. Vous pouvez également éteindre l’écran vous-même en appuyant sur la touche d’arrêt. -
Page 33: Mise Au Rebut
Le plateau tournant en verre fait du bruit quand le Il se peut que la plaque de fond du four et l’anneau four est en service. du plateau tournant soient sales. Nettoyez le four selon les instructions. MISE AU REBUT Ce symbole sur le produit ou son emballage indique que ce produit ne peut être traité... - Page 34 GARANTIE Sehr geehrte Kundin, sehr geehrter Kunde, Sämtliche unserer Produkte unterliegen einer strengen Qualitätskontrolle, bevor sie Ihnen angeboten werden. Sollten dennoch Probleme mit Ihrem Gerät auftreten, bedauern wir dies zutiefst. Wir möchten Sie in diesem Fall bitten, unseren Kundenservice zu kontaktieren. Unsere Mitarbeiter helfen Ihnen gern weiter! +32 14 21 71 91 info@linea2000.be...
- Page 35 · Küchenbereich für Mitarbeiter von Geschäften, Büros und anderen ähnlichen beruflichen Umfeldern · Bauernhöfe · Hotel- und Motelzimmer und andere Bereiche mit wohnungsähnlichem Charakter · Gästezimmer oder Ähnliches · Dieses Gerät darf von Kindern ab 16 Jahren und Menschen mit körperlichen oder sensorischen Behinderungen oder Menschen mit eingeschränkten geistigen Fähigkeiten oder mangelnder Erfahrung bzw.
- Page 36 · Das Gerät muss stets an eine Steckdose angeschlossen werden, die gemäß den örtlichen Installationsvorschriften installiert und geerdet wurde. · Lassen Sie das Netzkabel nicht auf einer heißen Oberfläche oder über einen Tischrand oder eine Arbeitsplatte herunter hängen. · Das elektrische Kabel von heißen Teilen entfernt halten und das Gerät nicht abdecken.
- Page 37 · Durch die Verwendung von Zubehör, das nicht vom Hersteller empfohlen oder verkauft wird, besteht die Gefahr von Brand, elektrischen Schlages oder von Verletzungen. Verwenden Sie nur das Zubehör, das mit dem Gerät mitgeliefert wird. I REINIGUNG UND WARTUNG · Tauchen Sie das Gerät, das Kabel oder den Stecker auf keinen Fall in Wasser oder andere Flüssigkeiten.
- Page 38 · Eier mit Schale oder ganze hart gekochte Eier dürfen nicht im Mikrowellenofen aufgewärmt werden. Diese könnten explodieren, selbst nachdem der Ofen ausgeschaltet ist. · Das Gerät nur, wie in der Betriebsanleitung beschrieben steht, verwenden. Keine schädlichen Chemikalien oder Dämpfe in diesem Gerät verwenden.
- Page 39 · WARNUNG: Ist die Türe oder das Schloss beschädigt, darf der Ofen nicht benutzt werden, bis dieser von einem Fachmann repariert wurde. · Wird das Gerät nicht ausreichend und gut gepflegt, kann dies zu Schäden am Gerät führen, die schlechtes Funktionieren oder gefährliche Situationen zur Folge haben.
- Page 40 MATERIALIEN DIE IM MIKROWELLENOFEN VERWENDET WERDEN KÖNNEN Nachfolgend eine Liste der Gegenstände, die im Gerät sehr wohl oder nicht verwendet werden können. Falls Sie einen Gegenstand, den Sie benutzen möchten nicht auf dieser Liste finden, können Sie durch die folgende Handlung prüfen, ob der Gegenstand für die Mikrowelle geeignet ist. Einen mikrowellenbeständigen Behälter mit 250 ml kaltem Wasser füllen und zusammen mit dem zu prüfenden Gegenstand in den Mikrowellenofen geben.
- Page 41 TEILE Fenster Sicherheitsschloss Microwave Grill/Combi. Glasdrehteller Stütze Drehteller Clock/Timer Convection Bedienfeld Grillgitter Weight defrost Time defrost Spritzschutz für den Hohlleiter- niemals entfernen! Mikrowelle Stop/Clear Start/Confirm Konvektion Auftauen nach Gewicht Stopptaste Grill/ Kombination Uhr/Timer Auftauen nach Zeit (Schnell-)Starttaste 16. Drehschalter Waveguide Cover ...
-
Page 42: Vor Der Ersten Inbetriebnahme
VOR DER ERSTEN INBETRIEBNAHME INBETRIEBNAHME · Kontrollieren Sie das Gerät auf eventuelle Beschädigungen, wie z. B. Dellen oder Schäden an der Tür. Verwenden Sie das Gerät nicht, wenn Schäden vorliegen. Entfernen Sie die Schutzfolie rund um das Gerät. Diese diente als Transportschutz zur Verhinderung von Kratzern. ·... -
Page 43: Einstellung Der Uhr
EINSTELLUNG DER UHR Zum Einstellen der Uhr am Gerät führen Sie die folgenden Schritte aus: Stecken Sie den Stecker in die Steckdose. Auf dem Display erscheint „0:00“. Drücken Sie 2x die Taste um die Zeit einzustellen. Die Zeit kann von 00:00 bis 23:59 eingestellt werden. - Page 44 Drücken Sie auf die Start-Taste, um die gewählte Einstellung zu starten. ! Achtung: Achtung: Wenn die eingestellte Zeit zur Hälfte abgelaufen ist, ertönt ein Signal. Es wird empfohlen, die Speisen umzudrehen. Wenn Sie die Tür öffnen und wieder schließen und anschließend auf die Start-Taste drücken, wird der Garprozess fortgesetzt.
-
Page 45: Auftauen Nach Gewicht
! Achtung: Sie können die Zeit nicht einstellen, bis das Gerät vorgeheizt ist. Wenn das Gerät vorgewärmt ist und Sie stellen innerhalb von 5 min. die gewünschte Zeit nicht ein, stoppt das Gerät mit dem Vorheizen. Konvektion ohne Vorheizfunktion Drücken Sie auf die Taste Konvektion. „110°C“ erscheint auf dem Display. Drücken Sie mehrmals auf diese Taste oder drehen Sie den Drehknopf, bis die gewünschte Temperatur auf dem Display angezeigt wird. -
Page 46: Auftauen Nach Zeit
Wählen Sie das geeignete Gewicht und bestätigen Sie es mit der Start-Taste. Das Gerät arbeitet mit der gewünschten Einstellung. Wenn das Lebensmittel aufgetaut ist, hören Sie einen Signalton. ! Achtung: Achtung: Wenn die eingestellte Zeit zur Hälfte abgelaufen ist, ertönt ein Signal. Es wird empfohlen, die Speisen umzudrehen. -
Page 47: Mehrstufiges Kochen
A3 - Fleisch 150 g 300 g 450 g 600 g A4 - Gemüse 150 g 350 g 500 g A5 - Fisch 150 g 250 g 350 g 450 g 650 g A6 - Pasta 50 g (mit 450 ml kaltem Wasser) 100 g (mit 800 ml kaltem Wasser) 150 g (mit 1200 ml kaltem Wasser) A7 - Suppe... -
Page 48: Reinigung Und Wartung
! Achtung: Bei dieser Einstellung Mehrstufiges Kochen können die automatischen Kochprogramme und das Vorheizen nicht verwendet werden. Stellen Sie die erste der beiden Einstellungen wie oben in diesem Handbuch beschrieben ein, aber drücken Sie noch nicht auf Start. Stellen Sie dann die zweite Einstellung ein und drücken Sie die Starttaste. -
Page 49: Probleme Und Lösungen
· Teile wie Grillgitter, Glasdrehteller, ... in warmem Wasser mit einem milden Spülmittel abwaschen. · Türe, Schloss und Bedienfeld mit einem leicht feuchten Tuch reinigen, wenn diese schmutzig sind. · Verwenden Sie zur Reinigung des Geräts keinen Dampfreiniger. · Verwenden Sie keine aggressiven Reinigungsmittel oder scharfen Gegenstände. Dies kann das Glas beschädigen und zu Rissen führen. - Page 50 ENTSORGEN Dieses Symbol auf dem Produkt oder seiner Verpackung weist darauf hin, dass dieses Produkt nicht als normaler Haushaltsabfall zu behandeln ist, sondern an einem Sammelpunkt für das Recyling von elektrischen und elektronischen Geräten abgegeben werden muss. Durch Ihren Beitrag zum korrekten Entsorgen dieses Produkts schützen Sie die Umwelt und die Gesundheit Ihrer Mitmenschen.
-
Page 51: Warranty
WARRANTY Dear client , All of our products are always submitted to a strict quality control before they are sold to you. Should you nevertheless experience problems with your device, we sincerely regret this. In that case, we kindly request you to contact our customer service. Our staff will gladly assist you. - Page 52 · farm houses; · by clients in hotels, motels and other residential type environments; · bed and breakfast type environments. · Children should be supervised to ensure that they do not play with the appliance. · This appliance can be used by children aged from 16 years and above and persons with reduced physical, sensory or mental capabilities or lack of experience and knowledge if they have been given supervision or instruction concerning use of the...
- Page 53 · Keep the power cord away from hot parts and don’t cover the appliance. · Unwrap the cord completely to prevent overheating of the cord. Do not allow the power cord supply to run underneath or around the unit. · The appliance may not be used with an extension lead or a multiple socket.
- Page 54 I PRODUCT-SPECIFIC WARNINGS · Warning: Liquids and other foods must not be heated in sealed containers since they can explode. · Warning: It is hazardous for anyone other than a competent person to remove a cover which gives protection against exposure to microwave energy.
- Page 55 · Do not use abrasive cleaners or sharp metal scrapers to clean the oven door glass, since they can scratch the surface, which may result in shattering of the glass. · During use the appliance becomes hot. Do not touch any heating elements inside the oven.
- Page 56 SAVE THESE INSTRUCTIONS FOR FUTURE REFERENCE WHAT MATERIALS CAN BE USED IN THE MICROWAVE OVEN? In the list below you can find which materials can and can not be used in the microwave oven. If in doubt, or if you can not find the material in the list below, you can test the utensil in question, following the procedure below: Fill a microwave-safe container with 1 cup of cold water (250 ml) along with the utensil.
- Page 57 PARTS Observation window Safety interlock system Microwave Grill/Combi. Glass turntable Turntable shaft Control panel Convection Clock/Timer Grill rack Protection cover wave guide - never remove this cover! Weight defrost Time defrost Microwave Convection Stop/Clear Start/Confirm Defrosting by weight Stop button Grill/combi Clock/timer Defrosting by time...
-
Page 58: Before The First Use
BEFORE THE FIRST USE INSTALLATION · Check the oven for any damage, such as dents or a damaged door. Do not use the oven if it is damaged. Remove the protective film around the machine, this is applied to avoid scratches. ·... -
Page 59: Cooking With The Microwave
Turn the knob to set the minutes between 0-59. Press the clock/timer button again to confirm. If the appliance is not used for 10 minutes, the display will switch off to save energy. You will hear a signal. You can also turn off the display yourself by pressing the stop button. The display will become visible again when the appliance is active again. - Page 60 Press the grill/combi button. “G-1” will appear on the display. Press this button again or turn the turning knob until “C-1”, “C-2”, “C-3” or “C-4” appears on the display. DISPLAY MICROWAVE GRILL CONVECTION Choose one of these settings and press start. Turn the knob to set the desired time.
-
Page 61: Quick Use
QUICK USE You can also use the microwave mode without pressing the microwave button first. This can be done in 2 ways: Press the start button. The microwave will then operate at 100% power for 30 seconds. Every press of the knob increases the set time by 30 seconds. Turn the knob to the left. - Page 62 AUTOMATIC COOKING PROGRAMME The appliance is equipped with ten different automatic cooking programmes. Turn the knob to the right to select a program. The display will show “A1” to “A10”. Select one of these programmes and press start. Turn the knob once more to set the desired weight. Press start to start the desired setting.
- Page 63 A9 - Pizza 100 g 200 g 300 g A10 - Roast chicken 500 g 750 g 1000 g 1200 g ! Note: when you select programme A8 - Cake, you will have to preheat the appliance first to 160°C. Once the appliance has pre-heated, you can put the cake in and select this programme.
-
Page 64: Cleaning And Maintenance
NOTES · If the door is opened while the appliance is operating, it will not continue automatically once the door is closed. To do so, press the start button. · After setting a mode, press the start button within 1 min. If you do not do this, the settings will be lost and the clock will be displayed. -
Page 65: Environmental Guidelines
PROBLEM SOLUTION The microwave oven does not start. It may be that the plug is not correctly plugged in to the outlet. Pull the plug out and after 10 seconds plug it back into the outlet. Check the fuse in the fusebox and have it repaired by a professional if necessary. -
Page 66: Instrucciones De Seguridad
GARANTIA Este aparato tiene un periodo de garantía de 2 años a partir de la fecha de compra. Durante el periodo de garantía, el distribuidor será completamente responsable de los defectos directamente asignables a errores del material y fabricación. Cuando se detecten este tipo de errores, y siempre que se estime necesario, el aparato se sustituirá... - Page 67 · Los niños no deben jugar con el aparato. · El mantenimiento y la limpieza del dispositivo no deben ser realizados por niños, a menos que tengan 16 años o más o estén supervisados por un adulto. · Mantenga el aparato fuera del alcance de los niños. ·...
- Page 68 · No utilice nunca el aparato si el cable de alimentación o el enchufe están dañados, después de un mal funcionamiento del aparato o cuando el aparato está dañado. En el caso de que el aparato esté dañado, llévelo al servicio de postventa de DOMO o al centro de servicio cualificado más cercano para su inspección, reparación o para realizar ajustes eléctricos/ mecánicos.
- Page 69 I ADVERTENCIAS ESPECÍFICAS DEL PRODUCTO · Advertencia: los líquidos u otros alimentos no deben calentarse en recipientes cerrados, pues hay riesgo de explosión. · Advertencia: es peligroso que una persona no calificada, retire las piezas que protegen contra las microondas. ·...
- Page 70 · No use limpiadores agresivos ni objetos cortantes para limpiar el vidrio de la puerta, pues esto puede dañar el vidrio y provocar su rotura. · La puerta del horno puede calentarse durante el uso. I PRECAUCIONES PARA EVITAR LA EXPOSICIÓN A MICROONDAS ·...
- Page 71 MATERIALES QUE PUEDEN UTILIZARSE EN EL MICROONDAS A continuación se muestra una lista de objetos que pueden usarse o no en el horno. Si el objeto que desea usar no está en esta lista, puede hacer que la operación siguiente para comprobar si el objeto es adecuado para el microondas-: Llene un recipiente apto para microondas con 250 ml de agua fría y colóquelo junto con el objeto de prueba en el microondas.
- Page 72 PIEZAS Mirilla Ranura de seguridad Plato giratorio de vidrio Microwave Grill/Combi. Soporte del plato giratorio Panel de control Clock/Timer Parrilla de cocción Convection Placa de protección de la guía del microondas ¡No la retire nunca! Microondas Weight defrost Time defrost Aire caliente Descongelar según el peso Stop/Clear...
-
Page 73: Antes Del Primer Uso
ANTES DEL PRIMER USO INSTALACIÓN · Compruebe que el horno no tenga ningún daño, como abolladuras o la puerta rota. No utilice el horno si está dañado. Retire la película protectora que cubre la unidad que sirve para evitar arañazos. ·... - Page 74 Pulse dos veces el botón reloj/ temporizador en el panel de control para configurar el tiempo. Es posible configurar el tiempo de “0:00” hasta “23:59”. Gire el botón rotatorio para configurar la hora hasta 0 y 23. Pulse de nuevo el botón reloj/ temporizador para confirmar la hora y para configurar los minutos.
- Page 75 ! Atención: cuando haya transcurrido la mitad del tiempo programado, oirá una señal. Se recomienda dar la vuelta a los alimentos. Si abre y cierre la puerta y pulse después el botón de inicio, el proceso de cocción continuará. UTILIZACIÓN DE LA FUNCIÓN COMBINACIÓN Con esta función puede cocinar combinando la función del microondas, del grill y de la convección.
- Page 76 Función de aire caliente sin función de precalentamiento Pulse el botón aire caliente. “110°C” aparecerá en la pantalla. Pulse este botón repetidamente o gire el botón giratorio hasta que la temperatura deseada aparezca en la pantalla. Se puede configurar la temperatura de 110°C hasta 200°C. Pulse el botón de inicio para confirmar este ajuste.
- Page 77 ! Atención: cuando haya transcurrido la mitad del tiempo programado, oirá una señal. Se recomienda dar la vuelta a los alimentos. Si abre y cierre la puerta y pulse después el botón de inicio, el proceso de cocción continuará. DESCONGELACIÓN SEGÚN EL TIEMPO Pulse el botón descongelación según el tiempo.
- Page 78 A4 - Verduras 150 g 350 g 500 g A5 - Pescado 150 g 250 g 350 g 450 g 650 g A6 - Pasta 50 g (con 450 ml de agua fría) 100 g (con 800 ml de agua fría) 150 g (con 1200 ml de agua fría) A7 - Sopa 200 ml...
-
Page 79: Limpieza Y Mantenimiento
Pulse el botón descongelación según el tiempo. En la pantalla aparece “d-2“. Gire el mando giratorio hasta que aparezca en la pantalla 5 minutos. Pulse el botón microondas para seleccionar el ajuste de potencia deseado. Vuelva a pulsar el botón para ajustar la potencia o gire el mando giratorio hasta que en la pantalla aparezca P80. Pulse el botón de inicio para confirmar el ajuste deseado. -
Page 80: Problemas Y Soluciones
Consejo de limpieza: llene un recipiente adecuado para el microondas con 300 ml de agua y el jugo de medio limón. Colóquelo en el centro del plato giratorio y ponga el microondas en funcionamiento durante 10 minutos al 100% de potencia. A continuación, limpie el interior con un paño suave y seco. PROBLEMAS Y SOLUCIONES Si sospecha que el horno de microondas no funciona correctamente, puede consultar las instrucciones siguientes antes de ponerse en contacto con un centro de servicio. - Page 81 DIRECTRICES MEDIOAMBIENTALES El símbolo en el producto o en el embalaje indica que este producto no puede ser tratado como residuo doméstico. Se debe llevar a un lugar en el que se reciclan equipos eléctricos y electrónicos. Si se asegura de que este producto se desecha correctamente, usted ayudará...
-
Page 82: Garanzia
GARANZIA La garanzia dell’apparecchio è valida per 2 anni a partire dalla data di acquisto. Durante il periodo di validità della garanzia, il distributore si assume la piena responsabilità dei difetti dei materiali o di quelli di fabbricazione. In caso di presenza di tali difetti, se necessario, si procederà alla sostituzione o alla riparazione dell’apparecchio. - Page 83 · Tenere l’apparecchio fuori dalla portata dei bambini di età inferiore a 16 anni. · Tutte le riparazioni che non rientrino nella normale manutenzione dell’apparecchio devono essere effettuate dal produttore o dal suo servizio assistenza. · Gli incidenti o i danni causati dalla mancata osservanza delle presenti istruzioni sono responsabilità...
- Page 84 · Non utilizzare mai l’apparecchio se il cavo di alimentazione o la spina sono danneggiati, dopo un malfunzionamento o quando è danneggiato. Portare l’apparecchio al servizio assistenza post-vendita di DOMO Elektro o al centro assistenza autorizzato più vicino per farlo controllare, riparare o per apportare le necessarie modifiche elettriche o tecniche.
- Page 85 · Avvertenza: l’esecuzione di operazioni che comportano la rimozione dei componenti che proteggono dall’esposizione a microonde può rivelarsi pericolosa per le persone non qualificate. · Utilizzare solamente utensili da cucina adatti all’uso nel forno a microonde. · Pulire regolarmente il forno e rimuovere eventuali depositi di alimenti.
- Page 86 · Non utilizzare detergenti abrasivi o strumenti appuntiti per la pulizia dei vetri dello sportello, in quanto potrebbero provocare il danneggiamento o la rottura del vetro. · Lo sportello dell’apparecchio potrebbe surriscaldarsi durante il normale utilizzo. I PRECAUZIONI PER EVITARE LA POSSIBILE ESPOSIZIONE ALLE MICROONDE ·...
- Page 87 MATERIALI UTILIZZABILI NEL FORNO A MICROONDE Di seguito è riportato un elenco di utensili che non possono essere utilizzati in microonde. Se l’utensile che si desidera utilizzare non è contenuto in questo elenco, è possibile verificarne l’idoneità all’uso nel microonde seguendo le istruzioni riportate di seguito: Riempire con 250 ml di acqua fredda un contenitore adatto all’uso in microonde e inserirlo nel forno con l’oggetto da verificare.
- Page 88 COMPONENTI Finestra di osservazione Chiusura di sicurezza Piatto girevole in vetro Microwave Grill/Combi. Supporto del piatto girevole Pannello di controllo Convection Clock/Timer Supporto a griglia Placchetta di protezione dalle microonde - Non toglierla mai! Weight defrost Time defrost Microonde Convezione Stop/Clear Start/Confirm Scongelamento in base al peso...
-
Page 89: Prima Dell'uso
PRIMA DELL’USO INSTALLAZIONE · Esaminare il forno per rilevare eventuali danni, come rientranze o sportelli rotti. Non utilizzare il forno se danneggiato. · Togliere la pellicola protettiva che ricopre il forno, che è stata applicata per evitare graffi. · Posizionare il forno a microonde su una superficie con spazio sufficiente 30cm per le aperture di ingresso e uscita... -
Page 90: Cottura Con Grill
Premere due volte il tasto orologio/timer sul pannello comandi per impostare l’ora. L’ora è impostabile da “0:00” a “23:59”. Ruotare la manopola per impostare le ore. Il valore deve essere compreso tra 0 e 23. Premere di nuovo il tasto orologio/timer sul pannello comandi per impostare i minuti. Ruotare la manopola per impostare i minuti. - Page 91 FORNO COMBINATO Con questa funzione è possibile combinare l’utilizzo di microonde, grill e convezione. Premere il pulsante grill/combi. Il display visualizza “G-1”. Premere più volte questo tasto o ruotare la manopola fino a quando sul display non compare “C-1”, “C-2”, “C-3” o “C-4”. DISPLAY MICROWAVE GRILL...
- Page 92 Ruotare la manopola per impostare il tempo desiderato. Il tempo massimo impostabile e di 95 min. Premere il tasto start per far partire il forno con l’impostazione selezionata. UTILIZZO RAPIDO È possibile utilizzare la funzione microonde anche senza premere prima il tasto microonde. Ciò è possibile in due modi: Premere il pulsante di avvio.
-
Page 93: Programmi Di Cottura Automatici
! Attenzione: quando il tempo impostato è trascorso per metà, si sente un segnale. Si consiglia di girare il cibo. Se si apre lo sportello, lo si richiude e si preme il tasto start, il processo di cottura prosegue. PROGRAMMI DI COTTURA AUTOMATICI L’apparecchio ha dieci programmi automatici di cottura. - Page 94 A7 - Zuppa 200 ml 400 ml 600 ml A8 - Dolci 475 g A9 - Pizza 100 g 200 g 300 g A10 - Pollo arrosto 500 g 750 g 1000 g 1200 g ! Attenzione: se si seleziona il programma A8-Dolci, è necessario preriscaldare il forno a 160°C. Quando il forno è...
-
Page 95: Protezione Bambini
PROTEZIONE BAMBINI La protezione bambini blocca automaticamente i pulsanti per garantire la sicurezza dei bambini. Tenere il pulsante di arresto premuto per 3 secondi per bloccare il pannello. Sul display compare il simbolo della chiave. Tenere il pulsante di arresto premuto per 3 secondi per sbloccare il pannello. Il simbolo della chiave scopare dal display. - Page 96 PROBLEMI SOLUZIONE La luce nel forno è fioca. Nella cottura a bassa potenza, la luce all'interno del forno può essere meno intensa. È normale. La funzione microonde è stata avviata senza che il Spegnerlo immediatamente. In nessun caso il cibo fosse inserito. Sta quindi funzionando vuoto. microonde deve essere azionato senza cibo al suo interno.
-
Page 97: Bezpečnostní Pokyny
ZÁRUKA Práva a povinnosti prodávajícího a kupujícího ohledně práv z vadného plnění se řídí příslušnými obecně závaznými předpisy dle občanského zákoníku. Trvání záruky: 2 roky Záruka se nevztahuje a) na mechanické poškození b) nesprávné používání v rozporu s návodem k použití Záruka zaniká: - při použití... - Page 98 · kuchyňky v obchodech, kancelářích atd. · chaty, chalupy · hotely, penziony a jiné dočasné ubytování · Dohlédněte, aby si děti nehrály s přístrojem. · Tento spotřebič mohou používat děti ve věku 16 let a starší a osoby se sníženými fyzickými, smyslovými nebo mentálními schopnostmi, nebo nedostatkem zkušeností...
- Page 99 · Přívodní kabel se nesmí dotýkat horkých/teplých povrchů. Přístroj nikdy nezakrývejte. · Rozviňte kompletně celý přívodní kabel, jinak hrozí riziko jeho přehřátí. Kabel nenechávejte ležet pod přístrojem ani nesmí být omotán kolem přístroje. · Spotřebič nepoužívejte s prodlužovacím přívodním kabelem. Zapojujte vždy přímo do vlastní...
- Page 100 Pokud je přístroj velmi zanedbaný, tak může hrozit i riziko poranění obsluhy. I UPOZORNĚNÍ – SPECIFICKÉ · Varování: Tekutiny a jiná jídla se nesmí ohřívat v uzavřených nádobách, protože by mohli explodovat. · Varování: Kryty chránící před únikem mikrovlnného záření smí sundávat pouze kompetentní...
- Page 101 · Trouba může být při používání horká. Dejte pozor, aby se přívodní kabel těchto horkých míst nedotýkal. Troubu nesmíte ničím zakrývat. · Obsah kojeneckých lahví a dětské stravy musí být promíchán, nebo protřásán a jeho teplota kontrolována před konzumací, aby se zabránilo popálení. Jídlo zbytečně nepřevařujte. ·...
- Page 102 · Přístroj nerozebírejte! · Nesprávné používání přístroje a uzemnění přístroje může způsobit úraz elektrickým proudem. Nezapínejte přístroj dokud není správně nainstalován a uzemněn. · Tento přístroj musí být uzemněný. V případě elektrického zkratu uzemnění snižuje riziko úrazu elektrickým proudem tím, že napomůže úniku elektrického proudu. Přístroj je vybaven kabelem se zemnícím drátem a elektrickou zástrčkou s uzemněním.
- Page 103 CONTROL PANEL Materiály nevhodné pro mikrovlnný ohřev · Hliníkové tácky: mohou způsobit jiskření. Přendejte potraviny do nádobí vhodného pro mikrovlnný ohřev. · Obal s kovovou rukojetí: může způsobit jiskření. Přendejte potraviny do nádobí vhodného pro mikrovlnný ohřev. · Kovové, nebo pokovené nádobí: kov brání mikrovlnám v ohřevu. Kov může v mikrovlnné troubě jiskřit. ·...
-
Page 104: Před Prvním Použitím
PŘED PRVNÍM POUŽITÍM INSTALACE TROUBY · Zkontrolujte zejména sklo dvířek a dvířka. Jakkoliv poškozenou troubu nepoužívejte. Nezapomeňte odstranit ochranou fólii na těle přístroje. · Zvolte si místo, kam chcete troubu 30cm umístit. Takové místo by mělo poskytovat dostatek prostoru pro 20cm proudění... - Page 105 Otočným ovladačem nastavte první hodnotu hodin (0-23). Volbu potvrďte stisknutím tlačítka hodin/časovač. Hodnota se potvrdí a přejde se na nastavení minut. Minuty si opět nastavíte pootáčením ovladače a volbu opět uložíte tlačítkem hodin/časovač. Pokud přístroj nepoužíváte 10 minut a déle, tak se vypne displej (aby šetřil energii). Pokud mikrovlnku nepoužíváte, tak můžete svícení...
- Page 106 KOMBINOVANÝ OHŘEV S GRILEM Touto funkcí můžete kombinovat různé druhy ohřevu - ohřev pomocí mikrovln, horkovzduchem a grilování. Stiskněte tlačítko grilu a na displeji se objeví hodnota „G-1“ pootáčením ovladače nebo opětovným stlačením pokračujte dokud se na displeji neobjeví jedna z hodnot „C-1“, „C-2“, „C-3“, „C-4“...
- Page 107 RYCHLÁ VOLBA Ohřívání mikrovlnami je možné používat rovnou i bez potřeby stisku tlačítka „mikrolvn“. Rychlovolbu lze spustit 2 způsoby: Stiskem tlačítka „START“ se spustí ohřev na maximální výkon 100% a po dobu 30 vteřin. Každý další stisk navýší dobu ohřevu o dalších 30 vteřin. Pootočte ovladačem doleva: Následně...
- Page 108 PŘEDNASTAVENÉ AUTOMATICKÉ PROGRAMY Přístroj je vybaven několika automatickými programy. Pootočte ovladač doprava: Následně můžete otáčením vybírat program na ohřívání. Na displeji se budou zobrazovat hodnoty „A1“ až „A10“. Vyberte si program – potvrďte tlačítkem START- Dalším pootočením ovladače si navolte hmotnost jídla. Stiskem tlačítka START spustíte takto přednastavený...
-
Page 109: Dětský Zámek
A9 - Pizza 100 g 200 g 300 g A10 - Grilované kuře 500 g 750 g 1000 g 1200 g ! Poznámka: pokud vyberete program A8 – Koláč, tak je nutné nechat troubu nejdříve předehřát na 160 °C. Jakmile je trouba předehřátá/vyhřátá, tak vložte koláč a poté vyberte a spusťte program. ! Upozornění: Pokud vyberete program A10 –... -
Page 110: Čištění A Údržba
POZNÁMKY: · Pokud během spuštěného programu otevřete dvířka, tak se ohřev přeruší. Po uzavření je potřeba program opět spustit (k pokračování) – stačí stisknout tlačítko „start“. · Nastavujete-li nějaký program, tak volbu musíte potvrdit tlačítkem „start“ a to nejpozději do 1 minut, jinak se program neuloží... - Page 111 PROBLÉMY ŘEŠENÍ Otočný skleněný talíř je příliš hlučný pokud trouba Zkontrolujte, zda pod talířem není nějaká pracuje. nečistota. Vyčistěte vnitřek trouby dle návodku k použití. OHLED NA ŽÍVOTNÍ PROSTŘEDÍ Symbol na přístroji či na jeho obalu znamená, že s tímto výrobkem není...
-
Page 112: Bezpečnostné Pokyny
ZÁRUKA Práva a povinnosti predávajúceho a kupujúceho ohľadom práv z chybného plnenia sa riadi príslušnými všeobecne záväznými predpismi podľa občianskeho zákonníka. Trvanie záruky: 2 roky Záruka sa nevzťahuje a) na mechanické poškodenie b) nesprávne používanie v rozpore s návodom na použitie Záruka zaniká: - pri použití... - Page 113 · kuchynky v obchodoch, kanceláriách atď. · chaty, chalupy · hotely, penzióny a iné dočasné ubytovanie · Dohliadnite, aby sa deti nehrali s prístrojom. · Tento spotrebič môžu používať deti vo veku 16 rokov a staršie a osoby so zníženými fyzickými, zmyslovými alebo mentálnymi schopnosťami, alebo nedostatkom skúseností...
- Page 114 · Elektrický kábel nenechávajte visieť cez hranu stola, alebo pracovného pultu a nedovoľte. Nedovoľte, aby kábel prišiel do styku s horúcimi plochami, tak aby sa nepoškodil. · Prívodný kábel sa nesmie dotýkať horúcich / teplých povrchov. Prístroj nikdy nezakrývajte. · Rozviňte kompletne celý prívodný kábel, inak hrozí riziko jeho prehriatia.
- Page 115 I UPOZORNENIE - ÚDRŽBA A ČISTENIE · Nikdy neponárajte spotrebič ani prívodný kábel so zástrčkou do vody. Pri namočení hrozí riziko poranenia el. prúdom. · Zanedbaná údržba skracuje životnosť a efektivitu spotrebiča. Pokiaľ je prístroj veľmi zanedbaný, tak môže hroziť aj riziko poranenia obsluhy.
- Page 116 · Používajte tento prístroj iba na účely popísaným v tomto návode. Nepoužívajte v prístroji chemikálie spôsobujúce koróziu, alebo nebezpečné výpary. Rúra je určená hlavne na ohrievanie jedla a nie k priemyselným, alebo laboratórnym účely. · Ak je poškodený prívodný kábel, musí byť vymenený odborným servisom, alebo inou kvalifikovanou osobou.
- Page 117 · Nevkladajte žiadne predmety medzi dvere mikrovlnnej rúry a jej vnútro. Prístroj udržujte v čistote. · VAROVANIE: Ak je poškodený bezpečnostný uzáver, závesy dverí, tesnenie dvierok, či dvierka, nechajte prístroj neodkladne opraviť v autorizovanom servise. · V prípade zanedbania údržby rúry a ponechanie nečistôt vnútri, riskujete poškodenie rúry, zníženie životnosti prístroja, alebo možnosť...
- Page 118 AKÉ RIAD MOŽNO POUŽÍVAŤ V MIKROVLNNEJ RÚRE? V zozname nižšie, môžete nájsť materiály, ktoré môžu a ktoré nemôžu byť použité vnútri mikrovlnnej rúry. Ak ste na pochybách, alebo nemôžete nájsť materiál v zozname, môžete urobiť test popísaný nižšie: Nalejte do nádoby vhodnej pre ohrev v mikrovlnnej rúry asi 250 ml studenej vody a dajte hriať spolu s testovaným riadom.
- Page 119 ČASTI Sklenený priehľad Bezpečnostný zámok dvierok Sklenený tanier Microwave Grill/Combi. Hriadeľ pohonu taniera Ovládací panel Grilovacia mriežka Convection Clock/Timer Bezpečnostné clona mikrovĺn - nikdy neodkrývejte! Mikrovĺn Weight defrost Time defrost Horúci vzduch Rozmrazovanie podľa váhy Stop/Clear Start/Confirm Tlačidlo STOP Grilu Tlačidlo hodín/časovača Rozmrazovanie podľa času Rýchla voľba ŠTARTU...
-
Page 120: Pred Prvým Použitím
PRED PRVÝM POUŽITÍM INŠTALÁCIA RÚRY · Skontrolujte najmä sklo dvierok a dvierka. Akokoľvek poškodenú rúru nepoužívajte. Nezabudnite odstrániť ochrannú fóliu na tel. prístroja. · Zvoľte si miesto, kam chcete rúru 30cm umiestniť. také miesto by malo poskytovať dostatok priestoru 20cm pre prúdenie vzduchu okolo rúry 20cm a pre odvod tepla. - Page 121 Otočným ovládačom nastavte prvú hodnotu hodín (0-23). Voľbu potvrďte stlačením tlačidla hodín/časovač. Hodnota sa potvrdí a prejde sa na nastavenie minút. Minúty si opäť nastavíte pootáčaním ovládače a voľbu opäť uložíte tlačidlom hodín/časovač. Pokiaľ prístroj nepoužívate 10 minút a dlhšie, tak sa vypne displej (aby šetril energiu). Pokiaľ mikrovlnku nepoužívate, tak môžete svietenie displeja vypnúť...
- Page 122 KOMBINOVANÝ OHREV S GRILOM Touto funkciou môžete kombinovať rôzne druhy ohrevu - ohrev pomocou mikrovĺn, teplovzduchom a grilovanie. Stlačte tlačidlo gril a na displeji sa objaví hodnota “G1” pootáčaním ovládača alebo opätovným stlačením pokračujte až kým sa na displeji neobjaví jedna z hodnôt “C-1”, “C-2”, “C-3”, “C -4 “ DISPLAY MICROWAVE GRILL...
-
Page 123: Rýchla Voľba
RÝCHLA VOĽBA Ohrievanie mikrovlnami je možné používať rovno aj bez potreby stlačenia tlačidla „mikrolvn“. Rýchlovoľbu možné spustiť 2 spôsobmi: Stlačením tlačidla “START” sa spustí ohrev na výkon 100% a po dobu 30 sekúnd, každý ďalší stisk navýši dobu ohrevu o ďalších 30 sekúnd. Pootočte ovládačom doľava: Následne pomocou otáčania (doľava aj doprava) nastavte požadovaný... - Page 124 PREDNASTAVENÉ AUTOMATICKÉ PROGRAMY Prístroj je vybavený niekoľkými automatickými programami. Pootočte ovládač doprava: Následne môžete otáčaním vyberať program na ohrievanie. Na displeji sa budú zobrazovať hodnoty “A1” až “A10”. Vyberte si program - potvrďte tlačidlom ŠTART- Ďalším pootočením ovládača si navoľte hmotnosť jedla. Stlačením tlačidla ŠTART spustíte takto prednastavený...
-
Page 125: Detský Zámok
A9 - Pizza 100 g 200 g 300 g A10 – Grilované kurča 500 g 750 g 1000 g 1200 g ! Poznámka: ak vyberiete program A8 - Koláč, tak je nutné nechať rúru najskôr predhriať na 160 °C. Akonáhle je rúra predhriata / vyhriata, tak vložte koláč a potom vyberte a spustite program. ! Upozornenie: Ak vyberiete program A10 - grilované... -
Page 126: Čistenie A Údržba
POZNÁMKY: · Ak počas spusteného programu otvoríte dvierka, tak sa ohrev preruší. Po uzatvorení je potreba program opäť spustiť (k pokračovanie) - stačí stlačiť tlačidlo “štart”. · Ak nastavujete nejaký program, tak voľbu musíte potvrdiť tlačidlom “štart” a to najneskôr do 1 minút, inak sa program neuloží... - Page 127 PROBLÉMY RIEŠENIA Rúra nehreje. Skontrolujte či sú správne zatvorené dvierka. Otočný sklenený tanier je príliš hlučný pokiaľ rúra Zkontrolujte, zda pod talířem není nějaká pracuje. nečistota. Vyčistěte vnitřek trouby dle návodku k použití. OHĽAD NA ŽIVOTNÉ PROSTREDIE Symbol na prístroji alebo na jeho obale znamená, že s týmto výrobkom nie je možné...
- Page 128 über: webshop.domo-elektro.be or scan here: oder hier scannen: of scan hier: ou scannez ici: LINEA 2000 BV - Dompel 9 - 2200 Herentals - Belgium - Tel: +32 14 21 71 91 - Fax: +32 14 21 54 63...
Need help?
Do you have a question about the DOMO DO22301C and is the answer not in the manual?
Questions and answers