Advertisement
Quick Links
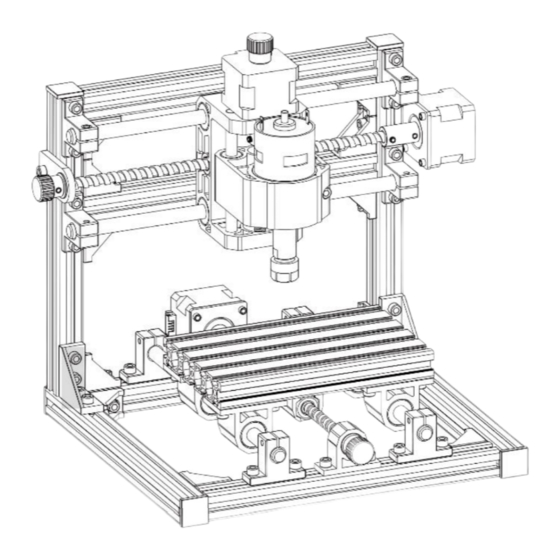
S1610
1. Part List
2. Machine Assembly
3. Control board and Laser
4. Candle Soft are
5. Laser Grbl Soft are
6. Offline Controller
7. Restore factory settings
8. Online guide and video
Safty Notice
Avoid direct laser irradiation on eyes or skin
Away from children
Always wear protective glasses when use the machine
Prohibited from use in flammable objects or gases
Please cut off the power immediately in case of emergency
Shutdown steps: first cut off the power, then pull out the USB cable
Precautions
(1). All parts description just for illustrative purpose. If there is any difference, please refer to the actual part shape.
(2). Please make sure that the machine is under care when it is working.
(3). If your machine is equipped with an offline controller, please note that the offline controller and the computer
cannot be connected to the engraving machine at the same time, otherwise it will not work normally.
(4). If the U disk in the machine kit can't be read, please scan the QR code to see how to download the software and
related content.
CNC Engraving Machine
Catalog
....................................................3
.
.. . ........... ..............7
..............................................................11
.
.................................14
..
.................................14
Scan for assembly videos
... 2
...... ......7
..
.. 13
14
1/
S1610 Ver 1.2
Advertisement

Subscribe to Our Youtube Channel
Related Manuals for VEVOR S1610


Summary of Contents for VEVOR S1610
- Page 1 (4). If the U disk in the machine kit can't be read, please scan the QR code to see how to download the software and related content. S1610 Ver 1.2...
-
Page 2: Parts List
Inner He agon Wrench 2/2.5/3/4mm 1 Set 32-3 Scre M5*45 4 PCS Nut Wrench 14# / 17mm 1 Set 32-4 Butterfl nut 4 PCS Soft brush 32-5 Washer M6*2mm 4 PCS U Disk 32-2 32-1 32-3 2/14 S1610 Ver 1.2... - Page 3 Y Lead screw at the same time 14: Muff coupling 1PCS 13: Mounting for motor 1PCS 12: Stepper motor 1PCS 24: M5*8 2PCS Screw 25: M3*6 4PCS Screw 29: M4*5 1PCS 26: M5-10 2PCS Ship nut 20: Hand knob Φ8mm 1PCS 3/14 S1610 Ver 1.2...
- Page 4 26: Ship nut 2PCS 4Set 07: Y Smooth axis Φ10*235mm 2PCS Step Step 24: M5*8 Screw 10PCS 01 Aluminum profile 20100*160 mm 1PCS Step 02 Aluminum profile 2020*220 mm 2PCS 6Set 02 Aluminum profile 2020*220 mm 2PCS 4/14 S1610 Ver 1.2...
- Page 5 10 Support for smooth axis). 06: X Smooth axis Φ10*260mm 2PCS -4. Finally, assemble 06 X Smooth axis , adjust component A to left-right movement is smooth, fixt the 10 Support for smooth axis . S1610 Ver 1.2 5/14...
- Page 6 25: M3*6 screw 4PCS 13: Mounting for motor 1PCS Step Step C1: Control board 1PCS 23: M5*10 4PCS Screw 26: Ship nut 4PCS C2: Column 4PCS The plastic column must be assembled between the controlboard and the aluminum parts. 6/14 S1610 Ver 1.2...
- Page 7 Be sure to turn of the switch before you start laser engraving. 4. Candle Software Candle is a GUI application for GRBL-based CNC-machines with G-Code visualizer. Candle is an open-source software suitable for CNC machine tool processing. It supports G code file processing and visual display. S1610 Ver 1.2...
-
Page 8: Supported Functions
"Settings" option in the upper left corner. Selecting the setting will pop up the setting window. Under "Connection", select the port name you queried, select the baud rate 115200, and then click the "ok" to finish the setting. S1610 Ver 1.2... - Page 9 At the same time, the content of the G-Code will be displayed in the lower command bar. During processing, the machine will run one by one according to the G-Code commands. S1610 Ver 1.2...
- Page 10 You can choose the pause and stop buttons below when engraving. (After pausing, click again to continue the previous carving. After termination, click Send to start processing from the beginning). (7). Finished processing After the processing is completed, the visualization window prompts that the engraving is completed and the time required for carving. S1610 Ver 1.2...
- Page 11 . Click Crea e af er se ing. S1610 Ver 1.2...
- Page 12 The length of time required for engraving depends mainly on the speed of the engraving, the speed of the idling, and the size of the picture. Users can view the total time spent on the software or on the progress bar on the touch screen. S1610 Ver 1.2...
- Page 13 Network status: There is a dot in the upper left corner of the main page. The dot indicates that VIGO-STK**** hotspot is active, and the GREEN dot indicates that the controller has connected to Local WiFi. The web management interface is as right. S1610 Ver 1.2...
-
Page 14: Restore Factory Settings
Please scan the QR code below to watch the machine assembly video. If the U disk in the machine kit can't be read, please scan the QR code to see how to download the software and related documents. Powered by VEVOR 2020 S1610 Ver 1.2...
Need help?
Do you have a question about the S1610 and is the answer not in the manual?
Questions and answers