Table of Contents
Advertisement
Available languages
Available languages
Advertisement
Table of Contents

Related Manuals for VEVOR WP9600A


Summary of Contents for VEVOR WP9600A
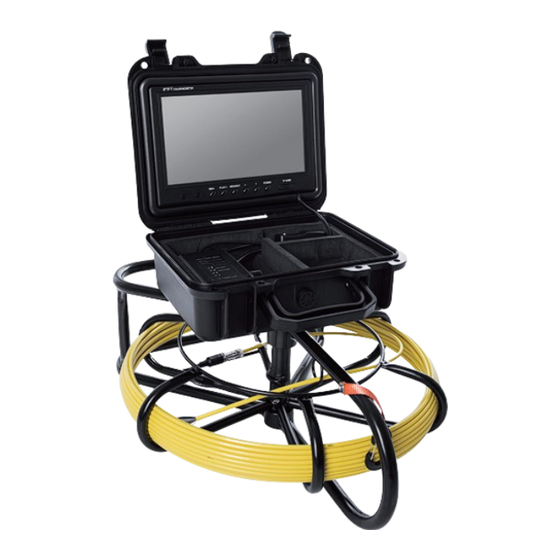
- Page 1 PIPE INSPECTION SYSTEM User Manual...
- Page 3 This is the original instruction, please read all manual instructions carefully before operating. VEVOR reserves clear interpretation of our user manual. The appearance of the product shall be subject to the product you received. Please forgive us that we won't inform you again if...
-
Page 4: Product Specification
ATTENTIONS 1. Please read the manual carefully before using it. 2. Handle it carefully during operation, avoid throwing down or pressing it heavily. 3. please keep distance from the system when charging. 4. After being used, turn off the display and pull out all the connection joints. DESCRIPTION 1. - Page 5 INSTRUCTION FOR PRODUCT 1. Camera 1. Metal Contact Chip 2. Spring 3. Highlight White Led 4. Camera Lens Product Specification Item: Parameter Camera diameter: 23 mm With the tube diameter: >25mm Camera light source: 12 LED with high white light(adjustable) Camera working voltage: Lights’...
- Page 6 2. Coil Cable Length Scale Fixed Buckle the scaled cable can show the cable length fixed the cable wheel SPECIAL DETECTION CABLE FIXER Useful Tool...
-
Page 7: System Installation
3. Cell Box 1. Monitor Video 2. Power of Monitor 3. Adjacent Coil Plug 4. AV Output 5. Battery Indicator 6. Power Input for Charger 7. Light-Degree Adjustment for White Light LED 8. Power Switch 9. Power Light System Installation 1. -
Page 8: Troubleshooting
Charging When the battery power is low, it needs charging, and the method is as below: 1. Take out the battery and charger from the box. 2. Connect the charger to the battery. 3. Connect the charger to the alternating current of 100-240V. The red indicator means charging. 4. -
Page 9: Main Menu Settings
1. It is recommended to use the cable on the pipe with a diameter ≥ 60cm. Pay attention to the force of pushing the cable to avoid breaking the Broken cable detection line. 2. This product is only used for pipeline detection and inspection and cannot be used for other purposes. -
Page 10: Fcc Information
3. Photo playback on monitor 1. Loop press MENU button to find PHOTO. 2. Press </> button to find Playback. 3. Press REC button to enter,then press </> to choose one and press REC button to playback. 4. Press PLAY button to exit. 4. - Page 11 Bitte kontaktieren Sie uns: Es handelt sich hierbei um die Originalanleitung, bitte lesen Sie vor der Inbetriebnahme alle Anweisungen sorgfältig durch. VEVOR behält sich eine eindeutige Auslegung unserer Bedienungsanleitung vor. Das Aussehen des Produkts entspricht dem Produkt, das Sie erhalten haben.
-
Page 12: Produkt-Spezifikation
Hinweise 1. Lesen Sie bitte vor dem Gebrauch des Gerätes die Bedienungsanleitung aufmerksam durch. 2. Beim Betrieb vorsichtig damit umgehen, nicht hinunterwerfen oder stark drücken. 3. Bitte halten Sie beim Aufladen Abstand zum System. 4. Schalten Sie das Display nach dem Gebrauch aus und ziehen Sie alle Verbindungsstücke heraus. Beschreibung 1. - Page 13 Anleitung zum Produkt 1. Kamera 1. Metallkontakt-Chip 2. Feder 3. helle weiße LED 4. Kameraobjektiv Produkt-Spezifikation Artikel: Parameter Durchmesser der Kamera: 23 mm Mit dem Rohrdurchmesser: >25mm Kamera-Lichtquelle: 12 LED mit hoher Helligkeit (einstellbar) Betriebsspannung der Kamera: Betriebsspannung der Beleuchtung: Schutzart (wasserdicht): IP68 Kamera- Material:...
- Page 14 2. Spulen Skala der Kabellänge Feste Schnalle Das skalierte Kabel kann die Befestigung des Kabelrads Kabellänge anzeigen SPEZIAL-DETEKTIONSKABEL-FIXIERER Nützliches Werkzeug So lösen Sie die Kabelleitung Wie man Kabel aufwickelt.
-
Page 15: Installation Des Systems
3. Kammer-Box 1. Videoüberwachung 2. Strom von Monitor 3. Angrenzende Spulenstecker 4. AV-Ausgang 5. Batterie-Anzeiger 6. Stromeingang für Ladegerät 7. Licht-Grad-Einstellung für Weißlicht-LED 8. Stromschalter 9. Betriebsanzeige Installation des Systems 1. Wichtig: Schalten Sie den Netzschalter aus, schließen Sie die Videokamera und den Monitor an, sonst können die Videokamera und der Monitor beschädigt werden. -
Page 16: Fehlerbehebung
Aufladung Wenn die Batterieleistung schwach ist, muss sie wie folgt aufgeladen werden: 1. Packen Sie die Batterie und das Ladegerät aus der Verpackung aus. 2. Schließen Sie das Ladegerät an die Batterie an. 3. Schließen Sie das Ladegerät an den Wechselstrom von 100-240V an. Die rote Anzeige bedeutet Aufladung. - Page 17 1. Es wird empfohlen, das Kabel an einem Rohr mit einem Durchmesser von ≥ 60 cm zu verwenden. Achten Sie auf die Kraft, mit der Sie das Kabel Kaputtes Kabel schieben, um zu vermeiden, dass die Detektionslinie bricht. 2. Dieses Produkt ist ausschließlich für die Detektion und Inspektion von Rohrleitungen bestimmt und kann nicht für andere Zwecke verwendet werden.
- Page 18 3. Fotowiedergabe auf dem Bildschirm 1. Drücken Sie die Taste MENU, um PHOTO zu finden. 2. Drücken Sie die </> Taste, um Wiedergabe zu finden. 3. Drücken Sie die REC-Taste zum Aufrufen, dann </> zur Auswahl und drücken Sie die REC-Taste zum Abspielen.
- Page 19 EUREP GmbH Unterlettenweg 1a, 85051 Ingolstadt, Germany Eurep Uk Ltd Unit 2264, 100 Ock Street, Abingdon Oxfordshire England Ox14 5dh EU Importer: WAITCHX Address: 250 bis boulevard Saint-Germain 75007 Paris UK Importer: FREE MOOD LTD Address: 2 Holywell Lane, London, England, EC2A 3ET Hersteller: Shenzhen Woshijie Electronic Technology Co., Ltd Add: 5Floor, B2B 501 Building Yingzhan Industry Park, Longtian Community, Pingshan District, Shenzhen, China...
- Page 20 E-mail: CustomerService@vevor.com...
Need help?
Do you have a question about the WP9600A and is the answer not in the manual?
Questions and answers
How do you change to English
yes hi my camera syopped working i was wanting a wiring diagram