Table of Contents
Advertisement
Quick Links
Advertisement
Table of Contents

Related Manuals for Bosch HEG539U 6 Series


Summary of Contents for Bosch HEG539U 6 Series
- Page 1 Built-in cooker HEG539U.6 [en] Instruction manual...
-
Page 3: Table Of Contents
Table of contents [ e n ] I n s t r u c t i o n m a n u a l Intended use ......4 Sabbath mode . -
Page 4: Intended Use
R ead these instructions carefully. Only then www.bosch-home.com and in the online shop I n t e n d e d u s e will you be able to operate your appliance www.bosch-eshop.com... -
Page 5: Important Safety Information
Important safety information Water in a hot cooking compartment may Risk of scalding! (Important safety ■ create hot steam. Never pour water into the information hot cooking compartment. Warning – Risk of injury! G eneral information Scratched glass in the appliance door may I m p o r t a n t s a f e t y i n f o r m a t i o n ■... -
Page 6: Halogen Lamp
Causes of damage Halogen lamp ]Causes of damage Warning – Risk of burns! G eneral information The bulbs in the cooking compartment C a u s e s o f d a m a g e become very hot. There is still a risk of burning Caution! your skin for some time after they have been Accessories, foil, greaseproof paper or ovenware on... -
Page 7: Environmental Protection
Environmental protection Open the appliance door as infrequently as possible 7Environmental protection ■ when the appliance is in use. Y our new appliance is particularly energy-efficient. E n v i r o n m e n t a l p r o t e c t i o n Here you can find tips on how to save even more energy when using the appliance, and how to dispose of your appliance properly. -
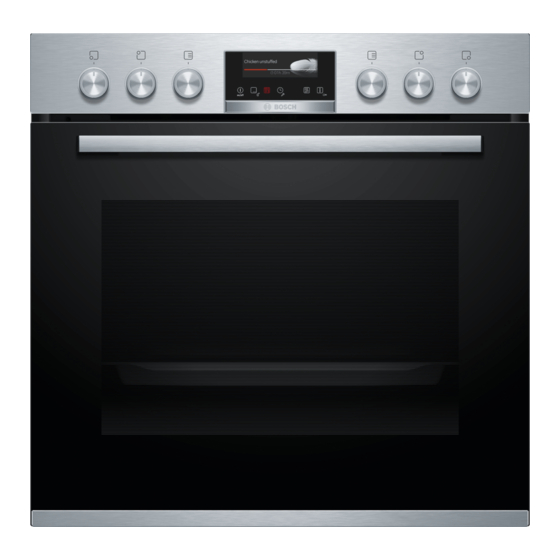
Page 8: Getting To Know Your Appliance
Getting to know your appliance Depending on the appliance model, individual Note: *Getting to know your details and colours may differ. appliance Control panel I n this chapter, we will explain the indicators and You can set your appliance's various functions on the G e t t i n g t o k n o w y o u r a p p l i a n c e controls. -
Page 9: Types Of Heating And Functions
Getting to know your appliance Types of heating and functions Use the function selector to set the types of heating and To make sure you always use the right type of heating other functions. to cook your food, we have explained the differences and applications below. -
Page 10: Temperature
Getting to know your appliance Other functions Your new oven has yet more functions; see below for a brief description of these. Function Rapid heating Preheats the cooking compartment rapidly without accessories. Interior lighting Switches on the interior lighting; all other functions remain off. Makes it easier to clean the cooking compartment, for example. -
Page 11: Accessories
Accessories Accessories can be pulled out approximately halfway _Accessories without tipping. You can use the pull-out rails to pull the accessories out further. Y our appliance is accompanied by a range of Make sure that the accessory is placed behind the lug A c c e s s o r i e s accessories. -
Page 12: Optional Accessories
Accessories When inserting baking trays, ensure that lug ‚ is at the Wire insert rear and is facing downwards. The sloping edge of the For meat, poultry and fish. accessory ƒ must be facing towards the appliance For inserting into the universal pan to catch dripping fat and meat door. -
Page 13: Before Using For The First Time
Before using for the first time Cleaning the cooking compartment and KBefore using for the first accessories time Before using the appliance to prepare food for the first time, you must clean the cooking compartment and accessories. B efore you can use your new appliance, you must B e f o r e u s i n g f o r t h e f i r s t t i m e make some settings. -
Page 14: Operating The Appliance
Operating the appliance Changing 1Operating the appliance The heating function and temperature can be changed at any time using the relevant selector. Y ou have already learnt about the controls and how If you change the heating function, the temperature will O p e r a t i n g t h e a p p l i a n c e they work. -
Page 15: Time-Setting Options
Time-setting options Use the temperature selector to set the cooking OTime-setting options time. Y our appliance has different time-setting options. T i m e - s e t t i n g o p t i o n s Time-setting option Use Cooking time Once the set cooking time has elapsed, the appliance automatically stops heating. -
Page 16: Setting The End Time
Time-setting options Setting the end time The cooking time has elapsed An audible signal sounds. The appliance stops heating. You can delay the time at which cooking is due to The time on the display is zero. finish. You can, for example, put your food in the cooking compartment in the morning and set the Once the signal stops, you can use the temperature cooking time so that it is ready at lunchtime. -
Page 17: Childproof Lock
Childproof lock AChildproof lock QBasic settings Y our appliance is equipped with a childproof lock so T here are various settings available to you in order to C h i l d p r o o f l o c k B a s i c s e t t i n g s that children cannot switch it on accidentally or change help use your appliance effectively and simply. -
Page 18: Meat Thermometer
Meat thermometer @Meat thermometer Night-time dimming Switched off* Switched on (display dimmed between 10 T he meat thermometer makes precise cooking p.m. and 5.59 a.m.) M e a t t h e r m o m e t e r possible. -
Page 19: Setting The Core Temperature
Meat thermometer to remove hot accessories and the meat thermometer from the cooking compartment. Changing and cancelling You can use the temperature selector to change the core temperature at any time. After a few seconds, the change is applied. If you want to cancel the process, remove the meat probe from the socket and the food. -
Page 20: Sabbath Mode
Sabbath mode FSabbath mode oHome Connect S abbath mode lets you set a cooking time of over 70 T his appliance is Wi-Fi-capable and can be remotely S a b b a t h m o d e H o m e C o n n e c t hours. -
Page 21: Remote Start
Home Connect If the oven door is opened 15 minutes after the oven Manual registration in the home network ■ has stopped heating. You can apply the Home Connect settings when Note: Twenty-four hours after remote start has been ■ you first start up the appliance or by going to the basic activated. -
Page 22: Updating The Software
The login process is complete once "Connected to the Declaration of Conformity app" is shown on the display. Robert Bosch Hausgeräte GmbH hereby declares that the appliance which features Home Connect is in Updating the software accordance with the basic requirements and the other relevant provisions of the directive 2014/53/EU. -
Page 23: Cleaning
Cleaning DCleaning Door panels Hot soapy water: Clean with a dish cloth and then dry with a soft cloth. W ith good care and cleaning, your appliance will retain Do not use a glass scraper or a stainless steel C l e a n i n g its appearance and remain fully functioning for a long scouring pad. -
Page 24: Surfaces In The Cooking Compartment
Cleaning Surfaces in the cooking compartment Keeping the appliance clean The back wall in the cooking compartment is self- Always keep the appliance clean and remove dirt cleaning.You can tell this from the rough surface. immediately so that stubborn deposits of dirt do not build up. -
Page 25: Rails
Rails qAppliance door pRails W ith good care and cleaning, your appliance will retain W ith good care and cleaning, your appliance will retain R a i l s A p p l i a n c e d o o r its appearance and remain fully functional for a long its appearance and remain fully functional for a long time to come. - Page 26 Appliance door If necessary, you can remove the condensate trough Push the inner panel in at the top (fig. for cleaning. To do this, open the appliance door fully (fig. Tilt the condensate trough up and remove it (fig. & Slide the outer panel back in and make sure that it is sitting correctly at the bottom in the retainer (fig.
-
Page 27: Trouble Shooting
Trouble shooting Maximum operating time 3Trouble shooting If you do not change the settings on your appliance for several hours, the appliance will automatically stop I f a fault occurs, there is often a simple explanation. heating. This prevents the appliance from continuing to T r o u b l e s h o o t i n g Before calling the after-sales service, please refer to the heat when you are no longer using it. -
Page 28: Customer Service
Customer service Screw the glass cover back on. PProgrammes Depending on the appliance model, the glass cover may have a sealing ring. If the glass cover has a sealing ring, put it back in place before screwing the Y ou can prepare food very easily using the various P r o g r a m m e s cover back on. -
Page 29: Programmes
Programmes Programmes The weight range is deliberately limited.For very Note: large items of food, there is often no suitable cookware When the roast is ready, it can be left to rest for an available, meaning that the cooking result would not be additional 10 minutes in the cooking compartment with what was expected. - Page 30 Programmes Program Food Cookware Add liquid Shelf posi- Set weight Notes tion Whole fish Ready-to-cook Roasting dish with Cover the bottom of Weight of the The fish does not need fish, seasoned lid, suitable for tem- the roasting dish food to be seared before- peratures of up to with liquid...
- Page 31 Programmes Program Food Cookware Add liquid Shelf posi- Set weight Notes tion b Boned leg of lamb, well Boned leg of Roasting dish with Cover the bottom of Meat weight The meat does not done lamb, seasoned lid, suitable for tem- the roasting dish need to be seared peratures of up to...
-
Page 32: Setting A Programme
Programmes Program Food Cookware Add liquid Shelf posi- Set weight Notes tion b Pork tenderloin steak Seasoned Roasting dish with Cover the bottom of Meat weight The meat does not glass lid, suitable the roasting dish need to be seared for temperatures of with liquid, and add beforehand. -
Page 33: Tested For You In Our Cooking Studio
Tested for you in our cooking studio the appliance door closed when cooking. Only cook on JTested for you in our one level when using this function. cooking studio Baking on one level When baking on one level, use the following shelf H ere, you can find a selection of dishes and the ideal positions: T e s t e d f o r y o u i n o u r c o o k i n g s t u d i o... -
Page 34: Cakes And Pastries
Tested for you in our cooking studio Cakes and pastries Frozen products Do not use frozen products that are heavily frosted. Your appliance offers you a range of heating types for Remove any ice on the food. the preparation of cakes and small baked items. You can find the ideal settings for many dishes in the Some frozen products may be unevenly pre-baked. - Page 35 Tested for you in our cooking studio Small baked items Dish Accessories/cookware Shelf posi- Heating Tempera- Cooking tion function ture in °C time in mins Muffins Muffin tray 170-190 20-40 Muffins, 2 levels Muffin trays 160-170* 20-45 Small yeast cakes Baking tray 150-170 20-30...
- Page 36 Tested for you in our cooking studio Pizza, quiche and savoury cakes Dish Accessories/cookware Shelf posi- Heating Tempera- Cooking tion function ture in °C time in mins Pizza, fresh Baking tray 190-210 20-30 Pizza, fresh, 2 levels Universal pan + baking tray 180-200 30-40 Pizza, fresh, thin-crust...
-
Page 37: Bakes And Gratins
Tested for you in our cooking studio The baked item looks good, but is not Use a lower temperature and bake slightly longer; if necessary, add slightly less liquid. For baked items with a cooked properly in the middle. moist topping, bake the base first. Sprinkle it with almonds or breadcrumbs and then place the topping on top. The baked item cannot be turned out Allow the baked item to cool down for 5 to 10 minutes after baking. - Page 38 Tested for you in our cooking studio Do not add salt to the meat until it has been grilled. Salt Meat draws water from the meat. Baste lean meat with fat as required or cover it with strips of bacon. Notes The grill element switches itself continuously on and When roasting, add a little liquid if the meat is lean.
- Page 39 Tested for you in our cooking studio Dish Accessories/cookware Shelf posi- Heating Tempera- Cooking tion function ture in °C time in mins Small turkey, 2.5 kg Wire rack 180-200 75-90 Turkey breast, boned, 1 kg Cookware, covered 240-260 80-100 Turkey thigh, with bone, 1 kg Wire rack 180-200 80-100...
-
Page 40: Vegetables And Side Dishes
Tested for you in our cooking studio The roast looks good but the juices Next time, use a smaller roasting dish and add more liquid if necessary. are burnt. The roast looks good but the juices Next time, use a larger roasting dish and add less liquid if necessary. are too clear and watery. -
Page 41: Slow Cooking
Tested for you in our cooking studio Slow cooking The slow cooking temperature and cooking time are dependent on the size, thickness and quality of the Slow cooking is a technique for cooking food over a meat. For this reason, the table specifies setting ranges. long period at low temperatures. -
Page 42: Preserving
Tested for you in our cooking studio Grate vegetables and then blanch them.Drain the In the table, you will find settings for drying various blanched vegetables thoroughly and spread them foodstuffs. The temperature and drying time are evenly on the wire rack. dependent on the type, moisture, ripeness and thickness of the food to be dried.The longer you leave Dry herbs on the stem. -
Page 43: Prove Dough
Tested for you in our cooking studio Meal Accessory/cookware Shelf posi- Heating Step Tempera- Cooking time in mins tion function ture in °C Vegetables, e.g. carrots 1-litre preserving jars 160-170 Before it starts bubbling: 30- Once it starts bubbling: 30- Residual heat: 30 Vegetables, e.g. -
Page 44: Keeping Warm
Tested for you in our cooking studio Dish Accessories/cookware Shelf posi- Heating Tempera- Cooking tion function ture in °C time in mins Bread, general Baking tray 40-70 Cake, moist Baking tray 70-90 Cake, dry Baking tray 60-75 Keeping warm You can keep cooked dishes warm using the "Keeping warm"... -
Page 45: Test Dishes
Tested for you in our cooking studio Test dishes These tables have been produced for test institutes to facilitate appliance testing. As per EN 60350-1. Baking Items that are placed in the oven on baking trays or in baking tins/dishes at the same time will not necessarily be ready at the same time. - Page 48 Robert Bosch Hausgeräte GmbH Carl-Wery-Straße 34 81739 München, GERMANY www.bosch-home.com *9001343589* 9001343589 970925...
Need help?
Do you have a question about the HEG539U 6 Series and is the answer not in the manual?
Questions and answers