Table of Contents
Advertisement
Quick Links
Advertisement
Table of Contents

Related Manuals for CTC Union CTC GS 600


Summary of Contents for CTC Union CTC GS 600
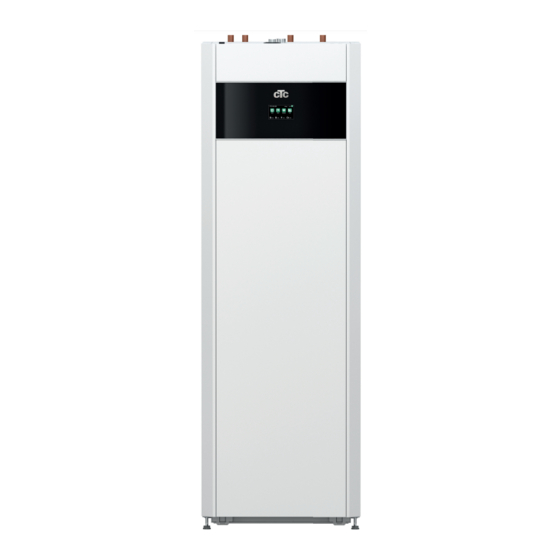
- Page 1 162 505 70-4 2022-12-20 Providing sustainable energy solutions worldwide Installation and Maintenance Manual CTC GS 600 Model 606 / 608 400V 3N~ / 230V 1N~ / 230V 3~ Important! • Read carefully before use, keep for future reference. • Translation of the original instructions.
- Page 2 Removing the cooling module • Any work done on the product’s cooling system should be done by authorised personnel only. Close the safety switch before doing any work on the product. • 1. Disconnect the cooling module’s power cable 2. Attach the two carrying handles to the bottom of the cooling module.
- Page 3 162 505 70-4 2022-12-20 Installation and Maintenance Manual CTC GS 600 Ground source heat pump 400V 3N~/ 230V 1N~/ 230V 3~...
-
Page 4: Table Of Contents
Fill in the information below. It may come in useful if anything should happen. Product: Serial number: Installer: Name: Date: Tel. no.: Electrical installer: Name: Date: Tel. no.: No liability is accepted for any misprints. We reserve the right to make design changes. CTC GS 600... - Page 5 Congratulations on your new product You have just purchased a CTC GS 600, with which we CTC GS has a control system which: hope you will be very pleased. Read about how you can • monitors all heat pump functions.
-
Page 6: Important! Information On Air Bleeding
[!] is particularly important for If ‘gushing’ sounds can be heard from the product, this is a sign of remaining correctly installing and using the air. product. A loss of heating functionality can also be a sign of remaining air. CTC GS 600... -
Page 7: Safety Instructions
Cleaning and maintenance should not be carried out by children without supervision. If these instructions are not followed when installing, operating and maintaining the system, Enertech’s commitment under the applicable warranty terms is not binding. CTC GS 600... -
Page 8: Your Home's Heating Installation
Menu: ”Installer / Settings / Heating Circuit / Heating Circuit 1/Heating adjusted between different circuits. curve". Active curve: #1. T °C Menu: ”Installer / Settings / Heating Circuit / Heating Circuit 1/Heating curve/Fine adjustment". CTC GS 600... - Page 9 The set heating curve always takes priority. The room sensor can only increase or decrease the heat beyond the set heating curve to a certain extent. Where operating without a room sensor, the selected heating curve determines the fl ow temperature supplied to the radiators. CTC GS 600...
- Page 10 Outside Temperature If the values set are too low, this may mean that the desired room temperature is not being reached. You then need to adjust the heating curve, as necessary, following the method shown above. CTC GS 600...
- Page 11 The heating starts up Outside Temperature automatically when it is required again. Heating off , out See chapter ”Settings/Heating circuit” for information on setting the heating mode. Part of the ”Installer/Settings/Heating Circuit/Heating Circuit 1” menu. CTC GS 600...
-
Page 12: Technical Data
Flow qw minimum A7 or B0/W35, ∆t = 15K 0.10 0.11 Flow qw nominal A7 or B0/W35, ∆t = 5K 0.29 0.41 Max ext available pressure head, nom flow Pressure drop See diagram in chapter "Pipe installation". CTC GS 600... - Page 13 Required ceiling height 1940 dB(A) 41 / 41 39 / 39 Sound power (L ) acc. to EN 12102 @B0, W35/55 dB(A) Noise pressure 1m B0/W35 (EN ISO 11203) No annual leakage control of the refrigerant is required. CTC GS 600...
-
Page 14: Operating Range Ctc Gs
Operating range is based on normal operating conditions and may therefore be different in different installations. = temperature brine in) °C °C Primary fl ow temperature (t ) °C Return temperature (t T re ) °C T re CTC GS 600... -
Page 15: Measurements
Measurements Erfoderlig reshöjd: 1940mm Cold water Ø22 Erfoderlig reshöjd: 1940mm Erfoderlig reshöjd: 1940mm DHW Ø22 Return Ø22 Primary flow Ø22 Expansion connection/ Lifting sleeve G 3/4" Bleed valve connection G 1/2" CTC GS 600... -
Page 16: Design
Circuit breakers (F2) Circuit breakers (F1) Brine connections The brine is connected to the collector here. Junction box (A5) Module Brine pump (G20) Charge pump (G11) Pump for the hot side (concealed, placed behind the electrical connection box). CTC GS 600... -
Page 17: Parameter List
Ext. block cooling Defrost heating temp min m Block cooling schedule Defrost heating temp max m Defrost heating temp min °C Defrost heating temp max °C *The value varies depending on the heat pump model, see chapter ”Electrical installation”. CTC GS 600... -
Page 18: Important To Remember
The installation engineer fills in a checklist and contact information • – the customer and installation engineer sign the list, which the customer keeps. • Register the product for warranty and insurance via the website https://www.ctc-heating.com/customer-service#warranty-registration CTC GS 600... -
Page 19: Installation
Filter ball valve, magnetite for heating system return flow Dirt filter for cold tap water • 2 x automatic bleeders (9) • Pressure gauge (11) • Manifold (8) • Bushing 3/4" x 3/8" (10) • Bushing 1/2" x 3/8" (12) • CTC GS 600... -
Page 20: Control Functions (Std.) And With Expansion Card
Heating Circuit 2* • • DHW circulation EHS tank* • • Pool Diff thermostat* • Passive cooling* • CTC SMS* • • Remote control SmartGrid • * Requires accessories such as: Extra sensor, mixing valve group 2, etc. CTC GS 600... -
Page 21: Pipe Installation
To fi nd out about connecting the cold side, see the section entitled "Connecting the brine system". Heating circuit 2 can only give the same temperature = Heating circuit 2 (accessory) as heating circuit 1 or a lower temperature. CTC GS 600... - Page 22 2.5 m in order to avoid introducing oxygen into the system. If the heat pump is connected together with another heat source, e.g. an existing boiler, the installations must have separate expansion vessels. Position of expansion tank. CTC GS 600...
- Page 23 If an open expansion vessel is used, the distance between the expansion vessel and the highest radiator should not be less than 2.5 meters to avoid the system being oxygenated. If a heat pump is connected with another heat source, e.g. an existing boiler, the installations must have separate expansion vessels. CTC GS 600...
- Page 24 ∆p kPa GS 606 GS 608 10 l/min 20 l/min 25 l/min 30 l/min Varma sidan 6.1.9 Heat medium pump (G11) GS 608/GS 612 25/7-130 PWM 20 l/min 25 l/min 32 l/min 38 l/min 45 l/min Kalla sidan CTC GS 600...
- Page 25 6.1.11 DHW circulation (accessory) The settings for hot water circulation require the installation of an “Expansion Card accessory”. DHW circulation is connected as shown in the schematic diagram. Pump G40 is used to circulate the hot water. CTC GS 600...
- Page 26 The mixing valve motor ARA 671 is mounted on the valve with the knob in the centre position. The motor must move in an anticlockwise direction to close. Three-way mixing valve VRG 131 CTC GS 600...
- Page 27 When a constant fl ow is desired in the pool water, the pool pump (G51) is connected with a separate supply and constant voltage. The expansion card accessory is required to connect pool heating to your heating circuit. CTC GS 600...
- Page 28 6.1.15 Schematic diagram, passive cooling Alt. 1 common cooling/heating CTC GS 600...
- Page 29 6.1.16 Schematic diagram, passive cooling Alt. 2 common cooling/heating CTC GS 600...
- Page 30 6.1.17 Schematic diagram, passive cooling Alt. 3 CTC GS 600...
- Page 31 The external heat source tank (01) may also have a solar coil; this means that the heat exchanger (F2), pump (G32) or non-return valve (Y11) is not required. Schematic diagram only The installation engineer fi ts expansion tank, safety valves, bleeders, etc. and sizes the system. CTC GS 600...
- Page 32 The buffer tank (02) may also have a solar coil; this means that the heat exchanger (F2), pump (G32) or non-return valve (Y11) is not required. Schematic diagram only The installation engineer fi ts expansion tank, safety valves, bleeders, etc. and sizes the system. CTC GS 600...
- Page 33 Charging starts when B31 is 7°C warmer than B42 or B47. Charging stops when there is a difference of 3°C between B31/B30 or when the charge temperature is reached. Schematic diagram only The installation engineer fi ts expansion tank, safety valves, bleeders, etc. and sizes the system. CTC GS 600...
- Page 34 6.1.19 Schematic diagram (full diagram) CTC GS 600...
-
Page 35: Connecting The Brine System
You can also connect the primary flow on one side and the return on the other. See the section entitled "Measurement details for measurements and dimensions". The pipe between the heat pump and collector loop should have an internal diameter of no less than Ø28 mm. Brine out Brine in CTC GS 600... - Page 36 Right-side connection (Use front outlet) Left-side connection (Use rear outlet) Rear installation Use through-hole. Fit the “brine out” pipe. Push the pipe to the side under the tank. Fit the “brine in” pipe. Connection, back CTC GS 600...
- Page 37 For example, the requirement in some areas is for the system to be installed within a water catchment area. If there is a leak, the compressor and brine pump stop and the "Flow/level switch" alarm appears on the display. For connection, refer to the "Electrical Installation" chapter. CTC GS 600...
-
Page 38: Brine System Schematic Diagram
Top up with a little brine, if necessary, before fi tting the cap. The fi lter should be checked and cleaned after a short period of operation. CTC GS 600... - Page 39 If this is the case, the heat pump triggers the alarm. few days’ operation. The alarm factory setting is 7°C, but 9°C is permitted for the first 72 hours while the compressor is running, as microbubbles in the system can reduce brine flow. CTC GS 600...
- Page 40 GS 608 ≤ 20 l/min 25 l/min 32 l/min 38 l/min 45 l/min Kalla sidan 7.2.8 Coolant pump (G20) CTC GS 606/608 25/125-180 PWM, 1x230V, 50/60Hz 25/125-180 PWM, 1x230V, 50/60Hz [kPa] ≤ Q [m³/h] Q [l/s] Q [m³/h] CTC GS 600...
-
Page 41: Electrical Installation
Accessory: expansion card (A3) For certain system options the product must be supplemented with the expansion card accessory (A3). See the manual provided for how to install the card. Settings which are entered after installation are found in this manual. CTC GS 600... -
Page 42: Sensor Connection
Check that the room sensor LED lights up. If not, check the cables and connection. Select "Off" using the "-" button and press "OK". If the OK LED goes • off, the check is complete. • Return to start menu by pressing the "Home" button. CTC GS 600... -
Page 43: Checking Connected Sensors
Sensor (B46) is connected to the relay card (A2) at terminal block G65–G66. Circulation pump G46 is connected to the following terminal blocks: Phase: brown Terminal block A:11 Zero: blue Earth: yellow/green Check the function by test running the pump in the "Installer/Service/Function Test" menu in the control system. CTC GS 600... -
Page 44: Heating Circuit 2 (Alt. Passive Cooling)
(Y60) must be connected as follows: Black Relay output Terminal block X2/ A36 Brown Phase Terminal block X2/L1 Blue Zero Terminal block X2/N Sensory element Sensor cable Contact paste Sensor Primary flow pipe Insulation Cable tie CTC GS 600... -
Page 45: Pool (Accessory)
Zero Terminal block A29 CTC EcoVent (accessory) To connect the CTC EcoVent ventilation product, please refer to the CTC EcoVent manual. 8.10 CTC SmartControl (accessory) To connect CTC SmartControl, please refer to the separate CTC SmartControl manual. CTC GS 600... -
Page 46: Solar Heat (Accessory)
Test" menu in the control system. Valve 2 tanks (Y30) 230V 1N~ 3-way valve Y30 is connected at the following terminal blocks: Expansion card (A3) X6: Control voltage: black Terminal block X6:4 Phase: brown Terminal block X6:5 Zero: blue Terminal block X6:7 CTC GS 600... -
Page 47: Current Sensor Connection (Accessory)
The current sensor connection has no alarm, but the current value can be read in the “Operation data” menu. Note that the tolerance/accuracy is very low with small current values. From electricity distribution board Fuse panel Current sensor CTC GS 600... -
Page 48: Electrical Diagram Tank (A2), 3X400V /1
8.13 Electrical diagram tank (A2), 3x400V /1. GNYE GNYE -X22 -X22 -X10 -X10 -F10 -F10 /2.B1 /2.B1 105,112 105,112 /2.B3 /2.B3 -X20, -X21 -X20, -X21 EL3B EL3B /2.D7 /2.D7 -X11:6 -X11:6 EL3A EL3A /2.C7 /2.C7 -X11:5 -X11:5 EL2B EL2B /2.D7 /2.D7 -X11:4 -X11:4... - Page 49 -X30 -X30 -W11 -W11 COM1 COM1 -X103 -X103 VOLTAGE- VOLTAGE- DETECTION DETECTION #146 #146 /3.A4 /3.A4 -X104:1 -X104:1 #147 #147 /3.A4 /3.A4 -X104:2 -X104:2 #148 #148 /3.A4 /3.A4 -X104:3 -X104:3 #112 #112 /3.C7 /3.C7 -X2:G47 -X2:G47 #113 #113 /3.C7 /3.C7 -X2:G48 -X2:G48 -X102...
-
Page 50: Flow Heater (E15), 3X400V /2
8.14 Flow heater (E15), 3x400V /2. -
Page 51: Terminal Block (X2), 3X400V /3
/1.E6 -A2:A15 #111 /1.E5 -A2:A16 #110 /1.E4 -A2:A36 #109 913145402 /1.A2 8.15 Terminal block (X2), 3x400V /3. -X1:N (S1) -W13 -W13 External 230V External 230V 913145403 /1.A2 -X1:PE #162 913145401 /1.C7 913145401 913145401 -A2:G42 #146 /1.E4 /1.E4 /1.C7 -F1:1 -F1:1 -A2:G43 #147 /1.C7... -
Page 52: Electrical Diagram Tank (A2), 1X230V /1
8.16 Electrical diagram tank (A2), 1x230V /1. -W15 -W15 -PE Heater -PE Heater -X22 -X22 #244 #244 /2.B3 /2.B3 -X10 -X10 200,203 200,203 101,104 101,104 -W14 -W14 -F10 -F10 #248 #248 /1.F5 /1.F5 -A2:A23 -A2:A23 EL3B EL3B EL3A EL3A EL2B EL2B /2.D7 /2.D7... - Page 53 -X30 -X30 -W11 -W11 COM1 COM1 -X103 -X103 VOLTAGE- VOLTAGE- DETECTION DETECTION #146 #146 /3.A4 /3.A4 -X104:1 -X104:1 #147 #147 /3.A4 /3.A4 -X104:2 -X104:2 #148 #148 /3.A4 /3.A4 -X104:3 -X104:3 #112 #112 /3.C7 /3.C7 -X2:G47 -X2:G47 #113 #113 /3.C7 /3.C7 -X2:G48 -X2:G48 -X102...
-
Page 54: Flow Heater (E15), 1X230V /2
8.17 Flow heater (E15), 1x230V /2. -
Page 55: Terminal Block (X2), 1X230V /3
/1.E6 -A2:A15 #111 /1.E5 -A2:A16 #110 /1.E4 -A2:A36 #109 8.18 Terminal block (X2), 1x230V /3. 913145402 /2.C2 -X24 -W13 -W13 External 230V External 230V 913145403 /2.C4 -X23 #162 913145401 /1.C7 913145401 913145401 -A2:G42 #146 /1.F4 /1.F4 /1.C7 -F1:1 #300 -F1:1 #300 -A2:G43 #147... -
Page 56: Electrical Diagram Tank (A2), 3X230V /1
8.19 Electrical diagram tank (A2), 3x230V /1. -PE Heater -PE Heater -X10 -X10 -F10 -F10 #248 #248 /1.F5 /1.F5 -A2:A23 -A2:A23 EL3B EL3B EL3A EL3A EL2B EL2B /2.D7 /2.D7 -X11:4 -X11:4 EL2A EL2A /2.C7 /2.C7 -X11:3 -X11:3 EL1B EL1B /2.D7 /2.D7 -X11:2 -X11:2... - Page 57 -X30 -X30 COM1 COM1 -X103 -X103 VOLTAGE- VOLTAGE- DETECTION DETECTION #146 #146 /3.A4 /3.A4 -X104:1 -X104:1 #147 #147 /3.A4 /3.A4 -X104:2 -X104:2 #148 #148 /3.A4 /3.A4 -X104:3 -X104:3 #112 #112 /3.C7 /3.C7 -X2:G47 -X2:G47 #113 #113 /3.C7 /3.C7 -X2:G48 -X2:G48 -X102 -X102 -B102...
-
Page 58: Flow Heater (E15), 3X230V /2
8.20 Flow heater (E15), 3x230V /2. -
Page 59: Terminal Block (X2), 3X230V /3
/1.E6 -A2:A15 #111 /1.E5 -A2:A16 #110 /1.E4 -A2:A36 #109 913145402 8.21 Terminal block (X2), 3x230V /3. /1.E2 -F1:3 -W13 -W13 External 230V External 230V 913145403 /2.B4 -X23 #162 913145401 /1.C7 913145401 913145401 -A2:G42 #146 /1.F4 /1.F4 /1.C7 -F1:1 #300 -F1:1 #300 -A2:G43 #147... -
Page 60: Hp Cooling Module Schematic Diagram 3X400V (A5)
8.22 HP cooling module schematic diagram 3x400V (A5) -
Page 61: Hp Cooling Module Schematic Diagram 1X230V / 3X230V (A5)
8.23 HP cooling module schematic diagram 1x230V / 3x230V (A5) -
Page 62: Expansion Card (Accessory) Schematic Diagram
8.24 Expansion card (accessory) schematic diagram... - Page 63 B102...
-
Page 64: Parts List
3-way valve, passive cooling External heat source tank NTC 22 Sensor pool NTC 22 B100 High pressure sensor B101 Low pressure sensor B102 Flow switch Automatic circuit breaker 10 A Automatic circuit breaker 13 A Max thermostat High pressure switch CTC GS 600... -
Page 65: Resistance Values For Sensor, Cooling Module
8.26 Resistance values for sensor, cooling module CTC GS 600... -
Page 66: Resistance Values For Sensor, Other
Resistance Ω 1027 1167 1330 1522 1746 2010 2320 2690 3130 3650 4280 5045 5960 7080 8450 10130 12200 1115 14770 1443 18000 1883 22000 2478 27100 3289 33540 41800 52400 66200 84750 108000 139000 181000 238000 CTC GS 600... -
Page 67: Installation Communication
CTC Remote (screen mirroring for phone/tablet/ network. CTC Product computer) Port 3. Communication between the product’s electrical cabling and display: Factory fi tted. *CTC SmartControl is also available with a gateway connected to Port 3. Refer to the CTC SmartControl accessories manual. CTC GS 600... -
Page 68: Install Ethernet Cable
4. Route the ethernet cable through any hole in the top cover, remove rubber grommet if necessary. 5. Connect ethernet cable to network port or router. To permit and defi ne connectivity, refer to the "Communication" section in the "Installer/Defi ne" chapter. CTC GS 600... -
Page 69: Remote - Screen Mirroring
- App Defi ne myUplink. See "Installer/Defi ne/Communication/ myUplink – Yes". Installing the app. Download myUplink from the App Store or • Google Play. Create an account. • • Follow the instructions in the app's Help feature. CTC GS 600... -
Page 70: First Start
NB: The product has an automatic bleeding sequence for the DHW system, Symbol for backup heating which runs in the background. The sequence takes approx. 15 minutes thermostat: and does not affect other functions. CTC GS 600... - Page 71 The heat pump then starts and the start menu appears. When only an electric boiler is operating. When starting the product without bedrock, it is necessary to specify the electrical power for hot water production in the menu "Installer/Settings/ Electric heater/Max electric heater DHW kW". CTC GS 600...
-
Page 72: Operation And Maintenance
The DHW circuit, which contains around five litres, is emptied by inserting a hose at the bottom of the cold water connection and then siphoning it off. CTC GS 600... -
Page 73: Detailed Menu Descriptions
This is where the installer confi gures the settings and service for your system. Indoor temperature Displays the current indoor temperature for each heating circuit if room sensors have been installed. DHW temperature Shows the current temperature in the upper tank. Outside Temperature Shows the outdoor temperature. CTC GS 600... -
Page 74: Installation Wizard
"+" and "-" buttons. Confirm with the "right" directional arrow. Pump" chapter. 9. If Heating circuit 2 is defined, the corresponding menu for this system is displayed. Make a corresponding selection ("Radiator" and "Underfloor Heating") for Heating circuit 2 and finish the wizard with "OK". CTC GS 600... -
Page 75: Heating/Cooling
= 23.5 -2 -2 °C = 19.5 °C. In the menu, ”Cooling” (setpoint: 20.0 °C) is active for heating circuit 2. "Holiday mode” (V) does not lower the setpoint when cooling is active. CTC GS 600... - Page 76 "Auto", "On" or "Off". Heating mode can also be selected in the menu "Installer/Settings/Heating circuit/Heating mode". Menu ”Heating/Cooling/HC1 Heating/Cooling”. See chapter "Installer/Settings/Heating circuit" for more information. Menu ”HC1 Heating/Cooling/HC1 Heating mode” where mode ”Auto” has been activated. CTC GS 600...
- Page 77 (primary flow temperature 45 °C). To the left of the If a fault occurs with a room sensor, the product triggers setpoint is the outdoor temperature (0 °C) at the current primary flow an alarm and automatically switches to operating temperature. according to the set curve. CTC GS 600...
- Page 78 °C”. Holiday reduction is enabled from the time of setting When both "Night Reduction" and "Holiday (press the plus (+) sign). Reduction" are in use, "Holiday Reduction" supersedes "Night Reduction". Up to 300 days can be set. CTC GS 600...
-
Page 79: Dhw
"Extra DHW" is active. A horizontal Refer to the "Installation and Maintenance Manual" for yellow line indicates the current time. The X axis represents the days, the CTC EcoVent ventilation product. Monday to Sunday. CTC GS 600... -
Page 80: Weekly Program
Schedule Active (Active/Inactive/Restore factory settings) Activate the weekly program by placing it in "Active" mode. It is also possible to restore factory settings. Weekly schedule "Night reduction". CTC GS 600... - Page 81 Go to the menu by selecting "SmartGrid weekly program" in the price and SG Overcapacity) is specified in the "Installer/Settings" menu. "Action" row. The status of the row automatically switches to "On". Active Yes (Yes/No) "Yes" means that the row is activated. CTC GS 600...
-
Page 82: Operation Data
Scroll using the arrows or swipe in the list if not all the functions fi t on the page. External DHW History tank (EHS) The gear icon is a shortcut to "Settings" for the respective part. CTC GS 600... - Page 83 If not confi gured, only the highest value phase the time measured for this in minutes. is displayed. Control unit status The heat pump charges the heating circuit. The heat pump charges the DHW system. Pool The heat pump charges the pool CTC GS 600...
- Page 84 The system produces passive cooling. "Holiday reduction" of room temperature is active. For more information, refer to the "Heating/Cooling" Holiday chapter. "Night reduction" of room temperature is active. For more information, refer to the "Heating/Cooling" Night reduction chapter. No heating/cooling produced. CTC GS 600...
- Page 85 The heat pump is in the "On" position. Stop, tariff Compressor blocked due to the Tariff remote control function being active. Compressor off due to an alarm. Alarm Blocked, low brine in Compressor blocked due to too low brine temperature. CTC GS 600...
- Page 86 Operation time /24 h:m 07:26 Shows total operating time during the last 24 hours. Number of starts /24 h Shows the number of starts in the last 24 hours. Total operation time 1800 Displays total compressor operating time in hours. CTC GS 600...
- Page 87 12.7.6 Operation data, Diff Thermostat function Status Shows whether the charge pump is turned on (“On”/”Off”). Temperature °C Temperature in external tank being charged ”Off”. Target temp. °C Temperature in external tank being charged ”On”. Menu: "Operation Data/Diff. Thermostat function". CTC GS 600...
- Page 88 Demand pool No (0) "Yes" means that there is a need for heat in the pool and that heat is taken from the EHS tank. The pool setpoint is shown in brackets. CTC GS 600...
-
Page 89: Installer
SNTP Menu option ”On” retrieves the current time from the internet (if online). More settings options can be found in the ”Installer/Settings/Communication/Internet” menu. Menu: "Installer/Display/Time". CTC GS 600... - Page 90 A lock code can be deleted by entering ”0000” in this menu instead of the previously specifi ed lock code. Font size Standard (Small/Standard/Large) The display’s font size can be changed here. CTC GS 600...
-
Page 91: Settings
In the ”Settings” menu, select ”Heating circuit” and then the heating circuit to be set. Part of the "Installer /Settings/Heating Circuit" menu. Part of the "Installer/Settings/Heating Circuit/Heating Circuit 1" menu. *CTC GS can control up to two heating circuits. CTC GS 600... - Page 92 SmartGrid function is activated. • Reset program Current program is reset with factory values. *SmartGrid functions "SmartGrid Low price °C" and "SmartGrid Overcapacity °C" are set in the menu "Installer/ Settings/Heating circuit". **Applies only to "Custom" heating program. CTC GS 600...
- Page 93 1 will have the same appearance as heat curve 2 by selecting the line ”Copy from 2” and pressing ”OK”. The menu bar cannot be selected (marked with gray) when heating curves 1 and 2 have the same values (the graphs look the same). CTC GS 600...
- Page 94 (or equals) the set value in the "Heating off, outdoor °C" menu for the number of minutes set in the "Heating off, time" menu. CTC GS 600...
- Page 95 Charge pump % 60* (20-100) Setting for charge pump (G11) speed (percent) when charging the heating circuit. *The value may vary depending on the heat pump model. CTC GS 600...
- Page 96 (1-3) is selected in the "Drying period of 25 °C. mode" menu above. The "On" option means that the drying period mode selected for Heating Circuit 1 will also be run for the selected heating circuit. CTC GS 600...
- Page 97 Applies only to modulating heat pump CTC GSi 600. Ext. silent mode rps 50 (50...100) Applies only to modulating heat pump CTC GSi 600. Passive cooling brine pump On Off (On/Off) Enable "Yes" if the brine pump should be used for passive cooling. CTC GS 600...
- Page 98 When the outdoor temperature exceeds T2, the heating time adjusts heating time is regulated up to the value set in the menu down to ”Min m”. ”Defrost heating temp max m”. These temperatures and times are set in the menus ”Defrost heating temp...” on the left. CTC GS 600...
- Page 99 This menu bar is displayed if an "Input" for remote control is defined for the "Tariff EL" function in the "Installer/Define/Remote Control" menu. "Yes" means the function can be activated via remote control. Read more in the "Installer/Define/Remote Control/Tariff EL" chapter. CTC GS 600...
- Page 100 No (Yes/No) For this menu to be displayed, define a remote control input for both SmartGrid A and SmartGrid B. "Yes" means the function can be activated via remote control. Read more in the "Installer/Define/Remote Control" chapter. CTC GS 600...
- Page 101 SmartGrid. Both SmartGrid A and SmartGrid B must be defined in the remote control menu for this menu to be displayed. Read more in the "Def. Remote Control /SmartGrid A/B" section of the "Installer/Define” chapter. CTC GS 600...
- Page 102 HC2 Mixing valve close 120 (Off, 1...300) The time in seconds to position the mixing valve at 50%. This is done to prevent flow problems when charging DHW. This menu is displayed if heating circuit 2 is defined. CTC GS 600...
- Page 103 5–10°C is achieved over the EHS temperature difference falls below this set value, tank during charging. charging stops. Charge temperature °C 60 (10...95) Setting for the maximum permitted temperature in the EHS tank. Charging stops once the set temperature has been reached. CTC GS 600...
- Page 104 This menu bar is displayed if a "Schedule" has been defined for the "Block Cooling" function. For more information, refer to: • chapter "Weekly Program" for schedule setting. section "Def. Remote Control" of the "Installer/ • Define" chapter for defining the remote control function. CTC GS 600...
- Page 105 In the app: Scan the QR code or enter values for “Serial number” and “Connection string”. Select the menu items “Remove users” and / or “Remove service partners” to disconnect these accounts from the system. Confirm with “OK”. Menu: "Installer/Settings/Communication/myUplink". CTC GS 600...
- Page 106 Menu: "Installer/Settings/Round circulation". remotely by activating the "Input" defined for the function. For more information, refer to: • chapter "Weekly Program" for schedule setting. section "Def. Remote Control" of the • "Installer / Define" chapter for defining the remote control function. CTC GS 600...
- Page 107 12.9.14 Load factory settings The product is supplied with the factory values set. Saved settings in "Bank" 1-3 are deleted when factory settings are restored. The selected language is recovered. Press OK to confirm. Menu: "Installer/Settings/Load My Settings". CTC GS 600...
-
Page 108: Define
If you want a function to recur during weekdays, you G73 & G74 Extra-low voltage (<12V) can set when the function should be active/inactive in a The table shows the remote control inputs K22-K25 on the relay card. weekly program. CTC GS 600... - Page 109 Menu: "Installer/Settings/Heating Circuit/Heating Circuit 1". Remote control mode "Off" becomes active when terminal block K24 is closed. Open terminal block = Heating mode "On" (in this example). Closed terminal block = Heating mode "Off" (in this example). CTC GS 600...
- Page 110 "Heating mode, schedule". mode, schedule" row. For more information, refer to the "Heating Circuit" section in the "Installer/Settings" chapter. Also refer to the "Your home’s heating settings" chapter. *CTC GS can control up to two heating circuits. CTC GS 600...
- Page 111 On menu bar "Block. cooling ext. config.", the normal mode is For more information, refer to the "Cooling" section in specified for the external control signal ("Normally Open (NO)" or the "Installer/Settings" chapter. "Normally Closed (NC)"). CTC GS 600...
- Page 112 "Input" for the remote control function. In the "Installer/Settings” menu: • Access function scheduling from the "Round circulation" row. For more information, refer to the "Round circulation" section in the "Installer/Settings" chapter. Menu: "Installer/Settings”. Setting a "Round circulation" weekly program. CTC GS 600...
- Page 113 "Input" for the remote control function. In the "Installer / Define/Heat Pump" menu: configure the normal mode for the external • control signal (Normally Open (NO)/Normally Closed (NC)) in the "Flow/level switch" row. Menu: "Installer/Define/Heat Pump". CTC GS 600...
- Page 114 SmartGrid Block HP (Yes/No) • Additional Heat/Electric Heater SmartGrid Block EL (Yes/No) • SmartGrid Block Mixing valve (Yes/No) • Cooling SmartGrid Low Price °C (room temp.: -1 °C) • SmartGrid Overcapacity °C (room temp.: -2 °C) • CTC GS 600...
- Page 115 For more information, refer to the "Heating Pump" "Normally Closed (NC)") is defined for "Tariff HP ext. config." section in the "Installer/Settings" chapter. HP Noise reduction (Off/ K22-K25 /Channel 1A-7B / B MS DI0-7) Applies only to modulating heat pump CTC GSi 600. CTC GS 600...
- Page 116 This menu defines the Normally Open (NO) or Normally Closed (NC) mode for the external control signal when remotely controlling the function. For examples of how to set the normal mode, refer to the ”Installer/Define/Remote Control” chapter. CTC GS 600...
- Page 117 This menu defines the Normally Open (NO) or Normally Closed (NC) mode for the external control signal when remotely controlling the function. For examples of normal mode settings, refer to the ”Def. Remote Control” section of the ”Installer / Define” chapter. CTC GS 600...
- Page 118 Menu: " Installer / D efine / Electric Heater". 12.10.8 Def. External heat source (EHS) External heat source No (Yes/No) Specify here whether an external heat source is Menu: ” Installer/Define/External heat source (EHS)”. connected to the heating circuit. CTC GS 600...
- Page 119 The function can be used to turn off cooling with the help of a humidity sensor when there is a risk of condensation. This menu defines the Normally Open (NO) or Normally Closed (NC) mode for the external control signal when remotely controlling the function. CTC GS 600...
- Page 120 SmartControl Accessories manual. 12.10.12 Def. Current sensor Current sensor Yes (Yes/No) Menu: "Installer/Define/SmartControl". Select "Yes" is current sensors are to be connected to the system. For more information, refer to the "Current Sensors" section in the "Installer/Settings" chapter. CTC GS 600...
-
Page 121: Service
HP Brine tump/Fan Off (Off/On) Function test brine pump or fan (air-to-water heat pump). HP Charge pump Off (Off/On/ 0...100) Function test charge pump 0–100%. Menu: "Installer/Service/ Function Test/Heat Pump". CTC GS 600... - Page 122 Off (On/Off) Test of hot water circulation pump. Sensor • DHW ºC (B25) 0 ºC Displays current DHW temperature. • Flow sensor (B102) Off (On/Off) Menu: "Installer/Service/ Function Test/DHW". Indicates whether there is flow in the DHW pipe. CTC GS 600...
- Page 123 The delay normally prevents compressor start earlier than 10 mins after compressor stop. The delay is also activated in the event of a power failure, or the first time Menu: "Installer/Service/Coded settings". after production is started. This function speeds up this process. CTC GS 600...
- Page 124 NB: Only an authorised service engineer is allowed to log in to the Factory settings coded option. Severe operational problems and faults may occur affecting the product if values are amended without authorisation. Note that in such cases the warranty terms do not apply. CTC GS 600...
-
Page 125: Troubleshooting/Appropriate Measures
If heating is uneven, perform a check (if room sensor installed): • That the placement of the room sensors is appropriate for the house. • That the radiator thermostats don’t interfere with the room sensor. • That no other heat sources/cold sources interfere with the room sensor. CTC GS 600... - Page 126 If an unusual sound comes from hard- closing dishwasher and washing machines, this can be remedied using a shock arrestor. A shock arrestor can also be an alternative to soft-closing water taps. CTC GS 600...
-
Page 127: Information Messages
6 kW for 2 hours after being switched on. This message appears if more than 6 kW are required during the product's first 2 hours of operation. This is applicable after a power outage or a new installation. CTC GS 600... -
Page 128: Alarm Messages
Press reset and check whether the alarm recurs. If the fault recurs, contact your installer. [E048] Stop, low evapor. This message appears when the expansion valve’s evaporation temperature is low. Press reset and check whether the alarm recurs. If the fault recurs, contact your installer. CTC GS 600... - Page 129 During installation, make sure the max. thermostat (F10) has not been triggered as there is a chance of this occurring if the boiler has been stored in extremely cold temperatures, Reset it by pressing in the button on the electrical switchboard behind the front panel. CTC GS 600...
- Page 132 162 505 70-4 2022-12-20 Enertech AB. P.O Box 309 SE-341 26 Ljungby Sweden www.ctc.se, www.ctc-heating.com...
Need help?
Do you have a question about the CTC GS 600 and is the answer not in the manual?
Questions and answers