Table of Contents

Related Manuals for CTC Union GSi 16


Summary of Contents for CTC Union GSi 16
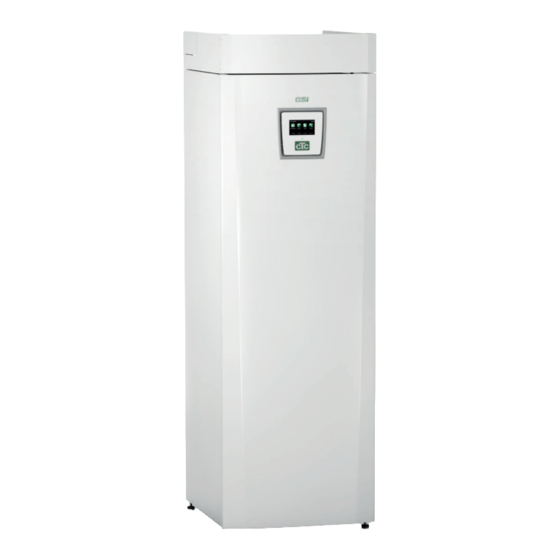
- Page 1 162 205 94-1 06/02/2019 Providing sustainable energy solutions worldwide Installation and Maintenance Manual CTC GSi 16 Modulating ground source heat pump 400 V 3N~ IMPORTANT READ CAREFULLY BEFORE USE KEEP FOR FUTURE REFERENCE...
- Page 2 Removing the cooling module • Any work done on the product’s cooling system should be done by authorised personnel only. • Close the safety switch before doing any work on the product. 1. Disconnect the cooling module’s power cable connector and hoses. 2.
- Page 3 Installation and Maintenance Manual 162 205 94-1 06/02/2019 CTC GSi 16 Modulating ground source heat pump 400 V 3N~...
-
Page 4: Important! Information On Air Bleeding
A loss of heating functionality can also be a sign of remaining air. Information in this type of box [i] is intended to help ensure that the product functions optimally. Information in this type of box [!] is particularly important for correctly installing and using the product. CTC GSi 16... -
Page 5: Table Of Contents
8.13 Tank schematic diagram (A2) _____________________________ 8.14 HP cooling module schematic diagram (A5) ________ 8.15 Expansion card (accessory) schematic diagram (A3) ____________________________________ 8.16 Parts list __________________________________________________________ 8.17 Resistance for sensor 1(2) _________________________________ 8.18 Resistance sensor 2(2) _____________________________________ CTC GSi 16... - Page 6 CTC GSi 16...
- Page 7 If properly maintained, you will module, along with effective troubleshooting functions in be able to enjoy the use of your CTC GSi 16 for many the control program, make CTC GSi 16 easy to service. years. This manual will provide all the information you If you want to supplement your CTC GSi 16 with other will need.
-
Page 8: Safety Instructions
Cleaning and maintenance should not be carried out by children without supervision. If these instructions are not followed when installing, operating and maintaining the system, Enertech’s commitment under the applicable warranty terms is not binding. CTC GSi 16... -
Page 9: Your Home's Heating Settings
Installer/Settings/Radiator system menu. Recommended values are: Floor heating only Inclination 35 Low temperature system (well insulated houses) Inclination 40 Normal temperature system (factory setting) Inclination 50 High temperature system (older houses, small radiators, poorly insulated) Inclination 60 CTC GSi 16... - Page 10 Inclination 60 °C Adjustment 0 °C In this example, the maximum outgoing primary flow temperature is set at 55 °C. The minimum permitted primary flow temperature is 27 °C (e.g. summer-time basement heating or the floor circuits in a bathroom). Outside Temperature CTC GSi 16...
- Page 11 Off means that the heating is switched off. For systems with a radiator pump, the radiator pump is switched off. - No selection means no function when activated. CTC GSi 16...
-
Page 12: Technical Data
Pdesign = 16 kW, SCOP = 4.0 EN14511:2018 SCOP according to FprEN14825 Heating system Water volume (V) Max. operating pressure boiler (PS) Max. temperature boiler (TS) °C Heating system nominal flow @50 rps 0.52 Pressure drop See diagram in chapter Pipe installation CTC GSi 16... - Page 13 300 / 275 Dimensions 673 x 596 x 1910 (Depth x Width x Height) Required ceiling height 1940 Noise level (L ) according to EN 12102 @30/35 °C dB(A) 36/40 No annual leakage control of the refrigerant is required CTC GSi 16...
-
Page 14: Operating Range Ctc Gsi 16
Operating range is based on normal operating conditions and may therefore be different in different installations. = temperature brine in) ºC ºC T fra T fra Primary low temperature (t ) °C T re Return temperature (t ) °C T re CTC GSi 16... - Page 15 Expansionsanslutning/ L Expansionsanslutning/ Lyftmu G 3/4” 1. Cold water Ø22 2. DHW Ø22 3. Return Ø22 4. Primary low Ø22 5. Expansion connection/ Lifting sleeve G 3/4” 6. Bleed valve connection G 1/2” CTC GSi 16...
-
Page 16: Design
Max. thermostat (F10) Junction box (A2) Circuit breakers (F2) Circuit breakers (F1) Charge pump (G11) Brine pump (G20) Pump for the hot side (concealed, Junction box (A5) placed behind the electrical Module connection box) CTC GSi 16... -
Page 17: Parameter List
Smart overcapacity ºC Start at degree minute -500 Diff step, degree minute External heat source Factory User value Main fuse A settings Input voltage 3x400V Charge start ºC Tariff EL Start/ stop diff. Smart block immersion Smart block cap. CTC GSi 16... - Page 18 Factory setting Adapted (RPS) Forced (RPS) Normal (RPS) Reduced (RPS) Run-on time (minutes) Time until filter change (d) Night cooling Start diff room 3 °C Stop diff room 1 °C Diff. inside/outside (hard-coded) 3 °C Weekly program CTC GSi 16...
- Page 19 Recharging active -Charge start diff temp °C -Charge stop diff temp °C -Max brine temperature °C Charging EHS-tank Factory User value settings Charge start diff temp °C Charge stop diff temp °C Charge tank temp °C CTC GSi 16...
-
Page 20: Important To Remember
• The installation engineer advises the property owner on the construction and servicing of the system. • The installation engineer fills in a checklist and contact information – the customer and installation engineer sign the list, which the customer keeps. CTC GSi 16... -
Page 21: Installation
• Filter ball valve, magnetite for heating system return flow • Dirt filter for cold tap water • 2 x automatic bleeder valves (9) • Pressure gauge (11) • Manifold (8) • Bushing 3/4"x3/8" (10) • Bushing 1/2"x3/8" (12) CTC GSi 16... -
Page 22: Control Functions (Std.) And With Expansion Card
• Heating circuit 2* • Hot water circulation • EHS tank* • Pool • Diff thermostat* • Cooling* • CTC SMS* • Remote control • Smart Grid * Requires accessories such as: Extra sensor, mixing valve group 2, etc. CTC GSi 16... -
Page 23: Pipe Installation
To find out about connecting the cold side, see the section entitled “Connecting the brine system”. = Heating circuit 2 (accessory) CTC GSi 16... - Page 24 NB: It is important to 6.1.5 Manometer – system pressure fit shut-off valves to both the primary and Fit a manometer to the expansion pipe or the heating circuit’s return line. return flows. CTC GSi 16...
- Page 25 10 m. Maximum volume in the heating circuit System (excl. product) Maximum Pre-pressure pressure height (H) (m) (bar) (bar) The table assumes installation with the expansion tank included in the CTC Installation Kit GSi accessory. CTC GSi 16...
- Page 26 6.1.8 Pressure differential diagram CTC GSi 16 – hot side Varma sidan ∆p kPa Diff kPa l/min 6.1.9 Heat medium pump (G11) UPML - XL GEO 25-125 130 PWM, 1 x 230 V, 50/60 Hz CTC GSi 16...
- Page 27 6.1.11 DHW circulation (accessory) The settings for hot water circulation require the installation of an expansion card accessory. DHW circulation is connected as shown in the schematic diagram. Pump G40 is used to circulate the hot water. CTC GSi 16...
- Page 28 EHS and the heat pump to protect the heat exchanger. The mixing valve motor ARA 671 is mounted on the valve with the knob in the centre position. The motor must move in an anticlockwise direction to close. Three-way mixing valve VRG CTC GSi 16...
- Page 29 When a constant flow is desired in the pool water, the pool pump (G51) is connected with a separate supply and constant voltage. The expansion card accessory is required to connect pool heating to your heating circuit. CTC GSi 16...
- Page 30 The external heat source tank (01) may also have a solar coil; this means that the heat exchanger (F2), pump (G32) or non-return valve (Y11) is not required. Schematic diagram only The installation engineer fits expansion tank, safety valves, bleeders, etc. and sizes the system. CTC GSi 16...
- Page 31 The buffer tank (02) may also have a solar coil; this means that the heat exchanger (F2), pump (G32) or non-return valve (Y11) is not required. Schematic diagram only The installation engineer fits expansion tank, safety valves, bleeders, etc. and sizes the system. CTC GSi 16...
- Page 32 Charging starts when B31 is 7°C warmer than B42 or B47. Charging stops when there is a difference of 3°C between B31/B30 or when the charge temperature is reached. Schematic diagram only The installation engineer fits expansion tank, safety valves, bleeders, etc. and sizes the system. CTC GSi 16...
- Page 33 6.1.16 Schematic diagram (full diagram) CTC GSi 16...
-
Page 34: Connecting The Brine System
You can also connect the primary flow on one side and the return on the other. See the section entitled “Measurement details for measurements and dimensions”. The pipe between the heat pump and collector loop should have an internal diameter of no less than Ø28 mm. Brine out Brine in CTC GSi 16... - Page 35 Right side panel 1. Use through-hole A 2. Fit the “brine out” hose 3. Push the hose to the side under the tank 4. Fit the “brine in” hose A B C Rear connection (Use outlet A) CTC GSi 16...
- Page 36 For example, the requirement in some areas is for the system to be installed within a water catchment area. If there is a leak, the compressor and brine pump stop and the Flow/level switch alarm appears on the display. For connection, see the section entitled “Electrical installation”. CTC GSi 16...
-
Page 37: Brine System Schematic Diagram
Top up with a little brine, if necessary, before fitting the cap. The filter should be checked and cleaned after a short period of operation. CTC GSi 16... - Page 38 Local regulations and permit requirements must be taken into account. The return water is discharged elsewhere, to a drilled return flow well or similar. The brine pump (G20) and groundwater pump must be connected to run simultaneously in order to prevent freezing. CTC GSi 16...
-
Page 39: Coolant Pump (G20)
7.3.1 Pressure differential diagram CTC GSi 16 – cold side ∆p kPa Diff kPa Pressure drop, brine ≤ circuit side l/min Coolant pump (G20) UPMXL GEO 25-125 180 PWM, 1x230 V, 50/60 Hz [kPa] ≤ Q [m³/h] Q [l/s] Q [m³/h]... -
Page 40: Electrical Installation
To open the front panel, loosen the two screws at the top, fold out and set the front aside. Bear in mind that the cable to the display on the front is sensitive to damage. Positioning of supply cable CTC GSi 16... - Page 41 Accessory: expansion card (A3) For certain system options the product must be supplemented with the expansion card accessory (A3). See the manual provided for how to install the card. Settings which are entered after installation are found in this manual. CTC GSi 16...
-
Page 42: Sensor Connection
Check that the room sensor LED lights up. If not, check the cables and connection. • Select Off using the - button and press OK. If the OK LED goes off, the check is complete. • Return to start menu by pressing the Home button. CTC GSi 16... -
Page 43: Checking Connected Sensors
Sensor (B46) is connected to the relay card (A2) at terminal block G65–G66. Circulation pump G46 is connected to the following terminal blocks: Phase: brown Terminal block A:11 Zero: blue Earth: yellow/green Check the function by test running the pump in menu “Installer/Service/ Function test” in the control system. CTC GSi 16... -
Page 44: Heating Circuit 2 (Alt. Free Cooling)
Free cooling is adjusted using primary flow sensor 2 (B2), which then means that heating circuit 2 and cooling cannot be used simultaneously Contact paste Sensory element S ensor Sensor cable Primary low pipe Cable tie Insulation CTC GSi 16... -
Page 45: Pool (Accessory)
Blue cable Zero Terminal block A29 CTC EcoVent (accessory) To connect the CTC EcoVent ventilation product, please refer to the CTC EcoVent manual. 8.10 CTC SmartControl (accessory) To connect CTC SmartControl, please refer to the separate CTC SmartControl manual. CTC GSi 16... -
Page 46: Solar Heat (Accessory)
Valve 2 tanks (Y30) 230 V 1N~ Diverting valve Y30 is connected at the following terminal blocks: Expansion card (A3) X6: Control voltage: black Terminal block X6:4 Phase: brown Terminal block X6:5 Zero: blue Terminal block X6:7 CTC GSi 16... -
Page 47: Current Sensor Connection (Accessory)
The current sensor connection has no alarm, but the current value can be read in the Operation data menu. Note that the tolerance/accuracy is very low with small current values. From electricity distribution board Fuse panel Current sensor CTC GSi 16... -
Page 48: Tank Schematic Diagram (A2)
8.13 Tank schematic diagram (A2) CTC GSi 16... - Page 49 CTC GSi 16...
-
Page 50: Hp Cooling Module Schematic Diagram (A5)
8.14 HP cooling module schematic diagram (A5) CTC GSi 16... - Page 51 CTC GSi 16...
-
Page 52: Expansion Card (Accessory) Schematic Diagram (A3)
8.15 Expansion card (accessory) schematic diagram (A3) a) CTC EcoZenith i350, CTC EcoVent i350F CTC GSi 16... - Page 53 CTC GSi 16...
- Page 54 B102 CTC GSi 16...
-
Page 55: Parts List
Low pressure sensor Solar 2-step valve external buffer B102 Flow switch tank Solar 2-step valve Automatic circuit breaker 10 A External heat source tank Automatic circuit breaker 13 A Electric shut-off valve Max thermostat Diverting valve, pool EMC filter CTC GSi 16... -
Page 56: Resistance For Sensor 1(2)
Sensor Type 2 Sensor Type 3 Sensor Type 1 Temperature °C Temperature°C Temperature °C kΩ kΩ kΩ 0.22 0.67 5.37 0.25 0.78 6.18 0.28 0.908 7.13 0.32 1.06 8.26 0.37 1.25 9.59 0.42 1.47 11.17 0.49 1.74 13.06 0.57 2.07 15.33 18.1 21.4... -
Page 57: Resistance Sensor 2(2)
Resistance Ω 1027 1167 1330 1522 1746 2010 2320 2690 3130 3650 4280 5045 5960 7080 8450 10130 12200 1115 14770 1443 18000 1883 22000 2478 27100 3289 33540 41800 52400 66200 84750 108000 139000 181000 238000 CTC GSi 16... -
Page 58: First Start
Also make sure that the backup thermostat is turned off. Symbol for backup heating thermostat: The selected power output must be written on the rating plate with a marker. Save these settings under: Installer/ Settings/Save settings CTC GSi 16... - Page 59 10. The heat pump then starts and the start menu appears. When only an electric boiler is operating. When the product is started without boreholes, the electrical output must be specified for DHW production. Installer/Settings/Immersion heater/Max. immersion heater DHW kW CTC GSi 16...
-
Page 60: Operation And Maintenance
The DHW circuit, which contains around five litres, is emptied by inserting a hose at the bottom of the cold water connection and then siphoning it off. CTC GSi 16... - Page 61 CTC GSi 16...
-
Page 62: Menu Overview
11. Menu overview Night reduction heat circ. Start menu Weekly program Day by day Monday 22 - 24 -- - -- CTC GSi 16 Monday 09:35 Tuesday 00 - 06 -- - -- Wednesday -- - -- -- - --... - Page 63 EcoVent EcoVent 20 Primary flow 2ºC 37 (38) SmartControl Radiator pump 2 Mixing valve 2 Service Function test Alarm log Factory settings coded Quick start compressor. Software update, USB Write log to USB Control current sensors Re-installation CTC GSi 16...
-
Page 64: Detailed Menu Descriptions
12. Detailed menu descriptions CTC GSi 16 Monday 09:35 All settings can be configured directly on-screen using the easy-to-read control panel. The large icons function as buttons on the touch display. Operational and temperature information is also displayed here. Room temp. -
Page 65: Room Temperature
The product’s alarm is triggered. correctly when the system is tuned. If a fault occurs with a room sensor, the heat pump automatically switches to operating according to the set curve. The product’s alarm is triggered. CTC GSi 16... - Page 66 The period starts from the time at which you set this parameter The value by which the temperature is reduced – Room temp reduced °C – can be set in the Installer/Settings/Heating circuit menu. Factory setting: -2 °C. CTC GSi 16...
-
Page 67: Dhw
Tip: Set the time to approx. 1 hour and in the evening. before you need the hot water, as it takes a while to heat up the water. CTC GSi 16... -
Page 68: Operation
This value will vary during operation according to the parameters set, the heating circuit’s capacity and the current outdoor temperature. CTC GSi 16... - Page 69 12.4.1 Operational data CTC GSi 16 CTC GSi 16 Status DHW tank °C 49/ 45 (55) DHW ºC 54 (50) 73% This menu displays current temperatures and operating Stored oper data Degree minute -1000 Electric power kW data. The first figure is the actual operational value, with...
- Page 70 El. heat kWh Shows the total energy consumed by the product’s electric heaters This is an indirect energy measurement, based on the operating periods of the electric heaters. Total operation time Displays the total operating time of the compressor. CTC GSi 16...
- Page 71 Shows the operating status and flow of the charge pump (G11) as a percentage. Brine pump (On/Off) Shows whether the brine pump (G20) is operating or not. HP in/out °C Shows the heat pump’s return and primary flow temperatures. CTC GSi 16...
- Page 72 The green and pink curves show room temperatures 1 and 2 respectively. The red curve shows the primary flow temperature. The grey curve shows the primary flow temperature of heating circuit 2 if it is installed. The yellow curve shows the return temperature. CTC GSi 16...
- Page 73 Valve charging (Y31) Shows whether charging is to tank or borehole. Valve tank (Y30) When two tanks are being charged by solar power, the position of the 3-way valve between the tanks is shown here. CTC GSi 16...
- Page 74 12.4.7 Operational data CTC EcoVent Current operational data for the CTC EcoVent ventilation product is displayed here. The menu is only shown if EcoVent is defined. For operational information, please refer to the CTC EcoVent manual. CTC GSi 16...
-
Page 75: Installer
Time/Language Settings Define system Service Settings, Define system and Service. Time/Language includes time and language settings for your CTC GSi 16. Software display PCB: 20120205 Software HP PCB: 20120125 Settings are used both by the installer and user. Define system is used by the installer. -
Page 76: Heat Pump
Tip: Read more about these settings Off means that the function is turned off. in the section “Your home’s heating settings”. There is no radiator pump in heating circuit 1. Instead, “Heating, mode” is controlled by the diverting valve. CTC GSi 16... - Page 77 –15°C if inclination adjustment is set to 0. If inclination adjustment is set to +5, the temperature will be 55 °C instead. For all outdoor temperatures the inclination is increased by 5 °C, i.e. inclination is parallel displaced by 5 °C. CTC GSi 16...
- Page 78 This is the maximum time (minutes) during which the heat pump charges the heating circuit if needed in the hot water tank. Charge pump % 60 (25—100) Setting for charge pump (G11) speed (percent) when charging the heating circuit. CTC GSi 16...
- Page 79 25 °C, the value is calculated automatically according to “Your home’s heating settings”. Mode 3 This mode starts with Mode 1, followed by Mode 2 CTC GSi 16 CTC GSi 12 Monday 09:35 and finally by “Your home’s heating settings”.
-
Page 80: Heat Pump
Smart blocking HP Off(On/Off) Read more in the “Smartgrid” section. Start at degree minute -60 (-900—-30) This states the degree minute at which the heat pump will start. Max. RPS 80 (50—80) Sets the maximum permitted compressor speed. CTC GSi 16... - Page 81 Example: Monday 00-06—22-24 On Monday the noise is reduced between 12 am and 6 am and between 10 pm and 12 am; normal operation at all other times. CTC GSi 16...
-
Page 82: Electric Heater
Conv. factor curr. sensors 1 (1—10) – Tariff EL Off (On/Off) Find out more in the section titled “Define remote control”. Smart block immersion Off (Off/On) Read more in the “Smartgrid” section. CTC GSi 16... -
Page 83: Dhw Tank
The settings for hot water circulation require the installation of an expansion card accessory (A3). Run-time DHW circ. 4 (1—90) Run-time (in minutes) of domestic hot water circulation during each period. Applies if DHW circulation has been defined in the Installer/Define system menu. CTC GSi 16... - Page 84 Extra hot water function is enabled when activated in the menu Remote control ( Installer/Define system/ Remote control/Extra DHW ) or when activated by a CTC SmartControl accessory For CTC SmartControl functionality and settings, please refer to the relevant manual. CTC GSi 16...
-
Page 85: Communication
Reset program The current DHW program will be restored to factory settings. 12.9 Communication These settings are activated for the accessory’s superior systems and are not used in normal operation. They are not described in these instructions. CTC GSi 16... -
Page 86: Cooling
This is used to set the desired room temperature for cooling. Smart low price. °C 1 ( Off, 1—5 ) Read more in the “Smartgrid” section. Smart over capacity °C 1 ( Off, 1—5 ) Read more in the “Smartgrid” section. CTC GSi 16... -
Page 87: Solar Panels (Accessories)
When the temperature difference between the solar panel and the tank falls below this set value, the charging stops. Charge pump min % 20 (20—100) The lowest permitted speed of the charge pump (G30, G32) is indicated here. CTC GSi 16... - Page 88 X-volume (acc. tank) should be prioritised when charging (shown only if alternate charging has been defined). Flow l/min 6.0 (0.1 — 50.0) The flow circulating through the solar collectors should be indicated here. (This can be read from the flow CTC GSi 16...
- Page 89 Antifreeze protection panel No (No/Yes) In the winter, at extremely cold outdoor temperatures there is a risk of the panels freezing (despite antifreeze fluid). The function to take heat from the tank to the panel is activated here. CTC GSi 16...
- Page 90 70 (60—80) If the solar panel temperature exceeds its maximum set temperature, energy is permitted to be transferred to the tank up to this set tank temperature. Check that the protection function “Over temp protection panel” is activated. CTC GSi 16...
- Page 91 30 (1—118) Here you can set the temperature difference at which charging of the bore hole should stop. When the temperature difference between the solar panel and the brine falls below this set value, the charging stops. CTC GSi 16...
- Page 92 EcoTank and the EHS tank falls below this set value, charging stops. Charge temperature °C 60 (10—80) Setting for the maximum permitted temperature in the EHS tank. Transfer stops once the set temperature has been reached. CTC GSi 16...
-
Page 93: Diff Thermostat Function
EHS tank should stop. When the temperature difference falls below this set value, charging stops. Charge temperature °C 60 (10—95) Setting for the maximum permitted temperature in the EHS tank. Transfer stops once the set temperature has been reached. CTC GSi 16... -
Page 94: Pool (Accessory)
The charge pump speed is set here. Smart low price. °C 1 ( Off, 1—5 ) Read more in the “Smartgrid” section. Smart over capacity °C 2 ( Off, 1—5 ) Read more in the “Smartgrid” section. CTC GSi 16... -
Page 95: External Heat Source (Ehs)
The saved settings can be reloaded using this option. Load factory settings The product is supplied with the factory values set. They can be restored by activating this function. Press OK to confirm. The language, product and product size are retained. CTC GSi 16... -
Page 96: Deine System
Specify whether or which type of level switch is installed Flow/level switch None in the system. Choose between: • None • NC (Normally Closed) • NO (Normally Open). Flow/level switch must also be set. See the"Procedure for remote control" chapter. CTC GSi 16... - Page 97 The cooling function is adjusted using primary flow sensor 2 (B2), which means that heating circuit 2 and cooling cannot be used simultaneously. Cooling No (No/Yes) This is for selecting whether cooling is installed. NB: See the CTC EcoComfort manual for more information. CTC GSi 16...
- Page 98 No (No/Yes) This function activates system 2 with EcoTank buffer tank (or equivalent). Panel connected to Heat exchanger (coil/ exchanger) Specify here whether there is a solar coil in the EcoTank or an intermediate exchanger is installed. CTC GSi 16...
- Page 99 The CTC EcoVent ventilation product is defined here. For more information, please refer to the CTC EcoVent manual. 12.16.9 Deine CTC SmartControl (accessory) SmartControl CTC SmartControl components are defined in this menu. For CTC SmartControl functionality and settings, please refer to the relevant manual. CTC GSi 16...
-
Page 100: Deine Remote Control
First of all, “ Heating, ext mode HS1 ” is assigned to input Vent. Custom K24. Vent. Unoccupied Enertech AB is NOT responsible for the required heat being produced if the remote control has blocked the heating over a long period. CTC GSi 16... - Page 101 Closed terminal block = “Off” (in this example) NB: If both the heat pump and the immersion heater are blocked, the building may be without heating for a long time. It is therefore recommended that you only block the immersion heater with the tariff. CTC GSi 16...
- Page 102 ” Off ” if the heating is to be switched off. “ Auto ” mode can also be selected. Read more in the section entitled “Your home’s heating curve”. Smart A CTC GSi 16...
-
Page 103: Smart Grid
• Normal price: (Smart A: Open, Smart B: Open). No effect on the system. • Low price mode: (Smart A: Open, Smart B: Closed). • Overcapacity mode: (Smart A: Closed, Smart B: Closed). • Blocking mode: (Smart A: Closed, Smart B: Open) CTC GSi 16... - Page 104 • DHW tank: Setpoint increased by 10°C (Factory setting, Smart low price °C) • Pool: Pool temp. increased by 1°C (Factory setting, Smart low price °C) • Cooling. Room temperature reduced by 1°C (Factory setting, Smart low price °C) CTC GSi 16...
- Page 105 (Factory setting, Smart overcap. °C). • Pool: Pool temp. is increased by 2°C (Factory setting, Smart overcap. °C) • Cooling. Room temperature is reduced by 2°C • EHS. Can be blocked in Installer/Settings/External heat source CTC GSi 16...
-
Page 106: Service
Opens and closes the mixing valve. Rad pump 2 Starts and stops the radiator pump (G2). LED room sensor The room sensor alarm function can be controlled from here. When activated, the room sensor’s red LED comes on steady. CTC GSi 16... - Page 107 Electric heater L1A Electric heater L1B You use this function to test the electric heater’s various Electric heater L2A Electric heater L2B phases L1, L2 and L3. Electric heater L3A Electric heater L3B Immersion heater L1A Off (Off/On) CTC GSi 16...
- Page 108 Pump EHS tank (G46) (Off/On) Function test of circulation pump to tank transfer. Temperatures This displays current temperatures. Solar panels in (B30) Solar panels out (B31) EHS-tank (B47) EcoTank upper (B41) / lower (B42) X-vol. upper (B41) / lower (B42) CTC GSi 16...
- Page 109 An alarm which reoccurs within an hour is ignored so as not to fill up the log. If all the alarms are the same, this can indicate that there is an intermittent fault, e.g. a loose contact. CTC GSi 16...
- Page 110 Planning (Boverket) must be adhered to when setting maximum power output. In such a case the installer must enter the four figure code 8818, which will lock the installed maximum power once the 8818 code is changed to a different one. CTC GSi 16...
- Page 111 In this situation it is important that you have switched off any major consumers of electricity in the house. Also make sure that the backup thermostat is turned off. 12.20.8 Re-installation This command re-launches the installation sequence (see the section entitled “First start”). CTC GSi 16...
-
Page 112: Troubleshooting/Appropriate Measures
The room sensor ensures that the temperature in the room is always suitable circulation. and stable. For the sensor to provide the correct signals to the control unit, radiator thermostats should always be fully open in the area where the room sensor is located. CTC GSi 16... - Page 113 If heating is uneven, perform a check (if room sensor installed): • That the placement of the room sensors is appropriate for the house. • That the radiator thermostats don’t interfere with the room sensor. • That no other heat sources/cold sources interfere with the room sensor. CTC GSi 16...
- Page 114 If an unusual sound comes from hard-closing dishwasher and washing machines, this can be remedied using a shock arrestor. A shock arrestor can also be an alternative to soft-closing water taps. CTC GSi 16...
-
Page 115: Information Messages
Not currently in use in the UK. The compressor and electrical output are blocked when ripple control is active. CTC GSi 16... - Page 116 If the heating is switched off, “Heating off, heating circuit 1/2” is also displayed. [I028] Holiday period Displayed when setting the holiday schedule, which entails lowering the room temperature and that no hot water is produced. CTC GSi 16...
-
Page 117: Alarm Messages
Press reset and check whether the alarm recurs. If the fault recurs, contact your installer. [E047] Stop, low suct. gas exp. This message appears when the suction gas temperature is low. valve Press reset and check whether the alarm recurs. If the fault recurs, contact your installer. CTC GSi 16... - Page 118 If the fault recurs, contact your installer and tell them the error code number [E109] Driver: 29 Driver fault. where applicable. [E117] Driver: Offline Communication error. The electrical connection box and driver of the heat pump are not communicating. CTC GSi 16...
- Page 120 162 205 94-1 06/02/2019 Enertech AB. P.O Box 309 SE-341 26 Ljungby Sweden. www.ctc.se, www.ctc-heating.com...
Need help?
Do you have a question about the GSi 16 and is the answer not in the manual?
Questions and answers