Table of Contents
Advertisement
Available languages
Available languages
Quick Links
Bedienungsanleitung
celexon Batterie Leinwand
V2.0 Motor Professional Plus
Vielen Dank für den Kauf dieses Produkts.
Für eine optimale Leistung und Sicherheit lesen Sie diese Anweisungen bitte sorgfältig
durch, bevor Sie dieses Produkt anschließen oder betreiben. Bitte bewahren Sie diese
Anleitung für eine spätere Verwendung auf.
Version: 32422_031
Advertisement
Table of Contents

Related Manuals for Celexon Motor Professional Plus V2.0


Summary of Contents for Celexon Motor Professional Plus V2.0
- Page 1 Bedienungsanleitung celexon Batterie Leinwand V2.0 Motor Professional Plus Vielen Dank für den Kauf dieses Produkts. Für eine optimale Leistung und Sicherheit lesen Sie diese Anweisungen bitte sorgfältig durch, bevor Sie dieses Produkt anschließen oder betreiben. Bitte bewahren Sie diese Anleitung für eine spätere Verwendung auf.
- Page 2 Beschädigungen am Produkt zu finden sind. Sollten Sie äußerliche Beschädigungen an dem Gerät oder unerwartete oder unübliche Funktionsweisen feststellen, darf das Produkt nicht weiter genutzt werden. Kontaktieren Sie umgehend den Händler, bei dem Sie das Produkt gekauft haben oder celexon direkt (Web: www.celexon.de, Mail: info@celexon.de) für weitere Informationen. •...
- Page 3 (Web: www.celexon.de, Mail: info@celexon.de). • Technische Änderungen und Irrtümer vorbehalten. Der Hersteller übernimmt keine Verantwortung für Sachschäden oder Personenschäden, wenn die Leinwand außerhalb der empfohlenen Spezifikationen verwendet wird, oder bei unsachgemäßer Installation. Verwenden Sie diese Leinwand nicht in der Nähe von Heizungen oder Klimaanlagen.
- Page 4 HAFTUNGSAUSSCHLUSS Die Angaben in diesem Dokument können ohne vorherige Ankündigung durch den Hersteller geändert werden. Änderungen werden jeweils in den folgenden Versionen dieses Handbuchs ergänzt. Irrtümer ausgeschlossen. PFLEGEHINWEIS Reinigen Sie die Leinwand NIEMALS mit Alkohol oder anderen Reinigungsmit- teln, die Lösungsmittel enthalten. Benutzen Sie nur ein weiches und sauberes Tuch.
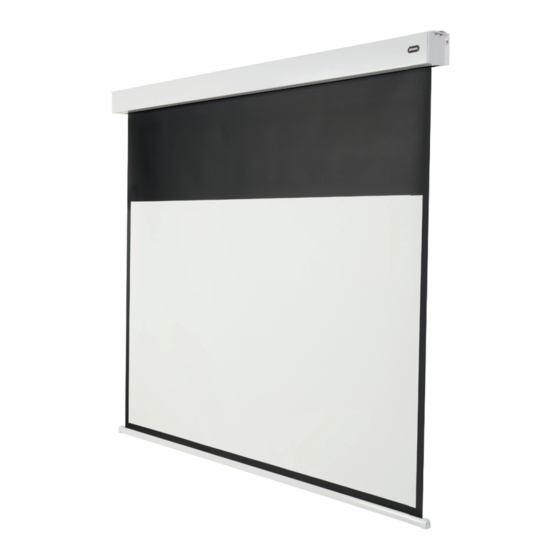
- Page 5 LIEFERUMFANG 1x Leinwand 4x Kunststoff-Dübel 4x Schrauben 1x Funk-Fernbedienung Benötigt (Nicht im Lieferumfang): Batterie-Knopfzelle CR2450 für Funk-Fernbedienung 1x Ladegerät INSTALLATIONSHINWEIS Installieren Sie die Leinwand an einer für alle Betrachter gut sichtbaren Posi- tion! Die optimale Installationshöhe entspricht der Position der Betrachter bei ausgefahrenem Tuch: Augenhöhe = unteres Drittel der Bildfl äche.
- Page 6 MONTAGE AN DER DECKE (ÜBER ÖSEN) Messen Sie den Abstand zwischen den Ösen. Markieren Sie die Punkte an der Decke und achten darauf, dass die Ösen in Flucht zu einander und parallel zur Wand ausgerichtet sind. Bohren Sie die Löcher an den Markie- rungen im passenden Durchmesser zu den eingesetzten Ringösen vor, schrau- ben diese fest in die Decke (gem.
- Page 7 Achten Sie auf Parallelität der Löcher zur Wand! Nutzen Sie für Ihren Unter- grund passende Dübel und Schrauben. Achtung: Schrauben nicht zu fest an- ziehen! Wenn Sie Risse in den Kappen feststellen, müssen diese ausgewech- selt werden! Die Leinwand darf nicht mit beschädigten Kappen genutzt und muss ggf.
- Page 8 Achten Sie darauf, dass die Leinwand gerade und in Waage installiert ist. Zie- hen Sie die Schrauben fest und bringen jeweils beidseitig die unteren Schrau- ben in der Seitenkappe an. Achtung: Schrauben nicht zu fest an- ziehen! Wenn Sie Risse in den Kappen feststellen, müssen diese ausgewech- selt werden! Die Leinwand darf nicht mit beschädigten Kappen genutzt und...
- Page 9 STEUERUNG ÜBER DIE FUNK-FERNBEDIENUNG HOCH STOPP RUNTER KOPPLUNG DER FUNK-FERNBEDIENUNG Die Funkfernbedienung ist bereits werksseitig mit dem integrierten Empfänger gekoppelt. Sollte die Kopplung aufgehoben sein, gehen Sie bitte wie folgt vor: SCHRITT 1 Drücken Sie gemäß der Abbildung die Taste am Mo- torkopf für 3 Sekunden.
-
Page 10: Bedienung
SCHRITT 4: LEINWAND STOPPEN Um die Leinwand manuell zu stoppen, betätigen Sie den Stopp-Taster auf der Fernbedienung oder am Gehäuse. Die Einstellung der Stopp-Punkte ist möglich. Bitte fordern Sie für diesen Vorgang die Anleitung bei Ihrem Fachhändler oder direkt über www.celexon.de an. - Page 11 Gutenbergstraße 2, 48282 Emsdetten, DE Produktname: celexon Batterie Leinwand V2.0 Motor Professional Plus Hiermit erklärt celexon Europe GmbH, dass das celexon Batterie Leinwand V2.0 Motor Professional Plus der Richtlinie 2014/53/EU entspricht. Die EU-Kon- formitätserklärung kann unter folgender Adresse heruntergeladen werden: www.celexon.de/zertifikate...
- Page 12 Operating instructions celexon battery screen V2.0 Professional Plus Thank you for purchasing this product. For optimum performance and safety, please read these instructions carefully before connecting or operating this product. Please retain these instructions for future reference. Version: 32422_061...
- Page 13 If you notice any external damage to the unit or any unexpected or unusual functioning, the product must not be used any further. Immediately contact the dealer from whom you purchased the product or celexon directly (Web: www.celexon.co.uk, Mail: info@celexon.co.uk) for further information.
- Page 14 • If you are unsure about the use of the product, please contact specialist personnel, your dealer or celexon directly (Web: www.celexon.co.uk, Mail: info@celexon.co.uk). • Technical changes and errors expected. The manufacturer accepts no responsibility for damage to property or personal injury, if the screen is used outside the recommended specifications, or in the event of improper installation.
-
Page 15: Care Instructions
DISCLAIMER The information in this document is subject to change without notice by the manufacturer. Changes will be added to subsequent versions of this manual. Errors expected. CARE INSTRUCTIONS NEVER clean the screen with alcohol or other cleaning agents containing solvents. -
Page 16: Installation Note
IN THE BOX 1x Screen 4x Plastic dowels 4x Screws 1x Radio remote control Required (Not included in delivery): Battery button cell CR2450 for Radio remote control 1x Battery charger INSTALLATION NOTE Install the screen in a position that is fully visible to all viewers! The optimum installation height corresponds to the position of the viewers in the centre of the screen with the screen fabric extended: eye level = lower third of the screen surface. - Page 17 MOUNTING ON THE CEILING (VIA EYELETS) Measure the distance between the eyelets. Mark points ceiling and make sure that the eyelets are aligned with each other and parallel to the wall. Drill the holes at the markings at a diameter to match the diameter of the ring eyelet used, screw them fi rmly into the ceiling (according to the manufacturer‘s instructions and the...
-
Page 18: Mounting On The Wall
Make sure that the holes are parallel to the wall! Use suitable dowels and screws for your substrate. Caution: overtighten screws! If you notice cracks in the caps they must be replaced! The screen must not be used with cracked caps. Please ensure that the metal plates are also used for wall and ceiling mounting, otherwise a safe installation cannot be... - Page 19 Make sure that the screen is installed straight and level. Tighten the screws and install the bottom screws in the side cap on both sides. Caution: overtighten screws! If you notice cracks in the caps they must be replaced! The screen must not be used with cracked caps.
- Page 20 CONTROL VIA THE RADIO REMOTE CONTROL STOP DOWN PAIRING THE RADIO REMOTE CONTROL The radio remote control is already coupled to the integrated receiver at the factory. If the pairing has been lost, please proceed as follows: STEP 1 As shown in the illustration, press the button on the motor head for 3 seconds.
- Page 21 To stop the projection screen manually, press the stop button on the remote control or on the housing. It is possible to set the stop points. Please request the instructions for this procedure from your specialist dealer or directly via www.celexon.com...
- Page 22 Gutenbergstraße 2, 48282 Emsdetten, DE Product name: celexon battery screen V2.0 Professional Plus Hereby celexon Europe GmbH declares that the celexon battery screen V2.0 Professional Plus complies with the directive 2014/53/EU. The EU declaration of conformity can be downloaded from the following address: www.celexon.de/...
- Page 23 Product name: celexon battery screen V2.0 Professional Plus Hereby celexon Europe GmbH declares that the radio equipment type celexon battery screen V2.0 Professional Plus complies with the Radio Equipment Regulations 2017. The UK declaration of conformity can be downloaded from the following address: www.celexon.de/zertifikate...
-
Page 24: Manuel D'utilisation
Manuel d’utilisation celexon écran Motorisé sur batterie PRO Plus V2.0 Nous vous remercions d’avoir acheté cet article. Pour des performances et une sécurité optimales, veuillez lire attentivement ces instructions avant d’installer ou d’utiliser ce produit. Veuillez conserver ce manuel pour une utilisation ultérieure. - Page 25 Si vous constatez des dommages extérieurs sur le produit ou un fonctionnement inattendu ou inhabituel, l’écran ne doit plus être utilisé. Contactez immédiatement le revendeur chez qui vous avez acheté le produit ou directement le fabricant celexon (Web: www.celexon.fr, Mail: info@celexon.fr) pour plus d’informations. •...
- Page 26 également être annulée en cas d’installation ou d’utilisation incorrecte. • Si vous avez des doutes sur l’utilisation du produit, contactez le personnel spécialisé, votre revendeur ou le fabricant celexon directement (Web: www.celexon.fr, mail: info@celexon.fr). • Sous réserve de modifications techniques et d’erreurs.
-
Page 27: Avis De Non-Responsabilité
Les positions des points de butée sont déjà réglées de manière optimale en usine et ne doivent pas être modifiées. Pour les écrans motorisés en particulier, il convient de toujours utiliser toute la longueur de la toile afin de garantir la meilleure planéité. Un réglage de quelques centimètres des points de butée finaux ne devrait être effectué... -
Page 28: Contenu De La Livraison
CONTENU DE LA LIVRAISON 1x écran de projection 4x chevilles en plastique 4x vis 1x télécommande radiofréquence Nécessaire (non fourni): Pile bouton CR2450 pour Télécommande radiofréquence 1x câble d’alimentation électrique CONSEIL D’INSTALLATION Installez l’écran à un endroit bien visible pour tous les spectateurs ! La hauteur d’installation optimale correspond à... - Page 29 MONTAGE AU PLAFOND (AVEC LES ANNEAUX) Mesurez la distance entre les anneaux. Marquez les points au plafond en veillant à ce que les anneaux soient alignés ensemble et parallèles au mur. Percez trous niveau marques au diamètre correspondant aux crochets utilisés (non fournis), vissez-les fermement dans le plafond (selon les indications du fabricant et en fonction de la charge de la toile) et...
- Page 30 Veillez à ce que les trous soient parallèles au mur ! Utilisez des chevilles et des vis adaptées à votre plafond. Attention: ne pas trop serrer les vis ! Si vous constatez des fi ssures dans les capuchons, ceux-ci doivent être remplacés ! L’écran ne doit pas être utilisé...
- Page 31 Veillez à ce que l’écran soit installé bien droit et à niveau. Serrez les vis et placez des deux côtés les vis inférieures dans les capuchons latéraux. Attention: ne pas trop serrer les vis ! Si vous constatez des fi ssures dans les capuchons, ceux-ci doivent être remplacés ! L‘écran ne doit pas être utilisé...
- Page 32 CONTRÔLE VIA LA TÉLÉCOMMANDE RADIOFRÉQUENCE Haut Arrêt APPARIEMENT DE LA TÉLÉCOMMANDE RADIOFRÉQUENCE La télécommande radiofréquence est déjà couplée en usine avec le récepteur intégré. Si le couplage est annulé, veuillez procéder comme suit: ÉTAPE 1 Appuyez sur le bouton du moteur pendant 3 secondes, comme indiqué...
-
Page 33: Étape 1: Contrôle De Sécurité
FONCTIONNEMENT ÉTAPE 1: CONTRÔLE DE SÉCURITÉ L’écran est chargé à environ 1/3 de sa capacité de charge au moment de la livraison. Branchez la fi che dans la prise de courant (veillez à ce que la tension soit correcte et que le type de fi che soit adapté). Le câble ne doit pas être posé sur des surfaces chaudes ou être tendu. - Page 34 Ecran de projection celexon motorisé PRO PLUS sur batterie V2.0 Par la présente, celexon Europe GmbH déclare que le produit Ecran de projection celexon motorisé PRO PLUS sur batterie V2.0 est conforme à la directive 2014/53/EU. La déclaration de conformité UE peut être téléchargée à l’adresse suivante: www.celexon.de/zertifikate...
- Page 35 Manual de usuario celexon Professional Plus V2.0 motor pantalla con batería Gracias por comprar este producto. Para un rendimiento y seguridad óptima, lea atentamente estas instrucciones antes de conectar o utilizar este producto. Conserve estas instrucciones para futuras consultas. Versión: 32422_032...
- Page 36 Si observa algún daño externo en la unidad o un funcionamiento inespe- rado o inusual, no siga utilizando el producto. Póngase inmediatamente en contacto con el distribuidor al que compró el producto o directamente con celexon (Web: www.celexon.es, correo: info@celexon.es) para obtener más información.
- Page 37 • Si tiene dudas sobre el uso del producto, póngase en contacto con personal cua- lificado, con su distribuidor o directamente con celexon (Web: www.celexon.es, correo: info@celexon.es). • Nos reservamos el derecho sobre posibles cambios y/o errores técnicos.
-
Page 38: Instrucciones De Cuidado
EXONERACIÓN DE RESPONSABILIDAD La información de este documento puede ser modificada por el fabricante sin previo aviso. Los cambios se añadirán a las versiones posteriores de este ma- nual. Excepto los errores. INSTRUCCIONES DE CUIDADO NUNCA limpie la lona con alcohol u otros productos de limpieza que con- tengan disolventes. - Page 39 ALCANCE DE LA ENTREGA 1x Pantalla de Proyección 4x Tacos de plástico 4x Tornillos 1x Mando a distancia por radio frecuencia Necesario (no incluido en la entrega): Pila de botón CR2450 para Mando a dis- tancia por radio 1x Cargador NOTA DE INSTALACIÓN Instale la pantalla en una posición claramente visible para todos los espectado- res.
- Page 40 MONTAJE EN EL TECHO (MEDIANTE ARGOLLAS) Mida la distancia entre las argollas. Mar- que los puntos en el techo y asegúrese de que las argollas estén alineadas en- tre sí y paralelas a la pared. Perfore previamente los agujeros en las marcas con el diámetro adecuado para los anillas utilizados, atorníllelos fi rme- mente en el techo (según las especifi -...
-
Page 41: Montaje En La Pared
La pantalla no debe utilizarse con ta- pas dañadas y debe desmontarse in- mediatamente si es necesario. Por favor, asegúrese de que los tacos/ arandelas de metal también se utilizan para el montaje en la pared y el techo, de lo contrario no se puede garantizar una instalación segura. - Page 42 Atención: ¡No apriete demasiado los tornillos! Si se observan grietas en las tapas, hay que sustituirlas. La pantalla no debe utilizarse con tapas dañadas y debe desmontarse inmediatamente si es necesario. Por favor, asegúrese de que los tacos / arandelas metálicas se utilizan tam- bién para el montaje en la pared y en el techo, de lo contrario no se puede garantizar una instalación segura.
- Page 43 CONTROL A TRAVÉS DEL MANDO A DISTANCIA POR RADIO ARRIBA PARAR ABAJO EMPAREJAMIENTO DEL MANDO A DISTANCIA POR RADIO El mando a distancia por radio ya viene emparejado de fábrica con el receptor integrado. Si se cancela el emparejamiento, proceda de la siguiente manera: PASO 1 Presione el botón en el motor durante 3 segundos como se muestra en la ilustración.
-
Page 44: Paso 1: Control De Seguridad
Para detener la pantalla manualmente, pulse los botones de parada del mando a distancia o de la carcasa. Es posible fi jar los puntos de parada. Solicite las instrucciones para este procedimiento a su distribui- dor especializado o directamente a través de www.celexon.es. - Page 45 Gutenbergstraße 2, 48282 Emsdetten, DE Nombre del producto: celexon Battery Screen V2.0 motor Professional Plus Por la presente, celexon Europe GmbH declara que el celexon Battery Screen V2.0 motor Professional Plus cumple con la Directiva 2014/53/UE. La decla- ración de conformidad de la UE puede descargarse en la siguiente dirección: www.celexon.de/zertifikate...
- Page 46 Manuale di istruzioni celexon schermo motorizzato Professional Plus a batteria V2.0 Gentile Cliente, celexon ringrazia l´acquisto questo prodotto. Prima di utilizzare lo schermo leggere attentamente le istruzioni e conservare il manuale dopo la consultazione. Version: 32422_031...
- Page 47 La mancata osservazione delle indicazioni sopracitate può causare danni a persone, allo schermo o ai dispositivi ad esso collegati. La garanzia non copre danni dovuti ad un‘installazione o ad un uso non idonei. • In caso di dubbi sull‘utilizzo del prodotto, rivolgersi direttamente o celexon Europe...
- Page 48 GmbH (info@celexon.it, www.celexon.it) o a installatori specializzati. • Le informazioni presenti all´interno di questo manuale possono subire modifiche senza alcun preavviso. Versioni successive del presente manuale possono dunque contenere correzioni/aggiunte. Il produttore non si assume alcuna responsabilità per danni a persone o cose in caso di utilizzo scorretto dello schermo o errata installazione.
-
Page 49: Esclusione Di Responsabilità
ESCLUSIONE DI RESPONSABILITÀ Le informazioni contenute in questo documento sono soggette a modifiche senza preavviso da parte del produttore. Le modifiche saranno apportate nelle versioni successive di questo manuale. Il produttore non garantisce o assicura la garanzia della correttezza delle informazioni contenute in questo documen- INDICAZIONI SULLA CURA DEL PRODOTTO Pulire la superficie dello schermo da asciutta solo con un panno morbido. -
Page 50: Contenuto Della Fornitura
CONTENUTO DELLA FORNITURA 1x schermo 4x tasselli in plastica 4x viti 1x radiocomando Attenzione: Batteria CR2450 NON inclusa nella fornitura! Necessaria per il telecomando! 1x cavo di alimentazione INSTALLAZIONE lnstallare lo schermo in un punto ben visibile da tutti gli spettatori! Lo spetta- tore principale dovrebbe trovarsi al centro dello schermo e, una volta srotolato il telo, l’altezza degli occhi dovrebbe coincidere con la parte inferiore (1/3) dell’... - Page 51 MONTAGGIO AL SOFFITTO (FISSAGGIO TRAMITE GANCI) Fissare i ganci alle estremità del casso- netto e misurare la distanza tra di esse. Fare un segno sul soffi tto in corrispon- denza delle stesse. Fare attenzione che le asole siano perfettamente parallele alla parete.
- Page 52 I punti segnati devono essere paralleli alla parete! Utilizzare tasselli e viti ido- nei alla superfi cie su cui verrà installa- to lo schermo e avvitare lo schermo al soffi tto. Attenzione: non avvitare eccessiva- mente! In caso di lesioni è necessario sostituire i coperchi posti alle estremità...
- Page 53 Verifi care con una livella la perpendi- colarità dello schermo. Finire di avvi- tare le viti e inserire quelle inferiori nei coperchi laterali. Attenzione: non stringere troppo le viti! In caso di lesioni come crepe, le coperture laterali dello schermo de- vono essere sostituite! Lo schermo di proiezione non deve essere usato con coperchi laterali danneggiati! Si prega...
- Page 54 AZIONAMENTO DELLO SCHERMO DAL RADIOCOMANDO RISALITA STOP DISCESA ACCOPPIAMENTO RADIOCOMANDO-RICEVITORE Il radiocomando è già collegato al ricevitore in dotazione. Qualora non fosse così, procedere come segue: STEP 1 Come mostrato nell‘illustrazione, tenere premuto per 3 secondi il pulsante sulla testa del motore. Lo schermo inizia a scendere completamente, per poi risalire.
- Page 55 STEP 4: FERMARE LA RISALITA/ DISCESA DEL TELO Per fermare la tela nella posizione desiderata, è suffi ciente premere il pulsante centrale alle due frecce. È possibile regolare i punti di arresto. Richiedete le istruzioni per questa procedura al vostro rivenditore specializzato o direttamente su www.celexon.it...
- Page 56 Nome del prodotto:celexon schermo motorizzato Professional Plus a batteria V2.0 Con la presente, celexon Europe GmbH dichiara che il prodotto celexon schermo motorizzato Professional Plus a batteria V2.0 è conforme alla direttiva 2014/53/ EU. La dichiarazione di conformità UE può essere scaricata al seguente indirizzo: www.celexon.de/zertifikate...
-
Page 57: Instrukcja Obsługi
Instrukcja obsługi Ekran projekcyjny na baterie ce- lexon V2.0 Motor Professional Plus Dziękujemy za zakup tego produktu. Aby zapewnić optymalne działanie i bezpieczeństwo, przed podłączeniem lub obsługą tego produktu należy uważnie przeczytać niniejsze instrukcje. Prosimy o zachowanie niniejszej instrukcji do wykorzystania w przyszłości. Wersja: 32422_031... -
Page 58: Wskazówki Ostrzegawcze
Jeśli widoczne są zewnętrzne uszkodzenia urządzenia lub w przypadku stwierdzenia niespodziewanego lub nietypowego sposobu działania nie wolno da- lej używać produktu. Należy bezzwłocznie skontaktować się ze sprzedawcą, u któ- rego nabyto produkt lub bezpośrednio z firmą celexon (Internet: www.celexon.pl, e-mail: info@celexon.pl), aby uzyskać więcej informacji. •... - Page 59 (Internet: www.celexon.pl, e-mail: info@celexon.pl). • Zastrzega się możliwość zmian technicznych i błędów. Producent nie ponosi odpowiedzialności za szkody materialne lub obrażenia ciała, jeśli ekran projekcyjny będzie używany niezgodnie z zalecanymi specyfikacjami lub jeśli jest nieprawidłowo zainstalowany. Nie używać ekranu projekcyjnego w pobliżu grzejników lub klimatyzatorów.
-
Page 60: Wyłączenie Odpowiedzialności
WYŁĄCZENIE ODPOWIEDZIALNOŚCI Informacje zawarte w tym dokumencie mogą ulec zmianie bez uprzedniego powiadomienia ze strony producenta. Zmiany będą dodawane do kolejnych wersji niniejszej instrukcji. Wyklucza się pomyłki. WSKAZÓWKA DOTYCZĄCA PIELĘGNACJI NIGDY nie czyścić ekranu projekcyjnego alkoholem lub innymi środkami czyszczącymi zawierającymi rozpuszczalniki. Używać tylko miękkiej i czystej szmatki. -
Page 61: Zakres Dostawy
ZAKRES DOSTAWY 1x ekran projekcyjny 4x kołki plastikowe 4x śruby 1x bezprzewodowy pilot zdalnego sterowania Potrzebne elementy (nie dołączono do zestawu): bateria guzikowa CR2450 do bezprzewodowego pilota zdalnego ste- rowania 1x ładowarka WSKAZÓWKA DOTYCZĄCA INSTALACJI Zainstalować ekran projekcyjny w miejscu dobrze widocznym dla wszystkich widzów! Optymalna wysokość... - Page 62 MONTAŻ NA SUFICIE (ZA POMOCĄ UCHWYTÓW) Zmierzyć odstęp między zaczepami. Zaznaczyć punkty na sufi cie upew- niając się, że zaczepy są wyrównane względem siebie i skierowane równo- legle do ściany. miejscach oznaczeń wywiercić otwory o odpowiedniej średnicy dla zastosowanych uchwytów, wkręcić je mocno w sufi t (zgodnie z zaleceniami producenta i obciążeniem ekranu pro- jekcyjnego) i zawiesić...
-
Page 63: Montaż Na Ścianie
Upewnić się, że otwory są rozmieszczo- ne równoległe względem ściany! Użyć kołków i śrub odpowiednich do dane- go podłoża. Uwaga: Nie dokręcać śrub zbyt moc- no! W przypadku stwierdzenia pęknięć na osłonach należy je wymienić! Ekra- nu projekcyjnego nie wolno używać z uszkodzonymi osłonami i w razie po- trzeby należy go natychmiast zdjąć. - Page 64 Upewnić się, czy ekran projekcyjny jest zainstalowany prosto i poziomo. Dokręcić śruby i zainstalować każdo- razowo dolne śruby w bocznych osło- nach po obu stronach. Uwaga: Nie dokręcać śrub zbyt moc- no! W przypadku stwierdzenia pęknięć na osłonach należy je wymienić! Ekra- nu projekcyjnego nie wolno używać...
- Page 65 STEROWANIE ZA POMOCĄ BEZPRZEWODOWEGO PILOTA ZDAL- NEGO STEROWANIA DO GÓRY STOP W DÓŁ PODŁĄCZANIE BEZPRZEWODOWEGO PILOTA ZDALNEGO STERO- WANIA Bezprzewodowy pilot zdalnego sterowania jest już fabrycznie sparowany ze zintegrowanym odbiornikiem. Jeśli połączenie zostało usunięte, należy wyko- nać następujące czynności: KROK 1 Zgodnie z rysunkiem nacisnąć...
- Page 66 KROK 4: ZATRZYMYWANIE EKRANU PROJEKCYJNEGO Aby ręcznie zatrzymać ekran projekcyjny, nacisnąć przycisk Stop na pilocie zdalnego sterowania lub na obudowie. Możliwe jest ustawienie punktów zatrzymania. Instrukcje dotyczące tego procesu można uzyskać u sprzedawcy specjalistycznego lub bezpośrednio na stronie www.celexon.de.
- Page 67 Ekran projekcyjny na baterie celexon V2.0 Motor Professional Plus Firma celexon Europe GmbH niniejszym oświadcza, że ekran projekcyj- ny na baterie celexon V2.0 Motor Professional Plus jest zgodny z Dyrek- tywą 2014/53/UE. Deklarację zgodności UE można pobrać pod adresem: www.celexon.de/zertifikate Symbol oznacza, że w krajach UE urządzenia elektryczne i elektroniczne...
- Page 68 Handleiding celexon accu-scherm V2.0 Motor Professional Plus Hartelijk dank voor uw aankoop van dit product. Voor optimale prestaties en veiligheid moet u deze aanwijzingen zorgvuldig doorlezen voordat u dit product aansluit of gebruikt. Bewaar deze handleiding voor later gebruik. Versie: 32422_031...
- Page 69 Mocht u beschadigingen aan de buitenkant van het apparaat of een onverwachte of ongebruikelijke werking constateren, mag het product niet verder worden gebruikt. Neem voor meer informatie onmiddellijk contact op met de dealer waarbij u het product hebt gekocht of rechtstreeks met celexon (internet: www.celexon.nl, e-mail: info@celexon.nl). •...
- Page 70 • Als u twijfelt bij het gebruik van het product, neem dan contact op met vak- personeel, uw dealer of rechtstreeks met celexon (internet: www.celexon.nl, e-mail: info@celexon.nl). • Technische wijzigingen en fouten zijn voorbehouden.
-
Page 71: Uitsluiting Van Aansprakelijkheid
UITSLUITING VAN AANSPRAKELIJKHEID De informatie in dit document kan zonder voorafgaande kennisgeving door de fabrikant worden gewijzigd. Wijzigingen worden telkens in de volgende versies van dit handboek aangevuld. Fouten voorbehouden. VERZORGINGSAANWIJZING Reinig het scherm NOOIT met alcohol of andere reinigingsmiddelen die op- losmiddel bevatten. - Page 72 LEVERINGSOMVANG 1x scherm 4x kunststof pluggen 4x schroeven 1x draadloze afstandsbe- 1x draadloze afstandsbe- diening Benodigd (niet in leveringsomvang): Knoopcelbatterij CR2450 voor draadloze afstandsbediening 1x oplader INSTALLATIE-AANWIJZING Installeer het scherm op een positie die voor alle kijkers goed zichtbaar is! De optimale installatiehoogte komt overeen met de positie van de kijkers als het doek uitgeschoven is: Ooghoogte = onderste derde deel van het beeldopper- vlak.
- Page 73 MONTAGE AAN HET PLAFOND (VIA OGEN) Meet de afstand tussen de ogen. Mar- keer de punten op het plafond en let erop, dat de ogen op één lijn ten op- zichte van elkaar en parallel ten opzich- te van de wand zijn uitgelijnd. Boor de gaten op de markeringen in de passende diameter voor de geplaatste ringogen, schroef deze vast in het pla-...
- Page 74 Let erop dat gaten parallel ten opzich- te van de wand moeten zijn! Gebruik pluggen en schroeven die geschikt zijn voor uw ondergrond. Let op: Schroeven niet te vast aan- draaien! Als u scheuren in de kappen constateert, moeten deze worden ver- vangen! Het scherm mag niet met be- schadigde kappen worden gebruikt en moet evt.
- Page 75 Let erop dat het scherm recht en wa- terpas is geïnstalleerd. Draai de schroe- ven vast en breng aan beide kanten de onderste schroeven in de zijkap. Let op: Schroeven niet te vast aan- draaien! Als u scheuren in de kappen constateert, moeten deze worden ver- vangen! Het scherm mag niet met be- schadigde kappen worden gebruikt en...
- Page 76 BESTURING VIA DE DRAADLOZE AFSTANDSBEDIENING OMHOOG STOP OMLAAG KOPPELEN VAN DE DRAADLOZE AFSTANDSBEDIENING De draadloze afstandsbediening is af fabriek al met de geïntegreerde ontvan- ger gekoppeld. Mocht de koppeling verbroken zijn, gaat u als volgt te werk: STAP 1 Druk in overeenstemming met de afbeelding de toets op de motorkop gedurende 3 seconden in.
- Page 77 STAP 4: SCHERM STOPPEN Om het scherm handmatig te stoppen, gebruikt u de Stop-toets op de af- standsbediening of op de behuizing. De instelling van de stoppunten is mogelijk. Vraag voor deze procedure de handleiding bij uw dealer of direct via www.celexon.de aan.
- Page 78 Gutenbergstraße 2, 48282 Emsdetten, DE Productnaam: celexon accu-scherm V2.0 Motor Professional Plus Hiermee verklaart celexon Europe GmbH dat het celexon accu-scherm V2.0 Motor Professional Plus voldoet aan richtlijn 2014/53/EU. De EU-con- formiteitsverklaring kan op het volgende adres worden gedownload: www.celexon.de/zertifikate Het symbool wijst op de gescheiden inzameling van elektrische en elek- tronische apparaten in EU-landen.
- Page 79 Bruksanvisning celexon Batteridriven Projektorduk V2.0 Motor Professional Plus Tack för att du har köpt denna produkt. För optimal prestanda och säkerhet, läs dessa instruktioner noggrant innan du ansluter eller använder produkten. Spara också dessa instruktioner för framtida referens. Version: 32422_031...
- Page 80 är skadad, kontrollera också om produkten är skadad. Om du märker någon yttre skada på enheten eller oväntad eller ovanlig funktion, fortsätt inte att använda produkten. Kontakta omedelbart den återförsäljare som du köpte produkten av eller celexon direkt (webb: www.celexon.se, e-post: info@celexon.se) för ytterligare information. •...
- Page 81 • Om du är osäker på hur produkten ska användas, kontakta kvalificerad personal, din återförsäljare eller celexon direkt (webb: www.celexon.se, e-post: info@celexon.se). • Tekniska ändringar och fel förbehålles. Tillverkaren tar inget ansvar för skador på egendom eller personskador om duken an- vänds utanför de rekommenderade specifikationerna eller om den är felaktigt instal-...
- Page 82 ANSVARSFRISKRIVNING Informationen i detta dokument kan ändras av tillverkaren utan förhandsbes- ked. Ändringar kommer att läggas till i senare versioner av denna handbok. Fel förbehållna. SKÖTSELRÅD Rengör ALDRIG duken med alkohol eller andra rengöringsmedel som innehål- ler lösningsmedel. Använd endast en mjuk och ren trasa. Vid behov kan smuts avlägsnas från ytan med en mild tvållösning (max.
-
Page 83: Leveransens Omfattning
LEVERANSENS OMFATTNING 1x Projektorduk 4x Plastplugg 4x Skruvar 1x Radiofjärrkontroll 1x Radiofjärrkontroll Krävs (ingår inte i leveransen): Knappcellsbatteri CR2450 för Radiofjärrkontroll 1x Laddare MONTERINGSANVISNING Installera duken på en plats som är väl synlig för alla tittare! Den optimala höj- den för montering motsvarar tittarnas position när duken är utdragen: ögon- höjd = nedre tredjedelen av dukens yta. - Page 84 MONTERING I TAKET (VIA ÖGLOR) Mät avståndet mellan öglorna. Markera punkterna i taket och se till att öglor- na är i linje med varandra och parallella med väggen. Förborra hålen vid markeringarna i lämplig diameter för de ringöglor som används, skruva fast dem ordentligt i taket (enligt tillverkarens specifi kati- oner och belastningen på...
- Page 85 Se till att hålen är parallella med väg- gen! Använd lämpliga pluggar och skruvar för ditt underlag. OBS: Dra inte åt skruvarna för hårt! Om du märker sprickor i kåporna måste de bytas ut! Duken får inte användas med skadade kåpor och måste tas ned ome- delbart om det är nödvändigt.
- Page 86 Kontrollera att duken är installerad är monterad rakt och plant. Dra åt skru- varna och montera de nedre skruvarna i sidokåpan på båda sidor. OBS: Dra inte åt skruvarna för hårt! Om du märker sprickor i kåporna måste de bytas ut! Duken får inte användas med skadade kåpor och måste tas ned ome- delbart om det är nödvändigt.
- Page 87 STYRNING VIA RADIOFJÄRRKONTROLLEN STOPP KOPPLA IHOP RADIOFJÄRRKONTROLLEN Radiofjärrkontrollen är redan kopplad till den integrerade mottagaren i fabri- ken. Om parningen avbryts, fortsätt på följande sätt: STEG 1 Tryck på knappen på motorhuvudet i 3 sekunder en- ligt illustrationen. Duken fälls ut och dras in en gång. STEG 2 Tryck nu på...
- Page 88 STEG 4: STOPPA PROJEKTORDUKEN Om du vill stoppa duken manuellt trycker du på stoppknappen på fjärrkont- rollen eller på skåpet. Det är möjligt att justera stopppunkterna. Begär anvisningar för detta från din återförsäljare eller direkt via www.celexon.de.
- Page 89 Gutenbergstraße 2, 48282 Emsdetten, DE Produktnamn: celexon Batteridriven Projektorduk V2.0 Motor Professional Plus Härmed förklarar celexon Europe GmbH att celexon Batteridriven Projek- torduk V2.0 Motor Professional Plus uppfyller kraven i direktiv 2014/53/ EU EU-försäkran om överensstämmelse kan laddas ner från följande adress: www.celexon.de/zertifikate Symbolen visar att elektrisk och elektronisk utrustning samlas in separat i EU-länderna.
Need help?
Do you have a question about the Motor Professional Plus V2.0 and is the answer not in the manual?
Questions and answers