Celexon Professional Plus Operating Instructions Manual
Hide thumbs
Also See for Professional Plus:
- Operating instructions manual (97 pages) ,
- Installation manual (13 pages) ,
- User manual (9 pages)
Table of Contents
Advertisement
Available languages
Available languages
Quick Links
Bedienungsanleitung
celexon Leinwand Rollo
Professional Plus
Vielen Dank für den Kauf dieses Produkts.
Für eine optimale Leistung und Sicherheit lesen Sie diese Anweisungen bitte sorgfältig
durch, bevor Sie dieses Produkt anschließen oder betreiben. Bitte bewahren Sie diese
Anleitung für eine spätere Verwendung auf.
Version: 32422_031
Advertisement
Table of Contents

Related Manuals for Celexon Professional Plus


Summary of Contents for Celexon Professional Plus
- Page 1 Bedienungsanleitung celexon Leinwand Rollo Professional Plus Vielen Dank für den Kauf dieses Produkts. Für eine optimale Leistung und Sicherheit lesen Sie diese Anweisungen bitte sorgfältig durch, bevor Sie dieses Produkt anschließen oder betreiben. Bitte bewahren Sie diese Anleitung für eine spätere Verwendung auf.
- Page 2 Sollten Sie äußerliche Beschädigungen an dem Gerät oder unerwar- tete oder unübliche Funktionsweisen feststellen, darf das Produkt nicht weiter genutzt werden. Kontaktieren Sie umgehend den Händler, bei dem Sie das Produkt gekauft haben oder celexon direkt (Web: www.celexon.de, Mail: info@celexon.de) für weitere Informationen. •...
- Page 3 Auch kann bei fehlerhafter Installation oder Verwendung die Garantie erlöschen. • Wenn Sie beim Verwenden des Produktes unsicher sind, kontaktieren Sie Fachpersonal, Ihren Händler oder celexon direkt (Web: www.celexon.de, Mail: info@celexon.de). • Technische Änderungen und Irrtümer vorbehalten. Der Hersteller übernimmt keine Verantwortung für Sachschäden oder Perso- nenschäden, wenn die Leinwand außerhalb der empfohlenen Spezifikationen...
- Page 4 HAFTUNGSAUSSCHLUSS Die Angaben in diesem Dokument können ohne vorherige Ankündigung durch den Hersteller geändert werden. Änderungen werden jeweils in den folgenden Versionen dieses Handbuchs ergänzt. Irrtümer ausgeschlossen. PFLEGEHINWEIS Reinigen Sie die Leinwand NIEMALS mit Alkohol oder anderen Reinigungsmit- teln, die Lösungsmittel enthalten. Benutzen Sie nur ein weiches und sauberes Tuch.
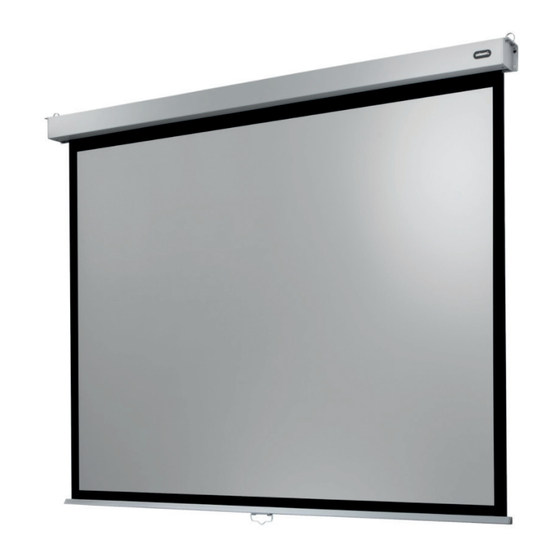
- Page 5 LIEFERUMFANG 1x Leinwand 4x Kunststoff-Dübel 4x Schrauben INSTALLATIONSHINWEIS Installieren Sie die Leinwand an einer für alle Betrachter gut sichtbaren Posi- tion! Die optimale Installationshöhe entspricht der Position der Betrachter bei ausgefahrenem Tuch: Augenhöhe = unteres Drittel der Bildfl äche. Die Leinwand kann an der Wand/ Decke installiert oder an der Decke an ge- schlossenen Ringösen zzgl.
- Page 6 Bohren Sie die Löcher an den Markie- rungen im passenden Durchmesser zu den eingesetzten Ringösen vor, schrau- ben diese fest in die Decke (gem. An- gaben des Herstellers und der Last der Leinwand entsprechend) und hängen die Leinwand mit Hilfe von Karabinern ein.
- Page 7 MONTAGE AN DER WAND Messen Sie den Abstand der Löcher in den Seitenkappen (Zwei pro Kappe) und übertragen diese auf die Wand. Bohren Sie die Löcher an den Markie- rungen im passenden Durchmesser zum Montagematerial vor und setzten das Material ein. Achten Sie darauf, dass die Bohrungen absolut waage- recht sind (Wasserwaage!).
-
Page 8: Bedienung
Gehäuse eingefahren werden. Durch Vibrationen am Gehäuse die durch das zu schnelle Einfahren entstehen, kann die Leinwand herabstürzen und Perso- nenschäden verursachen! celexon Europe GmbH | Gutenbergstraße 2 | 48282 Emsdetten | DE... - Page 9 Operating instructions celexon Manual Professional Plus Thank you for purchasing this product. For optimum performance and safety, please read these instructions carefully before connecting or operating this product. Please retain these instructions for future reference. Version: 32422_031...
- Page 10 If you notice any external damage to the appliance or any unexpec- ted or unusual functioning, do not use the product further. Immediately contact the dealer from whom you purchased the product or celexon directly (Web: www.celexon.co.uk, Mail: info@celexon.co.uk) for further information.
- Page 11 (Web: www.celexon.co.uk, Mail: info@celexon.co.uk) • Technical changes and errors expected. The manufacturer accepts no responsibility for damage to property or perso- nal injury if the screen is used outside the recommended specifications or for improper installation. Do not use this screen near heaters or air conditioners.
-
Page 12: Care Instructions
DISCLAIMER The information in this document is subject to change without notice by the manufacturer. Changes will be added to subsequent versions of this manual. The manufacturer does not guarantee or warrant for the correctness of the information in this document. CARE INSTRUCTIONS NEVER clean the screen with alcohol or other cleaning agents that contain sol- vents. -
Page 13: Installation Notes
IN THE BOX 1 x Screen 4 x Plastic dowels 4x Screws INSTALLATION NOTES Install the screen in a position that is fully visible to all viewers! The optimum installation height corresponds to the position of the viewers in the centre of the screen with the screen fabric extended: eye level = lower third of the screen surface. - Page 14 Pre-drill the holes at the markings with the right diameter drill bit for the ring eyelets and mounting material, fi x them to the ceiling (according to the instructions from the manufacturer and the load of the screen) and hang the screen from them.
-
Page 15: Mounting On The Wall
MOUNTING ON THE WALL Measure the distance between the holes in the side caps (two per cap) and transfer them to the wall. Drill the holes at the markings with the holes with the right diameter for the mounting material and make sure that the drill holes are absolutely level (Use a spirit level!). -
Page 16: Operation
Europe GmbH | Gutenbergstraße 2 | 48282 Emsdetten | DE... -
Page 17: Manuel D'utilisation
Manuel d’utilisation celexon Manuel PRO Plus Nous vous remercions d‘avoir acheté cet article. Pour des performances et une sécurité optimales, veuillez lire attentivement ces instructions avant d’installer ou d‘utiliser ce produit. Veuillez conserver ce manuel pour une utilisation ultérieure. Version: 32422_031... - Page 18 être utilisé. Contactez immédiatement le revendeur chez qui vous avez acheté le produit ou directement le fabricant celexon (Web: www.celexon.fr, Mail: info@celexon.fr) pour plus d‘informations. •...
- Page 19 La garantie peut également être annulée en cas d‘installation ou d‘utilisation incorrecte. • Si vous avez des doutes sur l‘utilisation du produit, contactez le personnel spécialisé, votre revendeur ou le fabricant celexon directement (Web: www.celexon.fr, Mail: info@celexon.fr). • Sous réserve de modifications techniques et d‘erreurs.
-
Page 20: Avis De Non-Responsabilité
AVIS DE NON-RESPONSABILITÉ Les informations contenues dans ce document peuvent être modifiées sans préavis par le fabricant. Les modifications seront toujours ajoutées dans les versions suivantes de ce manuel. Toute erreur est exclue. CONSEIL D‘ENTRETIEN Ne nettoyez JAMAIS la toile avec de l‘alcool ou d‘autres produits de nettoyage contenant des solvants. -
Page 21: Contenu De La Livraison
CONTENU DE LA LIVRAISON 1x écran de projection 4x chevilles en plastique 4x vis CONSEIL D‘INSTALLATION Installez l‘écran à un endroit bien visible pour tous les spectateurs! La hauteur d‘installation optimale correspond à la position des spectateurs assis lorsque la toile est déployée : hauteur des yeux = tiers inférieur de la surface de l‘image. - Page 22 Percez les trous au niveau des marques diamètre correspondant anneaux de levage utilisés, vissez-les fermement dans le plafond (selon les indications du fabricant et en fonction de la charge de la toile) et venez accrocher l’écran en installant les anneaux dans les crochets. MONTAGE AU PLAFOND (VISSÉ) Mesurez l‘espacement...
-
Page 23: Montage Sur Un Mur
MONTAGE SUR UN MUR Mesurez l‘espacement trous des capuchons latéraux (deux par capuchon) reportez-les mur. (Vérifiez que les trous choisis soient bien ceux qui se trouvent sur la partie arrière du capuchon, sur la surface parallèle au mur). Pré-percez les trous au niveau des marques au diamètre correspondant au matériel de montage et insérez les chevilles. - Page 24 à bien remonter l’écran manuellement dans le carter. L‘écran peut s’abîmer ou tomber et provoquer des dommages corporels en raison des vibrations dues à une remontée trop rapide! celexon Europe GmbH | Gutenbergstraße 2 | 48282 Emsdetten | DE...
- Page 25 Manual de usuario celexon manual Professional Plus Gracias por comprar este producto. Para un rendimiento y seguridad óptima, lea atentamente estas instrucciones antes de conectar o utilizar este producto. Conserve estas instrucciones para futuras consultas. Versión: 32422_031...
- Page 26 Si observa algún daño externo en la unidad o un funcionamiento inesperado o inusual, no siga utilizando el producto y póngase inmediatamente en contacto con el distribuidor autorizado, donde compró el producto o celexon directamente: www.celexon.es; info@celexon.es para más información. •...
- Page 27 La garantía también puede quedar anulada en caso de instalación o uso incorrecto. • Si tiene alguna duda sobre el uso del producto, póngase en contacto con el personal especializado, con su distribuidor o con el fabricante celexon directamente: www.celexon.es; info@celexon.es. • Se reservan los cambios y errores técnicos.
-
Page 28: Recomendaciones De Mantenimiento
EXONERACIÓN DE RESPONSABILIDAD La información contenida en este documento está sujeta a cambios sin previo aviso por parte del fabricante. Los cambios se incorporarán siempre en las versiones posteriores de este manual. Se excluyen los errores. RECOMENDACIONES DE MANTENIMIENTO NUNCA limpie el tejido con alcohol u otros productos de limpieza que contengan disolventes. -
Page 29: Contenido De La Entrega
CONTENIDO DE LA ENTREGA 1 X Pantalla 4 X Tacos de plástico 4 X Tornillos INSTRUCCIONES DE INSTALACIÓN Instale la pantalla en un lugar claramente visible para todos los espectadores. La altura óptima de instalación es la posición de los espectadores sentados con la pantalla desplegada: nivel de los ojos = tercio inferior del área de la imagen. - Page 30 Taladre previamente los agujeros en las marcas con el diámetro adecuado para los anillas utilizados, atorníllelos firmemente en el techo (según las especificaciones del fabricante y la carga de la pantalla) y cuelgue la pantalla. MONTAJE EN EL TECHO (ATORNILLADO) Mida la distancia entre los agujeros de las tapas laterales (dos por tapa) y transfieralos al techo.
-
Page 31: Montaje En La Pared
MONTAJE EN LA PARED Medir la distancia de los agujeros en las tapas laterales (dos por tapa) y transferirlos a la pared. Taladre previamente los agujeros en las marcas con el diámetro adecuado para el material de montaje e introduzca el material. - Page 32 Debido a las vibraciones que se producen en la carcasa al replegarse la pantalla con demasiada rapidez, ésta puede caerse y provocar daños personales. celexon Europe GmbH | Gutenbergstraße 2 | 48282 Emsdetten | DE...
- Page 33 Manuale di istruzioni celexon schermo manuale Professional Plus Gentile Cliente, celexon ringrazia l´acquisto questo prodotto. Prima di utilizzare lo schermo leggere attentamente le istruzioni e conservare il manuale dopo la consultazione. Version: 32422_031...
- Page 34 Qualora si riscontrassero danni esterni all´imballo, si prega di verificare che non ci siano danni al prodotto. In caso di danni al prodotto o malfun- zionamento dello stesso, non utilizzare lo schermo. Contattare immedia- tamente il venditore dello schermo o celexon Europe GmbH all´indirizzo info@celexon.it o www.celexon.it. •...
- Page 35 • In caso di dubbi sull‘utilizzo del prodotto, rivolgersi direttamente o celexon Europe GmbH (info@celexon.it o www.celexon.it) o a installatori specializ- zati. • Le informazioni presenti all´interno di questo manuale possono sub- ire modifiche senza alcun preavviso.
-
Page 36: Esclusione Di Responsabilità
ESCLUSIONE DI RESPONSABILITÀ Le informazioni contenute in questo documento sono soggette a modifiche senza preavviso da parte del produttore. Le modifiche saranno apportate nelle versioni successive di questo manuale. Il produttore non garantisce o assicura la garanzia della correttezza delle informazioni contenute in questo documen- INDICAZIONI SULLA CURA DEL PRODOTTO Pulire la superficie dello schermo da asciutta solo con un panno morbido. -
Page 37: Contenuto Della Fornitura
CONTENUTO DELLA FORNITURA 1x schermo 4x tasselli in plastica 4x viti INSTALLAZIONE Assicuratevi di fi ssare lo schermo in una posizione che assicuri un‘ottima visione a tutti gli spettatori. Fissate lo schermo in modo che la posizione degli occhi dello spettatore centrale sia nel terzo inferiore e centrali alla superfi cie di proiezione. - Page 38 Utilizzare tasselli e ganci idonei alla su- perfi cie su cui verrà installato lo scher- mo, forare il muro nei punti segnati e agganciare lo schermo. MONTAGGIO AL SOFFITTO (FISSAGGIO TRAMITE VITI) Misurare la distanza tra i fori presenti sulle estremità del cassonetto (due per ogni lato) e fare un segno sul soffi tto in corrispondenza degli stessi.
-
Page 39: Montaggio A Parete
MONTAGGIO A PARETE Misurare la distanza tra i fori presenti sulle estremità del cassonetto e fare un segno sulla parete in corrispondenza degli stessi. I punti segnati devono es- sere perfettamente allineati (utilizzare una livella!). Utilizzare tasselli e ganci idonei alla su- perfi cie su cui verrà... - Page 40 In caso di vibrazioni al casso- netto dovute al riavvolgimento rapido del telo, lo schermo potrebbe cadere e causare lesioni alle persone. celexon Europe GmbH | Gutenbergstraße 2 | 48282 Emsdetten | DE...
-
Page 41: Instrukcja Obsługi
Instrukcja obsługi Ekran projekcyjny celexon Rollo Professional Plus Dziękujemy za zakup tego produktu. Aby zapewnić optymalne działanie i bezpieczeństwo, przed podłączeniem lub obsługą tego produktu należy uważnie przeczytać niniejsze instrukcje. Prosimy o zachowanie niniejszej instrukcji do wykorzystania w przyszłości. Wersja: 32422_031... -
Page 42: Wskazówki Ostrzegawcze
Nale- ży bezzwłocznie skontaktować się ze sprzedawcą, u którego nabyto pro- dukt lub bezpośrednio z firmą celexon (Internet: www.celexon.pl, e-mail: info@celexon.pl), aby uzyskać więcej informacji. •... - Page 43 • Jeśli nie ma pewności w odniesieniu do korzystania z produk- tu, skontaktować się z wykwalifikowanym personelem, sprzedaw- cą lub bezpośrednio z firmą celexon (Internet: www.celexon.pl, e-mail: info@celexon.pl). • Zastrzega się możliwość zmian technicznych i błędów. Producent nie ponosi odpowiedzialności za szkody materialne lub obrażenia ciała, jeśli ekran projekcyjny będzie używany niezgodnie z zalecanymi specyfi-...
-
Page 44: Wyłączenie Odpowiedzialności
WYŁĄCZENIE ODPOWIEDZIALNOŚCI Informacje zawarte w tym dokumencie mogą ulec zmianie bez uprzedniego powiadomienia ze strony producenta. Zmiany będą dodawane do kolejnych wersji niniejszej instrukcji. Wyklucza się pomyłki. WSKAZÓWKA DOTYCZĄCA PIELĘGNACJI NIGDY nie czyścić ekranu projekcyjnego alkoholem lub innymi środkami czyszczącymi zawierającymi rozpuszczalniki. Używać tylko miękkiej i czystej szmatki. -
Page 45: Zakres Dostawy
ZAKRES DOSTAWY 1x ekran projekcyjny 4x kołki plastikowe 4x śruby WSKAZÓWKA DOTYCZĄCA INSTALACJI Zainstalować ekran projekcyjny w miejscu dobrze widocznym dla wszystkich widzów! Optymalna wysokość montażu odpowiada pozycji widzów przy roz- winiętym ekranie: Wysokość oczu = dolna jedna trzecia obszaru obrazu. Ekran projekcyjny można zamontować... - Page 46 miejscach oznaczeń wywiercić otwory o odpowiedniej średnicy dla zastosowanych uchwytów, wkręcić je mocno w sufi t (zgodnie z zaleceniami producenta i obciążeniem ekranu pro- jekcyjnego) i zawiesić ekran projekcyj- ny za pomocą karabińczyków. MONTAŻ NA SUFICIE (WARIANT PRZYKRĘCANY) Zmierzyć rozstaw otworów w bocz- nych osłonach (po dwa na osłonę) i przenieść...
-
Page 47: Montaż Na Ścianie
MONTAŻ NA ŚCIANIE Zmierzyć rozstaw otworów w bocznych osłonach (po dwa na osłonę) i prze- nieść je na ścianę. Wywiercić otwory w miejscach oznaczeń o odpowiedniej średnicy dla materiału montażowego i umieścić materiał w otworach. Upew- nić się, czy otwory są ustawione do- kładnie poziomo (poziomica!). - Page 48 Wibracje obudowy spo- wodowane zbyt szybkim jej schowa- niem mogą doprowadzić do upadku ekranu projekcyjnego i obrażeń ciała! celexon Europe GmbH | Gutenbergstraße 2 | 48282 Emsdetten | DE...
- Page 49 Handleiding celexon scherm Rollo Professional Plus Hartelijk dank voor uw aankoop van dit product. Voor optimale prestaties en veiligheid moet u deze aanwijzingen zorgvuldig doorlezen voordat u dit product aansluit of gebruikt. Bewaar deze handleiding voor later gebruik. Versie: 32422_031...
- Page 50 Neem voor meer informatie onmiddellijk contact op met de dealer waar- bij u het product hebt gekocht of rechtstreeks met celexon (internet: www.celexon.nl, e-mail: info@celexon.nl). •...
- Page 51 Bij foutieve installatie of gebruik kan de garantie ook komen te vervallen. • Als u twijfelt bij het gebruik van het product, neem dan contact op met vak- personeel, uw dealer of rechtstreeks met celexon (internet: www.celexon.nl, e-mail: info@celexon.nl). • Technische wijzigingen en fouten zijn voorbehouden.
-
Page 52: Uitsluiting Van Aansprakelijkheid
UITSLUITING VAN AANSPRAKELIJKHEID De informatie in dit document kan zonder voorafgaande kennisgeving door de fabrikant worden gewijzigd. Wijzigingen worden telkens in de volgende versies van dit handboek aangevuld. Fouten voorbehouden. VERZORGINGSAANWIJZING Reinig het scherm NOOIT met alcohol of andere reinigingsmiddelen die op- losmiddel bevatten. - Page 53 LEVERINGSOMVANG 1x scherm 4x kunststof pluggen 4x schroeven INSTALLATIE-AANWIJZING Installeer het scherm op een positie die voor alle kijkers goed zichtbaar is! De optimale installatiehoogte komt overeen met de positie van de kijkers als het doek uitgeschoven is: Ooghoogte = onderste derde deel van het beeldopper- vlak.
- Page 54 Boor de gaten op de markeringen in de passende diameter voor de geplaatste ringogen, schroef deze vast in het pla- fond (in overeenstemming met infor- matie van de fabrikant en belasting van het scherm) en hang het scherm in met behulp van karabijnhaken.
- Page 55 MONTAGE AAN DE WAND Meet de afstand van de gaten in de zijkappen (twee per kap en breng deze over op de wand. Boor de gaten op de markeringen in de passende diameter voor het montagemateriaal en plaats het materiaal. Let erop dat de boorga- ten absoluut horizontaal zijn (water- pas!).
- Page 56 Door trillingen aan de behuizing die door het te snelle in- schuiven ontstaan, kan het scherm naar beneden vallen en letsel veroorzaken! celexon Europe GmbH | Gutenbergstraße 2 | 48282 Emsdetten | DE...
- Page 57 Bruksanvisning celexon Manuell Professional Plus Projektorduk Tack för att du har köpt den här produkten. För optimal prestanda och säkerhet, läs dessa instruktioner noggrant innan du ansluter eller använder den här produkten. Spara dessa instruktioner för framtida referens. Version: 32422_031...
- Page 58 är skadad. Om du upptäcker yttre skador på enheten eller oväntad eller ovanlig funktion får produkten inte användas längre. Kontakta ome- delbart den återförsäljare som du köpte produkten av eller celexon direkt (webb: www.celexon.se, e-post: info@celexon.se) för ytterligare informa- tion.
- Page 59 • Om du är osäker på hur produkten ska användas, kontakta kvalificerad per- sonal, din återförsäljare eller celexon direkt (webb: www.celexon.se, e-post: info@celexon.se). • Tekniska ändringar och fel förbehålles.
- Page 60 ANSVARSFRISKRIVNING Informationen i detta dokument kan ändras av tillverkaren utan förhandsbes- ked. Ändringar kommer att läggas till i senare versioner av denna handbok. Fel förbehållna. SKÖTSELRÅD Rengör ALDRIG duken med alkohol eller andra rengöringsmedel som innehål- ler lösningsmedel. Använd endast en mjuk och ren trasa. Vid behov kan smuts avlägsnas från ytan med en mild tvållösning (max.
-
Page 61: Leveransens Omfattning
LEVERANSENS OMFATTNING 1x Projektorduk 4 x Plastplugg 4x Skruvar MONTERINGSANVISNING Installera duken på en plats som är väl synlig för alla tittare! Den optimala hö- jden för montering motsvarar tittarnas position när duken är utdragen: ögon- höjd = nedre tredjedelen av dukens yta. Duken kan installeras på... - Page 62 Förborra hålen vid markeringarna i lämplig diameter för de ringöglor som används, skruva fast dem ordentligt i taket (enligt tillverkarens specifi kati- oner och belastningen på duken) och häng upp duken med hjälp av karbin- hakar. MONTERING I TAKET (MED SKRUVAR) Mät avståndet mellan hålen i sidokåpor- na (två...
- Page 63 MONTERING PÅ VÄGG Mät avståndet mellan hålen i si- dokåporna (två per kåpa) och överför dem till väggen. Förborra hålen vid markeringarna i lämplig diameter för monteringsmaterialet och sätt in mate- rialet. Se till att hålen är helt horisontel- la (vattenpass!). Använd lämpliga pluggar och skruvar för din yta.
- Page 64 Observera att du aldrig får dra ut duken helt, efter- som den då inte längre kan frigöras och föras uppåt. Titta efter stoppmärket längst upp på duken. celexon Europe GmbH | Gutenbergstraße 2 | 48282 Emsdetten | DE...
Need help?
Do you have a question about the Professional Plus and is the answer not in the manual?
Questions and answers