Table of Contents
Advertisement
Quick Links
READ AND SAVE THESE INSTRUCTIONS
Thank you very much for purchasing this KDK product.
Please read these instructions especially "Safety Instructions" and "Installation Cautions"
carefully before attempting to install, operate or service the KDK product. Failure to comply
with instructions could result in personal injury or property damage.
Please explain to users how to operate and maintain the product after the installation, and
this booklet should be presented to users.
Please retain this booklet for future reference.
KDK
KDK
Installation and Operating Instructions
Model No.
型号
安装使用说明书
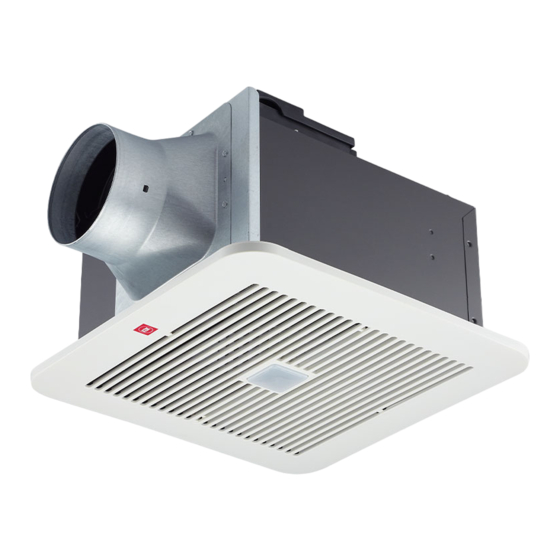
Ventilating Fan
24CURB
24CHRB
24CHRVB
换气扇
Advertisement
Table of Contents

Related Manuals for KDK 24CURB


Summary of Contents for KDK 24CURB
- Page 1 Thank you very much for purchasing this KDK product. Please read these instructions especially “Safety Instructions” and “Installation Cautions” carefully before attempting to install, operate or service the KDK product. Failure to comply with instructions could result in personal injury or property damage.
-
Page 2: Safety Instructions
SAFETY INSTRUCTIONS Please observe strictly 安全指引 Disconnect the power supply until blade is stationary before cleaning and maintenance. This appliance is not intended for use by persons (including children) with reduced physical, sensory or mental capabilities, or lack of experience and knowledge, unless they have been given supervision or instruction concerning use of the appliance by a person responsible for their safety. - Page 3 SAFETY INSTRUCTIONS Please observe strictly 安全指引 The following explanations must always be observed in order to prevent harm to users or other people and prevent damage to property. The following displays are classified and explained to what extent harm or damage occurs when the display details are ignored and the unit in question is wrongly used.
-
Page 4: Installation Cautions
INSTALLATION CAUTIONS 安装注意事项 Warning 警告 The product must be grounded. Do not install the fan out of the window and wall. 必须接地。 禁止将换气扇安装于窗外或墙壁外。 Otherwise, it may cause electric shock Otherwise, the product may get wet in the rain when there is any trouble or electric leakage. and cause short circuit. - Page 5 INSTALLATION CAUTIONS 安装注意事项 Caution 注意 The special-purpose or dedicated parts, Components must be installed tightly. such as mounting fixtures, must be used if 部品安装必须牢固。 such parts are provided. 有安装五金件等专用零部件时,应使用专用 零部件。 Otherwise, it may injure person caused by product's falling off. 否则部品可能会掉落,导致受伤。...
-
Page 6: Installation Requirements
INSTALLATION REQUIREMENTS 安装要求 Please observe the following requirement. Otherwise, it may cause the product aging and breakdown. 请遵守以下安装要求事项,否则有可能会导致机体老化或发生故障。 Do not install the product where Please set a square inspection there is steam. hole of at least 45 cm. 请勿安装在有蒸汽的场所。 请设置一个45 cm以上的方形 点检口。... -
Page 7: Supplied Accessories
SUPPLIED ACCESSORIES 包装附件清单 The following attachments are enclosed in the packing box of ventilating fan. Be sure to check if they are complete after unpacking, and if anything is missed, contact our After-Sales Service Center or the dealer. 随换气扇产品包装箱有以下附件,开箱后请清点是否齐全,如不齐全,请于客户咨询服务中心或经销商 联系。 Drawing Name and purpose Quantity... -
Page 8: How To Install
HOW TO INSTALL 安装方法 1. Fan body installation Method 1 install Fig.1 / 图1 with wooden joist. 25~30 mm □240±2 Wooden joist 1.机体的安装 方法一 使用木龙骨安装 木龙骨 1 Construct the wooden frame and attach it horizontally to the wooden joist. (Fig.1) Wooden frame 在木龙骨上水平搭建木框(图1)。... - Page 9 HOW TO INSTALL 安装方法 4 Connect the power cord (included earth) of fan Fig.5 / 图5 body to lead wire in accordance with the wiring diagram. (Fig.5) Power cord 根据接线示意图,将机体电源线 (包括地线) 电源线 连接到供电电源线上(图5)。 Lead wire from power source PVC coated cord (60227 IEC 53) ;...
- Page 10 HOW TO INSTALL 安装方法 6 Fix fan body firmly with 4 self-tapping screws Fig.8 / 图8 Fan body Φ4.2x20.(Fig.8) 机体 用自攻螺丝φ4.2x20(4颗)将机体牢固的固定(图8)。 Self-tapping screw Φ4.2x20 (4 PCS) 自攻螺丝φ4.2x20 (4颗) 7 Fix adaptor assembly and fan body firmly with Fig.9 / 图9 hexagon screw removed in step ②.
- Page 11 ST4. 2×8 (如有必要) The screw length is 8 mm. 自攻螺丝长度为8mm。 Suspension bracket must be made of metal with Suspension sufficient strength. bracket 悬挂支架必须由具有足够强度的金属制成。 悬吊支架 Model No. 24CURB 24CHRVB 24CHRB 型号 Net weight 净重 Fig.14 / 图14 [k ] Ceiling Washer 天花板...
- Page 12 HOW TO INSTALL 安装方法 2. Connect duct 2.管道连接 1 Insert the duct (not supply) into the adaptor and secure it with adhesive tape (not supply) tightly. Suspend the duct from the ceiling so that no force is applied to the fan body. Install the duct horizontally with a gradient downwards to the outside.
-
Page 13: Maintenance
TEST RUN 试运转 Please check whether all kinds of anomalies below happen after connecting power. (When motion sensor is detected, fan runs) 在接通电源后,检查一下是否发生以下各种异常现象。 Power switch (当动作传感器感应到用户运动时,扇叶开始运转) 电源开关 • Blades doesn't run properly. 扇叶不正常的运转。 • Blades is clockwise rotation. 扇叶顺时针旋转。 • Blades have abnormal vibration or noise. 发生不正常的声音或震动。... - Page 14 MAINTENANCE 日常使用及维修 Warning 警告 This product is applicable to living rooms, washrooms and other places where the Otherwise, it may lead to short circuit humidity is not too high. or electric shock. 本产品须安装在起居室、卫生间等湿度 否则可能会引起短路或触电。 不太高的场所。 Caution 注意 Awas Please wear the gloves when cleaning Otherwise, it may cause damage.
- Page 15 MAINTENANCE 日常使用及维修 Clean product 清洁产品 1 Remove the louver. (Fig.15) Groove Fixed spring Fig.15 / 图15 沟槽 固定弹簧 拆下面罩(图15)。 Gloves Louver 手套 面罩 2 Remove the motion sensor. (Fig.16) Fig.16 / 图16 去掉动作传感器(图16)。 Motion sensor Louver 动作传感器 面罩 3 Clean Louver. (Don’t put into hot water. Fig.17 / 图17 Use non-abrasive kitchen detergent, wipe dry with clean cloth) (Fig.17)
-
Page 16: Operation
SELECTOR INDICATION (24CHRVB only) 调节器指示 Humidity selector range from around 45% to 95%. Fig.20 / 图20 Factory setting is around 85%. (Fig.20) 湿度传感器湿度感应范围为45%~95%。出厂预设为85%。(图20) Humidity timer selector range of positions from 0 to 6h. Factory setting is 1 hour. (Fig.20) 湿度传感器延时设定范围为0~6h,出厂预设为1h。 (图20) Fig.21 / 图21 Humidity timer selector position OFF. -
Page 17: Wiring Diagram
WIRING DIAGRAM 电气原理图 24CURB 24CHRB 24CHRVB Double Double Thermal Fuse Thermal Fuse (In Motor) Pole (In Motor) Pole Switch Switch Brown (L) Brown (L) 134 ℃ Brown 134 ℃ Brown Blue (N) White Main Blue (N) White Main Humidity sensor... - Page 18 MEMO...
- Page 19 MEMO...
- Page 20 Head office: 4017, Takaki-cho, Kasugai, Aichi, Japan 24CURB461A V0123-1063...
Need help?
Do you have a question about the 24CURB and is the answer not in the manual?
Questions and answers