Advertisement
Quick Links
Advertisement

Related Manuals for Monogram GE ZET1


Summary of Contents for Monogram GE ZET1
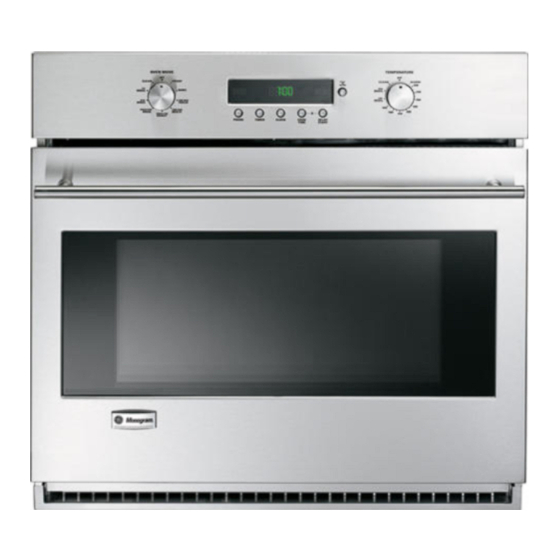
- Page 1 Owner’s Manual 30″ Convection Wall Oven ZET1 – Single Wall Oven ZET2 – Double Wall Oven ge.com...
- Page 2 Whether you chose it for its purity of design, assiduous attention to detail— or for both of these reasons—you’ll find that your Monogram wall oven’s superior blend of form and function will delight you for years to come.
- Page 3 Consumer Information Wall Oven Before Read this manual carefully. It is intended to If you don’t understand something or need help you operate and maintain your new wall more help, there is a list of toll-free consumer using your oven properly. service numbers included in the back section wall oven of this manual.
- Page 4 IMPORTANT SAFETY INSTRUCTIONS IMPORTANT SAFETY NOTICE • The California Safe Drinking Water • The fiberglass insulation in self-clean ovens and Toxic Enforcement Act requires the gives off a very small amount of carbon Governor of California to publish a list monoxide during the cleaning cycle.
- Page 5 MESURES DE SÉCURITÉ IMPORTANTES AVIS IMPORTANT EN MATIÈRE DE SÉCURITÉ • Le California Safe Drinking Water and Toxic • L’isolement en fibre de verre dans les fours Enforcement Act exige que le gouverneur de auto-nettoyants émet un très petit montant Californie publie une liste de substances que de gaz carbonique pendant le cycle de l’on sait occasionner le cancer, des anomalies...
- Page 6 IMPORTANT SAFETY INSTRUCTIONS SAFETY PRECAUTIONS • Do not use aluminum foil to line oven CAUTION: • ITEMS OF INTEREST bottoms, except as suggested in this manual. TO CHILDREN SHOULD NOT BE Improper installation of aluminum foil may STORED IN CABINETS ABOVE AN result in a risk of electric shock or fire.
- Page 7 MESURES DE SÉCURITÉ IMPORTANTES MESURES DE SÉCURITÉ • N’utilisez pas de papier d’aluminium pour ATTENTION : • NE RANGEZ PAS couvrir la sole du four, sauf de la façon DES ARTICLES QUI PRÉSENTENT UN indiquée dans le présent manuel. Une INTÉRÊT POUR LES ENFANTS, DANS LES utilisation inadéquate du papier d’aluminium ARMOIRES SE TROUVANT AU-DESSUS...
- Page 8 IMPORTANT SAFETY INSTRUCTIONS SAFETY PRECAUTIONS • Children in walkers, or children crawling, can • Extending the rack to its fully open position is be attracted to the round oven door handle a convenience in lifting heavy foods. It is also and may grab and open the oven door.
- Page 9 MESURES DE SÉCURITÉ IMPORTANTES MESURES DE SÉCURITÉ • Les enfants en marchette ou les enfants qui • Il est plus pratique de soulever des plats rampent peuvent être attirés par la poignée lourds lorsque la grille est entièrement ouverte. ronde de porte du four et peuvent la saisir, et Vous éviterez ainsi de vous brûler en touchant ainsi ouvrir la porte.
- Page 10 Features of Your Wall Oven Wall Oven Design information (Not all features are on all models. Appearance may vary.) ZET1—shown with Integrated style knobs ZET2—shown with Pro style knobs Feature Index Page Full Extension Oven Racks (3 in each oven) 13, 14, 15, 16, 17, 20, 21, 22, 23, 25, 26, 28, 37 Broiler Pan and Grid...
- Page 11 Oven Control, Clock and Timer Wall Oven Features of your oven control, clock and timer (Not all features are on all Double oven control – Pro style shown (Appearance may vary) models. Appearance may vary.) Single Oven control – Integrated style shown (Appearance may vary) 1 Oven Mode knob –...
- Page 12 Controls Overview Wall Oven Introduction to the oven controls Oven Mode knob Temperature knob For all modes except Proof, the oven will not To cancel a feature, turn either the Oven operate unless both the Oven Mode and the Mode knob or the Temperature knob to OFF. Temperature knobs are set.
- Page 13 Baking Tips Wall Oven An internal cooling fan operates during all oven Oven air flow modes. The warm air from inside the oven will be exhausted out through vents located between the O° WARM SELF door and control panel. CLEAN CONV.
- Page 14 Before You Begin Wall Oven Full To avoid possible burns, place the racks 3. Firmly holding onto both the upper and in the correct position before turning on lower front rack rails, pull the rack forward extension the oven. and remove it from the oven. oven racks The correct rack position depends on the Upper...
- Page 15 Baking Wall Oven How to set the oven for baking Oven Mode knob Temperature knob Turn the Oven Mode knob to BAKE. Using the Temperature knob, set the desired temperature, in 25°F increments, from 200°F to 550°F. The oven and the oven interior lights will turn on immediately and stay on until the oven is turned off.
- Page 16 Broiling Wall Oven Introduction Different broil elements are used in each broil mode as described below. There are to broiling 3 different broil modes, each providing a HI and a LO setting. Outer broil element • The HI setting can be used to seal in Inner broil juices or provide intense browning or element...
- Page 17 Broiling Wall Oven How to set the oven for broiling Oven Mode knob Temperature knob If the meat has fat or gristle around the edge, cut vertical slashes through both about 2″ apart. If desired, the fat may be trimmed, leaving a layer about 1/8″ thick. Place the meat or fish on the broiler pan and grid.
- Page 18 Using the Probe for Roasting Wall Oven Temperature For many foods, especially roasts and poultry, probe internal food temperature is the best test for Cable doneness. The temperature probe takes the Plug guesswork out of roasting by cooking foods to the exact doneness you want.
- Page 19 Using the Probe for Roasting Wall Oven How to set Double oven display shown. the oven for roasting when using the probe Push to select Mini-Knob Turn to select Oven Mode knob Temperature knob Push to enter 1 Insert the probe into the meat. 2 Plug the probe into the outlet in the oven.
- Page 20 Using the Convection Oven Wall Oven Convection In a convection oven, a fan circulates hot air over, under and around the food. This circulating hot air is evenly distributed throughout the oven cavity. As a result, foods are evenly cooked and browned—often in less time with convection heat.
- Page 21 Convection Baking Wall Oven How to set the oven for convection baking Oven Mode knob Temperature knob Convection Baking is ideal for evenly browned The oven and the oven interior lights will turn baked foods cooked on single or multiple racks. on immediately and stay on until the oven is turned off.
- Page 22 Convection Roasting Wall Oven How to set the oven for convection roasting Oven Mode knob Temperature knob Convection Roasting is good for roasting large Check the food for doneness at the tender cuts of meat, uncovered. minimum time on the recipe. Cook longer if necessary.
- Page 23 Convection Roasting with the Probe Wall Oven How to set Double oven display shown. the oven for convection roasting with the probe Oven Mode knob Temperature knob Push to select Mini-Knob Turn to select Push to enter See the Convection roasting tips section. 1 Place the rack in the desired rack position and insert the probe into the meat.
- Page 24 Convection Roasting Wall Oven Convection Meats Minutes/Lb. Oven Temp. Internal Temp. roasting Beef Rib, Boneless Rib, Rare 20–24 325°F 140°F† guide Top Sirloin Medium 24–28 325°F 160°F (3 to 5 lbs.) Well 28–32 325°F 170°F Beef Tenderloin Rare 10–14 325°F 140°F†...
- Page 25 Convection Broiling Wall Oven How to set the oven for convection broiling Temperature knob Oven Mode knob Convection Broil is good for broiling fish or smaller cuts of meat. When set at Convection Broil, both top elements operate whenever heating. If the meat has fat or gristle around the edge, cut vertical slashes through both about 2″...
- Page 26 Timed Cooking Wall Oven Timed Double oven display shown. cooking (immediate start and automatic stop) Push to select Mini-Knob Turn to select Push to enter Timed cooking allows you to set the oven Turn the Mini-Knob to select and push it to turn on immediately, cook for a selected to enter the desired length of cooking time.
- Page 27 Timed Cooking Wall Oven Double oven display shown. Timed cooking (delayed start and automatic stop) Mini-Knob Push to Push to Turn to select select select Push to enter Timed cooking with DELAY START allows Knob. To recall the cook time, push the COOK you to set the oven to turn on at the time of day TIME button.
- Page 28 Proofing Wall Oven How to set the oven for proofing Oven Mode knob The proofing feature maintains a warm NOTE: Do not use the proofing mode environment useful for rising yeast-leavened for warming food or keeping food hot. products. The proofing oven temperature is not hot Place the covered dough in a dish in the enough to hold foods at safe temperatures.
- Page 29 Self-Cleaning Oven Wall Oven Before a The oven door must be closed and all controls • Make sure the oven light lens and lens frame must be set correctly for the self-clean cycle to are in place. clean cycle work properly. •...
- Page 30 Self-Cleaning Oven Wall Oven How to Double oven display shown. delay the start of cleaning Oven Mode knob Temperature knob Push to Mini-Knob select Turn to select Push to enter You can set the oven to delay the start of cleaning, If your oven is connected to a 208V electrical supply, we clean for a selected length of time and turn off recommend that you set your clean time for 5 hours.
- Page 31 Clock and Control Lockout Features Wall Oven Power If a flashing time of day is in the display, you have experienced a power failure. failure Reset the clock. Clock The clock must be set for the automatic oven timing functions to work properly. The time of day clock cannot be changed during Delay Start.
- Page 32 Timer Feature Wall Oven Timer NOTE: The timer is independent of all the other Double oven display shown. functions and it does not control the oven. You may program the timer to time cooking or other household activities for up to 11 hours and 59 minutes.
- Page 33 Special Features Wall Oven Special Your oven has additional Special Features that you On double oven models, either the Oven Mode knob or may choose to use. the Temperature knob will have to be turned to OFF for features of each oven.
- Page 34 Special Features Wall Oven 12-hour, Your control is set to use a 12-hour clock. If you Double oven display shown. would prefer to have a 24-hour military time clock or 24-hour black out the clock display, follow the steps below. or clock 1 Push and hold the PROBE and DELAY blackout...
- Page 35 Special Features Wall Oven Sabbath With this feature, should you forget and leave the Double oven display shown. oven on, the control will automatically turn off the Feature, oven after 12 hours during baking functions. If you 12-hour wish to turn off this feature, follow the steps below. shut-off or 1 Push and hold the PROBE and DELAY no shut-off...
- Page 36 Care and Cleaning Wall Oven BE SURE ELECTRICAL POWER IS OFF AND ALL SURFACES ARE COOL BEFORE CLEANING ANY PART OF THE OVEN. Control Clean up spatters with a damp cloth. Remove heavier soil with warm, soapy water. panel and knobs Do not use abrasives of any kind on the control panel or knobs.
- Page 37 Care and Cleaning Wall Oven The racks may remain in the oven during the 6 Open and close the rack several times to Oven racks distribute the lubricant. self-cleaning cycle without being damaged. 7 Replace the cap on the lubricant and shake Periodically, after several self-clean cycles, the it again.
- Page 38 Care and Cleaning Wall Oven The door is very heavy. Be careful when removing Lift-off Slot and lifting the door. oven door— Do not lift the door by the handle. removal To remove the door: 1 Fully open the door. 2 Pull the hinge locks down toward the door Hinge lock frame, to the unlocked position.
- Page 39 Care and Cleaning Wall Oven Oven lights Each oven is equipped with two halogen light To replace: assemblies located on the side walls of the oven. Use a new 120-volt Halogen bulb, with G8 pins, The lights come on when the door is opened or not to exceed 25 watts.
- Page 40 Care and Cleaning Wall Oven To clean Inside of the door: the door • Because the area inside the gasket is cleaned during the self-clean cycle, you do not need to clean this by hand. Any soap left on the liner causes additional stains when the oven is heated, so be sure to rinse thoroughly.
- Page 41 The Problem Solver Wall Oven Save time PROBLEM POSSIBLE CAUSE & money! • OVEN WILL NOT A fuse in your home may be blown or the circuit breaker tripped. WORK • The oven controls are not properly set. Review the •...
- Page 42 The Problem Solver Wall Oven Save time PROBLEM POSSIBLE CAUSE & money! CLOCK AND TIMER • A fuse in your home may be blown or the circuit breaker tripped. DO NOT WORK Replace the fuse or reset the circuit breaker. •...
- Page 43 Notes Wall Oven...
- Page 44 Notes Wall Oven...
- Page 45 Place 1st Class Letter Stamp Here General Electric Company Warranty Registration Department P.O. Box 32150 Louisville, KY 40232-2150...
- Page 46 Consumer Product Ownership Registration Product Model Serial Wall Oven Mrs. Miss First Last Name Name Street Address Apt. # City State Code Date Placed Phone In Use Month Year Number Monogram® ge.com General Electric Company Louisville, KY 40225 ✄ TAPE CLOSED...
- Page 47 With the purchase of your new Monogram appliance, receive the assurance that if you ever need information or assistance from GE, we will be there. All you have to do is call—toll- free! Whatever your question about any Monogram major appliance, GE Answer Center ® GE Answer information service is available to help.
- Page 48 Warranty Wall Oven YOUR MONOGRAM WALL OVEN WARRANTY Staple sales slip or cancelled check here. Proof of original purchase date is needed to obtain service under warranty. Please have serial number and model number available when calling for service. WHAT IS...
Need help?
Do you have a question about the GE ZET1 and is the answer not in the manual?
Questions and answers