
Related Manuals for Monogram ZEP30FR


Summary of Contents for Monogram ZEP30FR
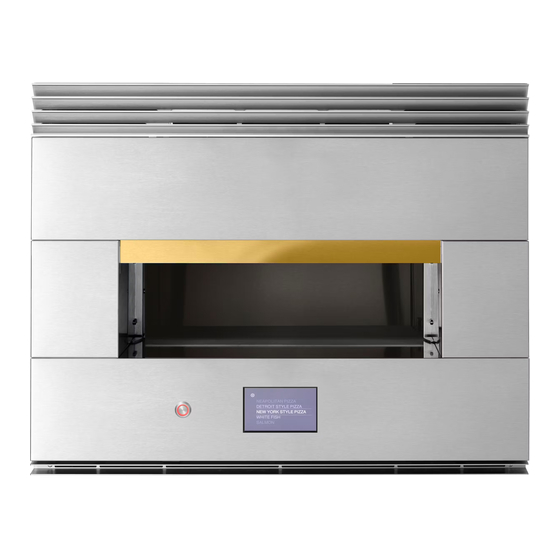
- Page 1 INSTALLATION INSTRUCTIONS Indoor Hearth Oven ZEP30FR ENGLISH/ESPAÑOL. MONOGRAM.COM...
-
Page 2: Safety Information
Safety Information Have a question or need assistance with your appliance? Try the Monogram website 24 hours a day, any day of the year! You can also shop for more great Monogram products and take advantage of all our on-line support services designed for your convenience. -
Page 3: Table Of Contents
Contents CONTENTS Safety Information ............2 1J: Hearth Oven Over Steam Oven – Flush-Inset Installation With A Minimum Gap Between... 16 Design Information 1K: Hearth Oven Over Steam Oven –Standard Product Dimensions (With Trim) ........4 Installation With A 2” Platform Between ....17 Pre-Installation Checklist .......... -
Page 4: Design Information
Design Information PRODUCT DIMENSIONS (WITH TRIM) 2 " 29 3 4 " 1 1 8 " Overall Front 4 " To Back Spacer Overall At Front Offset To Spacer Upper Trim 8 " Height Trim Offset 32 " Case Top 16 "... -
Page 5: Pre-Installation Checklist
Design Information PRE-INSTALLATION CHECKLIST Remove Installation Instructions from literature pack ALL INSTALLATION INFORMATION ON and read them carefully before you begin. THE FOLLOWING PAGES IS TO BE USED Be sure to place all literature, Owner’s Manual, FOR ELECTRIC INDOOR HEARTH OVEN Installations, etc. -
Page 6: Installation Information
Installation Information BEFORE YOU BEGIN MATERIALS NEEDED Read these instructions carefully and completely. IMPORTANT • — Save these instructions for local inspector’s use. Option 2 IMPORTANT • — Observe all governing Option 1 codes and ordinances. Strain Relief Clamp Junction Box for 1/2”... - Page 7 Installations HEARTH OVEN - STANDARD INSTALLATION A 45” is the required minimum installation height. Oven D Junction box location: Must be flush with back may be installed higher based on owner preference. surface so as not to extend into the 23 ½ inch cabinet depth.
-
Page 8: Hearth Oven - Flush Inset Installation
Installations HEARTH OVEN - FLUSH INSET INSTALLATION A 45” is the required minimum installation height. Oven D Junction box location: Must be flush with back may be installed higher based on owner preference. surface so as not to extend into the 24-15/16” cabinet depth. -
Page 9: Hearth Oven Over Wall Oven -Standard Installation With Aminimum Gap Between
Installations HEARTH OVEN OVER WALL OVEN –STANDARD INSTALLATION WITH A MINIMUM GAP BETWEEN A 45” is the required minimum installation height. Oven E A minimum 1/8” reveal BEYOND the OVERLAP may be installed higher based on owner preference. dimensions is recommended for proper drawer and door operating clearance. -
Page 10: Hearth Oven Over Wall Oven - Flush-Inset Installation With Aminimum Gap Between
Installations HEARTH OVEN OVER WALL OVEN – FLUSH-INSET INSTALLATION WITH A MINIMUM GAP BETWEEN A 45” is the required minimum installation height. Oven D Junction box location: Must be flush with back may be installed higher based on owner preference. surface so as not to extend into the 24-15/16”... -
Page 11: Hearth Oven Over Wall Oven -Standard Installation With A 2" Platform Between
Installations HEARTH OVEN OVER WALL OVEN –STANDARD INSTALLATION WITH A 2” PLATFORM BETWEEN A 45” is the required minimum installation height. Oven F Exterior cleats may be added to the sides and top may be installed higher based on owner preference. of the Hearth Oven opening in order to bring the front surface of the Hearth Oven into alignment with B Hearth Oven Platform must be able to support... -
Page 12: Between
Installations HEARTH OVEN OVER WALL OVEN – FLUSH-INSET INSTALLATION WITH A 2” PLATFORM BETWEEN A 45” is the required minimum installation height. Oven E The front surface of the interior cleats shall be a may be installed higher based on owner preference. finished appearance surface. -
Page 13: Installation With A Minimum Gap Between
Installations HEARTH OVEN OVER FRENCH DOOR WALL OVEN –STANDARD INSTALLATION WITH A MINIMUM GAP BETWEEN A 45” is the required minimum installation height. Oven E A minimum 1/8” reveal BEYOND the OVERLAP may be installed higher based on owner preference. dimensions is recommended for proper drawer and door operating clearance. -
Page 14: Installation With A 2" Platform Between
Installations HEARTH OVEN OVER FRENCH DOOR WALL OVEN –STANDARD INSTALLATION WITH A 2” PLATFORM BETWEEN A 45” is the required minimum installation height. Oven E A minimum 1/8” reveal BEYOND the OVERLAP may be installed higher based on owner preference. dimensions is recommended for proper drawer and door operating clearance. - Page 15 Installations HEARTH OVEN OVER STEAM OVEN –STANDARD INSTALLATION WITH A MINIMUM GAP BETWEEN A 45” is the required minimum installation height. Oven D Junction box location: Must be flush with back may be installed higher based on owner preference. surface so as not to extend into the 23 ½ inch cabinet depth.
- Page 16 Installations HEARTH OVEN OVER STEAM OVEN – FLUSH-INSET INSTALLATION WITH A MINIMUM GAP BETWEEN A 45” is the required minimum installation height. Oven D Junction box location: Must be flush with back may be installed higher based on owner preference. surface so as not to extend into the 24-15/16”...
- Page 17 Installations HEARTH OVEN OVER STEAM OVEN –STANDARD INSTALLATION WITH A 2” PLATFORM BETWEEN A 45” is the required minimum installation height. Oven E A minimum 1/8” reveal BEYOND the OVERLAP may be installed higher based on owner preference. dimensions is recommended for proper drawer and door operating clearance.
-
Page 18: Hearth Oven Over Steam Oven - Flush-Inset Installation With A 2" Platform Between
Installations HEARTH OVEN OVER STEAM OVEN – FLUSH-INSET INSTALLATION WITH A 2” PLATFORM BETWEEN A 45” is the required minimum installation height. Oven E The front surface of the interior cleats shall be a may be installed higher based on owner preference. finished appearance surface. -
Page 19: Hearth Oven Over Warming Drawer -Standard Installation With A Minimum Gap Between
Installations HEARTH OVEN OVER WARMING DRAWER –STANDARD INSTALLATION WITH A MINIMUM GAP BETWEEN A 45” is the required minimum installation height. Oven D Junction box location: Must be flush with back may be installed higher based on owner preference. surface so as not to extend into the 23 ½ inch cabinet depth. -
Page 20: Hearth Oven Over Warming Drawer - Flush-Inset Installation With A Minimum Gap Between
Installations HEARTH OVEN OVER WARMING DRAWER – FLUSH-INSET INSTALLATION WITH A MINIMUM GAP BETWEEN A 45” is the required minimum installation height. Oven C Solid enclosure required on the top, bottom, left may be installed higher based on owner preference. side, right side and back. -
Page 21: Hearth Oven Over Warming Drawer -Standard Installation With A 2" Platform Between
Installations HEARTH OVEN OVER WARMING DRAWER –STANDARD INSTALLATION WITH A 2” PLATFORM BETWEEN A 45” is the required minimum installation height. Oven E A minimum 1/8” reveal BEYOND the OVERLAP may be installed higher based on owner preference. dimensions is recommended for proper drawer and door operating clearance. -
Page 22: Hearth Oven Over Warming Drawer - Flush-Inset Installation With A 2" Platform Between
Installations HEARTH OVEN OVER WARMING DRAWER – FLUSH-INSET INSTALLATION WITH A 2” PLATFORM BETWEEN A 45” is the required minimum installation height. Oven D Junction box location: Must be flush with back may be installed higher based on owner preference. surface so as not to extend into the 24-15/16”... -
Page 23: Hearth Oven Platform For Minimum Gap Between Appliances: Dado & Mechanical Fastener Concept
Installations HEARTH OVEN PLATFORM FOR MINIMUM GAP BETWEEN APPLIANCES: DADO & MECHANICAL FASTENER CONCEPT Mechanical SECTION B-B Fasteners Cosmetic Panel To Cover Joinery For Exposed Wall DADO Joints & Wood Glue SECTION A-A Cosmetic Nose 31-2001053 Rev. 0... -
Page 24: Hearth Oven Platform For Minimum Gap Between Appliances: Tenon & Mechanical Fastener Concept
Installations HEARTH OVEN PLATFORM FOR MINIMUM GAP BETWEEN APPLIANCES: TENON & MECHANICAL FASTENER CONCEPT SECTION B-B Tenon Joints Cosmetic Panel To Cover Joinery For Exposed Wall Mechanical Fasteners Cosmetic Nose SECTION A-A 31-2001053 Rev. 0... -
Page 25: Side-By-Side Combo Installation
For a list of products compatible with Hearth Oven Side-by-Side Installation check online at geappliances.com/combinations. Please refer to the installation literature of both units for such installations. For assistance with cabinet design please connect with a Monogram Designer. Dimension A Hearth Oven... -
Page 26: Electrical Connections
Installation ELECTRICAL CONNECTIONS NOTE TO ELECTRICIAN: The 3 power leads supplied ATTENTION INSTALLER with this appliance are UL recognized for connection to heavier gauge household wiring. The insulation of All electric wall ovens must be hard wired (direct these 3 leads is rated at temperatures much higher wired) into an approved junction box. - Page 27 Installation A NEW CONSTRUCTION AND FOUR- ELECTRICAL CONNECTIONS (Cont) CONDUCTOR BRANCH CIRCUIT CONNECTION 1. Turn off the circuit breaker or remove fuses to the • When installing in new construction, or oven branch circuit. • When installing in a mobile home, or 2.
-
Page 28: Installing The Oven In The Cabinet
Installation ELECTRICAL CONNECTIONS (Cont) INSTALLING THE OVEN IN THE CABINET B THREE-CONDUCTOR BRANCH CIRCUIT CONNECTION 1. Before lifting oven into cabinet cutout, remove six screws from top vent and attach top grille to top of NOTE: If residence leads are aluminum conductors, oven using the same screws as shown. -
Page 29: Pre-Test Checklist
Installation PRE-TEST CHECKLIST Remove all protective film, if present. Check to be sure that all wiring is secure and not pinched. Remove cooking deck shipping supports by: 1. Remove Shipping Support Dowel by pulling up on one end. 2. Remove both Shipping Support Shoes, Slide out from wall towards center of Stone. - Page 30 NOTE: While performing installations described in this book, safety glasses or goggles should be worn. NOTE: Product improvement is a continuing endeavor at GE Appliances. Therefore, materials, appearance and specifications are subject to change without notice. 31-2001053 Rev. 0 01-22 GEA Printed in the United States...
- Page 31 INSTRUCCIONE DE INSTALACIÓN Horno de Hogar Para Interiores ZEP30FR ESPAÑOL. MONOGRAM.COM...
- Page 32 Información de Seguridad ¿Desea realizar una consulta o necesita ayuda con su electrodoméstico? ¡Intente a través del sitio Web de Monogram las 24 horas del día, cualquier día del año! También puede comprar más grandiosos productos de Monogram y sacar ventaja de todos nuestros servicios de soporte a través de Internet, diseñados para su conveniencia.
- Page 33 Contenidos CONTENIDOS ..........2 Mínimo Intermedio ..........15 Información de Seguridad 1J: Horno de Hogar sobre Horno de Vapor – Información de diseño Instalación con Montaje al Ras con un Espacio Dimensiones Del Producto (Con Marco)....... 4 Libre Mínimo Intermedio ........16 Lista De Control Antes De La Instalación .....
-
Page 34: Información De Diseño
Información de diseño DIMENSIONES DEL PRODUCTO (CON MARCO) Total de Frente de 21 ½” Hasta 29 3 4 " Altura del Marco Ajuste de 1 1/8” el Espaciador Trasero Superior de 3 ¼” hasta el Espaciador Total en el Frente Ajuste del Marco de 1/8”... -
Page 35: Lista De Control Antes De La Instalación
Información de diseño LISTA DE CONTROL ANTES DE LA INSTALACIÓN Extraiga las instrucciones de instalación del paquete y ¡TODA LA INFORMACIÓN DE INSTALACIÓN QUE léalas cuidadosamente antes de empezar la instalación. FIGURA EN LAS PÁGINAS SIGUIENTES DEBERÁ Cerciórese de guardar bien todas las instrucciones, SER USADA EN LA INSTALACIÓN DEL HORNO Manual del propietario, Instalación, etc. -
Page 36: Información De Instalación
Información de instalación ANTES DE EMPEZAR MATERIALES NECESARIOS Lea estas instrucciones cuidadosa y completamente. IMPORTANTE • — Guarde estas instrucciones y téngalas disponibles para el inspector local. IMPORTANTE Opción 2 • — Cumpla con todos los Opción 1 códigos y ordenanzas vigentes. Abrazadera de alivio de presión •... -
Page 37: Instalación Estándar
Instalacións HORNO DE HOGAR - INSTALACIÓN ESTÁNDAR 45” es la altura de instalación mínima requerida. El Ubicación de la caja de empalmes: Deberá estar nivelado horno podrá ser instalado más arriba, dependiendo de la con la superficie trasera de modo que no se extienda preferencia del propietario. -
Page 38: Horno De Hogar - Instalación Con Montaje Al Ras
Instalacións HORNO DE HOGAR – INSTALACIÓN CON MONTAJE AL RAS 45” es la altura de instalación mínima requerida. El Ubicación de la caja de empalmes: Deberá estar nivelado horno podrá ser instalado más arriba, dependiendo de la con la superficie trasera de modo que no se extienda preferencia del propietario. -
Page 39: Horno De Hogar Sobre Horno De Pared
Instalacións HORNO DE HOGAR SOBRE HORNO DE PARED – INSTALACIÓN ESTÁNDAR CON ESPACIO LIBRE INTERMEDIO MÍNIMO 45” es la altura de instalación mínima requerida. El Se podrán agregar soportes exteriores sobre los laterales horno podrá ser instalado más arriba, dependiendo de la y la parte superior de la abertura del Horno de Hogar, preferencia del propietario. -
Page 40: Horno De Hogar Sobre Horno De Pared
Instalacións HORNO DE HOGAR SOBRE HORNO DE PARED – INSTALACIÓN CON MONTAJE AL RAS CON ESPACIO LIBRE INTERMEDIO MÍNIMO 45” es la altura de instalación mínima requerida. El La base frontal de los soportes interiores deberán poseer horno podrá ser instalado más arriba, dependiendo de la un acabado de su superficie. -
Page 41: Horno De Hogar Sobre Horno De Pared - Instalación Estándar Con Una Plataforma Intermedia De 2
Instalacións HORNO DE HOGAR SOBRE HORNO DE PARED – INSTALACIÓN ESTÁNDAR CON PLATAFORMA INTERMEDIA DE 2” 45” es la altura de instalación mínima requerida. El Se podrán agregar soportes exteriores sobre los laterales horno podrá ser instalado más arriba, dependiendo de la y la parte superior de la abertura del Horno de Hogar, preferencia del propietario. -
Page 42: Horno De Hogar Sobre Horno De Pared - Instalación Con Montaje Al Ras Con Una Plataforma Intermedia De 2
Instalacións HORNO DE HOGAR SOBRE HORNO DE PARED – INSTALACIÓN CON MONTAJE AL RAS CON PLATAFORMA INTERMEDIA DE 2” 45” es la altura de instalación mínima requerida. El El Horno de Pared REQUIERE un MARCO DE horno podrá ser instalado más arriba, dependiendo de la VENTILACIÓN INFERIOR de aluminio extrudido. -
Page 43: Horno De Hogar Sobre Horno De Pared Con Puerta
Instalacións HORNO DE HOGAR SOBRE HORNO DE PARED CON PUERTA FRANCESA – INSTALACIÓN ESTÁNDAR CON ESPACIO LIBRE INTERMEDIO MÍNIMO 45” es la altura de instalación mínima requerida. El Se recomienda el uso de un perfil de 1/8” MÁS ALLÁ de horno podrá... -
Page 44: Horno De Hogar Sobre Horno De Pared Con Puerta Francesa - Instalación Estándar Con Una Plataforma Intermedia De 2
Instalacións HORNO DE HOGAR SOBRE HORNO DE PARED CON PUERTA FRANCESA – INSTALACIÓN ESTÁNDAR CON PLATAFORMA INTERMEDIA DE 2” 45” es la altura de instalación mínima requerida. El Se recomienda el uso de un perfil de 1/8” MÁS ALLÁ de horno podrá... -
Page 45: Horno De Hogar Sobre Horno De Vapor - Instalación Estándar Con Un Espacio Libre Intermedio Mínimo
Instalacións HORNO DE HOGAR SOBRE HORNO DE VAPOR – INSTALACIÓN ESTÁNDAR CON ESPACIO LIBRE INTERMEDIO MÍNIMO 45” es la altura de instalación mínima requerida. El Ubicación de la caja de empalmes: Deberá estar nivelado horno podrá ser instalado más arriba, dependiendo de la con la superficie trasera de modo que no se extienda preferencia del propietario. - Page 46 Instalacións HORNO DE HOGAR SOBRE HORNO DE VAPOR – INSTALACIÓN CON MONTAJE AL RAS CON ESPACIO LIBRE INTERMEDIO MÍNIMO 45” es la altura de instalación mínima requerida. El Ubicación de la caja de empalmes: Deberá estar nivelado horno podrá ser instalado más arriba, dependiendo de la con la superficie trasera de modo que no se extienda preferencia del propietario.
- Page 47 Instalacións HORNO DE HOGAR SOBRE HORNO DE VAPOR – INSTALACIÓN ESTÁNDAR CON PLATAFORMA INTERMEDIA DE 2” 45” es la altura de instalación mínima requerida. El Se recomienda el uso de un perfil de 1/8” MÁS ALLÁ de horno podrá ser instalado más arriba, dependiendo de la las dimensiones de SUPERPOSICIÓN, a fin de contar preferencia del propietario.
- Page 48 Instalacións HORNO DE HOGAR SOBRE HORNO DE VAPOR – INSTALACIÓN CON MONTAJE AL RAS CON PLATAFORMA INTERMEDIA DE 2” 45” es la altura de instalación mínima requerida. El La base frontal de los soportes interiores deberán poseer horno podrá ser instalado más arriba, dependiendo de la un acabado de su superficie.
- Page 49 Instalacións HORNO DE HOGAR SOBRE CAJÓN PARA CALENTAR – INSTALACIÓN ESTÁNDAR CON ESPACIO LIBRE INTERMEDIO MÍNIMO 45” es la altura de instalación mínima requerida. El Ubicación de la caja de empalmes: Deberá estar nivelado horno podrá ser instalado más arriba, dependiendo de la con la superficie trasera de modo que no se extienda preferencia del propietario.
-
Page 50: Horno De Hogar Sobre Cajón Para Calentar - Instalación Con Montaje Al Ras Con Un Espacio Libre Intermedio Mínimo
Instalacións HORNO DE HOGAR SOBRE CAJÓN PARA CALENTAR – INSTALACIÓN CON MONTAJE AL RAS CON ESPACIO LIBRE INTERMEDIO MÍNIMO 45” es la altura de instalación mínima requerida. El Se requiere un cerramiento sólido en las partes superior, horno podrá ser instalado más arriba, dependiendo de la inferior, izquierda, derecha y trasera. -
Page 51: Horno De Hogar Sobre Cajón Para Calentar - Instalación Estándar Con Una Plataforma Intermedia De 2
Instalacións HORNO DE HOGAR SOBRE CAJÓN PARA CALENTAR – INSTALACIÓN ESTÁNDAR CON PLATAFORMA INTERMEDIA DE 2” 45” es la altura de instalación mínima requerida. El Se recomienda el uso de un perfil de 1/8” MÁS ALLÁ de horno podrá ser instalado más arriba, dependiendo de la las dimensiones de SUPERPOSICIÓN, a fin de contar preferencia del propietario. -
Page 52: Horno De Hogar Sobre Cajón Para Calentar - Instalación Con Montaje Al Ras Con Una Plataforma Intermedia De 2
Instalacións HORNO DE HOGAR SOBRE CAJÓN PARA CALENTAR – INSTALACIÓN CON MONTAJE AL RAS CON PLATAFORMA INTERMEDIA DE 2” 45” es la altura de instalación mínima requerida. El Ubicación de la caja de empalmes: Deberá estar nivelado horno podrá ser instalado más arriba, dependiendo de la con la superficie trasera de modo que no se extienda preferencia del propietario. -
Page 53: Plataforma De Horno De Hogar Para Un Espacio Libre Mínimo Entre Electrodomésticos: Concepto De Dado Y Sujetador Mecánico
Instalacións PLATAFORMA DE HORNO DE HOGAR PARA UN ESPACIO LIBRE MÍNIMO ENTRE ELECTRODOMÉSTICOS: CONCEPTO DADO Y SUJETADOR MECÁNICO Sujetadores SECCIÓN B-B Mecánicos Panel Estético para Cubrir las Uniones de la Pared Expuesta Uniones DADO y Pegamento para Madera SECCIÓN A-A Borde Estético 31-2001053 Rev. -
Page 54: Plataforma De Horno De Hogar Para Un Espacio Libre Mínimo Entre Electrodomésticos: Concepto De Espiga Y Sujetador Mecánico
Instalacións PLATAFORMA DE HORNO DE HOGAR PARA UN ESPACIO LIBRE MÍNIMO ENTRE ELECTRODOMÉSTICOS: CONCEPTO DE ESPIGA Y SUJETADOR MECÁNICO SECCIÓN B-B Uniones Panel Estético de Espiga para Cubrir las Uniones de la Pared Expuesta Sujetadores Mecánicos Borde Estético SECCIÓN A-A 31-2001053 Rev. -
Page 55: Instalación De Combo De Lado A Lado
Para acceder a un listado de productos compatibles con la Instalación del Horno de Lado a Lado, consulte a través de Internet en geappliances.com/combinations. Por favor, consulte las instrucciones de instalación de ambas unidades para sus respectivas instalaciones. Para solicitar asistencia en relación al diseño del gabinete, por favor conéctese con un Diseñador de Monogram. Dimensión A Horno de Hogar... -
Page 56: Conexiones Eléctricas
Instalación CONEXIONES ELÉCTRICAS Nota al electricista: Los 3 alambres eléctricos ATENCIÓN AL INSTALADOR proporcionados con este aparato son reconocidos por la UL para conexiones a cableado residencial de mayor Todos los hornos eléctricos de pared deben ser calibre. El aislante de estos 3 alambres supera las cableados directamente en una caja de conexión. - Page 57 Instalación CONEXIÓN PARA NUEVA CONSTRUCCIÓN CONEXIONES ELÉCTRICAS (Cont) Y DE CIRCUITO DE EMPALMES DE CUATRO 1. Desconecte el interruptor del circuito o retire los fusibles CONDUCTORES que alimentan el circuito de empalmes del horno. • Cuando se instale en una construcción nueva, o 2.
-
Page 58: Instalación Del Horno En El Gabinete
Instalación CONEXIONES ELÉCTRICAS (Cont) INSTALACIÓN DEL HORNO EN EL GABINETE B CONEXIÓN DE CIRCUITO DE EMPALMES DE 2. Eleve el horno hasta el espacio del gabinete usando TRES CONDUCTORES la parte inferior como agarre. No lo levante desde la NOTA: Si los cables domésticos son conductores de abertura del horno. -
Page 59: Lista De Control Antes De La Prueba
Instalación LISTA DE CONTROL ANTES DE LA PRUEBA De estar presente, retire toda la película protectora. Revise para asegurarse de que todos los alambres estén bien conectados y no aplastados. Retire los soportes de embalaje de la superficie de cocción: 1. - Page 60 NOTA: Al realizar las instalaciones descriptas en este libro, se deberán usar anteojos o gafas de seguridad. NOTA: Monogram Appliances se esfuerza de forma constante para mejorar sus productos. Por lo tanto, los materiales, el aspecto y las especificaciones están sujetos a cambios sin aviso previo 31-2001053 Rev.
Need help?
Do you have a question about the ZEP30FR and is the answer not in the manual?
Questions and answers