Table of Contents
Advertisement
Available languages
Available languages
Quick Links
Advertisement
Chapters
Table of Contents

Related Manuals for Proline PF90WA GL


Summary of Contents for Proline PF90WA GL
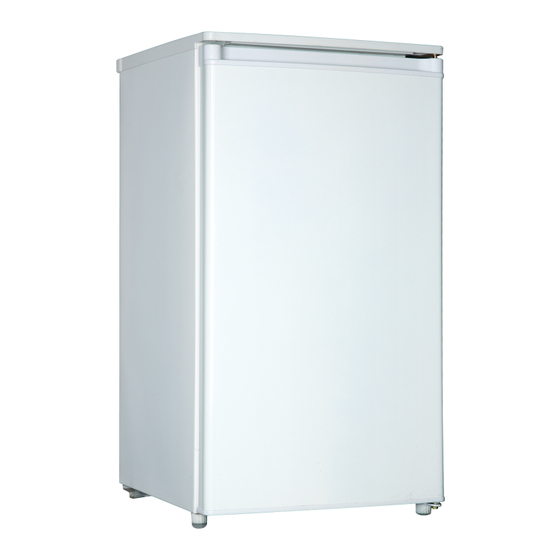
- Page 1 48cm UNDER COUNTER FRIDGE INSTRUCTION MANUAL MODEL No.: PF90WA GL...
-
Page 2: Table Of Contents
CONTENTS CONTENTS CONTENTS CONTENTS WARNINGS......................... 2 IMPORTANT SAFETY INSTRUCTIONS................4 NAME OF PARTS......................... 5 INSTALLATION........................6 OPERATION......................... 6 Setting the temperature control..................7 Making ice cubes........................7 Reversing the door......................8 Noise from your appliance....................8 Prolonged off periods......................8 Defrosting the ice box compartment...................9 Notes for use........................9 CLEANING AND MAINTENACE..................9 Changing the light bulb.....................10... -
Page 3: Warnings
WARNINGS This appliance is intended for domestic household use only and should not be used for any other purpose or in any other application, such as for non-domestic use or in a commercial environment. This appliance can be used by children aged from 8 ... - Page 4 WARNING: For making ice (ice cubes), use potable water only. CAUTION: The cooling system is under high pressure. Do not touch it. Contact qualified maintenance services before disposal. INSTALLATION: DO NOT INSTALL THIS APPLIANCE IN AREAS THAT ARE TOO HUMID OR TOO COLD, SUCH AS THE OUTBUILDINGS, GARAGES OR WINE CELLARS.
-
Page 5: Important Safety Instructions
IMPORTANT SAFETY INSTRUCTIONS If you are discarding an old freezer or refrigerator with a lock / catch fitted to the door, ensure that it is left in a disabled condition to prevent the entrapment of young children when playing. Unplug from outlet when not in use and before cleaning. Remove food before cleaning the appliance. -
Page 6: Name Of Parts
NAME OF PARTS 1. Cabinet 2. Ice box compartment 3. Drip tray 4. Glass shelf 5. Crisper cover 6. Compressor (back) 7. Crisper box 8. Levelling legs 9. Racks 10.Recessed handle 11.Door switch 12.Temperature control knob 13.Top Cover 14.Lamp NOTE: NOTE: NOTE: NOTE: The appliance design is subject to change without prior notice. -
Page 7: Installation
INSTALLATION Position the appliance and allow it to stand for two to three hours before it is turned on for the first time to allow the system to settle. Do not position next to any heat source e.g. cooker, boiler or in direct sunlight etc. Allow at least 10cm of space at the top and 10 cm of space on both sides of the appliance and between the back of the appliance and the wall for adequate air circulation. - Page 8 Setting temperature control Setting Setting Setting the the temperature temperature temperature control control control The refrigerator is controlled with a temperature control knob located inside the appliance, towards the upper right-hand corner. Turn the knob clockwise from the STOP (0) position towards the higher numbers for colder temperatures.
- Page 9 Reversing Reversing door door Reversing Reversing the the door door Before Before After After Before Before After After 1. Unscrew the two screws (6) and remove the top cover (7). 2. Remove the two screws (1) that hold the upper hinge (5). 3.
-
Page 10: Defrosting The Ice Box Compartment
Defrosting Defrosting Defrosting Defrosting the the ice ice box box compartment compartment compartment compartment The ice box compartment will need defrosting periodically or when the frost is more than 3mm thick. 1. Unplug the appliance. 2. Remove the ice trays. Ensure the drip tray is located correctly under the ice box. -
Page 11: Troubleshooting
Changing Changing light light bulb bulb Changing Changing the the light light bulb bulb 1. Set the thermostat to the off position (0) then unplug the appliance. 2. Remove the drip tray under the ice compartment. 3. Remove the light shield. 4. -
Page 12: Disposal
appliance appliance is is is is noisy noisy when operating. The appliance appliance noisy noisy when when when operating. operating. operating. Check the appliance is level and it is not in contact with another appliance or kitchen furniture. appliance does cool sufficiently. -
Page 13: Specifications
SPECIFICATIONS Brand Brand Proline Brand Brand Appliance type Appliance Appliance Appliance type type type Refrigerator Total Total Total Total gross gross gross gross volume volume volume volume Total storage volume Total Total Total storage storage storage volume volume volume Ice box... - Page 14 Réfrigérateur sous plan (48 cm) MANUEL D’UTILISATION PF90WA GL...
- Page 15 CONTENU CONTENU CONTENU CONTENU MISES.EN.GARDE……………………………………………………………………..2 INSTRUCTIONS IMPORTANTES DE SÉCURITÉ……………………………..4 IDENTIFICATION DES PIÈCES……………………………………………………5 INSTALLATION……………………………………………………………………….6 FONCTIONNEMENT…………………………………………………………………6 Réglage de la température…………………………………………………………..7 Fabrication des glaçons………………………………………………………………7 Inversion de la porte………………………………………………………………….8 Bruits émis par L’appareil…………………………………………………………...8 Périodes prolongées de non utilisation…………… …………………………………..8 Degivrage du compartiment à glaçons…………………………………………..9 À...
- Page 16 MISES EN GARDE Cet appareil est destiné à un usage domestique uniquement. Toute utilisation autre que celle prévue pour cet appareil, ou pour une autre application que celle prévue, par exemple une application commerciale, est interdite. Cet appareil peut être utilisé par des enfants âgés d'au ...
- Page 17 par le fabricant. MISE EN GARDE: Ne pas endommager le circuit de réfrigération. MISE EN GARDE: Ne pas utiliser d'appareils électriques à l'intérieur du compartiment de stockage des denrées, à moins qu'ils ne soient du type recommandé par le fabricant.
- Page 18 doit être faite de façon sûre dans des points de collecte publique prévus à cet effet. Installation et mise en service: L’appareil doit être installé sur le sol, sur une surface plane et horizontale en s’assurant que les ouvertures d’aération sont correctement dégagées.
- Page 19 INSTRUCTIONS IMPORTANTES DE S S S S É É É É CURIT CURIT CURITÉ É É É INSTRUCTIONS INSTRUCTIONS INSTRUCTIONS IMPORTANTES IMPORTANTES IMPORTANTES DE CURIT Si vous jetez un appareil usé de réfrigération avec un loquet ou un système verrouillage monté sur la porte ou sur le couvercle, assurez-vous qu'il soit démonté pour éviter tout risque d’emprisonnement des enfants quand ils jouent.
- Page 20 IDENTIFICATION DES PIÈCES 1. Enceinte extérieure 2. Compartiment à glaçons 3. Bac de dégivrage 4. Clayette Verre 5. Couvercle de bac à légumes 6. Compresseur (arrière) 7. Bac à legumes 8. Pieds réglables 9. Balconnets 10.Poignée 11.Interrupteur de porte 12.Bouton de thermostat 13.Couvercle supérieur 14.Lampe REMARQUE:...
- Page 21 INSTALLATION Mettez l’appareil en position puis attendez deux à trois heures avant de le mettre en marche pour la première fois, le temps que le système se mette en place. Ne placez pas votre Réfrigérateur près d'une source de chaleur, d’une cuisinière, d’une chaudière ou d’un radiateur.
- Page 22 Lorsque vous utilisez le réfrigérateur pour la première fois ou après une décongélation, tournez le bouton du thermostat jusqu’à la position maximale pendant au moins 2 heures avant d'insérer des aliments, puis réglez de nouveau le bouton du thermostat sur la position normale. R R R R é...
- Page 23 Inversion Inversion de de de de la la la la porte porte Inversion Inversion porte porte Avant Avant Avant Avant Aprè è è è s s s s 1. Dévissez les deux vis (6) et enlevez le couvercle supérieur (7). 2.
- Page 24 Débranchez l'appareil. Nettoyez l'intérieur, puis séchez (voir section ‘Nettoyage et entretien’). Laissez la porte ouverte pour éviter que les mauvaises odeurs s'accumulent alors que l'appareil n'est pas utilisé. COMPARTIMENT A GLACONS : : : : DEGIVRAGE DEGIVRAGE COMPARTIMENT COMPARTIMENT DEGIVRAGE DEGIVRAGE DU DU COMPARTIMENT Le compartiment du réfrigérateur doit être dégivré...
- Page 25 4. Nettoyez l’extérieur avec une éponge propre ou un chiffon mou et un mélange de détergent doux et d’eau chaude. 5. Rincez bien et essuyez avec un chiffon mou propre. 6. Remettez tous les récipients en place. 7. Branchez l'appareil. Remplacement Remplacement Remplacement...
- Page 26 D D D D é é é é pannage pannage pannage pannage Avant d'appeler un réparateur vérifiez les points suivants : Le r r r r é é é é frig frig frigé é é é rateur rateur rateur ne ne ne ne fonctionne fonctionne pas.
- Page 27 SPÉ É É É CIFICATIONS CIFICATIONS CIFICATIONS CIFICATIONS Marque Marque Marque Marque Proline Type Type d'appareil d'appareil Réfrigérateur Type Type d'appareil d'appareil Volume Volume Volume Volume brut brut brut brut total total total total Volume Volume utile utile total total...
- Page 29 48 cm ONDERBOUWIJSKAST GEBRUIKSAANWIJZING MODEL No.: PF90WA GL...
- Page 30 INHOUDSOPGAVE INHOUDSOPGAVE INHOUDSOPGAVE INHOUDSOPGAVE WAARSCHUWINGEN…………………………………………………………………..2 BELANGRIJKE VEILIGHEIDSVOORZORGEN……………………………………4 BENAMING VAN DE ONDERDELEN………………………………......5 INSTALLATIE…………………………………………………………………………..6 BEDIENING………………………………………………………………………………6 De temperatuurregeling instellen …………………………………………………..7 IJsblokjes maken ……………………………………………………………………..7 Omkeren van de deur…………………………………………………......7 Het toestel maakt lawaai……………………………………………………………...8 Lange periodes van geen gebruik…………………………………………………….8 Het ijsvak ontdooien ………………………………………………………………….9 Opmerkingen bij het gebruik ………………………………………………………..9 REINIGEN EN ONDERHOUD …………………………………………………………9 De lamp vervangen……………………………………………………………………9 VOORDAT U EEN REPARATIESERVICE OPBELT………………………………..10...
-
Page 31: Waarschuwingen
WAARSCHUWINGEN Dit apparaat is uitsluitend bedoeld voor huishoudelijk gebruik en mag niet worden gebruikt voor andere doeleinden of in andere toepassingen, zoals voor niet- huishoudelijk gebruik of in een commerciële omgeving. Dit apparaat mag worden gebruikt door kinderen vanaf 8 ... - Page 32 in de voedselvakken van het apparaat, tenzij dit door de fabrikant ervan wordt aanbevolen. Bewaar in dit apparaat geen brandbare of explosieve materialen zoals spuitbussen met brandbaar drijfgas. WAARSCHUWING: gebruik uitsluitend drinkwater voor het maken van ijs(blokjes). WAARSCHUWING: het koelsysteem staat onder hoge ...
- Page 33 onderdelen niet zelf. Indien nodig, raadpleeg het servicecentrum. Hantering: Hanteer het apparaat altijd met de nodige voorzichtigheid om schade te voorkomen,...
-
Page 34: Belangrijke Veiligheidsvoorzorgen
BELANGRIJKE VEILIGHEIDSVOORZORGEN Voordat u een oude diepvriezer of koelkast met een slot/vergrendeling op de deur gaat verwijderen, moet u de vergrendeling breken om te voorkomen dat jonge kinderen tijdens het spelen in het apparaat vast komen te zitten. Haal de stekker uit het stopcontact wanneer het apparaat niet wordt gebruikt en voordat u het gaat reinigen. - Page 35 BENAMING BENAMING ONDERDELEN ONDERDELEN BENAMING BENAMING VAN VAN DE DE ONDERDELEN ONDERDELEN 1. Kast 2. IJsvak 3. Afdruipschaal 4. Glasplaat 5. Groentedeksel 6. Compressor (achterkant) 7. Groentevak 8. Instelbare voeten 9. Rekken 10. Verzonken handgreep 11. Deurschakelaar 12. Thermostaatknop 13. Bovenplaat 14.
-
Page 36: Installatie
OPMERKING: OPMERKING: OPMERKING: OPMERKING: het uiteindelijke ontwerp van het apparaat kan zonder voorafgaande kennisgeving gewijzigd zijn. INSTALLATIE: INSTALLATIE: INSTALLATIE: INSTALLATIE: Installeer het apparaat en laat het twee tot drie uur staan voordat u het voor het eerste inschakelt, zodat het systeem zich kan op punt stellen. Zet dit apparaat niet naast warmtebronnen bijv. - Page 37 Verwijder al het verpakkingsmateriaal van het toestel. Was de binnenkant van de behuizing met lauw water en zuiveringszout (5ml voor 0.5 liter water). Droog het toestel grondig af. Wanneer u de vriezer voor het eerst in gebruik neemt of na het ontdooien, draait u de thermostaatknop naar de maximumstand en wacht minstens 2 uur voordat u eetwaren gaat invriezen.
-
Page 38: Reinigen En Onderhoud
Omkeren Omkeren Omkeren Omkeren van van de de de de deur deur deur deur Voor Voor Voor Voor 1. Draai de twee schroeven (6) los en verwijder de bovenplaat (7). 2. Verwijder de twee schroeven (1) waarmee het bovenste scharnier (5) is bevestigd. 3. - Page 39 ijsvak ontdooien Het ijsvak ijsvak ijsvak ontdooien ontdooien ontdooien Het ijsvak moet van tijd tot tijd en telkens wanneer het ijs meer dan 3 mm dik is worden ontdooid. 1. Haal de stekker uit het stopcontact. 2. Verwijder de ijsblokjesschalen. Zorg ervoor dat de afdruipschaal zich goed onder het ijsvak bevindt.
- Page 40 2. Verwijder de afdruipschaal onder het ijsvak. 3. Verwijder het schild van de lamp. 4. Schroef de lamp los en vervang door een nieuwe lamp. Maximaal wattage van de lamp 10W, model:E14. 5. Bevestig het schild. 6. Zet de afdruipschaal terug in. VOORDAT VOORDAT VOORDAT U U U U EEN...
-
Page 41: Verwijdering
Het apparaat apparaat apparaat apparaat is is is is luidruchtig luidruchtig luidruchtig luidruchtig tijdens tijdens tijdens tijdens de de de de werking werking werking werking..Controleer of het apparaat waxterpas staat en niet met een ander apparaat of keukenmeubilair in contact komt. - Page 42 TECHNISCHE GEGEVENS TECHNISCHE TECHNISCHE TECHNISCHE GEGEVENS GEGEVENS GEGEVENS Merk Merk Merk Merk Proline Type Type apparaat apparaat Koelkast Type Type apparaat apparaat Totaal Totaal Totaal Totaal volume volume volume volume Totaal Totaal bruikbaar bruikbaar volume volume Totaal Totaal bruikbaar bruikbaar volume...
- Page 43 48cm PODSTOLOVÁ CHLADNIČKA NÁVOD K OBSLUZE Model č: PF90WA GL...
- Page 44 OBSAH OBSAH OBSAH OBSAH UPOZORNĚNÍ ........................2 DŮLEŽITÉ BEZPEČNOSTNÍ POKYNY................4 NÁZVY ČÁSTÍ........................5 INSTALACE........................6 OBSLUHA...........................6 Nastavení regulace teploty....................7 Výroba ledových kostek....................7 Obrácení dveří........................8 Hluk ozývající se ze spotřebiče..................8 Dlouhodobé odstavení.......................8 Rozmrazování prostoru na led...................9 Poznámky k použití......................9 ČIŠTĚNÍ A ÚDRŽBA......................9 Výměna žárovky......................10 ŘEŠENÍ...
-
Page 45: Upozornění
UPOZORNĚNÍ Tento přístroj je navržen pouze pro domácí použití, nesmí být použit na žádné jiné účely a nesmí se tedy používat např. mimo domácnosti nebo pro komerční účely. Tento přístroj mohou používat děti starší 8 let a osoby se ... - Page 46 používejte pouze pitnou vodou. UPOZORNĚNÍ: Chladicí systém je pod vysokým tlakem. Před likvidací kontaktujte kvalifikovaného servisního pracovníka. MONTÁŽ: PŘÍSTROJ NEMONTUJTE NA VLHKÁ NEBO CHLADNÁ MÍSTA JAKO JSOU CHODBY, GARÁŽE NEBO VINNÉ SKLEPY. Aby se předešlo tvorbě škodlivých bakterií, ...
- Page 47 D D D D Ů Ů Ů Ů LE LEŽ Ž Ž Ž IT IT IT ITÉ É É É BEZPE BEZPE BEZPE BEZPEČ Č Č Č NOSTN NOSTN NOSTN NOSTNÍ Í Í Í POKYNY POKYNY POKYNY POKYNY Pokud likvidujete starou mrazničku nebo lednici se zámkem / západkou, ujistěte se, že je nefunkční, aby nedošlo k uvíznutí...
- Page 48 Z V Y ČÁ N N N N Á Á Á Á ZVY ČÁ ČÁ ČÁST STÍ Í Í Í 1. Skříňka 2. Prostor na led 3. Odkapávač 4. Skleněná police 5. Kryt na ovoce a zeleninu 6. Kompresor (vzadu) 7.
-
Page 49: Instalace
INSTALACE INSTALACE INSTALACE INSTALACE Umístěte spotřebič a před jeho prvním zapnutím jej nechte dvě až tři hodiny stát kvůli urovnání systému. Neumisťujte vedle zdroje tepla, např. vařiče, bojleru nebo na přímé sluneční světlo apod. Ponechte prostor nejméně 10 cm shora a 10 cm na obou stranách spotřebiče a mezi zadní částí... - Page 50 Při prvním použití lednice nebo po rozmrazování nastavte termostat na maximum na nejméně 2 hodiny, poté jej nastavte do normální pozice. Nastaven Nastaven Nastaven Nastavení í í í regulace regulace regulace regulace teploty teploty teploty teploty Lednice je ovládána pomocí knoflíku regulace teploty umístěného uvnitř spotřebiče, v pravém horním rohu.
-
Page 51: Dlouhodobé Odstavení
Obrá á á á cen cení í í í dve dveří ří ří ří P P P P ř ř ř ř ed ed ed ed 1. Odšroubujte dva šrouby (6) a odstraňte horní kryt (7). 2. Odstraňte dva šrouby (1), které drží horní závěs (5). 3. -
Page 52: Čištění A Údržba
Odpojte ze zásuvky. Očistěte a osušte vnitřní prostor (viz „Čištění a údržba“). Ponechte otevřené dveře, abyste předešli nepříjemnému zápachu způsobenému nepoužíváním spotřebiče. Rozmrazov Rozmrazov Rozmrazová á á á n n n n í í í í prostoru prostoru prostoru na na na led Rozmrazov prostoru na Je potřeba rozmrazovat prostor na led pravidelně, nebo pokud je námraza silnější... - Page 53 V V V V ý ý ý ý m m m m ě ě ě ě na na na na žá žá žá žárovky rovky rovky rovky 1. Nastavte termostat do pozice vypnutí („0“), a poté odpojte spotřebič. 2. Odstraňte odkapávač pod prostorem na led. 3.
-
Page 54: Likvidace
Spot Spot Spotř ř ř ř ebi ebič č č č je je je je p p p p ř ř ř ř i i i i provozu provozu provozu hluč č č č n n n n ý ý ý ý Spot provozu hlu Zkontrolujte úroveň... -
Page 55: Technické Údaje
TECHNICKÉ É É É Ú Ú Ú Ú DAJE DAJE TECHNICK TECHNICK DAJE DAJE Znač č č č ka ka ka ka Proline Typ spot spot spot spotř ř ř ř ebi ebič č č č e e e e Lednice Celkov Celkový... - Page 56 PRÍRUČKA K PODPULTOVEJ CHLADNIČKE (48 cm) Model číslo: PF90WA GL...
- Page 57 OBSAH OBSAH OBSAH OBSAH VAROVANIA........................2 DÔLEŽITÉ BEZPEČNOSTNÉ POKYNY................4 NÁZVY ČASTÍ........................5 INŠTALÁCIA........................6 POUŽÍVANIE........................6 Nastavenie ovládača teploty....................7 Vytváranie ľadových kociek....................7 Zmena smeru otvárania dvierok..................8 Zvuk vychádzajúci zo zariadenia..................8 Dlhý čas bez prevádzky.......................9 Rozmrazenie priestoru na ľad....................9 Poznámky k používaniu......................9 ČISTENIE A ÚDRŽBA......................9 Výmena žiarovky......................10 RIEŠENIE PROBLÉMOV....................10 LIKVIDÁCIA ZARIADENIA.....................11...
- Page 58 VAROVANIA Toto zariadenie bolo navrhnuté iba na používanie v domácnosti a nesmie byť používané na žiadny iný účel ani aplikáciu, ako napríklad na iné než domáce používanie alebo používanie v obchodnom prostredí. Toto zariadenie môžu používať deti staršie ako 8 rokov a ...
- Page 59 ktoré nie sú odporúčané výrobcom. V tomto zariadení neskladujte výbušné látky ako sú spreje s horľavými plynmi. VAROVANIE: Na výrobu ľadu (ľadových kociek) používajte iba pitnú vodu. VAROVANIE: Chladiaci systém je pod vysokým tlakom. Pred likvidáciou zariadenia kontaktujte kvalifikovaný servis.
- Page 60 súčiastky. V prípade potreby sa obráťte na servisné stredisko so žiadosťou pomoc. Manipulácia: S prístrojom vždy zaobchádzajte opatrne, aby sa zabránilo jeho poškodeniu.
- Page 61 D D D D Ô Ô Ô Ô LE LEŽ Ž Ž Ž IT IT IT ITÉ É É É BEZPE BEZPE BEZPEČ Č Č Č NOSTN NOSTN NOSTNÉ É É É POKYNY POKYNY BEZPE NOSTN POKYNY POKYNY Ak likvidujete starú mrazničku alebo chladničku so zámkom / úchytkou pripevnenou na dvierkach zaistite, že je vo vypnutom stave, aby ste predišli uväzneniu hrajúcich sa detí.
- Page 62 N N N N Á Á Á Á ZVY ZVY Č Č Č Č AST ASTÍ Í Í Í 1. Kryt zariadenia 2. Priestor na ľad 3. Podnos na odkvapkávanie 4. Sklenená polička 5. Kryt priestoru na ovocie a zeleninu 6.
- Page 63 INŠ Š Š Š TAL TALÁ Á Á Á CIA Umiestnite zariadenie a pred prvým zapnutím ho nechajte stáť dve až tri hodiny, aby sa systém vyrovnal. Zariadenie neumiestňujte vedľa akéhokoľvek zdroja tepla napr. varič, bojler alebo priame slnečné svetlo, atď. Nechajte voľný...
- Page 64 Vyberte všetky obalové materiály zo zariadenia. Vnútorný priestor umyte pomocou vlažnej vody a sódy bikarbóny (5 ml na 0,5 litra vody). Zariadenie celkom vysušte. Pri prvom použití chladničky alebo po rozmrazovaní nastavte termostat do maximálnej polohy aspoň na 2 hodiny a potom ho nastavte nazad do normálnej polohy. Nastavenie Nastavenie ovlá...
- Page 65 Zmena Zmena Zmena Zmena smeru smeru smeru smeru otv otvá á á á rania rania rania rania dvierok dvierok dvierok dvierok Pred Pred Pred Pred 1. Odskrutkujte dve skrutky (6) a vyberte horný kryt (7). 2. Odskrutkujte dve skrutky (1), ktoré držia horný záves (5). 3.
- Page 66 Dlhý ý ý ý č č č č as as as as bez prev prevá á á á dzky dzky bez prev prev dzky dzky Ak zariadenie nebudete dlhší čas používať, vykonajte nasledujúce: Odpojte zariadenie od elektrickej siete. Vyčistite a vysušte vnútro (pozri ‘Čistenie a údržba’). Nechajte dvierka otvorené, aby ste predišli nepríjemnému zápachu, ktorý...
- Page 67 V V V V ý ý ý ý mena mena mena mena ž ž ž ž iarovky iarovky iarovky iarovky 1. Nastavte termostat do vypnutej polohy (0), potom odpojte zariadenie. 2. Odoberte podnos na odkvapkávanie spod mraziaceho priestoru. 3. Odoberte kryt žiarovky. 4.
- Page 68 Zariadenie Zariadenie Zariadenie je je je je po po po poč č č č as as as as prev prev prev prevá á á á dzky dzky dzky hluč č č č n n n n é é é é ..Zariadenie dzky hlu Skontrolujte, či je zariadenie vyrovnané...
- Page 69 TECHNICK TECHNICKÉ É É É Ú Ú Ú Ú DAJE DAJE TECHNICK TECHNICK DAJE DAJE Znač č č č ka ka ka ka Proline Typ zariadenia zariadenia zariadenia zariadenia Chladnička Celkov Celková á á á hrub hrub hrubý ý ý ý objem...
Need help?
Do you have a question about the PF90WA GL and is the answer not in the manual?
Questions and answers