Table of Contents
Advertisement
Available languages
Available languages
Quick Links
https://tehnoteka.rs
Uputstvo za upotrebu (EN)
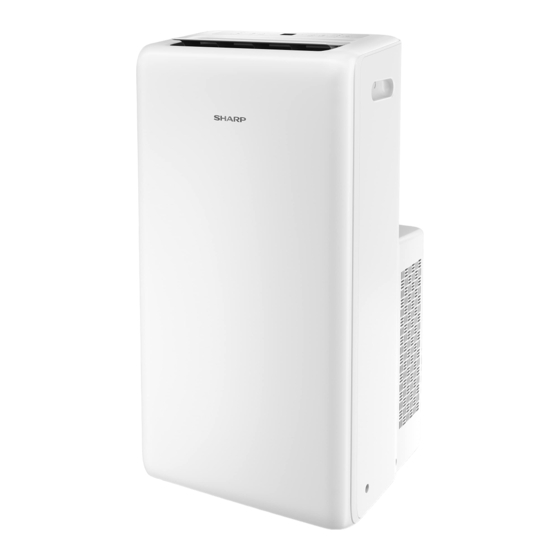
SHARP pokretna klima UL-C12EA-W On/Off
Tehnoteka je online destinacija za upoređivanje cena i karakteristika bele tehnike,
potrošačke elektronike i IT uređaja kod trgovinskih lanaca i internet prodavnica u Srbiji.
Naša stranica vam omogućava da istražite najnovije informacije, detaljne karakteristike
i konkurentne cene proizvoda.
Posetite nas i uživajte u ekskluzivnom iskustvu pametne kupovine klikom na link:
https://tehnoteka.rs/p/sharp-pokretna-klima-ul-c12ea-w-onoff-akcija-cena/
Advertisement
Table of Contents

Related Manuals for Sharp UL-C10EA-W


Summary of Contents for Sharp UL-C10EA-W
- Page 1 Uputstvo za upotrebu (EN) SHARP pokretna klima UL-C12EA-W On/Off Tehnoteka je online destinacija za upoređivanje cena i karakteristika bele tehnike, potrošačke elektronike i IT uređaja kod trgovinskih lanaca i internet prodavnica u Srbiji. Naša stranica vam omogućava da istražite najnovije informacije, detaljne karakteristike i konkurentne cene proizvoda.
-
Page 2: Portable Air Conditioner
User manual UL-C10EA-W, UL-C12EA-W, UL-Y12EA-W Portable air conditioner Product images are for illustration purposes only. Actual product may vary. - Page 4 10 11 13* 12 * - only for model | nur für modell | solo para modelo | uniquement pour le modèle | solo per modello | tylko dla modelu | apenas para modelo UL-Y12EA-W T-OFF COOL OPER LOCK AUTO T-OFF COOL MODE...
- Page 5 × 2 × 2 T-ON T-OFF AUTO SWING COOL OPER SLEEP LOCK AUTO SPEED HEAT ON/OFF MODE × 2 SWING SLEEP TIMER Images are for guidance only | Die Bilder dienen nur zur Orientierung | Las imágenes se incluyen únicamente como referencia. | Visuels non contractuels | Immagini solo a scopo illustrativo | Rysunki zamieszczono jedynie w celach poglądowych | As imagens servem apenas de orientação...
-
Page 6: Important Safety Instructions
,not covered under warrant and not supported by the manufacturer. • Compliance with national gas regulations have to be observed. Sharp will not be held responsible for personal injury or loss to property for the following: Important safety instructions 1. -
Page 7: Operation Environment
• If the equipment has been used for BUSINESS PURPOSES, please contact hazards occurring. your SHARP dealer who will inform you about take back. You might • Do not use an extension cord. be charged for the costs arising from take back. Small equipment (and Operation Environment: small quantities) might be taken back by your local collection facility. -
Page 8: Contents Of The Box
Contents of the Box NOTE ū Check if the accessories are available before installation. Refer to the pictures 6 on page 2. 1. Joint A (× 1) www.sharpconsumer.com/ www.sharpconsumer.com/ contact/ support/ 2. Rear Clip (× 1) 3. Heat Discharge Pipe (× 1) 4. -
Page 9: Operation Of Control Panel
Operation of Control Panel Remote control ON/OFF button Remote control buttons Pressing this button turns the air conditioner on and off. Refer to the pictures 4 on page 1. 1. ON/OFF + / - button 2. MODE Under cooling or heating mode, press “+” or “-” button to increase or 3. -
Page 10: Care And Maintenance
HEAT is selected by remote control, pressing ON/OFF button can't turn Temperature display switchover function on the air conditioner.) Under OFF status, press "-" button and "MODE" button simultaneously can switch between °C and °F. +/- button • Pressing + or - button once will increase or decrease set temperature Light function by 1°C. -
Page 11: Troubleshooting
Notice for recovery • Some of the packing items are recyclable materials. Please deal with them through your local recycling provider. • If you want to dispose the air conditioner, please contact local authority or consultant service center for the correct disposal method. Troubleshooting Before calling for service, please review the troubleshooting list below, since the problem may not be a main unit malfunction. -
Page 12: Error Codes
• Do not repair or refit the air conditioner by yourself. models max |Zsys| unit:ohm • If operate the air conditioner under abnormal condition, it may cause malfunction, electric shock or fire hazard. UL-C10EA-W UL-C12EA-W 0.13 Installation Precautions UL-Y12EA-W UL-C10UA-W WARNING! •... -
Page 13: Drain Water
Install Power Cord Hooks Assemble the power cord hooks at the back of the unit with screws (the direction of power cord hooks is as shown in following figure). 2. Screw the drain connector to (included in the package) the spout by turning clockwise. -
Page 14: Wiring Diagram
Wiring Diagram groove joint A The electric schematic diagram are subject to change without notice. Please refer to the one on the unit. UL-C10EA-W UL-C12EA-W UL-C10UA-W 3. Lead the heat discharge pipe outdoors. ROOM TEMP. TUBE TEMP. RECEIVER WATER MOTOR... -
Page 15: Repairs To Sealed Components
Check that cabling will not be subject to wear, corrosion, excessive The following checks shall be applied to installations using flammable pressure, vibration, sharp edges or any other adverse environmental refrigerants: effects. The check shall also take into account the effects of aging or •... -
Page 16: Leak Detection Methods
Leak detection methods recommended good practice that all refrigerants are recovered safely. Prior to the task being carried out, an oil and refrigerant sample shall be The following leak detection methods are deemed acceptable for all taken in case analysis is required prior to reuse of reclaimed refrigerant. It is refrigerant systems. -
Page 17: Technical Specification
Only electric heating to the compressor body shall be employed to accelerate this process. When oil is drained from a system, it shall be carried out safely. Technical specification Model UL-C10EA-W UL-C12EA-W UL-Y12EA-W Power Supply 220 – 240V AC, 50Hz 220 –... -
Page 18: Wichtige Sicherheitshinweise
• Benutzen Sie keine Methoden, um das Abtauen oder Reinigen zu beschleunigen, außer sie wurden vom Hersteller empfohlen. In den folgenden Fällen kann Sharp nicht für Personen- oder Sachschäden • Die Wartung darf nur nach den Empfehlungen des Geräteherstellers haftbar gemacht werden: durchgeführt werden. - Page 19 • Wenn das Gerät für GESCHÄFTSZWECKE verwendet wurde, kontaktieren Wenn Fremdkörper in den Luftkanal gelangen, wenden Sie sich bitte an Sie Ihren SHARP-Händler, der Sie über die Rückgabemöglichkeiten den Händler, um jegliche Gefahren zu vermeiden. informieren wird. Für die Rückgabe können Kosten anfallen. Kleingeräte •...
-
Page 20: Bezeichnung Der Teile
Inhalt der Schachtel elektrischen Geräten, der Verpackung und den Akkus/Batterien erinnern die Benutzer daran, diese Gegenstände ordnungsgemäß zu entsorgen. Nutzer werden gebeten, für gebrauchte HINWEIS Geräte und Akkus bestehende Rückgabeeinrichtungen zu ū Prüfen Sie vor der Installation, ob das Zubehör zur Verfügung steht. nutzen. - Page 21 Betrieb des Bedienfelds Fernbedienung Taste ON/OFF (EIN/AUS) Tasten der Fernbedienung Ein Druck auf diese Taste schaltet die Klimaanlage ein- und aus. Beziehen Sie sich auf die Bilder 4 auf Seite 1. 1. EIN/AUS Taste +/- 2. MODUS Drücken Sie im Kühl- oder Heizmodus die Taste „+“ oder „-“, um die der 3.
-
Page 22: Einlegen Der Batterien
• Wenn Sie TROCKNEN auswählen, arbeitet die Klimaanlage im Tro- • Drücken Sie diese Taste, wenn das Gerät ausgeschaltet ist, um den Einschalt-Timer einzustellen. Es blinken die Symbole T-ON und H. ckenmodus. Im Trockenmodus kann die Lüftergeschwindigkeit nicht Drücken Sie innerhalb von 5 Sekunden die Taste + oder -, um die Zeit eingestellt werden. -
Page 23: Pflege Und Wartung
Fernbedienung näher an das Gerät, um einen zuverlässigen Betrieb zu gewährleisten. ū Ersetzen Sie neue Batterien bei Bedarf mit dem gleichen Modell. ū Wenn Sie das Gerät für einen längeren Zeitraum nicht benutzen, neh- men Sie die Batterien aus der Fernbedienung. ū... -
Page 24: Vorsichtsmaßnahmen Bei Der Installation
Die Klimaanlage funktioniert nicht • Erreicht die Innentemperatur im Heizmodus den Sollwert? (Nur Modelle Ursache/Handlung „Cool and Heat“) / Der Gerätelüfter hört auf zu arbeiten, nachdem die • Stromausfall? / Warten Sie, bis die Stromversorgung wiederhergestellt Sollwerttemperatur erreicht ist. • Wird der Heizmodus zu spät aktiviert? (Nur Modell „Cool&Heat“) / Um ist. -
Page 25: Auswahl Des Einbauorts
3. Wenn das Netzkabel beschädigt ist, muss es vom Hersteller, seinem Sie während des Kühlbetriebs kein Wasser ablassen. Kundendiensttechniker, einem zugelassenen Sharp-Service-Center • Es wird empfohlen, zum Ablassen von Wasser im Trockenmodus den oder ähnlich qualifizierten Personen ersetzt werden, um Gefahren zu mittleren Ablassanschluss zu verwenden. - Page 26 HINWEIS 2. Stecken Sie das Verbindungsstück A des Wärmeabfuhrrohrs in die Nut, ū Wasser kann automatisch in einen Bodenablauf entleert werden, indem bis Sie ein klickendes Geräusch hören. Sie einen Schlauch mit einem Innendurchmesser von 13 mm (nicht im Lieferumfang enthalten) anbringen. Verbindung A 1.
- Page 27 Bitte beachten Sie die Schaltpläne auf dem Gerät. Maximale Ladung (kg) <0,152 0,225 0,304 UL-C10EA-W UL-C12EA-W Vor Beginn der Arbeiten an Systemen mit brennbaren Kältemitteln müssen UL-C10UA-W Sicherheitsüberprüfungen durchgeführt werden, damit eine Minimierung der Entzündungsgefahr garantiert wird. Bei Reparaturen am Kühlsystem müssen folgende Vorsichtsmaßnahmen beachtet werden, ehe Arbeiten am...
- Page 28 Die Wartungs- und Instandhaltungsrichtlinien des Herstellers müssen Bauteilen gearbeitet werden. Die Testvorrichtung muss den richtigen jederzeit eingehalten werden. Nennwert aufweisen. Kontaktieren Sie im Zweifelsfall die technische Abteilung des Herstellers. Ersetzen Sie Bauteile nur durch Teile, die vom Hersteller zugelassen wurden. Andere Teile können dazu führen, dass sich das Kältemittel in der Folgenden Prüfungen müssen bei Anlagen durchgeführt werden, die Atmosphäre bei einer Leckage entzündet.
- Page 29 gen Free Nitrogen) gelöst und weiter gefüllt wird, bis der Arbeitsdruck Geräte sofort vom Einsatzort entfernt werden. Außerdem müssen alle erreicht ist, dann wird es in die Atmosphäre entlüftet und schließlich auf Absperrventile der Geräte geschlossen sein. ein Vakuum heruntergefahren. k.
-
Page 30: Technische Daten
Technische Daten Modell UL-C10EA-W UL-C12EA-W UL-Y12EA-W Stromversorgung 220 – 240 V AC, 50 Hz 220 – 240 V AC, 50 Hz 220 – 240 V AC, 50 Hz Kühlen Energieeffizienzklasse Heizen Kühlen (W) 1345 1345 Stromverbrauch bei laufendem Betrieb Heizen (W) 1190 Stand-by-Stromverbrauch (W) Kühlleistung (W) -
Page 31: Instrucciones Importantes De Seguridad
• Se deben observar las normativas nacionales relacionadas con los gases. Sharp no será responsable por las lesiones personales o los daños a la propiedad consecuencia de lo siguiente: Instrucciones importantes de seguridad 1. -
Page 32: Entorno Operativo
• Si el equipo se hubiera usado CON FINES COMERCIALES, póngase Si entrara alguna sustancia extraña en el conducto de aire, póngase en en contacto con su distribuidor de SHARP, que le informará sobre la contacto con el distribuidor para evitar daños. -
Page 33: Contenidos De La Caja
Contenidos de la caja Declaración de CE y de CA del Reino Unido: • El texto completo de la declaración de conformidad de la UE está disponible en el siguiente enlace www.sharpconsumer.com. Una vez NOTA en la página, entre en la sección de descarga de su modelo y seleccione ū... -
Page 34: Funcionamiento Del Panel De Control
Funcionamiento del panel de control Mando a distancia Botón ON/OFF (Encender/apagar) Botones del mando a distancia Pulsar este botón permite encender y apagar el acondicionador de aire. Consulte las imágenes 4 de la página 1. 1. ON/OFF (Encendido/apagado) Botón + / - 2. -
Page 35: Instalación De Las Pilas
• Cancelación de la función del temporizador: si la función del temporiza- • Si se selecciona FAN (Ventilador), el acondicionador de aire solo fun- cionará en el modo de ventilador. Pulse el botón FAN (Ventilador) para dor está activada, pulse el botón TIMER (Temporizador) una vez para ver ajustar la velocidad del ventilador. -
Page 36: Limpieza Y Mantenimiento
Limpieza y mantenimiento séquelo y vuelva a instalarlo. (Para el método de instalación, consulte las instrucciones de la sección «Instalación del tubo de descarga de calor»). Verificaciones antes de la temporada de uso ADVERTENCIA • Compruebe que las entradas y salidas de aire no están bloqueadas. •... -
Page 37: Códigos De Error
El acondicionador de aire no recibe señal del mando a distancia o el 2. Compruebe si algún objeto bloquea el evaporador y el condensador; mando a distancia no responde. si así fuera, retire los objetos, apague la unidad y vuelva a ponerla en Causa/acción marcha. -
Page 38: Drenaje De Agua
11. Para cumplir la norma IEC 61000-3-11, el valor de impedancia del siste- ma de alimentación conectado al producto debe ser inferior o igual al valor máximo permitido de |Zsys| en la siguiente página: modelos máx |Zsys| unit:ohm UL-C10EA-W UL-C12EA-W 0,13 UL-Y12EA-W 2 Drene el agua de la orificio de drenaje intermedio... -
Page 39: Prueba De Funcionamiento
ATENCIÓN: ū Si desea utilizar la opción de drenaje continuo del orificio intermedio, coloque la unidad en una superficie nivelada y asegúrese de que la manguera no presenta ninguna obstrucción y se dirige hacia abajo. Si la unidad se coloca en una superficie no nivelada o inadecuada, la instalación de la manguera puede ocasionar que el chasis se llene de agua y que el aparato se apague. -
Page 40: Diagrama De Cableado
El diagrama eléctrico está sujeto a cambio sin previo aviso. Consulte el (Nota: Consulte la placa de identificación para la cantidad de carga del incluido en la unidad. gas R290). UL-C10EA-W UL-C12EA-W Área de la estancia (m2) UL-C10UA-W Carga máxima (kg) <0,152... - Page 41 Cableado • La carga de refrigerante real debe ser acorde al tamaño de la estancia en la que se van a instalar las piezas que contienen el refrigerante. Compruebe que el cableado no esté sometido a desgaste, corrosión, • La maquinaria y salidas de ventilación deben funcionar adecuadamente presión excesiva, vibración bordes afilados u otros efectos ambientales y no deben estar obstruidas;...
-
Page 42: Retirada Del Aparato
Procedimientos de carga Al transferir el refrigerante a cilindros, asegúrese de que se utilizan los cilindros para la recuperación de refrigerante adecuados y de disponer del Además de los procedimientos de carga convencionales, se deberán seguir número correcto de cilindros para la carga total del sistema. Los cilindros los requisitos que se indican a continuación. -
Page 43: Especificación Técnica
Especificación técnica Modelo UL-C10EA-W UL-C12EA-W UL-Y12EA-W Fuente de alimentación 220/240 V de CA 50 Hz 220/240 V de CA 50 Hz 220/240 V de CA 50 Hz Frío Clase de eficiencia energética Calor Frío (W) 1345 1345 Consumo de potencia en estado encendido Calor (W) 1190 Consumo en modo de espera (W) Capacidad de refrigeración... -
Page 44: Consignes De Sécurité Importantes
• Si une réparation est nécessaire, contactez votre centre de service agréé Sharp ne sera pas tenu responsable des dommages corporels ou matériels le plus proche. Toute réparation effectuée par du personnel non qualifié dans les cas suivants : peut être dangereuse, et n'est pas couverte par la garantie ni soutenue... -
Page 45: Environnement D'utilisation
• Si l'équipement a été utilisé à DES FINS COMMERCIALES, veuillez contac- • Ne réparez et ne démontez pas le climatiseur par vous-même. ter votre revendeur SHARP qui vous informera des méthodes de reprise. • N'insérez pas d'objets dans le climatiseur. -
Page 46: Contenu De L'emballage
Contenu de l'emballage ramassage d'équipements et de piles existants. Veuillez contacter le détaillant ou les autorités locales pour plus d'information. Déclaration CE et UKCA : REMARQUE • Le texte complet de la déclaration de conformité de l'UE est disponible ū Vérifiez si les accessoires sont disponibles avant l’installation. en suivant le lien www.sharpconsumer.com et en entrant ensuite dans Reportez-vous aux images 6 en page 2. -
Page 47: Fonctionnement Du Panneau De Commande
Fonctionnement du panneau de Télécommande commande Boutons de la télécommande Reportez-vous aux images 4 en page 1. Bouton MARCHE/ARRÊT 1. MARCHE/ARRÊT Appuyez sur ce bouton pour allumer et éteindre le climatiseur. 2. VEILLE Bouton + / - 3. +/- 4. VENT. En mode refroidissement ou en mode chauffage, appuyez sur «... -
Page 48: Installation Des Piles
• Lorsque vous sélectionnez FAN, le climatiseur fonctionne en mode • Les minuteries de marche et d'arrêt ne peuvent pas être réglées ventilateur uniquement. Appuyez alors sur le bouton FAN pour régler la ensemble. vitesse du ventilateur. REMARQUE : • Lorsque vous sélectionnez HEAT, le climatiseur fonctionne en mode ū... -
Page 49: Dépannage
• N'utilisez pas de liquide volatil (Tel qu'un diluant ou un gaz) pour nettoyer le • Vérifiez si le joint, le support de fenêtre et le tuyau d’évacuation de la climatiseur. Sinon, cela pourrait endommager la surface. chaleur sont fermement installés. •... -
Page 50: Codes D'erreur
AVERTISSEMENT ! • La sensibilité de la télécommande est-elle faible ? / Vérifiez les piles de la télécommande. Si la puissance est faible, veuillez remplacer les piles. • Si l'un des phénomènes énumérés ci-dessous se produit, éteignez le • Y a-t-il une lampe fluorescente dans la pièce ? / Déplacez la télécom- climatiseur et débranchez immédiatement l'alimentation, puis contactez mande à... - Page 51 électrique connecté au produit doit être inférieure ou égale à la valeur maximale autorisée de |Zsys| au tableau suivant : Modèles max |Zsys| unité : ohm UL-C10EA-W UL-C12EA-W 0,13 UL-Y12EA-W UL-C10UA-W 2. Vidangez l'eau du port de drainage moyen.
-
Page 52: Test De Fonctionnement
du tuyau peut entraîner le remplissage d’eau du châssis et provoquer • Si la longueur de la conduite d'évacuation de chaleur est inférieure à l’arrêt de l’appareil. Videz l'eau du châssis si un arrêt se produit, et vérifiez 1 m. Il est recommandé de l’utiliser avec la longueur la plus courte. •... -
Page 53: Schéma De Câblage
La quantité de charge de réfrigérant maximale est indiquée dans le tableau ci-dessous. Le schéma électrique est sujet à changement sans préavis. Consultez celui (Remarque : consultez la plaque signalétique pour la quantité de charge présent sur l'appareil. de R290). UL-C10EA-W UL-C12EA-W Surface de pièce (m2) UL-C10UA-W Charge maximale (kg) <0,152... - Page 54 Câblage Les contrôles suivants doivent être appliqués aux installations utilisant des réfrigérants inflammables : Vérifiez que le câblage ne sera pas soumis à l'usure, à la corrosion, à une • La charge de réfrigérant réelle est en fonction de la taille de la pièce dans pression excessive, aux vibrations, aux arêtes vives ou à...
-
Page 55: Mise Hors Service
Procédures de chargement Récupération En plus des procédures conventionnelles de chargement, les exigences Lorsque vous retirez du réfrigérant d'un système, que ce soit pour suivantes devront être respectées. l'entretien ou la mise hors service, il est recommandé de retirer tous les •... -
Page 56: Spécifications Techniques
Spécifications techniques Modèle UL-C10EA-W UL-C12EA-W UL-Y12EA-W Alimentation électrique 220 – 240 V CA, 50 Hz 220 – 240 V CA, 50 Hz 220 – 240 V CA, 50 Hz Refroidissement Classe de rendement énergétique Chauffage Refroidissement (W) 1345 1345 Consommation énergétique en fonctionnement Chauffage (W) 1190 Consommation électrique en mode veille (W) -
Page 57: Importanti Istruzioni Di Sicurezza
• In caso di necessità di riparazioni, contatta il centro assistenza autoriz- zato più vicino. Qualsiasi riparazione effettuata da personale non quali- ficato può essere pericolosa, non coperta da garanzia e non supportata Sharp non potrà essere ritenuta responsabile per lesioni personali o perdite dal produttore. di proprietà per quanto segue: •... - Page 58 • Se il dispositivo è stato utilizzato per SCOPI PROFESSIONALI, sei pregato dovessero entrare sostanze estranee nel dotto dell'aria, contatta il di contattare il rivenditore Sharp che ti darà informazioni sul ritiro. Po- rivenditore per prevenire l'insorgenza di danni. trebbero essere addebitate le spese di ritiro e riciclaggio. Prodotti piccoli •...
-
Page 59: Contenuto Della Confezione
Contenuto della confezione CE and UKCA statement: • Il testo intero della dichiarazione di conformità UE è disponibile al seguente link www.sharpconsumer.com e poi entrando nella sezione NOTA download del tuo modello e scegliendo “Dichiarazioni CE”. ū Controlla che gli accessori siano disponibili prima dell'installazione. Vedi le immagini 6 a pagina 2 1. -
Page 60: Utilizzo Del Pannello Di Controllo
Utilizzo del pannello di controllo Telecomando Tasto ON/OFF Pulsanti del telecomando Premendo questo pulsante accendi e spegni il condizionatore d'aria. Vedi 4 a pagina 1. 1. ON/OFF Tasto +/- 2. MODALITA' In modalità di raffreddamento o riscaldamento, premi il pulsante "+" 3. -
Page 61: Installazione Delle Batterie
premi il pulsante TIMER per confermare. Le icone T-ON e H smetteranno • Selezionando DRY (ASCIUGATURA), il condizionatore d'aria funzionerà a bassa velocità della ventola in modalità asciugatura. In questa modali- di lampeggiare. • Per cancellare la funzione timer: se la funzione timer è configurata, tà, la velocità... -
Page 62: Cura E Manutenzione
Cura e manutenzione Controllare prima della stagione di utilizzo • Controlla che gli ingressi e le uscite dell'aria non siano bloccate. • Controlla che la spina e le presa siano in buone condizioni. • Controlla che il filtro sia pulito. AVVERTENZA! •... -
Page 63: Codici Di Errore
ATTENZIONE! • Il telecomando è all'interno della portata di ricezione? / La portata di ricezione del telecomando è 8 metri. Non andare oltre questa distanza. • Se si verifica uno dei fenomeni indicati di seguito, spegni il condizionatore • C'è un ostacolo che blocca il segnale? / Rimuovi gli ostacoli. d'aria e disconnetti immediatamente l'alimentazione, e quindi contatta •... - Page 64 11. Per essere conformi con IEC 61000-3-11, il valore di impedenza del sistema alimentato elettricamente connesso al prodotto deve essere inferiore o uguale al valore massimo consentito di |Zsys| nel seguente foglio: modelli max |Zsys| unit:ohm UL-C10EA-W UL-C12EA-W 0,13 UL-Y12EA-W 2 Scarica l'acqua dalla bocca di scarico centrale. UL-C10UA-W NOTA ū...
-
Page 65: Test Di Funzionamento
Installare il tubo di scarico del calore Installare il tubo di scarico del calore 1. Ruota la giuntura A e la chiusura posteriore in senso orario nelle due estremità del tubo di scarico del calore. senso orario Test di funzionamento giuntura A tubo di scarico del calore chiusura posteriore... -
Page 66: Schema Elettrico
La quantità massima di carica del refrigerante è mostrata nella seguente tabella. Lo schema elettrico è soggetto a cambiamenti senza preavviso. Consulta (Nota: consulta la targhetta per la quantità di carica di R290). quello sull'unità. UL-C10EA-W Area stanza (m2 ) UL-C12EA-W Carica massima (kg) <0,152... - Page 67 • La carica reale del refrigerante è adeguata alle dimensioni della stanza in biente. Il controllo deve anche tenere conto degli effetti dell'invecchia- cui vengono installate le parti contenenti il refrigerante; mento o delle vibrazioni continue provenienti da fonti quali compressori •...
- Page 68 • Assicurarsi che la contaminazione di diversi refrigeranti non si verifichi siano disponibili i numeri corretti di cilindri per contenere la carica totale quando si usano apparecchiature di ricarica. I tubi o le tubazioni devono del sistema. Tutti i cilindri da utilizzare devono essere designati per il refri- essere il più...
-
Page 69: Specifiche Tecniche
Specifiche tecniche Modello UL-C10EA-W UL-C12EA-W UL-Y12EA-W Alimentazione 220 – 240V AC, 50Hz 220 – 240V AC, 50Hz 220 – 240V AC, 50Hz Raffreddamento Classe di efficienza energetica Riscaldamento N.A. N.A. Raffreddamento (W) 1345 1345 Consumo energetico in funzionamento Riscaldamento (W) N.A. -
Page 70: Środki Ostrożności
• Nie wolno przyspieszać procesu odszraniania lub czyszczenia w sposób inny niż zalecany przez producenta. • Czynności serwisowe należy przeprowadzać wyłącznie w sposób zgodny Firma Sharp nie ponosi odpowiedzialności za obrażania ciała ani utratę z zaleceniami producenta. mienia w następujących przypadkach: •... - Page 71 kanału należy skontaktować się ze sprzedawcą urządzenia, aby zapobiec wystąpieniu zagrożeń. Żeby zapobiec pożarowi, • Nie wolno stosować przedłużaczy. zawsze trzymaj świece i inne Warunki panujące w otoczeniu podczas pracy urzą- źródła otwartego ognia z dzenia: daleka od urządzenia. • Klimatyzator powinien pracować w zakresie temperatury od 16°C do 35°C: Ostrzeżenie: •...
-
Page 72: Zawartość Opakowania
• W przypadku gdy produkt używany jest do CELÓW BIZNESOWYCH UWAGA należy skontaktować z autoryzowanym sprzedawcą firmy SHARP, który ū Sprawdź, czy akcesoria są dostępne przed instalacją. poinformuje o możliwości zwrotu wyrobu. Być może będą Państwo mu- Patrz rysunek 6 na stronie 2. -
Page 73: Obsługa Panelu Sterowania
Obsługa panelu sterowania Pilot zdalnego sterowania Przycisk ON/OFF Przyciski na pilocie zdalnego sterowania Naciśnięcie przycisku powoduje włączenie lub wyłączenia klimatyzatora. Patrz rysunek 4 na stronie 1. 1. Przycisk ON/OFF Przyciski +/- 2. Przycisk MODE W trybie chłodzenia lub ogrzewania naciśnij przycisk „+” lub „-”, aby 3. -
Page 74: Instalacja Baterii
• Po wyborze trybu DRY (osuszanie), klimatyzator zacznie działać w trybie wskazanie czasu. Zwolnij przycisk po osiągnięciu żądanego wskazania czasu. Następnie naciśnij przycisk TIMER, aby zatwierdzić ustawienie. osuszania przy niskiej prędkości wentylatora. W tym trybie nie można Symbole T-ON i H przestaną pulsować. ustawić... -
Page 75: Czyszczenie I Konserwacja
Czyszczenie i konserwacja ū Nie wolno suszyć filtra poddając bezpośredniemu działaniu źródła ciepła lub za pomocą suszarki do włosów. W przeciwnym razie może to spowodować deformację lub zapalenie się filtra. OSTRZEŻENIE! Czyszczenie rury odprowadzającej ciepło Odłącz rurę odprowadzającą ciepło od klimatyzatora. Wyczyść i osusz ją, •... -
Page 76: Kody Błędów
Odgłos przepływającej wody • Czy żądana temperatura nie przekracza zakresu ustawienia temperatury? Przyczyna / działanie / Zakres ustawienia temperatury wynosi od 16°C do 30°C. • Czy urządzenie jest teraz włączone czy wyłączone? / W klimatyzatorze • Czy urządzenie jest teraz włączone czy wyłączone? / W klimatyzatorze słychać... -
Page 77: Odprowadzanie Kondensatu
• Wyłącz zasilanie urządzenia i odłącz wtyczkę przewodu zasilającego od gniazdka elektrycznego. Modele maks. |Zsys|, jednostki: omy • Umieść pojemnik na wodę pod dolnym otworem spustowym lub prze- UL-C10EA-W nieś urządzenie w miejsce, w którym można odprowadzić kondensat. UL-C12EA-W • Wyjmij gumową zatyczkę z otworu spustowego, aby odprowadzić 0,13 UL-Y12EA-W kondensat przez dolny otwór spustowy. - Page 78 2 Odprowadź kondensat przez środkowy otwór spustowy. 2. Wsuń złącze A rury odprowadzającej ciepło do wyżłobienia, aż usły- szysz „kliknięcie”. UWAGA wyżłobienie ū Kondensat można automatycznie odprowadzać do odpływu podłogo- wego podłączając rurkę o średnicy wewnętrznej 13 mm (spoza zestawu). złącze A 1.
-
Page 79: Schemat Elektryczny
Konserwacja i naprawy wymagające pomocy Schemat elektryczny może ulec zmianie bez wcześniejszego powiadomie- innego wykwalifikowanego personelu powinny być przeprowadzane nia. Należy odnieść się do schematu umieszczonego na urządzeniu. pod nadzorem osoby kompetentnej w stosowaniu palnych czynników UL-C10EA-W chłodniczych. UL-C12EA-W Przygotowanie do bezpiecznej pracy UL-C10UA-W Maksymalną... - Page 80 może zostać uwolniony do otaczającej przestrzeni. Przed rozpoczęciem • Należy upewnić się, że uszczelki lub materiały uszczelniające nie uległy prac należy dokonać oględzin obszaru wokół urządzenia, aby upewnić się, degradacji w takim stopniu, iż nie zapobiegają wnikaniu palnych że nie wystepuje zagrożenie zapalenia się lub zapłonu. Należy umieścić środków.
-
Page 81: Wycofanie Z Eksploatacji
praktykami biorącymi pod uwagę palność czynnika. Należy przestrzegać f. Upewnij się, że butla znajduje się na wadze zanim rozpocznie się poniższej procedury: odzyskiwanie. • usuń czynnik chłodniczy; g. Uruchom sprzęt do odzysku i postępuj zgodnie ze wskazówkami • przepłucz układ gazem obojętnym; producenta. -
Page 82: Dane Techniczne
Dane techniczne Model UL-C10EA-W UL-C12EA-W UL-Y12EA-W Zasilanie 220–240 V~, 50 Hz 220–240 V~, 50 Hz 220–240 V~, 50 Hz Chłodzenie Klasa efektywności energetycznej Ogrzewanie B.D. B.D. Chłodzenie (W) 1345 1345 Pobór mocy podczas pracy Ogrzewanie (W) B.D. B.D. 1190 Pobór mocy w trybie czuwania (W) Wydajność... -
Page 83: Instruções De Segurança Importantes
Sharp mais próximo. Todas as reparações efetuadas por pessoal não qualificado podem ser perigosas, não abran- A Sharp não se responsabiliza por danos pessoais ou perdas materiais gidas pela garantia e não suportadas pelo produtor. consequentes do seguinte: •... -
Page 84: Ambiente De Funcionamento
• Se o equipamento foi usado para FINS COMERCIAIS, contacte um ven- quaisquer substâncias estranhas entrarem no tubo de ar, contacte o dedor SHARP que o informará sobre a entrega. Poderá ter de suportar o revendedor para evitar a ocorrência de danos. -
Page 85: Conteúdo Da Caixa
Conteúdo da caixa Declaração CE e UKCA: • O texto integral da declaração de conformidade UE encontra-se dispo- nível seguindo o link www.sharpconsumer.com e depois entrando na NOTA secção de transferências do seu modelo e selecionando “Declarações CE". ū Antes de instalar, verifique se os acessórios estão disponíveis. Veja as imagens 6 na página 2. - Page 86 Funcionamento do painel de controlo. Telecomando Botão ON/OFF Botões do telecomando Carregar neste botão liga e desliga o ar condicionado. Veja as imagens 4 na página 1. 1. ON/OFF Botão + / - 2. MODO No modo de arrefecimento ou aquecimento, carregue no botão “+” ou “-” 3.
-
Page 87: Instalação Das Pilhas
Depois carregue no botão TIMER para a confirmar. A indicação T-ON e o • Quando selecionar SECO, o ar condicionado irá funcionar com uma velocidade baixa da ventoinha no modo seco. No modo seco não se ícone H deixarão de piscar. •... -
Page 88: Cuidados E Manutenção
Cuidados e Manutenção Verificar antes da época de utilização • Verifique se as entradas e saídas de ar estão bloqueadas. • Verifique se a ficha e a tomada estão em boas condições. • Verifique se o filtro está limpo. AVISO! •... -
Page 89: Códigos De Erro
AVISO! • Está bloqueado por obstáculos? / Remova os obstáculos. • A sensibilidade do telecomando está fraca? / Verifique as pilhas do • Se ocorrer algum dos fenómenos indicados em baixo, desligue o ar condi- telecomando. Se a potência estiver fraca, substitua as pilhas. cionado, desligue imediatamente a corrente e contacte imediatamente o •... -
Page 90: Drenagem De Água
|Zsys| na seguinte tabela: Modelos máx. |Zsys| unidade:ohm UL-C10EA-W UL-C12EA-W 2. Retire a água da porta de drenagem do meio. 0,13 UL-Y12EA-W... -
Page 91: Operação De Teste
Instalação do tubo de descarga de calor Instalar o tubo de descarga de calor 1. Gire a junta A e a presilha de trás no sentido dos ponteiros do relógio para as duas pontas do tubo de descarga de calor. sentido dos ponteiros do relógio Operação de teste junta A... - Page 92 O diagrama com o esquema elétrico encontra-se sujeito a alteração sem (Nota: Veja na placa de classificação a quantidade de carga de R290). aviso prévio. Por favor, veja o da unidade. UL-C10EA-W Área da divisão (m2) UL-C12EA-W Carga máxima (kg) <0,152...
- Page 93 Cablagem Devem efetuar-se as seguintes verificações às instalações que usarem refrigerantes inflamáveis: Verifique se a cablagem não está sujeita a desgaste, corrosão, pressão • A carga real de refrigerante encontra-se em conformidade com o excessiva, vibração, pontas afiadas ou outros efeitos adversos do ambiente. tamanho da divisão na qual estão instaladas as peças que contêm A verificação também deve ter em conta os efeitos da idade e da vibração refrigerante;...
- Page 94 linhas devem ser o mais curtas possível para minimizar a quantidade de são designados para o refrigerante recuperado e identificados para esse refrigerante contidas neste. refrigerante (isto é, cilindros especiais para a recuperação do refrigerante). • Os cilindros devem ser mantidos na vertical. Os cilindros devem estar completos com uma válvula de alívio de pressão •...
-
Page 95: Especificações Técnicas
Especificações técnicas Modelo UL-C10EA-W UL-C12EA-W UL-Y12EA-W Alimentação elétrica 220-240 V AC, 50 Hz 220-240 V AC, 50 Hz 220-240 V AC, 50 Hz Arrefecimento Classe de eflciência energética Aquecimento Arrefecimento (W) 1345 1345 Consumo energético em funcionamento Aquecimento (W) 1190 Consumo energético em standby (espera) (W) - Page 97 Sharp Consumer Electronics Poland sp. z o.o. Ostaszewo 57B, 87-148 Łysomice, Poland Made in China SDA/MAN/0195 www.sharpconsumer.eu...
- Page 98 Ovaj dokument je originalno proizveden i objavljen od strane proizvođača, brenda Sharp, i preuzet je sa njihove zvanične stranice. S obzirom na ovu činjenicu, Tehnoteka ističe da ne preuzima odgovornost za tačnost, celovitost ili pouzdanost informacija, podataka, mišljenja, saveta ili izjava sadržanih u ovom dokumentu.
Need help?
Do you have a question about the UL-C10EA-W and is the answer not in the manual?
Questions and answers