Table of Contents
Advertisement
Advertisement
Table of Contents

Related Manuals for Daymak Boomerbuggy X Pro


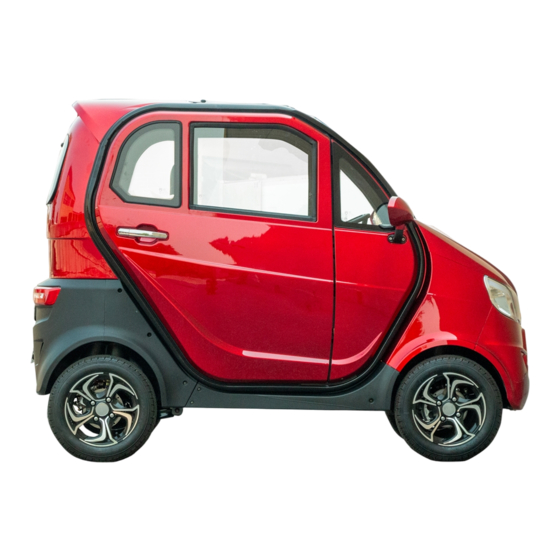
Summary of Contents for Daymak Boomerbuggy X Pro
- Page 1 manual...
-
Page 2: Safety
• Do not make sharp / abrupt turns at high speeds to avoid tipping. • Do not operate under the influence of drugs or alcohol • Do not completely submerge the unit in water • Do not operate in harsh weather conditions. For any questions or concerns please call 1-800-649-9320 or visit www.daymak.com... -
Page 3: About Daymak
Daymak warranties, services, and stocks parts for everything it sells. We support our products. Please feel free to visit our website. You’ll find the latest in cool transportation... -
Page 4: Introduction
Liability Daymak does not assume any liability for damages, loss of profits, or claims from third parties due to improper use of this product. Daymak does not assume any liability for damages due to problems with the product resulting from service by a third party that is not certified by Daymak. -
Page 5: Table Of Contents
• INTRODUCTION • PART DIAGRAMS • RIDING INSTRUCTIONS • THE BATTERY • CHARGING YOUR MOBILITY SCOOTER • UNDERSTANDING YOUR VOLTAGE • CHARGING THE BOOMERBUGGY X PRO • GETTING IN TO YOUR VEHICLE • OPERATION • BRAKES • SEAT • WINDOWS •... -
Page 6: Part Diagrams
Part Diagrams Diagram 1: Boomerbuggy X Pro This diagram illustrates the various parts of your mobility scooter. Please note that many of these parts are not user-serviceable and should be repaired only by trained professionals. This is especially true of the electrical systems and the mechanical components. -
Page 7: Riding Instructions
Riding Instructions This guide assumes that you already know have operated a mobility scooter. If you have never used a mobility scooter before, we strongly recommend that you read throught this guide entirely before beginning to operate. Caution Always make sure to be properly situated on the unit before turning it on and engaging the throttle. - Page 8 Items to Carry with the Electric Mobility Scooter It is a good idea to carry the following items with you at all times when you ride your Mobility Scooter. • The charger, to charge the mobility scooter in case the battery power runs out.
- Page 9 Accelerating and Decelerating The throttle is on the handlebars (see Operation for more information). Use this carefully when situated on the mobility scooter to go forward and release to decelerate. Warning Do not activate the accelerator until you are seated on the mobility scooter and are ready to accelerate.
- Page 10 Signalling The Horn The mobility scooter has a horn. Use this when coming close to pedestrians to warn of your passing. See the operation section for where to find your horn and how to use it. Turning Signal Lights Your mobility scooter has turn signal lights. Push it left or right to activate it to indicate that you are turning in the appropriate direction.
- Page 11 Riding in Cold Weather Your mobility scooter is designed to operate year-round. However, in very cold conditions or when there is a lot of snow or slush on the ground, it is possible for the motor in the mobility scooter to get wet or for the brakes to function less effectively, just as it can happen in wet weather.
-
Page 12: The Battery
The Battery This section details what you need to know about the battery that powers your mobility scooter. Always remember to treat your mobility scooters electrical systems with respect. Battery Power The dashboard has a battery charge indicator. When the mobility scooter is activated, the guage will jump and indicate the currently available battery power. -
Page 13: Charging Your Mobility Scooter
If your charger’s LED status light does not change from red to green over an extended period of time, for perhaps more than 14 hours, and the battery is very hot, the battery or charger may need replacing. Stop charging and bring both to your Daymak dealer immediately. Do not overcharge the battery. -
Page 14: Understanding Your Voltage
Underneath each reading on the above chart shows a number and a “S” this represents how many series are in your battery pack. To know the exact series of your battery contact your local Daymak dealer. -
Page 15: Charging The Boomerbuggy X Pro
Mobility Scooter is ready to go. Warning Do not leave the Boomerbuggy X Pro charging for long periods of time after it is fully charged. Once the Mobility Scooter is charged unplug it ASAP to avoid doing damage to... - Page 16 Contact your local Daymak dealer to purchase a new battery. When replacing your battery, dispose of it at a proper municipal battery recycling facility.
-
Page 17: Getting In To Your Vehicle
Getting in to your vehicle To get into your Boomerbuggy X Pro, first you will need to unlock the doors (if not unlocked already). You can do this by one of two way. Either using the key or pressing the unlock button on the remote control. -
Page 18: Operation
Operation Once you are in your unit and properly seated, you are now ready to begin operating. Warning Do not engage the machine without being seated properly on the unit as this can cause injury. We recommend reading through the whole manual prior to use for a complete understanding of the inner workings of this machine. - Page 19 handle bar Controls Above you will see the main handlebars. These are used to steer your vehicle. By pulling the left side of the handlebar towards you will turn the vehicle to the left and vice versa. On the handlebars there are some controls. Below is what each does: 1) Throttle (Right Hand) - Pull this lever towards you to engage the motor and start moving the machine forward.
-
Page 20: Brakes
Brakes To engage the brakes on the Boomerbuggy X Pro you will fi nd a pedal on the fl oor near the right side. This pedal must be pressed to engage the brakes. -
Page 21: Seat
Seat The Boomerbuggy X Pro comes with an adjustable seat that can be moved and positioned to fit your desired comfort. The seat can tilted back and forth, as well as slide back and forth. - Page 22 TILT seat To tilt the seat so that you are more or less upright. Grab the lever seen below and while holding it push the back rest to your desired position. This can also be folded completely down to access the back storage area more easily. adjust head rest You can also adjust the headrest at the top of the seat so that it provides support exactly where you need it.
-
Page 23: Windows
Windows The Boomerbuggy X Pro comes with Power windows as well as a sun roof and a rear window that can be opened and closed. Here is how to use them. To roll down the driver side windows on each side you will find a button seen on the right. - Page 24 To open the sun roof look at the latches above and do the same as the rear window on each latch to hold it in place. Windshield fluid To refill the Windshield fluid look just above the hood for a nozzle like this with a cap.
- Page 25 Door handle On the inside of the doors are the door handles that can be used to get out of the vehicle when needed. 1) Door Lock / Unlock - Flip this out or in, to unlock or lock the door respectively. 2) Door Handle - Pull this while pushing the door to open it.
-
Page 26: Display
Display The Boomerbuggy X Pro has two displays, one that shows your speedometer and one that controls your bluetooth MP3 playback, radio and more! speedometer display 1) Battery Meter - Shows how much battery power your unit has. 5 Bars is full... - Page 27 1) Bluetooth - Choosing this option will play music from your smartphone. To connect to your Boomerbuggy X Pro, go into your phones bluetooth settings and look for the device labelled IMotro-XXXX 2) Movie - Plays videos off a USB stick, (see Console Controls for more info)
- Page 28 Console Controls To the right of the Bluetooth display screen is a set of console buttons that you use to interact with the display. Press these buttons to switch stations , songs, pause and play or go to different settings. 1) Power - Press and hold this to turn on and off the Bluetooth Display 2) MOD - Press this to quickly switch between, Radio , Bluetooth, and USB 3) Previous Select / Last Song - Use this button to move selection screen to the previous...
- Page 29 radio display When you select the Radio option either by choosing it from the menu screen or pressing the MOD button, you will see a screen like this. Here is what everything means on this screen. 1) Station Preset - These are generic presets that you can switch to by pressing Next / Previous( ) select buttons.
- Page 30 Settings menu By moving the menu selection to Settings you can configure the Bluetooth display section as you see fit. Pick the setting you want to change with previous / next setting ( On any menu selection press select ( ) to change it, use the previous / next selection option ( - / + ) buttons to change the option, and then the select ( ) button to lock it...
-
Page 31: Vehicle Identification Number (Vin)
This is also required for registering your warranty on the warranty secti on of Daymak.com. To fi nd the VIN on your Boomerbuggy X Pro, look on the fl oor where the door opens on the right hand side of the vehicle (as if... -
Page 32: Technical Data
This section provides you with the technical specifications for your Mobility Scooter. The Motor and Wheel Assembly The Boomerbuggy X Pro has a magnetic DC brushless motor on the rear wheel hub. This type of motor has excellent low-end torque and high efficiency when working within its range. -
Page 33: Maintenance And Troubleshooting
Maintenance and Troubleshooting This section outlines problems you may have and solutions you may be able to use. Many of the parts in this product are not user-serviceable and should be repaired by trained professionals. This is especially true of the electrical systems and the mechanical components. - Page 34 Daymak dealer. The Motor Do not service the motor yourself. Bring the mobility scooter to your Daymak dealer for service. The motor in your mobility scooter is a highly complex and fine-tuned mechanism. Repairing it requires significant expertise. We suggest maintenance every 100 running hours or so.
- Page 35 Cleaning Cleaning is extremely important this will ensure your mobility scooter will serve you for a long time. In the long run, it will save you money and a lot of time waiting for the Mobility Scooter to be repaired. You should clean your mobility scooter weekly. Do not use aggressive power jets or water sprays when washing the mobility scooter and keep water off the battery as much as you can.
- Page 36 Schedule The frequency of maintenance depends on how much you ride and under which conditions. Recreational riders needs far less maintenance then off-road riders. The harder you ride, the more you have to take care of your Mobility Scooter if you want it to last. There are various time intervals for proper maintenance.
-
Page 37: Specifications
Specifications Name Boomerbuggy X Pro Motor 1200W Voltage Amp Hour Watt Hours 2700WH Battery Life 300 cycles Battery Lead Acid Removable Battery Charger 60V 5.3A 100-240V Charge Time 8 - 9 Hours Lights Incadescent / LED Max Load 550 lbs. - Page 38 Name Boomerbuggy X Pro Rear Brakes Hydraulic Disc Front Brakes Hydraulic Disc Ignition Push to Start Front Shocks Dual Coil Rear Shocks Dual Coil Controller Standard Pedal Assist Speed Levels 3 Speeds Throttle Push / Pull Throttle Cruise Control Display...
- Page 40 Thank you for choosing Daymak...
Need help?
Do you have a question about the Boomerbuggy X Pro and is the answer not in the manual?
Questions and answers