Advertisement
Advertisement
Table of Contents

Related Manuals for Daymak Boomerbuggy X


Summary of Contents for Daymak Boomerbuggy X
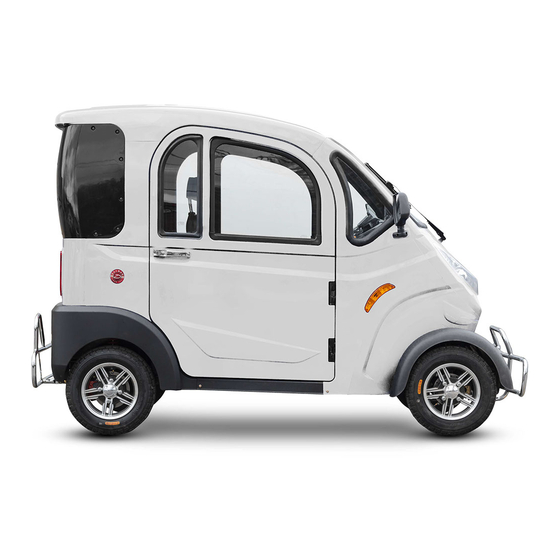
- Page 1 Boomerbuggy X User Manual...
-
Page 2: About Daymak
Our innovative in-house engineering and quality testing provide the lives of our customers and the world. Daymak warranties, services, and stocks parts for everything it sells. We support our prod- ucts. Please feel free to visit our website. You’ll nd the latest in cool transportation solutions,... - Page 3 Introduction Thank you for purchasing Daymak’s Boomerbuggy X Mobility Scooter. We thank you for choosing a Daymak scooter, especially one that has been designed to pro- vide you with years of trouble-free, comfortable, quiet, and eco-friendly service. Your scooter has been equipped with the latest technologies that assist in provid- ing you with the most e cient and comfortable ride you’ve ever felt.
- Page 4 Safety When operating the Boomerbuggy X please make sure you adhere to the following: Always check your mirrors and blind spots when operating the vehicle. Turn on headlights when in need of additional visibility. Make sure that your battery power is suffi cient before you go out to ride Obey all laws of the road.
- Page 5 Boomerbuggy X Diagram 1: The Boomerbuggy X Electric Scooter This diagram illustrates the various parts of your scooter. Please note that many of these parts are not us- er-serviceable and should be repaired only by trained professionals. This is especially true of the electrical systems and the mechanical components.
-
Page 6: Operation
Ignition The Boomerbuggy X comes with a keyless ignition. To turn on the Boomerbuggy X press the button seen here when the unit is unlocked. Press it once more to turn o the unit. - Page 7 Always press the Lock button on your remote once nished using the Boomerbuggy X Lights In addition to the headlights, the Boomerbuggy X comes with a LED light inside to help for visibility in- side your cabin. Push the switch to the right most position to turn o the lights.
- Page 8 Display The display on your Boomerbuggy X is an LED that shows the metrics of your machine including speed, travel distance and more. 1) Motor Power - This shows how much wattage is being given to your motor to engage the machine.
-
Page 9: Right Handlebar
Driving your Boomerbuggy X Below you will nd your two handle bars. You will use these to steer the unit turning left and right as well as to engage the motor and brakes. Below is some more detailed explanation on all the buttons and their functions. -
Page 10: Left Handlebar
Engaging / Disengaging the Brake Lock The Boomerbuggy X comes with a brake lock that prevents the unit from rolling when parked on an in- cline. To engage the brake lock, pulled the brake lever towards you. While holding the brakes close to you, pull the parking brake lever seen below and pull it into the grooves of the brakes. - Page 11 In the rear storage area behind the driving seat you will nd a charging port where you plug in your Boomerbuggy X to charge. Lift up the ap as seen below and plug the in your charger and the other end into a 110V outlet.
- Page 12 Features The Boomerbuggy X comes with a lot of features, get the speci cs on them below! The Boomerbuggy X comes with a built in rear view camera. This camera only activates when the unit is put into reverse. There are green yellow and red lines to help gauge how close you are to whatever is behind you.
- Page 13 Fans / Heating / Air Conditioning (cont’d) If your Boomerbuggy X is the Deluxe or Ultimate models you will have both buttons shown on the right. If you only have the standard Boomerbuggy X you will only have the red button.
- Page 14 Doors / Windows 1) Door handle - Pull this lever to open the door 2) Windows - Rotate this lever counterclockwise to roll down the window and rotate this clockwise to roll up the window. Seats and Storage On the left of the seat, you will nd a lever shown on the left.
- Page 15 Seats and Storage (cont’d) Under the seat you will nd two latches as seen on the right (one on the left and one on the right). Lift these latches up. Once these latches are up you can now lift the seat for a storage compartment under the seat.
- Page 16 Radio 1) Previous Song - Go back to the last song you played or go to the previous station 2) Next Song - Go to the next song or go the next station 3) Power - Turn on the Radio / MP3 player 4) Micro SD Port - Insert a MicroSD with music to play your own music.
-
Page 17: Maintenance And Troubleshooting
If you are having trouble operating your scooter, please check the following: The unit is switched on - All plugs and connectors are rmly xed - Battery is fully charged - Parking break is o - Call Daymak Service 1-800-649-9320... - Page 18 Thank you for choosing Daymak...
Need help?
Do you have a question about the Boomerbuggy X and is the answer not in the manual?
Questions and answers
where does the power come from to feed the ac switch
The power source for the AC switch in the Daymak Boomerbuggy X is a 72V lithium battery.
This answer is automatically generated
How can i find out the year?