Table of Contents
Advertisement
Quick Links
Advertisement
Table of Contents

Related Manuals for Hikmicro M Series M10 Series


Summary of Contents for Hikmicro M Series M10 Series
- Page 1 Handheld Thermography Camera HIKMICRO M Series User Manual...
- Page 2 INTERRUPTION, OR LOSS OF DATA, CORRUPTION OF SYSTEMS, OR LOSS OF DOCUMENTATION, WHETHER BASED ON BREACH OF CONTRACT, TORT (INCLUDING NEGLIGENCE), PRODUCT LIABILITY, OR OTHERWISE, IN CONNECTION WITH THE USE OF THE PRODUCT, EVEN IF HIKMICRO HAS BEEN ADVISED OF THE POSSIBILITY OF SUCH DAMAGES OR LOSS.
- Page 3 Handheld Thermography Camera User Manual PRODUCTION OF CHEMICAL OR BIOLOGICAL WEAPONS, ANY ACTIVITIES IN THE CONTEXT RELATED TO ANY NUCLEAR EXPLOSIVE OR UNSAFE NUCLEAR FUEL-CYCLE, OR IN SUPPORT OF HUMAN RIGHTS ABUSES. IN THE EVENT OF ANY CONFLICTS BETWEEN THIS MANUAL AND THE APPLICABLE LAW, THE LATTER PREVAILS.
- Page 4 Handheld Thermography Camera User Manual Regulatory Information Note These clauses apply only to the products bearing the corresponding mark or information. FCC Compliance Statement Please take attention that changes or modification not expressly approved by the party responsible for compliance could void the user's authority to operate the equipment. This device complies with Part 15 of the FCC Rules.
- Page 5 Handheld Thermography Camera User Manual Frequency Bands and Power (for CE/UKCA) The frequency bands and transmitting power (radiated and/or conducted) nominal limits applicable to the following radio equipment are as follows: Equipment Model Frequency Band and Power Wi-Fi 2.4 GHz (2.4 GHz to 2.4835 GHz): 20 dBm; Bluetooth 2.4 GHz (2.4 GHz to 2.4835 GHz): 20 dBm M11, M11W, M20, Wi-Fi 2.4 GHz (2.4 GHz to 2.4835 GHz): 20 dBm;...
- Page 6 Handheld Thermography Camera User Manual 2006/66/EC (battery directive): This product contains a battery that cannot be disposed of as unsorted municipal waste in the European Union. See the product documentation for specific battery information. The battery is marked with this symbol, which may include lettering to indicate cadmium (Cd), lead (Pb), or mercury (Hg).
- Page 7 Handheld Thermography Camera User Manual devices in the band 5725-5825 MHz shall limiter; et comply with the e.i.r.p. limits specified for (iii) Le gain d'antenne maximal autorisé pour point-to-point and non point-to-point les appareils dans la bande 5725-5825 MHz operation as appropriate. doivent respecter le pire limites spécifiées pour le point-à-point et l'exploitation non point à...
- Page 8 Handheld Thermography Camera User Manual Symbol Conventions The symbols that may be found in this document are defined as follows. Symbol Description Indicates a hazardous situation which, if not avoided, will or could Danger result in death or serious injury. Indicates a potentially hazardous situation which, if not avoided, Caution could result in equipment damage, data loss, performance...
- Page 9 Handheld Thermography Camera User Manual Safety Instruction These instructions are intended to ensure that user can use the product correctly to avoid danger or property loss. Laws and Regulations ● Use of the product must be in strict compliance with the local electrical safety regulations. Transportation ●...
- Page 10 ● Overvoltage category: II for power adapter. Technical Support The https://www.hikmicrotech.com/en/contact-us/ portal will help you as a HIKMICRO customer to get the most out of your HIKMICRO products. The portal gives you access to our support team, software and documentation, service contacts, etc. Emergency ●...
- Page 11 Handheld Thermography Camera User Manual length is 650 nm, and the power is less than 1 mW. The laser meets the IEC60825-1:2014 standard. Laser maintenance: It is not necessary to maintain the laser regularly. If the laser does not work, the laser assembly needs to be replaced in the factory under warranty.
-
Page 12: Table Of Contents
Handheld Thermography Camera User Manual Contents Chapter 1 Overview ........................1 1.1 Device Description ......................1 1.2 Main Function ........................1 1.3 Appearance ........................2 Chapter 2 Preparation ........................6 2.1 Charge Device ........................6 2.1.1 Charge Device via Charging Base ................6 2.1.2 Charge Device via Cable Interface ................ - Page 13 Handheld Thermography Camera User Manual 4.2 Set Image Measurement ....................24 4.3 Set Measurement Tool....................25 4.3.1 Measure by Custom Spot ..................26 4.3.2 Measure by Line ....................27 4.3.3 Measure by Rectangle ..................28 4.3.4 Measure by Circle ....................29 4.4 Temperature Alarm ......................
- Page 14 Handheld Thermography Camera User Manual 13.3 Upgrade Device ......................47 13.4 Restore Device ......................48 13.5 Initialize Memory Card ....................48 13.6 About Calibration ......................48 Chapter 14 Appendix ........................49 14.1 Common Material Emissivity Reference ............... 49 14.2 FAQ ..........................49 xiii...
-
Page 15: Chapter 1 Overview
Handheld Thermography Camera User Manual Chapter 1 Overview 1.1 Device Description Thermographic Handheld Camera is a device with both visual images and thermal images. It can measure temperature, record videos, take snapshots, trigger alarms, and it can connect to client software via Wi-Fi or hotspot. -
Page 16: Appearance
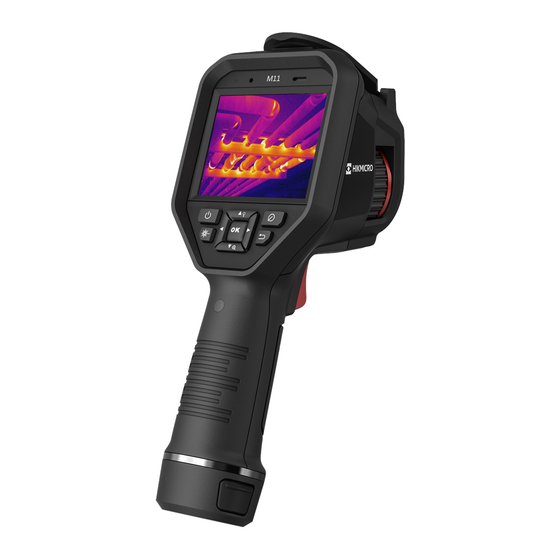
Handheld Thermography Camera User Manual Client Software Connection ● Mobile Phone: Use HIKMICRO Viewer to view live image, capture snapshots, and record videos on your phone. You can also, analyze pictures offline, generate and share a report via the app. - Page 17 Handheld Thermography Camera User Manual Figure 1-1 Appearance (Front View) Figure 1-2 Appearance (Side View) I...
- Page 18 Handheld Thermography Camera User Manual Figure 1-3 Appearance (Side View) II Note The warning sign is inside the lens cover. Table 1-1 Interface Description Component Function Laser Button Hold the button to turn on laser, and release the button to turn off laser. Menu Mode: ●...
- Page 19 Handheld Thermography Camera User Manual Component Function ● Menu Mode: Pull the trigger to return to the live view interface. ● Non-Menu Mode: Pull the trigger to capture snapshots. Hold the trigger to Trigger record videos. Cable Charge the device or export files with USB type-A to type C cable. Interface Caution The laser radiation emitted from the device can cause eye injuries, burning of skin or inflammable...
-
Page 20: Chapter 2 Preparation
Handheld Thermography Camera User Manual Chapter 2 Preparation 2.1 Charge Device Caution The built-in cell battery that powers the real time clock (RTC) of the device may drain during longtime transportation or storage. It is recommended to recharge the RTC battery for the well-functioning of the device clock. -
Page 21: Charge Device Via Cable Interface
Handheld Thermography Camera User Manual 2. Hold the lock catches, and draw the battery base to take out the battery. 3. Insert the battery into the charging base. You can see the charging status via the pilot lamp on the charging base. Figure 2-2 Charge Battery 4. -
Page 22: Power On/Off
Handheld Thermography Camera User Manual 2.2 Power On/Off Power On Remove the lens cover, and hold for over three seconds to turn on the device. You can observe the target when the interface of the device is stable. Note It may take at least 30 s until the device is ready for using when you power on it. Power Off When the device is turned on, hold for three seconds to power off the device. -
Page 23: Operation Method
Handheld Thermography Camera User Manual 2.4 Operation Method The device supports both touch-screen control and button control. Touch-screen control Tap on the screen to set parameters and configurations. Figure 2-4 Touch-screen Control Button control Press the navigation buttons to set parameters and configurations. Figure 2-5 Button Control ●... - Page 24 Handheld Thermography Camera User Manual Figure 2-6 Live View Interface Table 2-1 Live View Interface Description Descriptions Status bar, where device working status, such as, battery and connections, are displayed. Palette bar and display temperature range. The upper and lower values of the palette bar represent the max.
- Page 25 Handheld Thermography Camera User Manual Figure 2-7 Main Menu Swipe-down Menu In live view interface, swiping on screen from upper to lower to call the swipe-down menu. With this menu, you can turn on/off device function, change display theme, and adjust screen brightness.
-
Page 26: Chapter 3 Display Settings
Handheld Thermography Camera User Manual Chapter 3 Display Settings Note Your device will periodically perform a self-calibration to optimize image quality and measurement accuracy. In this process the image will pause briefly and you'll hear a "click" as a shutter moves in front of the detector. -
Page 27: Set Screen Brightness
Handheld Thermography Camera User Manual 3.2 Set Screen Brightness Call the swipe-down menu, or go to Settings → Device Settings → Screen Brightness. Swipe the brightness bar or press / to adjust the screen brightness. 3.3 Set Display Mode You can set the thermal/optical view of the device. Thermal, Fusion, PIP, Visual, and Blending are selectable. -
Page 28: Set Palettes
Handheld Thermography Camera User Manual In Blending mode, the device displays the mixture view of thermal and optical channels. Press to adjust the Optical Level. The lower the value is, the denser the optical effect is. 3. Press to exit. 3.4 Set Palettes The palettes allow you to select the desired colors. - Page 29 Handheld Thermography Camera User Manual Figure 3-4 Rainbow Example Ironbow The target is colored as heated iron. Figure 3-5 Ironbow Example Red Hot The hot part is red-colored in view. Figure 3-6 Red Hot Example Fusion The hot part is yellow-colored and the cold part is purple-colored in view.
- Page 30 Handheld Thermography Camera User Manual Figure 3-7 Fusion Example Rain The hot part in the image is colored, and the else is blue. Figure 3-8 Rain Example Blue Red The hot part in the image is colored red, and the else is blue. Figure 3-9 Blue Red Example 3.
-
Page 31: Set Alarm Mode Palettes
Handheld Thermography Camera User Manual 3.4.1 Set Alarm Mode Palettes Alarm mode palettes allows to mark the targets of certain temperature range with a different color from the rest. Steps 1. Select Palettes from the main menu. 2. Tap the icons to select an alarm rule type. Table 3-1 Icon Description Alarm Icon... -
Page 32: Set Focus Mode Palettes
Handheld Thermography Camera User Manual 3. Set a temperature range. – Press to select between upper limit and lower limit. Press to adjust the temperature. – Tap on the screen to select an interest area. The device automatically adjusts the upper and lower temperature limit of the selected scene. -
Page 33: Adjust Display Temperature Range
Handheld Thermography Camera User Manual 3. Set a temperature range. – Press to select between upper limit and lower limit. Press to adjust the temperature. – Tap on the screen to select an interest area. The device automatically adjusts the upper and lower temperature limit of the selected scene. -
Page 34: Level & Span Adjustment In Manual Mode
Handheld Thermography Camera User Manual 4. Fine-tune the temperature range for display. 1) Press , or tap on the value on screen to lock or unlock a value. 2) Press , or scroll the adjustment wheel on the screen to fine-tune the maximum temperature and the minimum temperature respectively. -
Page 35: Adjust Digital Zoom
Handheld Thermography Camera User Manual Figure 3-11 Level & Span Adjustment 5. Press to confirm. 3.6 Adjust Digital Zoom In the live view interface, press to enter the digital zoom setting interface. ● Hold to zoom in or zoom outcontinuously. Figure 3-12 Adjust Zooming Ratio Continuously ●... -
Page 36: Chapter 4 Temperature Measurement
Handheld Thermography Camera User Manual Chapter 4 Temperature Measurement The temperature measurement function provides the real-time temperature of the scene and display it on the left of your screen. When reading the measurement results, you may sometimes find certain signs, for example, "~", displaying in front of the values. -
Page 37: Set Unit
Handheld Thermography Camera User Manual ranges, it is recommended to set it as Auto Switch and the device will switch from the ranges automatically. Emissivity Refer to Common Material Emissivity Reference to set the emissivity of your target. Reflection Temperature If any object (not the target) of high temperature is in the scene, and the target emissivity is low, set the reflection temperature as the high temperature to correct the temperature effect. -
Page 38: Set Image Measurement
Handheld Thermography Camera User Manual low temperature objects in the area, which is good for discovering small low temperature targets such as cracks. 3. Return to previous menu to save the settings. Note This function is only supported in auto level & span. Example Figure 4-1 Color Distribution 4.2 Set Image Measurement... -
Page 39: Set Measurement Tool
Handheld Thermography Camera User Manual Figure 4-2 Image Measurements 4.3 Set Measurement Tool You can set temperature measurement parameters to improve the accuracy of temperature measurement. Before You Start Set parameters such as Humidity and Reflection Temperature. For detailed explanations, see Set Measurement Parameters. -
Page 40: Measure By Custom Spot
Handheld Thermography Camera User Manual Figure 4-3 Temperature Measurement Tool What to do next Set temperature alarm, then alarm actions such as audible warning and flashing alarm will be triggered when the tested temperature exceeds the set alarm value. See Temperature Alarm. 4.3.1 Measure by Custom Spot The device can detect the temperature of a custom spot. -
Page 41: Measure By Line
Handheld Thermography Camera User Manual 7. Optional: Modify the set custom spot tools, hide or display the tools and measurement results, etc. Tap to enter the editing interface and modify temperature measurement parameters such as emissivity and distance. Tap to hide or display the tool and measurement results. Tap to delete the tool. -
Page 42: Measure By Rectangle
Handheld Thermography Camera User Manual 7. Modify the set line tool, hide or display the tool and measurement results, etc. Tap to enter the editing interface and modify temperature measurement parameters such as emissivity and distance. Tap to hide or display the tool and measurement results. Tap to delete the tool. -
Page 43: Measure By Circle
Handheld Thermography Camera User Manual 8. Optional: Modify the rectangle tools, hide or display the tools and measurement results, etc. Tap to enter the editing interface and modify temperature measurement parameters such as emissivity and distance. Tap to hide or display the tool and measurement results. Tap to delete the tool. -
Page 44: Temperature Alarm
Handheld Thermography Camera User Manual 8. Optional: Modify the circle tools, hide or display the tools and measurement results, etc. Tap to enter the editing interface and modify temperature measurement parameters such as emissivity and distance. Tap to hide or display the tool and measurement results. Tap to delete the tool. -
Page 45: Clear All Measurements
Handheld Thermography Camera User Manual and client software. Note If you set rectangle and circle tools to measure temperature, the alarm threshold and linkage method settings only works in the measured areas. Otherwise, the parameters are valid for image temperature measurement (whole-screen temperature measurement). 4.5 Clear All Measurements to clear all set temperature measurement tools. -
Page 46: Chapter 5 Condensation Alarm
Handheld Thermography Camera User Manual Chapter 5 Condensation Alarm Condensation alarm marks the surface where the relative humidity exceeds the set threshold. Steps 1. Select Palettes from the main menu. 2. Tap on 3. Set ambient temperature, air relative humidity and humidity threshold for the alarm. Threshold The surface humidity threshold. -
Page 47: Chapter 6 Picture And Video
Handheld Thermography Camera User Manual Chapter 6 Picture and Video Insert memory card into the device, and then you can record videos, capture images, and mark and save important data. Note ● Device does not support capturing or recording when the menu is shown. ●... - Page 48 Handheld Thermography Camera User Manual Figure 6-1 Editing Image Before Saving Table 6-1 Editing Options Descriptions Text Note Select text note and enter the editing page. Tap on screen to input content and press to save. Voice Note ● Select voice note and enter voice recording page. ●...
-
Page 49: Record Video
Radiometric Video Radiometric data is attached in videos of this format. They can only be played and further analyzed with HIKMICRO Analyzer. Note When the storage space is smaller than 500 MB, radiometric video recording is not allowed. -
Page 50: View And Manage Local Files
Handheld Thermography Camera User Manual Recorded videos are saved in .mp4 format. These video clips can be played on local device, and any player that support this format (HIKMICRO Analyzer does not support playing this video format.). 2. Optional: Set frame rate for the selected video type. -
Page 51: Manage Albums
Handheld Thermography Camera User Manual Note Image editing function varies within the series. See your actual device for available operation options. 5. Press to exit. 6.3.1 Manage Albums You can create several albums to manage captured images and video files on your device. Newly captured images and videos are saved in the Default Saving Album Steps 1. -
Page 52: Edit Images
File of this format can not be played on your device. The file Video File Name.hrv extension is determined by the frame rate of a video. Use HIKMICRO Analyzer to play and analyze the file. Please upgrade the software to the latest version, otherwise the .hrv file may not be supported. Note This file type is not supported by certain models of this series. - Page 53 Handheld Thermography Camera User Manual Figure 6-2 Editing Image 4. Select an option and complete corresponding operations. Table 6-4 Editing and Managing Images Description Editing text note. Add a new text note or change the existed note, and press to save the settings. Editing voice note.
-
Page 54: Export Files
For the first time connection, the driver will be installed automatically. What to do next You can import the captured snapshots to HIKMICRO Analyzer for further data analysis. See the User Manual of HIKMICRO Analyzer (embedded in the client software, Help → User Manual) for... -
Page 55: Chapter 7 Thermal View Mobile Client Connection
Handheld Thermography Camera User Manual Chapter 7 Thermal View Mobile Client Connection The device supports both Wi-Fi connection and hotspot. Connect the device to HIKMICRO Viewer, and you can control the device via mobile client. 7.1 Connect via Wi-Fi Before You Start Download and install HIKMICRO Viewer on your phone. -
Page 56: Chapter 8 Connect Device To Wi-Fi
Handheld Thermography Camera User Manual Chapter 8 Connect Device to Wi-Fi Steps 1. Enter Wi-Fi setting interface. Choose from the following ways. – Tap and hold from the swipe-down menu. – Go to Settings → Connections → WLAN. 2. Tap to enable Wi-Fi, and the searched Wi-Fi will be listed. -
Page 57: Chapter 9 Set Device Hotspot
Using hotspot QR 1. Tap QR Code. A QR code is displayed. code 2. Scan the QR code with HIKMICRO Viewer to join the hotspot. Note ● When setting the password, do not tap space, or the password may be incorrect. -
Page 58: Chapter 10 Pair Bluetooth Devices
Handheld Thermography Camera User Manual Chapter 10 Pair Bluetooth Devices Pair your camera with an external bluetooth player (speaker or headsets) to play the audio recorded together with the videos and the images. Steps 1. Enter bluebooth configuration page. Choose from the following ways. –... -
Page 59: Chapter 11 Cast Device Screen To Pc
Handheld Thermography Camera User Manual Chapter 11 Cast Device Screen to PC The device supports casting screen to PC by UVC protocol-based client software or player. You can connect the device to your PC via a type-C cable, and cast the real-time live view of the device to your PC. -
Page 60: Chapter 12 Light Settings
Handheld Thermography Camera User Manual Chapter 12 Light Settings 12.1 Set LED Light Press in live view to turn on/off the LED light. Or tap in the swipe-down menu to quickly turn on/off LED light. 12.2 Set Laser In the live view interface, hold to enable/disable the laser light. -
Page 61: Chapter 13 Maintenance
Handheld Thermography Camera User Manual Chapter 13 Maintenance 13.1 View Device Information Go to Settings → Device Settings → Device Information to view the device information. 13.2 Set Date and Time Steps 1. Go to Settings → Device Settings → Time and Date. 2. -
Page 62: Restore Device
Handheld Thermography Camera User Manual 13.4 Restore Device Go to Settings → Device Settings → Device Initialization to initialize the device and restore default settings. 13.5 Initialize Memory Card When a memory card is use on the handheld thermal camera for the first time, it needs to be initialized first. -
Page 63: Chapter 14 Appendix
Handheld Thermography Camera User Manual Chapter 14 Appendix 14.1 Common Material Emissivity Reference Material Emissivity Human Skin 0.98 Printed Circuit Board 0.91 Concrete 0.95 Ceramic 0.92 Rubber 0.95 Paint 0.93 Wood 0.85 Pitch 0.96 Brick 0.95 Sand 0.90 Soil 0.92 Cloth 0.98 Hard Paperboard... - Page 64 Facebook: HIKMICRO Thermography LinkedIn: HIKMICRO Instagram: hikmicro_thermography YouTube: HIKMICRO Thermography E-mail: support@hikmicrotech.com Website: www.hikmicrotech.com UD33910B...
Need help?
Do you have a question about the M Series M10 Series and is the answer not in the manual?
Questions and answers