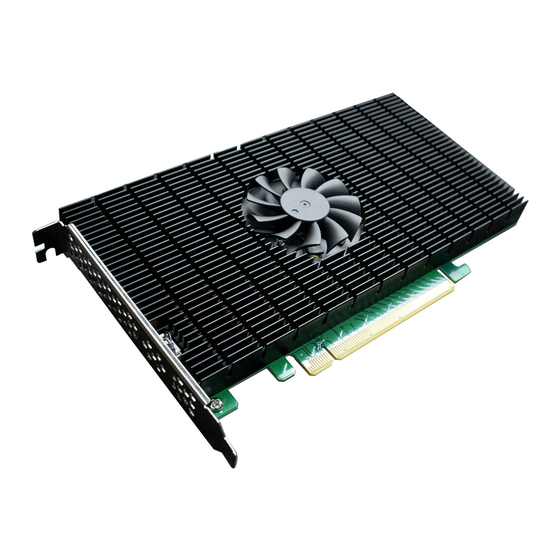
HighPoint RocketAIC 7105HW Series Installation Manual
Nvme raid aic bootraid
Hide thumbs
Also See for RocketAIC 7105HW Series:
- Using manual (19 pages) ,
- Installation manual (19 pages) ,
- Manual (32 pages)

Related Manuals for HighPoint RocketAIC 7105HW Series


Summary of Contents for HighPoint RocketAIC 7105HW Series
- Page 1 SSD7000 NVMe RAID AIC BootRAID Installation Guide SSD7000 NVMe RAID AIC BootRAID Installation Guide V1.00 - July 15, 2024 Copyright 2024 HighPoint Technologies, Inc. All rights reserved HighPoint Technologies, Inc...
-
Page 2: Table Of Contents
9. Appendix ....................39 9.1. Create Command ..................39 9.2. Delete Command ..................39 9.3. Info Command ..................... 39 9.4. Exit Command ..................... 40 9.5. Help Command ....................40 10. Revision History ................41 Version 1.00, July 15, 2024 .................41 HighPoint Technologies, Inc... -
Page 3: Overview
RAID array. Administrators can configure the array depending on the AIC using the AIC’s UEFI tool. Note: Though a Boot-RAID array can be moved from one HighPoint solution to another within the same product class and remain recognized, it is unlikely to remain bootable. This isn’t unique to HighPoint or RAID in general. - Page 4 Ubuntu Ubuntu 20.04 Ubuntu 20.04.1 Ubuntu 20.04.2 Ubuntu 20.04.3 Ubuntu 20.04.4 Ubuntu 20.04.5 Ubuntu 20.10 Ubuntu 22.04 Ubuntu 22.04.1 Ubuntu 22.10 Ubuntu 22.04.4 Ubuntu 24.04 HighPoint Technologies, Inc...
-
Page 5: Prerequisites
It will look like: The UEFI package must be unzipped directly to the root directory of this flash drive. (Do not extract the contents in a new folder.) It will look like: Example screenshot HighPoint Technologies, Inc... -
Page 6: Adjust System Efi Settings
Slot 2 PCI-E X16 OPROM” to “EFI”. Note: If the OPROM is not configured correctly, the UEFI driver will not load correctly! Set UEFI setting with ASUS Pro WS WRX90E-SAGE SE motherboard as an example. Set Boot from Storage Devices to UEFI only. HighPoint Technologies, Inc... - Page 7 SSD7000 NVMe RAID AIC BootRAID Installation Guide And Boot Device Control to UEFI Only or UEFI and Legacy OPROM. Note: If the OPROM is not configured correctly, the UEFI driver will not load correctly! HighPoint Technologies, Inc...
-
Page 8: Adjust Secure Boot Setting
2.4. Adjust Secure Boot Setting The Windows Boot-RAID supports Secure Boot enabled and disabled. The Linux Boot-RAID supports Secure Boot disabled. If Secure Boot is enabled, the HighPoint driver can not work. Set UEFI setting with SuperMicro X11DPi-NT motherboard as an example. -
Page 9: Create A Raid Array
4. Enter the following command to enter the RAID creation utility: ArrayCreate.efi 5. Enter the following command to create the RAID: create RAID0 6. Enter the following command to exit the UEFI command line: exit Note: For more additional commands, please refer to Appendix of this guide. HighPoint Technologies, Inc... -
Page 10: Method 2: Uefi Hii (Uefi Utility)
SSD7000 NVMe RAID AIC BootRAID Installation Guide 2.5.2. Method 2: UEFI HII (UEFI Utility) 1. Power on the motherboardthe BIOS SettingAdvanced, HighPoint RAID Management Utility should appear. 2. Enter HighPoint RAID Management Utility and select Create RAID…. 3. A disk list will appear, displaying all available disks. - Page 11 7. Select and press to create RAID to complete the RAID Array creation. A pop-up window prompt: Are you sure to create RAID0 with following disk(s). Press the Enter key to confirm. 8. A pop-up window will state that RAID*** creation succeeded. Press the Enter key to confirm the operation again. HighPoint Technologies, Inc...
-
Page 12: Install The Windows Os In A Raid Array
Windows?” you should see several legacy disks (one for each SSD installed into the NVMe RAID AIC). Insert a file USB flash drive with the Windows open source driver into the target system. Click “Load driver” in the pop-up window, and click “Cancel”. HighPoint Technologies, Inc... - Page 13 After loading the driver, return to the “Where do you want to install Windows?” interface. The previous legacy disks will now be recognized as a RAID array: Continue and complete the Windows installation procedure. Boot into the Windows and disable Hibernation. a. Enter the command to turn off hibernation. #powercfg /h off HighPoint Technologies, Inc...
- Page 14 Note: If you do not turn the hibernation functionality off, you may experience the following problems: Shutdown time is extended by an additional 3-5 minutes. You cannot shut down properly; you need to manually press the power switch button of the motherboard to power off the system. HighPoint Technologies, Inc...
-
Page 15: Install The Ubuntu Os In A Raid Array
When the following window appears during installation. Press ALT+F2 to switch to the shell on console 2. Note: The shortcut to switch to the shell may differ for different Ubuntu versions. b. Press Enter to activate this console. HighPoint Technologies, Inc... - Page 16 When the screen shows Install complete! Press ALT+F2 to the shell and type the following command to install the NVMe AIC binary driver. #sh /tmp/hptdd/postinst.sh A message will be displayed that the driver has been installed successfully. HighPoint Technologies, Inc...
- Page 17 When the USB flash drive is unmounted, please unplug the USB flash drive from the system. h. Execute the following command to load the NVMe AIC binary driver. # sh /tmp/hptdd/preinst.sh Close the Terminal and continue the installation. HighPoint Technologies, Inc...
- Page 18 Verify information and start the installation. When the screen shows Install complete! Open the Terminal and enter the following command to install the NVMe AIC binary driver. #sh /tmp/hptdd/postinst.sh m. Close the Terminal and finish the installation. HighPoint Technologies, Inc...
- Page 19 Manually restart the system. e. Execute the following command to download package information from all configured sources. (please connect to the internet) to install available upgrades of all packages currently installed on the system. #apt-get update HighPoint Technologies, Inc...
- Page 20 SSD7000 NVMe RAID AIC BootRAID Installation Guide Execute the following command to install available upgrades of all packages currently installed on the system. #apt-get upgrade HighPoint Technologies, Inc...
-
Page 21: Install The Rhel Os In A Raid Array
Note: The shortcut to switch to the shell may differ for different Red Hat Enterprise Linux versions. b. Execute the following command to create a mount point for the USB flash drive. #mkdir /hptdd c. Execute the following command to mount the USB flash drive to /hptdd. #mount /dev/sda1 /hptdd/ HighPoint Technologies, Inc... - Page 22 Execute the following command to load the NVMe AIC binary driver. #sh /tmp/hptdd/rhel-install-step1.sh h. Press ALT+F6 to switch back to the installation screen and continue the installation. Select Installation Destination and click Refresh. Select the previously created RAID. HighPoint Technologies, Inc...
- Page 23 Execute the following command to install the NVMe AIC binary driver. #sh /tmp/hptdd/rhel-install-step2.sh A message will be displayed that the driver has been installed successfully. q. Execute the following command to delete the NVMe AIC binary driver file. #rm -rf /tmp/hptdd HighPoint Technologies, Inc...
- Page 24 (please connect to the internet) to install available upgrades of all packages currently installed on the system. #yum update Execute the following command to install available upgrades of all packages currently installed on the system. #yum upgrade HighPoint Technologies, Inc...
-
Page 25: Install The Rocky Linux Os In A Raid Array
Note: The shortcut to switch to the shell may be different for different Rocky Linux versions. b. Execute the following command to create a mount point for the USB flash drive. #mkdir /hptdd c. Execute the following command to mount the USB flash drive to /hptdd. #mount /dev/sda1 /hptdd/ HighPoint Technologies, Inc... - Page 26 Execute the following command to load the NVMe AIC binary driver. #sh /tmp/hptdd/rhel-install-step1.sh h. Press ALT+F6 to switch back to the installation screen and continue the installation. Select Installation Destination and click Refresh. Select the previously created RAID. HighPoint Technologies, Inc...
- Page 27 When the screen shows Install complete! Press CTRL+ALT+F2 to the shell. n. Execute the following command to copy the binary driver installation file to the system. #cp -r /tmp/hptdd /mnt/sysimage/tmp/hptdd o. Execute the following command to switch to the top(/) directory. #chroot /mnt/sysimage/ HighPoint Technologies, Inc...
- Page 28 If you want to boot from another kernel, please install the NVMe AIC open source driver after entering the system. a. Boot the system. b. Enter the following command to extract the open source driver: #tar zxvf HighPoint_NVMe_G5_Linux_Src_vx.x.xx_xx_xx_xx.tar.gz HighPoint Technologies, Inc...
- Page 29 (please connect to the internet) to install available upgrades of all packages currently installed on the system. #yum update Execute the following command to install available upgrades of all packages currently installed on the system. #yum upgrade HighPoint Technologies, Inc...
-
Page 30: Install The Debian Os In A Raid Array
When the Installation screen appears, press the e key to edit the boot command line option. b. On the edit command window, move the cursor to the end of the line “linux /install.amd/vmlinuz...”, and append “modprobe.blacklist=nvme,mpt3sas”. c. Press CTRL+X or F10 to start the system. HighPoint Technologies, Inc... - Page 31 When the USB flash drive is unmounted, please unplug the USB flash drive from the system. h. Execute the following command to load the NVMe AIC binary driver. #sh /tmp/hptdd/preinst.sh Press Ctrl+ALT+F5 to switch back to the installation screen and continue the installation. HighPoint Technologies, Inc...
- Page 32 SSD7000 NVMe RAID AIC BootRAID Installation Guide Click the Go Back first, then click Detect disks and Continue to detect the hptnvme disk. k. Select the previously created RAID. HighPoint Technologies, Inc...
- Page 33 If you want to boot from another kernel, please install the NVMe AIC open source driver after entering the system. a. Boot the system. g. Enter the following command to extract the open source driver: #tar zxvf HighPoint_NVMe_G5_Linux_Src_vx.x.xx_xx_xx_xx.tar.gz HighPoint Technologies, Inc...
- Page 34 (please connect to the internet) to install available upgrades of all packages currently installed on the system. #apt-get update c. Execute the following command to install available upgrades of all packages currently installed on the system. #apt-get upgrade HighPoint Technologies, Inc...
-
Page 35: Trouble Shooting
The system is not connected to a network (internet connection). Solution Ensure that the network is properly connected. b. Reinstall the HighPoint software. If the following occurs after the network connection and reinstall driver: A lack of dependency packages can cause this problem: Solution: a. -
Page 36: For Rhel
SSD7000 NVMe RAID AIC BootRAID Installation Guide Note: See the mirror list at https://www.debian.org/mirror/list for more information. apt-get update Reinstall the HighPoint software. 8.1.2. For RHEL Description of the Problem When installing the driver, due to various factors, driver files such as gcc and make cannot be... -
Page 37: For Ubuntu
SSD7000 NVMe RAID AIC BootRAID Installation Guide #subscription-manager register --username=*** --password=*** --auto-attach e. Reinstall the HighPoint software. 8.1.3. For Ubuntu Description of the Problem When installing the driver, due to various factors, driver files such as gcc and make cannot be compiled, thus interrupting the driver installation process: Cause of the Problem &... -
Page 38: Fail To Install The Ubuntu 22.04.4 Server
Boot the system using a bootable USB flash drive. b. Select the Ubuntu Server with the HWE kernel. c. Press the e key to edit the boot command line option. d. Follow the installation steps for subsequent operations. HighPoint Technologies, Inc... -
Page 39: No Supported Controller Detected
Replace the motherboard slot and re-enter the command. If none of the above methods work, please provide a UEFI log. You can submit a support ticket using our Online Support Portal and include a problem description in as much detail as possible. HighPoint Technologies, Inc... -
Page 40: Appendix
{array ID} Examples <<<delete 1 Delete the first array from the Logical device list. <<<delete 2 Delete the second array from the Logical device list. 9.3. Info Command Syntax <<<info Display physical device list and logical list. HighPoint Technologies, Inc... -
Page 41: Exit Command
SSD7000 NVMe RAID AIC BootRAID Installation Guide 9.4. Exit Command Syntax <<<Q/q/quit/exit Quit the application. 9.5. Help Command Syntax <<<H/h/help This is a help message. HighPoint Technologies, Inc... -
Page 42: Revision History
SSD7000 NVMe RAID AIC BootRAID Installation Guide 10. Revision History Version 1.00, July 15, 2024 Initial version. HighPoint Technologies, Inc...
Need help?
Do you have a question about the RocketAIC 7105HW Series and is the answer not in the manual?
Questions and answers