
Related Manuals for Boulder 1108


Summary of Contents for Boulder 1108
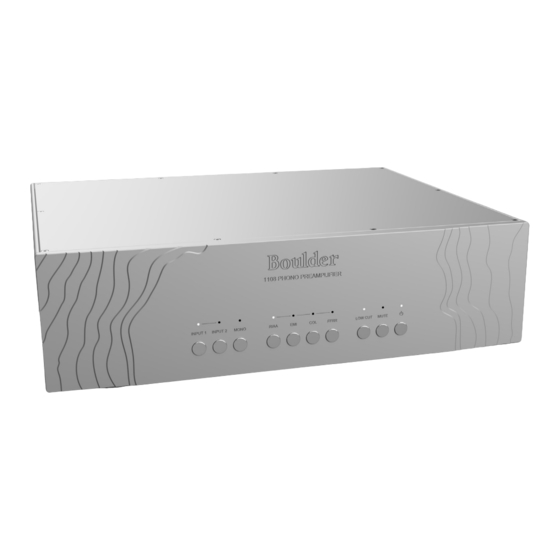
- Page 1 1108 Phono Preamplifier 06/01/2019 Boulder Amplifiers, Inc. Rev. 1.0 255 S. Taylor Ave. Louisville, CO 80027 (303) 449-8220 www.boulderamp.com P/N: 91059 www.facebook.com/BoulderAmplifiersInc...
- Page 2 About About Boulder Amplifiers, Inc. Boulder was founded in 1984 and is the last high-performance audio manufacturer operating in North America to still perform all of its own design, engineering and manufacturing in-house. While this form of production may be more costly than outsourcing, the resulting quality control and reliability of the finished products are never compromised.
- Page 3 Please take a few moments to read through this instruction manual prior to using your 1108. This will help you understand the many functions and capabilities of the phono preamplifier. It will also allow you to maximize the convenience and performance for which it was engineered.
-
Page 4: Table Of Contents
• • • • • • • • • • • • • • • • • • • • • • • • • • • • • • • • • • • • • • • • • • • • • • Making Connections to the 1108 Phono Preamplifier •... - Page 5 • • • • • • • • • • • • • • • • • • • • • • • • • • • • • • • • • • • • • • • 1108 Preamplifier Section Dimensions •...
-
Page 6: Getting Started
Getting Started The 1108 Phono Preamplifier embodies years of development and is the second generation of 1000-level phono preamplifier from Boulder. Here are some of the features that set the 1108 apart from the com- petition: Audio features: • Fully-balanced inputs and output circuitry •... -
Page 7: Unpacking And Care
The 1108 Phono Preamplifier weighs 37 Lbs (16.8 kg). Be sure to save all packaging materials! The 1108 is shipped in a foam wrap to protect the metal work’s fine finish. Try not to damage this wrap in the event that the unit must be transported in the future. -
Page 8: Before You Start
Getting Started Before You Start The 1108 is a single-chassis unit that must be put in place and con- nected. You should have received a large, heavy box. The pieces included in- side are: 1. 1108 Phono Preamplifier 2. 1 x AC power cord 3. -
Page 9: How To Clean The Casework
Getting Started How to Clean the Casework If the 1108 must be cleaned, use only a soft, lint-free cloth moistened with plain water. Never use any type of chemical cleaner unless recommended by your dealer or the Boulder factory. Do not use bleach! Bleach will remove the anodized surface of the casework. -
Page 10: Installation
Power transformers in other pieces of nearby equipment should be placed a minimum of 12 inches (30 cm) away. Because it is heavy, the 1108 must be placed on a sturdy, stable sur- face. Do not place in an enclosed rack without ventilation. The 1108 should have at least 2 inches (5 cm) of airspace around the chassis for proper cooling and airflow. -
Page 11: Connections
Getting Started Connections Making Connections to the 1108 Phono Preamplifier Input Connections 1. Input 1 2. Input 2 3. Ground (or Earth) Binding Posts Output Connections 4. Right Outputs 5. Left Outputs Power Supply Connections 6. AC Mains 7. Master AC Power Switch... -
Page 12: Connecting The Analog Outputs
Getting Started Connecting the Analog Outputs Connect the left and right interconnect cables from one of the 1108’s LEFT OUTPUTS and RIGHT OUTPUTS to you preamplifier or inte- grated amplifier’s left and right input connections. To maintain the best sound quality, Boulder recommends that balanced audio connec- tions always be used. -
Page 13: Connection To Ac Mains
Getting Started Connection to AC Mains Connect the AC power cord to the 1108’s AC Mains Connection and plug into your AC mains wall outlet. Always turn the unit OFF from the rear panel before disconnecting the AC Mains power cable. -
Page 14: Turntable Connection Types
Turntable Connection Types To get started listening, you only need to connect a turntable to the 1108 as you would any other phono preamplifier. Please take note of the following: The 1108 can be connected to many different types of turntables. To fully realize the sonic potential of your 1108 Phono Preamplifier, use balanced cable connections with XLR terminations whenever possible. -
Page 15: Connecting The Outputs To A Balanced Preamplifier
Boulder ABL2 input adaptor or any other “standard” RCA to XLR adaptors. These are not intended for phono use, as they short pin 1 to pin 3 and will cause hum in your system. Only use the Boulder PHRCA Phono Adaptors. -
Page 16: Unbalanced Rca Cable
Getting Started UNBALANCED RCA CABLE: PIN 2 + INPUT, PIN 3 - INPUT, PIN 1 GROUND 1-11... -
Page 17: Connecting The Outputs To A Balanced Preamplifier
Getting Started Connecting the Outputs to a Balanced Preamplifier The 1108 has balanced output connections on XLR jacks. With the low output impedance of the 1108 Phono Preamplifier, distances of more than 100 meters between the 1108 and preamplifier or integrated amplifier are practical. -
Page 18: Connecting The Outputs To An Unbalanced Preamplifier
Getting Started Connecting the Outputs to an Unbalanced Preamplifier If you are connecting the 1108 to a preamplifier or amplifier that does not have balanced input connections, you will either need a pair of Boulder XLR-to-RCA adaptors (ABL2) or need to have your cables properly terminated. -
Page 19: Setup And Loading
Getting Started Setup and Loading Personality Cards Each input connector of the 1108 has a slot below it for a Personality Card, one for the left and right channel of each input. These cards have three functions: 1. Selection of the type of cartridge to be used with the input (MC or 2. -
Page 20: Moving Coil Or Moving Magnet Selection
Getting Started Moving Coil or Moving Magnet Selection Set the Cartridge Type DIP Switch to either MC (Moving Coil) or MM (Moving Magnet), depending on the type of cartridge mounted to your turntable. From the factory, the Personality Cards for INPUT 1 and INPUT 2 are set to the MC position. -
Page 21: Cartridge Loading Adjustment - Resistive
Getting Started Cartridge Loading Adjustment - Resistive Set the Cartridge Type DIP Switch to either MC (Moving Coil) or MM (Moving Magnet), depending on the type of cartridge mounted to your turntable. From the factory Personality Cards for INPUT 1 and INPUT 2 are set to the MC position and the resistive cartridge loading is 100Ω, with a maximum unadjusted load of 1,000Ω... - Page 22 Getting Started Desired Cartridge Loading Value Resistor Value To Install in Position R1 175 ohms 212 ohms 200 ohms 250 ohms 225 ohms 290 ohms 250 ohms 333 ohms 275 ohms 379 ohms 300 ohms 429 ohms 325 ohms 481 ohms 350 ohms 538 ohms 375 ohms...
- Page 23 Getting Started Desired Cartridge Loading Value Resistor Value To Install in Position R1 875 ohms 7000 ohms 900 ohms 9000 ohms 925 ohms 12333 ohms 950 ohms 19000 ohms 975 ohms 39000 ohms 1000 ohms Open (no resistor installed) For MM cartridges, the maximum resistive load is 47kΩ. This is the value when there is no resistor installed in position R1 of the Person- ality Card.
-
Page 24: Cartridge Loading Adjustment - Capacitive
Getting Started Cartridge Loading Adjustments - Capacitive The 1108’s inputs have “parasitic” capacitance of less than 50 pF directly across the cartridge inputs. If desired, additional capacitance can be added on the Personality Card at position C1. The selected capacitor value should be 50 pF less than the desired value. -
Page 26: Operation
Boulder 1108 Phono Preamplifier. To turn the 1108 ON, move the Master AC Power Switch located on the rear panel to the ON position. The 1108 will then go into Standby mode. To bring the 1108 out of Standby mode, press the STANDBY button on the front panel. -
Page 27: Standby
Operation Standby To bring the 1108 out of Standby mode, press the STANDBY button on the front panel. The LED above the STANDBY button will illumi- nate white and the 1108 will automatically unmute when it is ready for listening. -
Page 28: Mute
First, the outputs are muted for three seconds when the 1108 is pow- ered ON. Pressing the MUTE button while the 1108 is in this state will have no effect. Second, the outputs can be temporarily muted at any time for your convenience. -
Page 29: Input Selection
To select an input, press one of the INPUT buttons on the front panel of the 1108. The LED above the selected input will illuminate white. When changing inputs, the 1108 will mute the outputs for three sec- onds. - Page 30 When played with a stereo cartridge, monaural or “mono” recordings can be enhanced by mixing the left and right channels to create a true monaural audio signal. It is possible to do this with the 1108 by putting the unit into MONO mode.
-
Page 31: Equalization
Operation Equalization The Boulder 1108 Phono Preamplifier provides the standard RIAA equalization curve for recordings produced after 1955, along with the EMI, Columbia, and FFRR (London/Decca) curves for records manu- factured before 1955. Select the equalization curve you wish to use by pressing the button labeled with the name of that particular curve. - Page 32 Operation...
- Page 33 Operation...
-
Page 34: Low Cut Filter
Operation Low Cut Filter The Boulder 1108 Phono Preamplifier uses a 3-pole (18 dB/octave) low cut filter that may be switched on or can be turned off. When the Low Cut circuit is activated, response will be -3 dB at 10 Hz. -
Page 35: Connections
Operation Recording Connections The Boulder 1108 Phono Preamplifier has two pairs of outputs. These outputs are connected in parallel, so there is no benefit to using one pair of outputs over the other. When one pair of outputs is connected to a preamplifier, the second pair of outputs can be connected to a recording device. -
Page 36: Appendix
Appendix Technical Specifications Inputs 2 x 3-pin balanced XLR, adaptable to unbalanced Outputs 2 x 3-pin balanced XLR, adaptable to unbalanced Input Impedance MC: maximum 1000Ω, MM: 47kΩ. Resistive and capacitive loading adjust able on individual Per- sonality Cards. Output Impedance 100Ω... -
Page 37: Dimensions & Weights
Appendix Dimensions and Weights 1108 Phono Preamplifier Chassis: 18” W x 15.83” D x 5.73” H 45.7 cm W x 40.2 cm D x 14.6 cm H (37 lbs./16.8 kg) 1108 Phono Preamplifier Shipping: 24” W x 23” D x 14” H 61 cm W x 58 cm D x 36 cm H (51 lbs./23.2 kg) -
Page 38: 1108 Preamplifier Section Dimensions
Appendix 1108 Preamplifier Section Dimensions (Inches) 1108 PH 15.833 15.075 PREAMP DIMEN 1108 PH 15.833 15.075 PREAMP DIMEN 1108 PHONO 15.075 PREAMPLIFIER DIMENSIONS 18.000 5.730 18.000 1.469 .980 13.000 5.730 ROUND 2.500 3.075 1.469 .980 13.000 ROUND 2.500 3.075 5.730 1.469... - Page 39 No power indica- Move Power Switch to ON tion on 1108 ON position position Connect power cord to AC 1108 is not plugged in mains outlet Home circuit breaker is Reset home circuit breaker tripped Low line voltage Have line voltage checked...
- Page 40 Appendix One Channel Loud- GAIN switches not set Set GAIN switches on Personal- er than the other equally ity Cards to same setting MC/MM switches not Set MC/MM switches on Per- set equally sonality Cards to same setting Cartridge loading is not Check cartridge loads on Per- set equally sonality Cards...
-
Page 41: Notes
Appendix Notes:... - Page 42 Appendix Notes:...
- Page 43 Appendix Notes:...
Need help?
Do you have a question about the 1108 and is the answer not in the manual?
Questions and answers