
Related Manuals for Boulder 1161


Summary of Contents for Boulder 1161
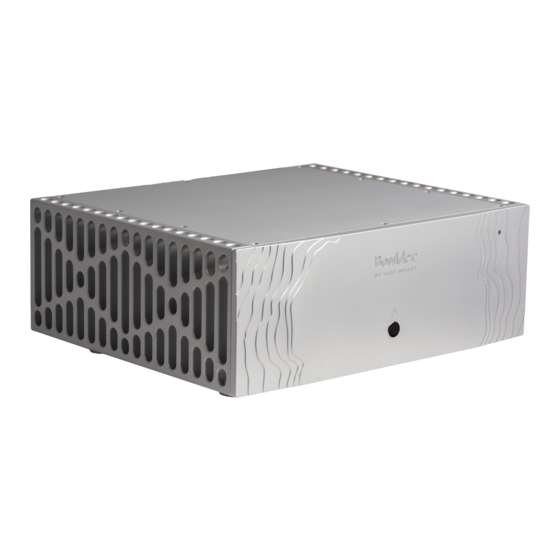
- Page 1 1161 Stereo Power Amplifier 06/01/2019 Boulder Amplifiers, Inc. Rev. 1.0 255 S. Taylor Ave. Louisville, CO 80027 (303) 449-8220 www.boulderamp.com P/N: 91058 www.facebook.com/BoulderAmplifiersInc...
- Page 2 About About Boulder Amplifiers, Inc. Boulder was founded in 1984 and is the last high-performance audio manufacturer operating in North America to still perform all of its own design, engineering and manufacturing in-house. While this form of production may be more costly than outsourcing, the resulting quality control and reliability of the finished products are never compromised.
- Page 3 The 1161 represents the concerted efforts of numerous Boulder designers, engineers, and technicians working to bring you the best audio playback components in the world. This amplifier is among the best that Boulder has to offer. Please take a few minutes to read through this instruction manual prior to using your 1161.
-
Page 4: Table Of Contents
Getting Started Placement of the 1161 Stereo Power Amplifier • • • • • • • • • • • • • • • • • • • • • • •... -
Page 6: Getting Started
Exact voltage and frequency compatibility is stated in the specifications section. See page 5-1. Once the 1161 Stereo Power Amplifier is connected to a live mains outlet and the rear panel switch is moved to the “On” position, the LED on the front panel will illuminate for a short time. - Page 7 Getting Started Getting Started The LED will then pulse white on and off, indicating that the supervis- ing microprocessor is powered up and the amp is ready to be turned on using the front panel Standby button. AC Mains...
-
Page 8: Connecting To A Network
ABL2 Input Adapter. It converts a balanced input into an unbalanced RCA input at the rear panel of the 1161. Like the above cable, the neg- ative input of the 1161 is connected to the ground of the RCA connec-... - Page 9 Getting Started tor. However, the negative side will then share the shield wire with the chassis ground and will not have very good hum rejection. Please contact your authorized Boulder dealer for further information about the ABL2 Input Adaptor. Ethernet...
-
Page 10: Polarity
AES standard of pin 2 as the “high, ” “positive, ” or “hot” pin for the bal- anced input. The polarity of the 1161 Stereo Power Amplifier is such that a posi- tivegoing transition at pin 2 will produce a positive-going transition at the “+”... - Page 11 Getting Started Getting Started...
-
Page 12: Operation
Standby mode, it is only necessary to place the amplifier in Standby when not in use. You do not need to turn the 1161 off via the Master AC Switch on the rear panel. The 1161 was designed for years of operation in this... - Page 13 Operation...
-
Page 14: Input Dc Offset Voltage Detection
Operation Input DC Offset Voltage Detection The Boulder 1161 is a direct-coupled power amplifier with a servo for zeroing out DC voltage offset coming from the preamplifier or other sources connected to the amplifier’s input. If the DC at the inputs is sufficient to cause potentially damaging voltage at the output terminals, a protection circuit will mute the am- plifier’s output by electronically disconnecting the loudspeakers. -
Page 15: Maintenance
Operation Maintenance No routine maintenance is required for the 1161 Stereo Power Ampli- fier. However, to keep operating temperatures at a minimum, be sure that the heat sinks are not obstructed and remove any dust buildup that may occur. -
Page 16: Remote Control
Boulder Net. 12V Trigger The 1161 has a 1/8” minijack that will allow it to be turned On or Off. To complete the 12V trigger system, a cable must be connected be- tween the 1161 and a source component or preamplifier with a 12V trigger output. - Page 17 Remote Control For further information about Boulder Net, please see the Boulder Net Manual or visit www.boulderamp.com.
-
Page 18: Fault Conditions
Fault Conditions Errors Requiring Boulder Dealer Service If the 1161 Stereo Power Amplifier will not turn on and the front panel LED blinks red, an error requiring dealer service has occurred. The indicator may flash in a specific sequence to define its error code for an authorized Boulder technician. - Page 19 Fault Conditions...
-
Page 20: Appendix
Appendix Technical Specifications Continuous Power, Each Channel Watts Ω THD @ 20kHz 0.003% 0.01% 0.004% 0.015% 0.005% 0.025% Peak Power, Each Channel Watts Ω Equivalent Input Noise (EIN), 20kHz BW 1.5 µV Magnitude Response, 20 to 20kHz +0.00, -0.04 dB Magnitude Response, -3dB at 0.015Hz, 150kHz Voltage Gain... - Page 21 Appendix Crosstalk, L to R or R to L -100 dB or better, 20 Hz to 20 kHz Power Requirements 90-240V, 50-60 Hz 50-60 Hz, 100W nominal, 1000 W at maximum output All specifications measured at 240 VAC mains Power...
-
Page 22: Dimensions & Weights
Appendix Dimensions and Weights 1161 Stereo Amplifier 18.00” W x 16.43” D x 7.20” H 45.7 cm W x 41.7 cm D x 18.3 cm H 54 lbs. (24.5 kg) Shipping 24” W x 23” D x 14” H 61cm W x 59cm D x 36cm H... -
Page 23: 1161 Amplifier Dimensions
Appendix 1161 Amplifier Dimensions (Inches) 16.433 15.075 16.433 15.075 15.075 18.000 18.000 7.200 7.200 1.469 .889 13.000 2.500 3.075 1.469 .889 13.000 2.500 3.075 7.200 1.469 .889 9.500 3.075 2.500... - Page 24 Power amplifier is not Connect to AC Mains plugged in outlet No Power Indication 1161 Rear panel fuse is Replace blown fuse with same blown type / rating Home circuit breaker is Reset home circuit breaker tripped...
- Page 25 Appendix Notes:...
- Page 26 Appendix Notes:...
- Page 27 Appendix Notes:...
Need help?
Do you have a question about the 1161 and is the answer not in the manual?
Questions and answers