
Subscribe to Our Youtube Channel
Related Manuals for Boulder 2120


Summary of Contents for Boulder 2120
- Page 1 2120 Instruction Manual Boulder Amplifiers, Inc. 255 Taylor Ave. Louisville, CO 80027 (303) 449-8220 6/2/16 www.boulderamp.com Rev. 1.0...
- Page 2 About About Boulder Amplifiers, Inc. Boulder was founded in 1984 and is the last high-performance audio manufacturer operating in North America to still perform all of its own design, engineering and manufacturing in-house. While this form of production may be more costly than more common outsourcing, the resulting quality control and reliability of the finished products are never compromised.
- Page 3 Please take a few minutes to read through this instruction manual prior to using your 2120. This will help you understand the many functions and capabilities of the converter. It will also allow you to maximize the convenience and performance for which it was engineered.
-
Page 4: Table Of Contents
Connections Connecting Source Inputs to the 2120 D/A Converter • • • • • • • • • • • • • • • • • • • • •... - Page 5 • • • • • • • • • • • • • • • • • • • • • • • • • • • • • • • • • • • • • • • • • • • • • • • • • • • • • • Technical Specifications 2120 Dimensions 10-1 •...
-
Page 6: Introduction
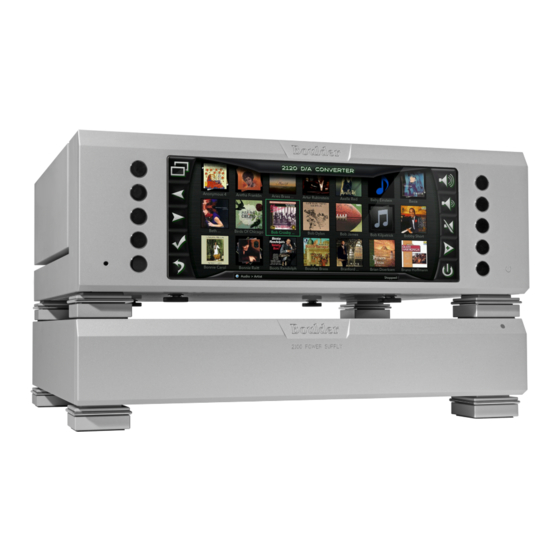
Introduction Introduction The 2120 embodies years of development and is the most advanced digital audio converter available. Here are a few of the features that set the 2120 apart from the competition: Digital Inputs: • Standard digital inputs, including S/PDIF (coaxial RCA), Toslink (optical), and AES3 (balanced XLR). -
Page 7: Digital Features
NOTE: DSD does not play when the internal volume control is set to Variable! • Boulder Precise Interval Clock for accurate data timing. • Modular architecture for future updates. • Boulder’s own Eigenvalue digital filter algorithm for optimized frequency and phase response. -
Page 8: Analog Features
• Fully-balanced Boulder digital to analog converter module in each audio chassis. • Fully-balanced audio path utilizing ten Boulder 993S gain stages per channel. • Two parallel, balanced output connections for each channel. Operational features: •... - Page 9 Introduction • Automatic software updates when connected to the Internet. • Two Standby modes, one for quick start and one for ultra-low power consumption. • Comprehensive setup and configuration. • IP control with two-way communication for external control. • HTML setup page for access to additional customizable features.
-
Page 10: Unpacking
Before You Start The 2120 system comes in two assemblies that must be put in place and connected: the 2120 D/A Converter and the 2101 Power Supply. You should have received two large, heavy boxes. The pieces included inside them are: •... -
Page 11: How To Clean The Casework
The 2101 should be placed at least 10 inches (25.4 cm) away from the 2120. The 2120 should not be stacked directly on top of the 2101 to allow for proper ventilation of the power supply. -
Page 12: Connections
8-10) for easy identification and this list will be very helpful at that time. The 2120 can be set up with many custom digital input combinations to suit your particular system needs. These input combinations are modular and can be fitted at the factory or by your dealer to match your individual setup. -
Page 13: Optional Input Connections
Connections Optional Input Connections Mod. 1 Mod. 2 Mod. 3 Mod. 4 S/PDIF AES 1 HDMI Toslink In 1 Mod. 4 Ethernet Mod. 1 Mod. 2 AES/EBU S/PDIF Inputs(RJ-45) AES 2 HDMI Mod. 3 Toslink In 2 Toslink Mod. 2 HDMI Passthrough NOTE: This illustration shows four optional input modules installed. - Page 14 HDMI module includes two inputs and one pass-through output. The pass-through output can be routed to a display device or external surround processor. This will enable the 2120 to process the audio portion of the HDMI signal and allow the secondary device to process any video signal present.
-
Page 15: Usb Type A
USB Type A The USB Type A connector is for simple storage devices and will allow the 2120 to play music from a storage device. These types of devices can include USB Flash memory sticks and some USB hard drives. -
Page 16: Connecting The 2120 To The 2101 Power Supply
ON or damage may occur, even when the 2120 is in Standby mode! Always turn the unit OFF from the rear panel of the 2101 power supply or disconnect the AC mains power... -
Page 17: Output And Power Connections
Connections Output and Power Connections Right Analog Left Analog Outputs Outputs 7-pin Digital 5-pin Left Analog 5-pin Right Analog DC Power Power Connection Power Connection Connection AC Mains Connection Master AC Power Switch... -
Page 18: Connecting The Analog Outputs
Connections Connecting the Analog Outputs. Connect the Left Analog and Right Analog interconnects from the 2120 to your preamplifier or amplifier. To maintain the best sound quality, Boulder recommends that balanced audio connections always be used. Connecting to an Unbalanced Preamp or Power Amplifier A special cable is required to make this connection. -
Page 19: Connecting A Network
Connections Connecting to a Network: To connect a network to the 2120 for Internet music or UPnP streaming, you will need a network with an active Internet connection. This will enable you to access subscription Internet music services or music from a media server and allow the 2120 to automatically download software updates as necessary. - Page 20 If you have only temporarily disconnected the network and will not change the network that the 2120 is connected to, change the option to NO and press the Enter button, or just reconnect the network and the screen will disappear.
- Page 21 pront...
-
Page 22: Controls
Controls Front Panel Navigation The 2120 has a large LCD display with 5 buttons on either side to control the unit and navigate media libraries. The unit initially powers on with the Now Playing Screen displayed. Different screens can be selected using the Screen Select Button. - Page 23 Controls When the Screen Select pop-up menu is displayed, the following icons are also displayed: Home Pressing the Home button cancels Screen Navigation mode. The pop-up menu disappears and the unit returns to Now Playing mode. Arrow Up Pressing the Arrow Up button moves the highlight upwards. Holding this button down will scroll the selection quickly until the button is released.
-
Page 24: Now Playing Screen Controls
Controls Front Panel Control: Fixed Purpose Buttons The functions of four of the five buttons on the right side of the screen (Volume Up, Volume Down, Mute and Standby) will always remain the same. See the next page for an illustration of these button icons and their meanings: Now Playing Screen Standby... - Page 25 Standby mode, it is only necessary to place the unit in Standby when not in use. You do not need to turn the 2120 off via the Master AC switch on the rear panel of the power supply.
- Page 26 Controls Now Playing Screen The Now Playing screen is the default screen that displays upon power up, and the unit returns to after a timeout period (this can be set in the Setup screen.) Please See Return to Now Playing After section on page 8-5.
- Page 27 Controls Skip Backward This button allows you to skip to the beginning of the currently playing track. If the button is pressed a second time within five seconds, it will skip to the beginning of the previous track in the playlist.
- Page 28 Controls Now Playing - Edit Playlist Mode While in the Now Playing screen, if the Edit Playlist button is pressed, the following icons will be displayed: Track Delete Hand Arrow Down Arrow Up Arrow Up Pressing the Arrow Up button moves the highlight upwards. Holding this button down will scroll the selection quickly until the button is released.
- Page 29 Controls Hand When the Playlist Edit screen is displayed, this button will show one of the Hand icons. This allows you to grab a track and move it anywhere in the playlist. 1. To move a track, highlight the desired track by using the Arrow buttons and press the Hand button.
-
Page 30: Art Browse Screen Controls
Controls Art Browse Screen When in UPnP streaming mode, selecting Art Browse displays the following screen and the icons defined below: PlayPlus Back Select Arrow Right Arrow Left Arrow Left Pressing this button moves the highlight to the left. It will roll up when at the beginning of a row. - Page 31 Controls Select Pressing the Select button opens the highlighted menu item and displays its contents. • If the highlighted menu item is a collection of albums, those albums are shown. • If the highlighted menu item is an album, the album’s tracks are shown.
-
Page 32: List Browse Screen Controls
Controls List Browse Screen When in UPnP streaming mode, selecting List Browse displays the following screen and the icons defined below: Arrow Up Pressing the Arrow Up button moves the highlight upwards. Holding this button down will scroll the selection quickly until the button is released. - Page 33 Controls Select Pressing the Select button opens the highlighted menu item and displays its contents. • If the highlighted menu item is a collection of albums, those albums are shown. • If the highlighted menu item is an album, the album’s tracks are shown.
-
Page 34: Input Select Screen
Input Select Screen The Input Select screen is used to choose which media type or stream will be played by the 2120. In this mode, several categories of inputs may be shown. • If USB storage devices are mounted, the USB Storage Media category is displayed, listing all USB storage devices by name. -
Page 35: Optional Additional Inputs
Inputs that are not available will say, “Disconnected.” Optional Additional Inputs The 2120 can be configured with up to four optional input modules to match your needs. Various combinations of Toslink, S/PDIF, AES3, HDMI, and USB can be added to the 2120. For more information about adding or changing inputs on the 2120, please contact your authorized Boulder dealer. -
Page 36: Remote Control
Remote Control Remote Control The 2120’s handheld remote control can be used to control all functions of the 2120, including browsing through music files on a DLNA/UPnP media server. Most of these buttons have the same functionality as the buttons on the 2120. -
Page 37: Remote Control Buttons
Remote Control Replacing the Remote Control’s Batteries. To replace the batteries in the remote control, remove the four screws that secure the back panel of the remote. The battery type is a CR2032 “coin” style battery. Insert the tip of a 1/8” slotted screwdriver under the coin cell battery through the most accessible opening on the battery holder. -
Page 38: Remote Id
Remote Control Remote ID In the event that the IR remote control interferes with other products in your system, the Remote ID can be changed. The factory default ID number is 3. To change the Remote ID, the back panel of the remote control must be removed. - Page 39 Remote Control To Change the Remote ID for the 2120: 1. Press the Screen Select button and navigate to Setup and press Select. 2. Using the Arrow buttons, navigate and highlight Remote ID under the General Settings section of the Setup Menu.
-
Page 40: Ethernet
Ethernet Playing from a UPnP/DLNA Networked Audio System The 2120 is able to play music files over a computer network. This type of music streaming adheres to the UPnP (Universal Plug and Play) protocol, which is a part of DLNA (Digital Living Network Alliance). The 2120 also adheres to the OpenHome Standard. - Page 41 The server can be a NAS drive, a computer, or a dedicated media server. Servers can also import music from the Internet, discs, or other computers. In your system, the renderer is the 2120. The 2120 has an internal control point utilizing the front panel display and push buttons.
-
Page 42: Usb
Insert a USB memory device into the USB connector on the rear panel. To make it easier to insert a USB thumb drive after the 2120 is installed, a USB extension cable can be used so that the connection can be accessed from the front of the unit. -
Page 43: Read Only
USB device every time it is inserted. Read Only: No This allows the 2120 to write a catalog file onto the USB memory device so that there will be faster access to the files each time it is inserted. -
Page 44: Create Network Share
USB memory device through the 2120. The default option is Create Network Share: Yes Once the read and sharing options are selected, press the Select button. If you select Yes, the 2120 will share all of the files on the USB memory device. NOTE: The more files on the memory device, the longer the 2120 will take to create a catalog. - Page 45 Eject To eject the USB memory device, navigate to the Input Select screen. Press the Eject button on the 2120’s front panel and wait for the USB memory device to disappear from the list of available inputs before removing it.
-
Page 46: Setup & Programming
Setup & Programming Setup Menu Multiple functions of the 2120 can be programmed to suit your preferences. To enter the Setup Menu, press the Screen Select button and highlight Setup. Press the Select button. To exit the Setup Menu, press the Screen Select button twice to return to the Now Playing screen. -
Page 47: Volume Settings
Setup & Programming The Setup Menu is categorized into five main sections: Volume Settings Fixed/Variable Default Volume Max Volume Timer Settings Return to Now Playing After Hide Screen Select Dialog After Enter Power Saving Mode After Power Saving Mode Playback Settings Repeat UPnP Metadata Display Text Display... - Page 48 The 2120s digital volume control must be used when connecting directly to a power amplifier. NOTE: The 2120 will not play DSD files when the volume control is set to Variable. When connected to a preamplifier, the volume control should be set to Fixed.
- Page 49 Setup & Programming Default Volume Default Volume determines the volume setting the 2120 will go to when powered up from Standby if the volume control is set to Variable mode. To adjust the level of the Default Volume setting, highlight Default Volume.
- Page 50 Timer Settings Return to Now Playing After The Return to Now Playing After setting determines how long the 2120 will wait before reverting to the Now Playing screen from any other screen. To increase this length of time, press and hold the Right Arrow button. To decrease this length of time, press and hold the Left Arrow button.
- Page 51 The Delay Audio By setting will delay the audio output of the 2120 in increments of 10 milliseconds in order to synchronize audio with video signals. This is useful when the 2120 is being used to process audio and a separate component is being used to process video.
- Page 52 (from the album and from the playlist) and you may wish to turn the track numbers off. Now Playing Display This setting determines whether the 2120 will show Album Art Only, Tracklist Only or both Art and Tracks.
- Page 53 2120. ID numbers from 0 to 6 can be programmed for the 2120. A set of DIP switches in the handheld remote must be changed to coincide with...
-
Page 54: Naming The Inputs
Input Selection screen. To enter a custom name for an input, you will need a computer that is connected to the same network as the 2120 in order to access your 2120’s HTML web page. Press the Screen Select button and enter the Setup Menu. - Page 55 Under the Available Inputs section you will see a listing of all of the 2120’s inputs, including any options. There will be a box with the words “New input name” or an existing custom input name inside. Type the new input name you would like in the box and click on the button marked Set.
-
Page 56: Troubleshooting
Home circuit breaker Reset home circuit breaker is tripped Power supply fuse Replace fuse on rear panel blown 2120 or 2101 is faulty Return to dealer for service Circuit breaker is Close or push back in open White power 2120 is muted... - Page 57 Open control point and select as renderer in control 2120 as renderer point Volume or output is Volume control is Change 2120 volume setting to set to Variable while Fixed in Setup Menu using a preamplifier Input does not appear Source component is...
-
Page 58: Technical Specifications
Technical Specifications 2120 Dimensions 10-1... -
Page 59: 2101 Dimensions
Technical Specifications 2101 Dimensions 10-2... - Page 60 Technical Specifications Technical Specifications Digital Inputs Ethernet, USB 2.0, S/PDIF (RCA), AES3 (XLR), Toslink optical (EIAJ), HDMI Audio File Formats Supported: PCM, DSF (DSD 1x/2x), FLAC, WAV, AIFF, MP3, OGG Vorbis, ALAC PCM Sample Rates Supported: 32 kHz, 44.1kHz, 48 kHz, 88.2 kHz, 96 kHz, 176.4 kHz, 192 kHz, 352.8 kHz, 384 kHz PCM Word Lengths Supported:...
- Page 61 Technical Specifications Power Supply Weight 48 lbs., shipping 59 lbs. (21.8 kg, shipping 26.8 kg) Power Consumption 240 W max Low Power Standby: 1W High Power Standby: 8W Power Requirements 100, 120, 240VAC, 50-60Hz, voltage by country All specifications measured at 120VAC mains power 10-4...
-
Page 62: Appendix A: Json Commands
Enter it into the web browser of your computer exactly as it appears on the screen, followed by “/debug.” In this example, 10.0.2.15/debug. Do not include the text “http://”. An HTML web-page will appear that will allow you to access IP control system functions of the 2120. The Following screen will appear: 11-1... - Page 63 Appendix A: JSON Commands Select the drop down menu at the bottom of the screen. All of the 2120 JSON commands can be seen. By selecting one and then pressing the Send button, the command is sent to the 2120 and the return values are displayed.
- Page 64 Appendix Notes: 11-3...
- Page 65 Appendix Notes: 11-4...
Need help?
Do you have a question about the 2120 and is the answer not in the manual?
Questions and answers