Table of Contents
Advertisement
Advertisement
Table of Contents

Subscribe to Our Youtube Channel
Related Manuals for Boulder 1012 DAC Preamplifier


Summary of Contents for Boulder 1012 DAC Preamplifier
-
Page 2: Owners Manual
Boulder 1012 DAC Preamplifier Owners Manual 10/27/03 Boulder Amplifiers, Inc. 3235 Prairie Ave. Boulder, CO 80301 www.boulderamp.com BOULDER REMOTE GETTING APPENDIX RECORDING LINK PROGRAMMING CONTROL OPERATION STARTED... - Page 3 B o u l d e r 1 0 1 2 D A C P r e a m p l i f i e r R e a r P a n e l...
-
Page 4: Table Of Contents
Placement of the 1012 DAC Preamplifier ........ - Page 5 REMOTE CONTROL Batteries ..............3-1 Source Selection .
- Page 6 RECORDING Connecting a Recording Device ..........6-1 APPENDIX Block Diagram .
-
Page 7: Getting Started
G ET TI NG START ED INTRODUCTION Congratulations on your selection of the Boulder 1012 DAC Preamplifier. We at Boulder Amplifiers are certain it will provide years of listening pleasure. QUICK START To get started listening, you only need to connect the 1012 as you would any other preamplifier, but you should take note of the following. -
Page 8: Placement Of The 1012 Dac Preamplifier
PLACEMENT OF THE 1012 DAC PREAMPLIFIER Your Boulder 1012 DAC Preamplifier is designed to reduce the effects that external magnetic and radio fields (RF) have on its internal circuitry. While placement is not critical, known magnetic fields should be avoided. Line of sight from the listening position is necessary for the remote control to function properly. -
Page 9: Connecting To The Mains Outlet
CONNECTING TO THE MAINS OUTLET Your 1012 DAC Preamplifier is supplied with a mains cord suitable to the location where it was purchased. A label showing the exact voltage and frequency range is located on the rear panel. Make certain that the mains voltage used is with in the specifications shown. -
Page 10: Connecting A Digital Source
CONNECTING A DIGITAL SOURCE There are four digital inputs to the DSP and D/A Converter section of the 1012. Three inputs are the AES/EBU style. Because of the balanced nature of these connections, it is the preferred method of connection and should be used whenever available. -
Page 11: Polarity
POLARITY Please note that the 1012 DAC Preamplifier conforms to the standard of pin 2 as the high or hot pin for all analog balanced inputs and outputs. Because input and output polarities are handled through programming setups and the remote control, no concern for polarity is needed while connecting sources. -
Page 12: Connecting An Unbalanced Analog Source
This cable has an RCA phono type connector on the source end and a 3 pin connector for going to an input on the 1012 DAC Preamplifier. The minus input (pin 3) should be wired to ground only at the RCA phono connector. -
Page 13: Connecting A Turntable
CONNECTING A TURNTABLE Balanced inputs are provided for connecting a turntable to the 1012. To avoid hum pickup in the cabling, it is important to follow these instructions. Do not connect pin 1 (chassis/ground) to either pin 2 or 3 at any point in the cable, turntable chassis, or tonearm. - Page 14 CARTRIDGE TURNTABLE CHASSIS CARTRIDGE TURNTABLE CHASSIS CARTRIDGE TURNTABLE CHASSIS PHONO CABLES N.C. 1012 PHONO INPUT 2-POS INPUT 3-POS INPUT 1-POS INPUT CHASSIS 1012 PHONO INPUT 2-POS INPUT 3-POS INPUT 1-POS INPUT CHASSIS 1012 PHONO INPUT 2-POS INPUT 3-POS INPUT 1-POS INPUT CHASSIS GETTING STARTED...
-
Page 15: Connecting To A Balanced Input Amplifier
CONNECTING TO A BALANCED INPUT AMPLIFIER With your 1012 DAC Preamplifier’s balanced output driving a balanced input power amplifier, you can take sonic advantage of short speaker cables and correspondingly longer input cables. With the 1012’s low output impedance, distances of more than 50 meters between preamplifier and power amplifier are practical. -
Page 16: Connecting To An Unbalanced Input Amplifier
1-10 CONNECTING TO AN UNBALANCED INPUT AMPLIFIER A special cable is required to make this connection. This cable connects pin 1 to the shield and pin 2 to the center pin. It leaves the output pin 3 unconnected. Connecting the unused output pin (usually pin 3) to ground will cause excessive ground currents and degrade performance. -
Page 17: Setting The Boulderlink Switch
1-11 SETTING THE BOULDERLINK SWITCH Set the Boulderlink MASTER / SLAVE switch to MASTER. For more information on Boulderlink, see the Boulderlink section as indicated by the finger tabs below. GETTING STARTED... -
Page 18: Operation
POWERING UP With all your connections made, you are ready to listen to your Boulder 1012 DAC Preamplifier. The power LED will cycle through a variety of colors indicating a standby mode. Power is applied only to the microprocessor during this mode. -
Page 19: Input Selections
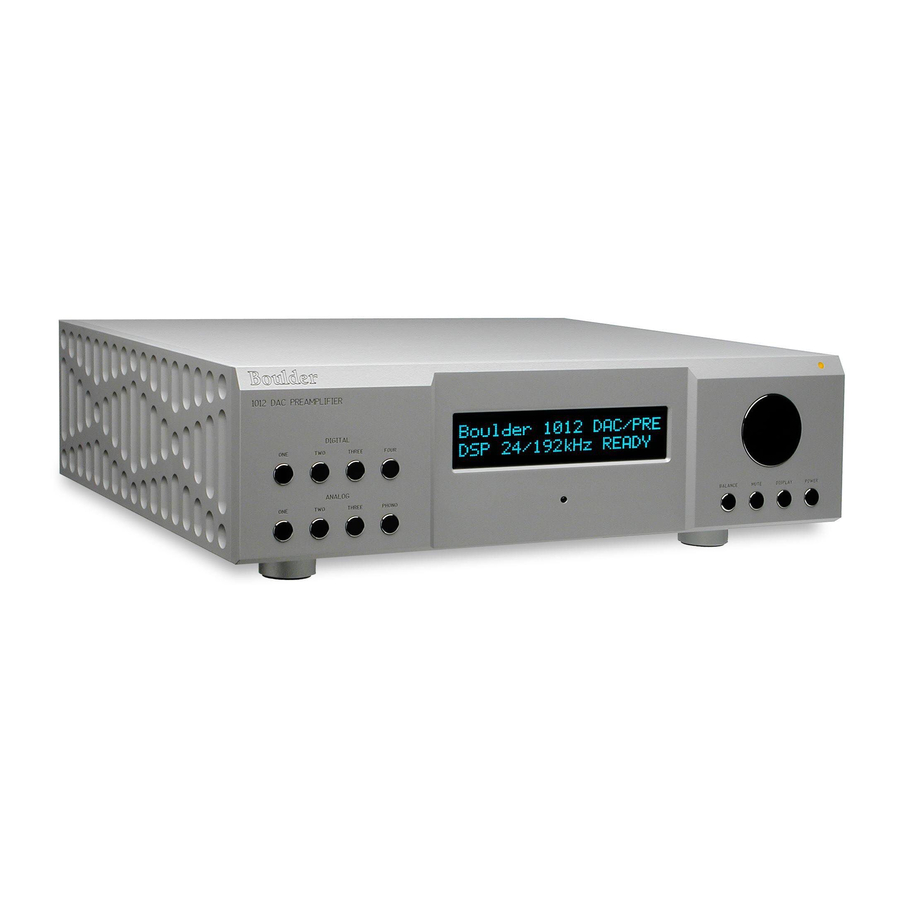
INPUT SELECTIONS To select an analog input, press one of the ANALOG pushbuttons labeled ONE, TWO, THREE or PHONO. The respective input will be shown in the display and that signal will be routed to both the main and record outputs. For example, if input ONE is chosen, “A1. ANALOG INPUT 1”... - Page 20 To select a digital input, press one of the DIGITAL pushbuttons labeled ONE through FOUR. For a few seconds, the input sample rate of the source and the Upandoversampling™ rate out of the DSP will be shown. For example, a regular CD will show “INPUT RATE 44.1kHz, OUTPUT RATE 705.6kHz.”...
-
Page 21: Volume
VOLUME Because the precise feel of the Boulder 1012’s volume control may be different than you are used to, we recommend starting the source device so that an audio signal is fed to the 1012 before increasing the volume. The display will show “VOLUME INFINITE” to indicate maximum attenuation or no sound. -
Page 22: Balance
BALANCE To change the level balance, press the BALANCE pushbutton. “BALANCE CENTERED” will show in the display. Now, rotating the control will change the balance instead of the volume for as long as “BALANCE...” is displayed. Turning the control counterclockwise (left) will cause an indication such as “BALANCE R -2.0dB <... -
Page 23: Mute
MUTE To temporarily reduce the volume, press the MUTE pushbutton. “VOLUME MUTED” will show in the display, replacing the volume indication. Again pressing the MUTE pushbutton will return the volume to normal level. While muted, the level of both channels will be reduced by -100 dB, regardless of volume setting. -
Page 24: Display
DISPLAY The display brightness may be set to any of 4 brightness levels. To change the brightness level, press the DISPLAY pushbutton. “DISPLAY 100%” will show in the display. Rotate the control until the desired brightness is obtained such as “DISPLAY 50%.” The number in the display is the relative brightness. -
Page 25: Remote Control
REM OTE CONT ROL BATTERIES A standard small flat blade screwdriver is required to install the three AAA batteries. To install batteries in the remote control, it is necessary to separate the two sections. WARNING: When opened, the pushbutton balls will be loose and care must be taken to properly retain them. -
Page 26: Source Selection
SOURCE SELECTION To select an input (source) press one of the eight buttons on the left side of the remote control in the ANALOG and DIGITAL groups. You will now be listening to your desired source, and it will be showing in the display. -
Page 27: Polarity
0 to 360 degrees, the correct term of polarity is preferred to indicate the 180º phase change, or inversion, available in the 1012 DAC Preamplifier. By using the remote control, the polarity of both channels may be changed simultaneously at the main outputs during any listening mode. -
Page 28: Programming
PROGRAMMI NG While it is not necessary to ever use any programming functions, you will find they maximize the enjoyment of your Boulder 1012 DAC Preamplifier. Each input has several programmable features associated with it. These include assigning an alphanumeric name of your choosing, setting an individual offset attenuation and balance, correcting polarity, and setting theater mode. -
Page 29: Input Polarity
If you chose to assign a name, then “A1 ANALOG INPUT 1” will be shown in the bottom display row with a blinking cursor before the name’s first character. Rotate the control until the desired character appears. Press the same input source number to accept the displayed character and go to the next character. -
Page 30: Theater Mode
THEATER MODE When the 1012 preamplifier is used in a surround sound theater system, it is normally desired to bypass the volume control, thus letting the surround processor control the volume. WARNING: Setting an input to THEATER MODE forces the volume to unity gain. -
Page 31: Input Level Calibration
INPUT LEVEL CALIBRATION Pressing the same input source number will make “INPUT LEVEL 0.0dB” show in the bottom display row. Rotating the volume control will change the display and the main outputs’ levels simultaneously. This allows calibration of each input with test tones if desired. For example, setting the display to “-6.0dB”... -
Page 32: Input Balance Calibration
INPUT BALANCE CALIBRATION Pressing the same input source number will make “INPUT BAL CENTERED” show in the bottom display row. Rotating the volume control will simultaneously change the display and the main output’s balance so that the action can be monitored or measured. For example, setting the display to “R -9.0dB”... -
Page 33: Programming By The Display Button
PROGRAMMING BY THE DISPLAY BUTTON Several special features are programmed by pressing and holding the DISPLAY pushbutton until the display changes indicating you are in a programming mode. If no action is taken for some time, then the 1012 reverts back to normal operation. The sequence is as follows. MAIN OUTPUTS POLARITY The polarity of the main outputs may be adjusted to match the power amplifiers used. -
Page 34: Boulderlink Id
BOULDERLINK ID Again pressing the DISPLAY pushbutton will make “PROGRAM BOULDER LINK, BOULDER LINK ID 20” show in the display. Rotating the volume control changes the ID number. For more information consult the Boulderlink section. Unless you are using two or more 1012 DAC Preamplifiers together, this setting should be left at “20.”... -
Page 35: Reset To Factory Defaults
RESET TO FACTORY DEFAULTS Should you wish to have all settings reset to original factory defaults, you may execute a master reset. Normally, this function is not used. Press and hold the POWER pushbutton. “RESET ALL PARAMETERS, DIG 1=YES DIG 2=NO” will show in the display. To leave all settings as they currently are, press the DIGITAL TWO pushbutton. -
Page 36: Boulderlink
Among the key features, Boulderlink allows sequential UNITS initiation of power amplifiers’ and other products’ power up when the 1012 DAC Preamplifier is turned on. Power amplifiers can send messages to the 1012 which are then shown on its display. CONNECTING THE BOULDERLINK Turn off all products to be linked before connecting Boulderlink cables and setting Boulderlink ID and Master/Slave switches. -
Page 37: Setting Boulderlink Switches
SETTING BOULDERLINK SWITCHES Every Boulderlink system must have one “MASTER” component, and only one component can be set to MASTER. Usually this is the preamplifier. Power amplifiers and other products not having a MASTER/SLAVE switch are not eligible to be “MASTER.” On the 1012, set the Boulderlink toggle switch to MASTER. -
Page 38: Power Up Via Boulderlink
POWER UP VIA BOULDERLINK With each component connected together with a Boulderlink cable, and individually connected to the mains, pressing the 1012’s POWER pushbutton will initiate the turn on sequence of all components. The first time a “MASTER” 1012 is powered up, it will search for any “slave”... -
Page 39: Boulderlink Messages
BOULDERLINK MESSAGES Each component in the system can send a message to the 1012 which is then shown on its display. This is particularly helpful in confirming the operating status of each power amplifier in a multiple amplifier system. “AMPLIFIER 1 ERROR” means that an internal power supply has failed and the amplifier has turned itself off to protect the speakers from damage. - Page 40 “UNIT 1 IS OFFLINE” means that the slave is no longer responding via Boulderlink. Its Boulderlink cable may have become disconnected, or the mains power has been disconnected. “UNIT 1 IS ONLINE” means that the slave is now responding via Boulderlink in a normal manner and has been recognized by the master.
-
Page 41: Connecting A Recording Device
CONNECTING A RECORDING DEVICE A recording device may be connected to the 1012 DAC Preamplifier. You may use balanced or unbalanced connections as previously described in the sections on connecting power amplifiers. See pages 1-8 and 1-9. -
Page 42: Appendix
DIGITAL INPUTS ANALOG INPUTS PHONO APPENDIX 1012 AUDIO BLOCK DIAGRAM DIGITAL BOULDER AUDIO CUSTOM DSP RECEIVER DIGITAL CONVERTER MODULE LOW PASS 100K OHM BALANCED ATTENUATOR INPUT BUFFER 30 DB GAIN 10/30 DB LOW NOISE SWITCHABLE RIAA CURVE GAIN PHONO STAGE BUFFER 6 POLE BESSEL... -
Page 43: Specifications
BOULDER 1012 DAC PREAMPLIFIER SPECIFICATIONS DIGITAL INPUTS Digital Inputs Sampling Rates Maximum DSP Sample Rate for Future I/F Digital Signal Processor Speed Decoding System Upandoversampling™ Converters per Channel Analog Anti-imaging Filter Full Scale Output Level at Record Output THD+N, 0 dBFS, 20 Hz to 1 kHz THD+N, 0 dBFS, 20 kHz S/N Ratio, A wtd. - Page 44 BOULDER 1012 DAC PREAMPLIFIER SPECIFICATIONS (CTD) Maximum Input Level Maximum Output Level THD+N, 2V Output, from 20 Hz to 20 kHz Output loaded with 150Ω Maximum Voltage Gain, Line input Maximum Voltage Gain, Phono (MM) Maximum Voltage Gain, Phono (MC)
-
Page 45: Troubleshooting
SYMPTOM No power indication Analog source selected, Amber power indication but sound not heard from either channel Amber power indication, but sound not heard from one channel Digital source is selected, but no input sig- nal is displayed Displays ”UNIT x ONLINE,” then ”UNIT x OFFLINE”... -
Page 46: Notes
NOTES APPENDIX...
Need help?
Do you have a question about the 1012 DAC Preamplifier and is the answer not in the manual?
Questions and answers