Table of Contents
Advertisement
Quick Links
Advertisement
Table of Contents

Related Manuals for HIKVISION DS-D4212FI-108H


Summary of Contents for HIKVISION DS-D4212FI-108H
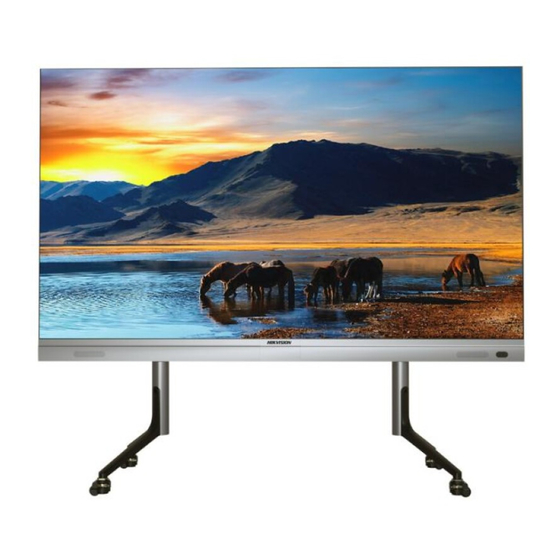
- Page 1 LED Multi-Media Display Installation Guide...
- Page 2 INTERRUPTION, OR LOSS OF DATA, CORRUPTION OF SYSTEMS, OR LOSS OF DOCUMENTATION, WHETHER BASED ON BREACH OF CONTRACT, TORT (INCLUDING NEGLIGENCE), PRODUCT LIABILITY, OR OTHERWISE, IN CONNECTION WITH THE USE OF THE PRODUCT, EVEN IF HIKVISION HAS BEEN ADVISED OF THE POSSIBILITY OF SUCH DAMAGES OR LOSS.
- Page 3 LED Multi-Media Display Installation Guide PUBLICITY, INTELLECTUAL PROPERTY RIGHTS, OR DATA PROTECTION AND OTHER PRIVACY RIGHTS. YOU SHALL NOT USE THIS PRODUCT FOR ANY PROHIBITED END-USES, INCLUDING THE DEVELOPMENT OR PRODUCTION OF WEAPONS OF MASS DESTRUCTION, THE DEVELOPMENT OR PRODUCTION OF CHEMICAL OR BIOLOGICAL WEAPONS, ANY ACTIVITIES IN THE CONTEXT RELATED TO ANY NUCLEAR EXPLOSIVE OR UNSAFE NUCLEAR FUEL-CYCLE, OR IN SUPPORT OF HUMAN RIGHTS ABUSES.
- Page 4 LED Multi-Media Display Installation Guide Symbol Conventions The symbols that may be found in this document are defined as follows. Symbol Description Indicates a hazardous situation which, if not avoided, will or could Danger result in death or serious injury. Indicates a potentially hazardous situation which, if not avoided, Caution could result in equipment damage, data loss, performance...
- Page 5 LED Multi-Media Display Installation Guide ● After installation, there should be no openings around the LED module. The bottom bracket under the wire outlet position should completely cover the bottom hole only to let the wire out, to prevent the molten material from dripping to the bottom during fire caused by internal failure.
-
Page 6: Table Of Contents
LED Multi-Media Display Installation Guide Contents Chapter 1 Overview........................1 1.1 Product Introduction ......................1 1.2 Product Components......................1 1.3 Packing List ..........................1 1.4 Installation Procedure ......................2 Chapter 2 Bracket ........................4 2.1 About the Bracket ......................... 4 2.2 Precautions .......................... - Page 7 LED Multi-Media Display Installation Guide Chapter 4 Device Configuration ....................30...
-
Page 8: Chapter 1 Overview
PC or mobile phone. Operation through a remote control is also allowed. The LED multi-media display is equipped with Hikvision’s professional image processing technology, including Pix Code (algorithm for optimizing the details of low- grayscale image), Pix Master (algorithm for image enhancement), Color Master (algorithm for color fidelity), HDR display, 3D display and other research and development achievements. -
Page 9: Installation Procedure
LED Multi-Media Display Installation Guide Cabinet Several regular cabinet unit (the quantity is subject to model) Frame 1 set Infrared remote control Cable Subject to model Screw Subject to model 1.4 Installation Procedure The LED multi-media display can be installed onto a mobile bracket or a wall-mounted bracket. You can choose the installation models according to the actual situation. - Page 10 LED Multi-Media Display Installation Guide Figure1-1 Installation Procedures...
-
Page 11: Chapter 2 Bracket
LED Multi-Media Display Installation Guide Chapter 2 Bracket 2.1 About the Bracket There are two types of brackets for the device: the mobile bracket and the wall-mounted bracket. 2.2 Precautions ● Installation personnel must wear protective gear. ● Take safety measures when working at height. ●... - Page 12 LED Multi-Media Display Installation Guide Figure 2-1 Fix Vertical Poles 2. Align the horizontal poles with the screw holes on the vertical poles, and use screws to fix.
- Page 13 LED Multi-Media Display Installation Guide Figure 2-2 Fix Horizontal Poles 3. Install horizontal poles for hanging display.
- Page 14 LED Multi-Media Display Installation Guide Figure 2-3 Install Horizontal Poles for Hanging Display Note Please pay attention to the direction arrows when installing the horizontal poles for hanging display. 4. After the poles are installed, adjust the footmaster levelling swivels to fix the castors for the convenience of following installation.
-
Page 15: Install The Wall-Mounted Bracket
LED Multi-Media Display Installation Guide Figure 2-4 Fix Casters 2.3.2 Install the Wall-Mounted Bracket The wall-mounted bracket is used for installing front-maintenance cabinets only. After determining installation position, fix the horizontal poles to the wall with M8 × 80 screws. Note ●... - Page 16 LED Multi-Media Display Installation Guide sizes according to the sizes of the device models. ● You should install the horizontal poles on a vertical load-bearing wall or steel frame. Steps 1. Choose appropriate wall and reserve installation space for the display. 2.
- Page 17 LED Multi-Media Display Installation Guide Figure 2-5 Wall-Mounted Bracket for 108-Inch Display Figure 2-6 Wall-Mounted Bracket for 135-Inch Display...
- Page 18 LED Multi-Media Display Installation Guide Figure 2-7 Wall-Mounted Bracket for 162-Inch Display...
-
Page 19: Chapter 3 Cabinet
LED Multi-Media Display Installation Guide Chapter 3 Cabinet 3.1 About the Cabinet A cabinet is a basic unit for LED engineering installation in which LED modules are neatly mounted on a metal sheet (cast aluminum) box, with a built-in independent receiving card and switching power supply, an engineering installation structure, and independent display. - Page 20 LED Multi-Media Display Installation Guide Steps 1. Use locating step screws (for locking cabinets) to stitch the cabinets vertically as cabinet columns. Figure 3-1 Stitch Cabinet Columns Note ● Number of cabinets in each column is subject to the product model. ●...
- Page 21 LED Multi-Media Display Installation Guide Figure 3-2 Install Hanging Boards Note ● The figure above takes 108-inch cabinet for example. ● Pay attention to the direction arrows. ● The lower hanging boards shall be installed at the bottom of the cabinet column. 3.
-
Page 22: Install Cabinet Columns Onto Mobile Bracket
LED Multi-Media Display Installation Guide Note The figure above takes 108-inch cabinet for example. 3.3.2 Install Cabinet Columns onto Mobile Bracket Hang cabinet columns with hanging boards onto the mobile bracket. Before You Start Ensure the cabinets have been installed as columns. Steps 1. - Page 23 LED Multi-Media Display Installation Guide Figure 3-5 Fasten Limit Screws Note After the screws are fastened, loosen them for one and a half turns. When all cabinet columns are locked to each other, adjust the flatness and fasten the screws again. 3.
- Page 24 LED Multi-Media Display Installation Guide Figure 3-6 Lock Horizontally Adjacent Cabinets 5. Check the flatness between cabinet columns. If there is unevenness, loosen the screws between two cabinets, adjust the cabinets, and fasten the screws.
-
Page 25: Install Frames
LED Multi-Media Display Installation Guide Figure 3-7 Adjust Flatness 3.3.3 Install Frames After the cabinets are installed onto the bracket, install the frames around the display. Before You Start Ensure all cabinets are installed and locked. Steps 1. Use customized screws to fix the frames on the top and sides. Each cabinet should be fixed to the frames with two screws on the top or sides. - Page 26 LED Multi-Media Display Installation Guide Figure 3-8 Fix Frames 2. Install M4 nuts inside the cabinets to lock the frames.
- Page 27 LED Multi-Media Display Installation Guide Figure 3-9 Lock Frames 3. Use KM3 × 6 screws to fix three clinching joints upon the mobile bracket feet. Stitch the two base frames. Each clinching joint is fixed with four screws.
- Page 28 LED Multi-Media Display Installation Guide Figure 3-10 Stitch Base Frames 4. Use M6 locating step screws and M6 nuts to fix the base frames on the cabinets. Each cabinet should be fixed to the base frame with two screws on the bottom.
-
Page 29: Wiring
LED Multi-Media Display Installation Guide Figure 3-11 Fix Base Frames 3.4 Wiring Wires include HDMI cables, power cords, Type-C cables, RJ45 signal cables, speaker cables, and relay cables. 3.4.1 Power Cords Between Cabinets Note Wires on the display are marked with numbers. Please refer to the numbers to connect the wires. -
Page 30: Network Cables Between Cabinets
LED Multi-Media Display Installation Guide Figure 3-12 Connect Power Cords Between Cabinets 3.4.2 Network Cables Between Cabinets Connect cabinets of the same column in cascade with one network cable, and connect the cables to the network interface panel on the lower frame. -
Page 31: Hdmi Cables
LED Multi-Media Display Installation Guide Figure 3-13 Connect Network Cables Between Cabinets 3.4.3 HDMI Cable Figure 3-14 Connect HDMI Cables... -
Page 32: Weak Power Cords
LED Multi-Media Display Installation Guide 3.4.4 Weak Power Cord Figure 3-15 Connect Weak Power Cord 3.4.5 Power Switch Control Line Figure 3-16 Connect Power Switch Control Line 3.4.6 Type-C Cable Figure 3-17 Connect Type-C Cables... -
Page 33: Rj 45 Signal Cables
LED Multi-Media Display Installation Guide 3.4.7 RJ45 Signal Cable Figure 3-18 Connect RJ45 Signal Cables 3.4.8 Speaker Cable Figure 3-19 Connect Speaker Cables 3.4.9 Relay Cable Figure 3-20 Connect Relay Cables Note After all cables are connected, use cable straps or tapes to organize and fix the cables inside the frames. -
Page 34: Install Rear Cover Plates And Lamp Board
LED Multi-Media Display Installation Guide 3.5 Install Bottom Cover Plate and Lamp Board Steps 1. Connect button signal cables and infrared signal cables. Figure 3-21 Connect Button Signal Cables and Infrared Signal Cables 2. After all internal cables are connected, use four M3 pan head screws to fix the logo panel. Figure 3-22 Fix Logo Panel Note Avoid pressing the internal cables when installing the logo panel. - Page 35 LED Multi-Media Display Installation Guide Figure 3-23 Fix Front Cover Plates on the Bottom Note Ensure that the infrared cables have been connected before fixing the front cover plates. 4. Install the lamp boards onto the cabinets from middle to sides and from bottom to top.
- Page 36 LED Multi-Media Display Installation Guide Figure 3-24 Install Lamp Boards...
- Page 37 LED Multi-Media Display Installation Guide Chapter 4 Device Configuration Please refer to the User Manual for device operation. Figure 4-1 User Manual QR Code...
- Page 38 UD30314B...
Need help?
Do you have a question about the DS-D4212FI-108H and is the answer not in the manual?
Questions and answers