Table of Contents
Advertisement
Available languages
Available languages
Quick Links
Advertisement
Table of Contents

Related Manuals for Termozeta MySlim 600


Summary of Contents for Termozeta MySlim 600
- Page 1 Libretto Istruzioni Instruction Manual...
-
Page 2: Dati Tecnici Technical Data
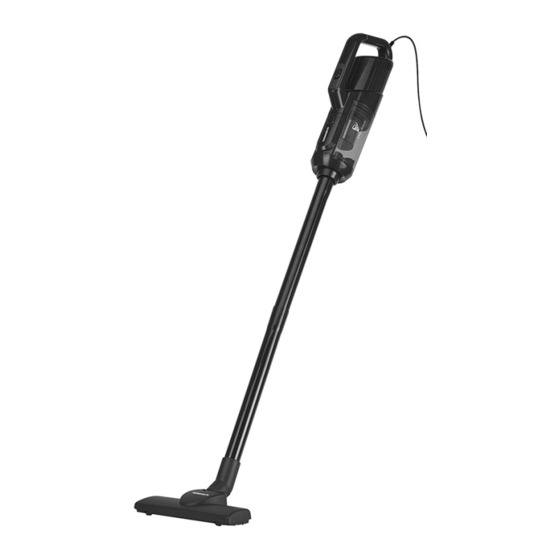
DATI TECNICI TECHNICAL DATA MYSLIM 600 Scopa elettrica no bag Type 304004 220-240 V 50/60 Hz 600 W Made in China... - Page 3 DESCRIZIONE DESCRIPTION 1. Cavo d’alimentazione 1. Power cord 2. Corpo apparecchio 2. Appliance body 3. Interruttore 3. ON/OFF switch accensione/spegnimento 4. Filter group 4. Gruppo filtro 5. Dust container 5. Contenitore polvere 6. Dust container release button 6. Pulsante di sgancio contenitore. 7.
-
Page 4: Prescrizioni Di Sicurezza
ITALIANO PRESCRIZIONI DI SICUREZZA Questo manuale è parte integrante del vostro apparecchio e deve essere letto con attenzione perché fornisce importanti indicazioni ed avvertenze sulla sicurezza, l’uso e la manutenzione del vostro apparecchio. Conservate con cura questo manuale. In caso di dubbi, non inventare ma contattare il nostro centro assistenza al Numero Verde 800-200899 •... - Page 5 ITALIANO debitamente istruiti sull'uso sicuro dell'apparecchio e sotto la diretta supervisione di una persona adulta e responsabile della loro sicurezza. • Questo apparecchio non è un giocattolo e, pertanto, non si deve mai giocare con l'apparecchio. • Le operazioni di pulizia e manutenzione non devono mai essere effettuate da minori e/o da persone con capacità...
- Page 6 ITALIANO infiammabili. • In caso durante l'utilizzo del prodotto venga a mancare la tensione della rete di alimentazione, spegnere l'apparecchio e staccare la spina dalla presa al fine di evitare che l'apparecchio possa ripartire incustodito al ritorno della stessa. • Questo apparecchio è conforme alle norme di sicurezza europee in vigore applicabili.
- Page 7 ITALIANO • Non aspirare oggetti appuntiti, quali frantumi di vetro e chiodi. • Non aspirare calcinacci. • Mantenere il prodotto lontano da superfici calde, non farlo entrare in contatto con spigoli taglienti e non farlo scorrere su superfici abra- sive. •...
-
Page 8: Prima Dell'uso
ITALIANO PROTEGGI L'AMBIENTE! Questo apparecchio contiene numerosi materiali riutilizzabili o riciclabili. Al termine del ciclo di vita, rendere inoperante l’apparecchio scollegando prima la spina dalla presa di corrente e poi tagliando il cavo di alimentazione. Per lo smaltimento attenersi alle norme in vigore nel proprio luogo di residenza. - Page 9 ITALIANO 2 – MONTAGGIO ASPIRAPOLVERE Tubi di prolunga (8) All’interno della confezione sono presenti due tubi rigidi di prolunga che vi permetteranno di aspirare senza fatica pavimenti e tappeti, utilizzando la spazzola (9). Mediante la bocchetta (11) è possibile raggiungere anche angoli più...
-
Page 10: Messa In Funzione
ITALIANO 3 – MESSA IN FUNZIONE Assicurarsi che il prodotto sia correttamente assemblato. • Svolgere completamente il cavo d’alimentazione (1) ed inserire la spina • nella presa di corrente. • Portare l’interruttore di accensione (3) sulla posizione “ I ”. L’apparecchio inizia a funzionare. - Page 11 ITALIANO Fig. 3 Fig.4 Per rimuovere il contenitore polvere (5) dal corpo apparecchio ed effettuare una pulizia completa del contenitore procedere come segue: 1. Premere il pulsante di sgancio (6) e rimuovere il contenitore dal corpo motore dell’aspirapolvere (fig.1) 2. Estrarre il gruppo filtro (4) dal contenitore (5) tramite l’occhiello e svuotare la polvere dal contenitore stesso (fig.2).
-
Page 12: Pulizia E Manutenzione
ITALIANO 6 – PULIZIA E MANUTENZIONE ATTENZIONE! Qualsiasi operazione di pulizia e manutenzione deve essere effettuata ad apparecchio spento e con la spina disinserita dalla presa di corrente. Pulizia corpo apparecchio • Pulire il corpo apparecchio (2) dell’aspirapolvere solo con un panno leggermente umido. -
Page 13: Safety Instructions
SAFETY INSTRUCTIONS This manual is an integral part of your appliance and must be read carefully as it provides important information and warnings regarding the safety, use and maintenance of your appliance. Keep this manual carefully. In case of doubts, do not invent but contact our assistance center on the toll-free number 800-200899•... - Page 14 • Cleaning and maintenance operations must never be carried out by minors and/or people with reduced physical, sensory or mental capabilities • Keep the appliance and the power cord out of the reach of minors and/or people with reduced physical, sensory or mental capabilities, especially when connected to the mains.
- Page 15 compromise your safety and void the guarantee. • This appliance is intended for domestic use only and NOT in similar applications such as: – kitchen areas for staff in shops, offices and other working environments; – farmhouses; – by clients in hotels, motels and other residential type environments; –...
- Page 16 • Before cleaning or maintaining the appliance, make sure it is disconnected from the power outlet. • During use, avoid sliding the appliance on the power cord. • The vacuum cleaner is equipped with a protection thermostat which stops operation in the event of motor overheating. If the thermostat intervenes, the fan stops;...
-
Page 17: Protect The Environment
PROTECT THE ENVIRONMENT! This appliance contains many reusable or recyclable materials. At the end of its life cycle, render the appliance inoperative by first disconnecting the plug from the socket and then cutting the power cord. For disposal, follow the regulations in force in your place of residence. -
Page 18: Vacuum Cleaner Assembly
2 – VACUUM CLEANER ASSEMBLY Extension tubes (8) Inside the package there are two rigid extension tubes that will allow you to vacuum floors and carpets effortlessly, using the brush (9). Using the nozzle (11) it is possible to reach even the most difficult corners. The extension tubes (8) are inserted simply by inserting them on the connector (7) on the body of the appliance. -
Page 19: After Use
3 – COMMISSIONING Make sure the product is properly assembled. • • Completely unwind the power cable (1) and insert the plug into the socket. • Turn the ignition switch (3) to the " I " position. The appliance starts working. - Page 20 Fig. 3 Fig.4 To remove the dust container (5) from the appliance body and carry out a complete cleaning of the container, proceed as follows: 1. Press the release button (6) and remove the container from the motor body of the vacuum cleaner (fig.1) 2.
-
Page 21: Cleaning And Maintenance
Lange Distribution S.r.l. reserves the right to introduce technical and/or aesthetic changes to its products intended to improve performances. Termozeta is an international trademark. Copyright © 1995. All rights reserved. Lange Distribution S.r.l. - Via Treviso, 35 - 20127 Milano – Italy...
Need help?
Do you have a question about the MySlim 600 and is the answer not in the manual?
Questions and answers