Cuisinart MG-100 Series - Electric Meat Grinder Manual
- Instruction and recipe booklet (16 pages) ,
- Instruction and recipe booklet (18 pages)
Advertisement
IMPORTANT SAFEGUARDS
When using electrical appliances, basic safety precautions should always be taken, including the following:
- READ ALL INSTRUCTIONS.
- TURN THE APPLIANCE OFF, THEN UNPLUG FROM THE OUTLET WHEN NOT IN USE, BEFORE ASSEMBLING OR DISASSEMBLING PARTS AND BEFORE CLEANING. TO UNPLUG, GRASP THE PLUG AND PULL FROM THE OUTLET. NEVER PULL FROM THE POWER CORD.
- T o protect against risk of electrical shock, do not put appliance in water or other liquids.
- This appliance is not intended for use by children or by persons with reduced physical, sensory, or mental capabilities, or lack of experience and knowledge. Close supervision is necessary when any appliance is used near children. Children should be supervised to ensure that they do not play with the appliance.
- Avoid contact with moving parts.
- Never put the unit near a hot burner, in an oven, or in a dishwasher.
- Do not operate any appliance with a damaged cord or plug or after the appliance malfunctions, or is dropped or damaged in any manner. Contact the manufacturer at their customer service telephone number for information on examination, repair, or adjustment.
- Never feed food by hand; always use the pusher. Keep hands, hair, clothing and utensils away from moving discs during operation to reduce the risk of personal injury and/or damage to the Cuisinart® Electric Meat Grinder.
- Do not use outdoors, or use for other than its intended use.
![]()
THE CUTTING BLADE IS SHARP; HANDLE WITH CARE BOTH WHEN USING AND WHEN CLEANING.- Do not let cord hang over edge of table or counter, come into contact with sharp edges, or touch hot surfaces.
- D o not pull on the power cord to disconnect.
- N ever plug in the appliance where water may flood the area.
- P lace the appliance on a firm and stable surface.
- NEVER PUT YOUR FINGERS NEAR THE FOOD CHUTE (GRINDER/FEEDER HEAD) WHILE GRINDER IS IN OPERATION.
- Ensure that the appliance is not placed close to the edge of the table, worktop, etc., where it can be pushed off or fall.
- The use of attachments not recommended or sold by the manufacturer may cause fire, electric shock or injury.
- Never use abrasive cleaning agents or abrasive cloths when cleaning the unit.
- Do not use fingers to scrape food away from cutting blade while appliance is plugged in. Laceration may result.
- Use the unit only when completely assembled.
- Do not leave the Cuisinart® Electric Meat Grinder unattended while it is running.
- Before using for the first time, remove all packaging and wash and dry parts.
- This appliance has a polarized plug (one blade is wider than the other). To reduce the risk of electric shock, this plug will fit in a polarized outlet only one way. If the plug does not fit the outlet perfectly, reverse the plug. If it should still not fit, contact a qualified electrician. Do not modify the plug in any way.
- Do not operate your appliance in an appliance garage or under a wall cabinet. When storing in an appliance garage, always unplug the unit from the electrical outlet. Not doing so could create a risk of fire, especially if the appliance touches the walls of the garage or the door touches the unit as it closes.

SAVE THESE INSTRUCTIONS FOR HOUSEHOLD USE ONLY
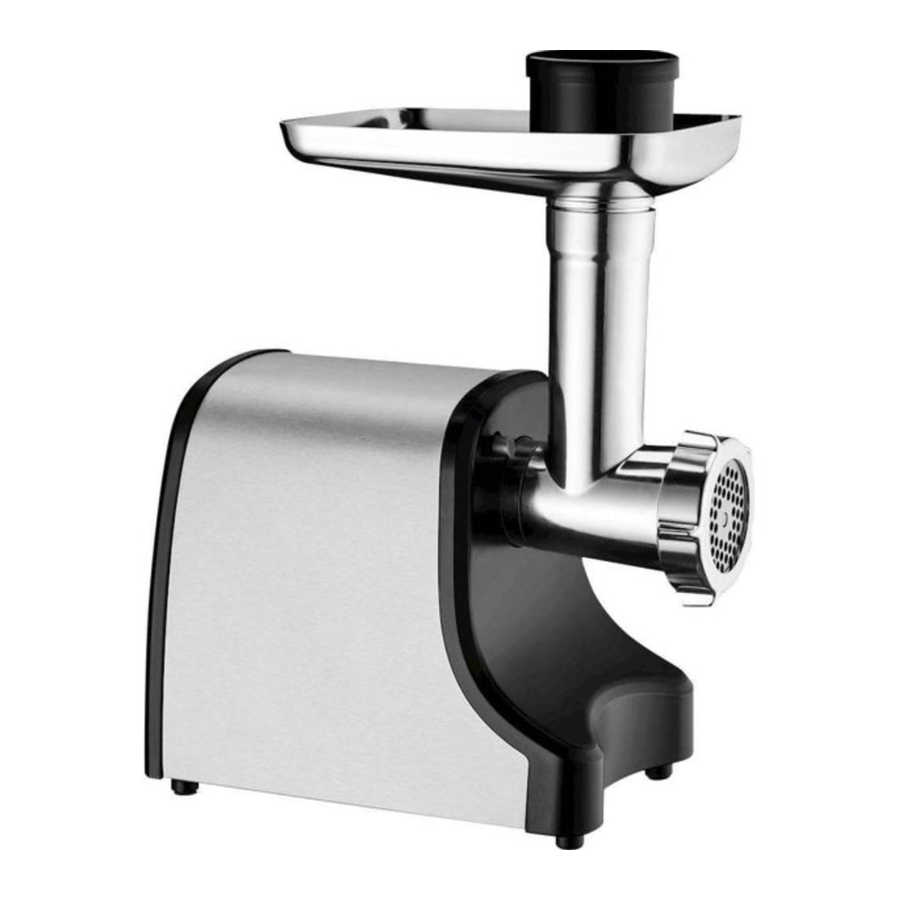
FEATURES

- ON/OFF/REVERSE switch
- Motor housing
- Attachment opening
- Food pusher and lid
- Aluminum hopper
- Grinder/feeder head
- Feed screw pin
- Cutting blade
- Cutting plate (medium)
- Cutting plate (coarse)
- Sausage attachment (small)
- Sausage attachment (large)
- Screwing ring nut
- Sausage spacer
- Power cord (not shown)
ASSEMBLING
Make sure unit is unplugged while assembling.
Assemble the meat grinder feeder head prior to attaching to the housing.
- Insert the feed screw pin into the open end of the attachment.
![]()
- Place the cutter with the flat side facing out toward you over the feed screw pin (this is an important step or the meat grinder will not work).
![]()
- P lace the grinding plate over the cutter on the feed screw pin. Align tabs with notches.
![]()
- Screw on the ring nut by turning it clockwise and hand lightly tighten. Do not over tighten.
- Fit the hopper onto the top of the meat grinder and put a mixing bowl under the grinder to catch food.
- Insert grinder/feeder head tightly into attachment opening. Twist on to lock.
- U se the food pusher to gently feed food, one piece at a time. Do not overload the feed tube. Do not force the food into the grinder/ feeder head.


CUTTING PLATES
Medium Cutting Plate – Great for ground meat used in soups, or for relishes
Coarse Cutting Plate – Great for ground meat used in chili and sausages, or for vegetables
THESE PLATES ARE NOT DISHWASHER SAFE.
PLEASE HAND-WASH ONLY!
DRY COMPLETELY AND COAT IN VEGETABLE OIL.
NOTE – REVERSE SWITCH
If the motor slows or stops, it may be due to jammed food. Immediately switch the Cuisinart® Electric Meat Grinder to its OFF position. Put the On/Off/Reverse switch in the REVERSE position to push the food in the opposite direction. Put the On/Off/Reverse switch in the ON position and turn the Electric Meat Grinder on again. If the Electric Meat Grinder should get jammed again, you may need to switch it off, unplug, disassemble the grinder head, and clean the internal parts.
HOW TO USE
- Before first use, wash and dry all parts of the Cuisinart® Electric Meat Grinder.
- Place the Cuisinart® Electric Meat Grinder on a stable work surface.
- Make sure the On/Off/Reverse switch is in the OFF position.
- Secure the meat grinder assembly to the unit.
- Insert plug into wall outlet.
- Place a wide, shallow bowl or plate beneath the grinder tube to catch food.
- Switch appliance to ON position. The Cuisinart® Electric Meat Grinder must ALWAYS be ON before adding food.
- Place food on the hopper and use pusher to feed food through opening.
SAUSAGE MAKER
Assembling Sausage Maker Attachment
Assemble the sausage maker attachment prior to attaching to the housing.
- Insert the feed screw pin into the open end of the grinder.
![]()
- Place the sausage spacer with the notches fitting into the notch openings on the feed screw pin.
![]()
- Place the sausage nozzle onto the ring nut and screw it onto the meat grinder nozzle by turning it clockwise and lightly hand tighten. Do not over tighten.
![]()


TO MAKE SAUSAGES
The sausage attachments allow you to blend meats and spices for homemade sausages.
- If you have purchased dry casings, they must be soaked in cold water until they become soft and pliable, and then rinsed under lukewarm water, being sure that the water is running through the casings. Assemble the Electric Meat Grinder with sausage maker attachment per instructions.
- Grind meat and seasonings of your choice, following the instructions.
- P lace ground meat in the hopper and turn the unit ON. Push the meat into the die-cast hopper opening with pusher until the mixture appears at the end of the sausage attachment. Turn the unit OFF and tie a knot at the end of the 2-inch casing overhang.
- Turn unit ON and feed more ground meat into the die-cast hopper opening until all the meat has been used or the casing is approximately 2 inches from being completely full.
- T urn unit OFF, remove the end of the casing from the sausage attachment, and tie a knot in the open end of the casing. Use a knife or needle to poke holes in the length of sausage to let out air bubbles.
- Sausages can be made to the desired length by twisting the casing at intervals.
NOTE: To avoid over-stretching and splitting the casing, do not make the sausages too thick. The meat mixture will expand slightly during cooking.
To Form Individual Sausages
- Lay long sausage on flat tray and poke hole all over with a sharp object, similar in size to a needle or cake tester, to prevent air pockets from forming.
- Twist into sausages – you choose the size – by twisting each "sausage" first forward, then backward, to prevent them from untwisting.
- Pierce any air pockets you see.
- For best results, dry uncovered in refrigerator for about 6 hours, then flip and dry another 6 hours before cooking.
CLEANING AND MAINTENANCE
- Remove the ring nut.
- Disassemble and wash each part in warm, soapy water. Dry all of the parts thoroughly. Do not put any of the metal parts in a dishwasher. Pusher is top rack dishwasher safe.
- Reassemble.
- Wipe the grinding plates with vegetable oil and wrap each plate with greaseproof paper. This will prevent discoloring/rusting.
- S tore the sausage attachments and grinding plates inside the pusher and attach the lid.
- Any other servicing should be performed by an authorized service representative.
TIPS AND HINTS
A wide variety of meat dishes, homemade sausages, chunky spreads, relishes, and purées are all great ways to use the meat grinder. With your own meat grinder you know exactly what is going into your food. You are able to control the ingredients you use such as cuts of meat, fat, salt and spices. For grinding:
- Meat should be very well chilled before grinding. Should meat heat up while grinding, pause and re-chill meat before grinding again. Keeping the meat below 45°F is ideal for grinding and sausage making.
- Cut meat into small 1- to 2-inch cubes for grinding, removing any skin, but keeping all of the fat.
- Fatty, cheaper cuts of meat are perfect for the grinder. Fat gives flavor and juiciness to ground meats and sausages.
- Coarse plate − Use for coarse-ground textured items such as coarsely ground beef for chili, relishes, sauces and salsas.
- Medium plate − Use for medium-ground textured items, such as medium-ground meat for sausage, meatballs or meatloaf.
- Be sure to refrigerate any ground meats immediately. Cook or freeze within 1 or 2 days.
- If grinding bread for breadcrumbs, make sure to use dry or toasted bread.
- When grinding meats or filling sausages:
After the last piece of meat has gone through the chute, place a slice of bread through the machine in order to clear the last bit of ground meat or to clear the sausage nozzle of ground meat.
For making sausages:
- Soak natural casings in water for at least 30 minutes to an hour and then allow lukewarm water to run through the entire casing to remove any excess salt.
- Be sure to fill the entire casing and then prick all over to release air before twisting into individual links.
- For casings, 2 feet of medium hog casings accommodates 1 pound of meat.
- Casings can be difficult to find. The best places to try are either your local butcher or websites geared to sausage making.
- Taste your mixture first before stuffing into casings. Cook a small amount of the mix in a skillet until it's cooked through.

Documents / ResourcesDownload manual
Here you can download full pdf version of manual, it may contain additional safety instructions, warranty information, FCC rules, etc.
Download Cuisinart MG-100 Series - Electric Meat Grinder Manual
Advertisement


Need help?
Do you have a question about the MG-100 Series and is the answer not in the manual?
Questions and answers