Makita DJV180 Instruction Manual
Hide thumbs
Also See for DJV180:
- Instruction manual (65 pages) ,
- Instruction manual (12 pages) ,
- Instruction manual (37 pages)
Table of Contents
Advertisement
Available languages
Available languages
Quick Links
Advertisement
Table of Contents

Subscribe to Our Youtube Channel
Related Manuals for Makita DJV180


Summary of Contents for Makita DJV180
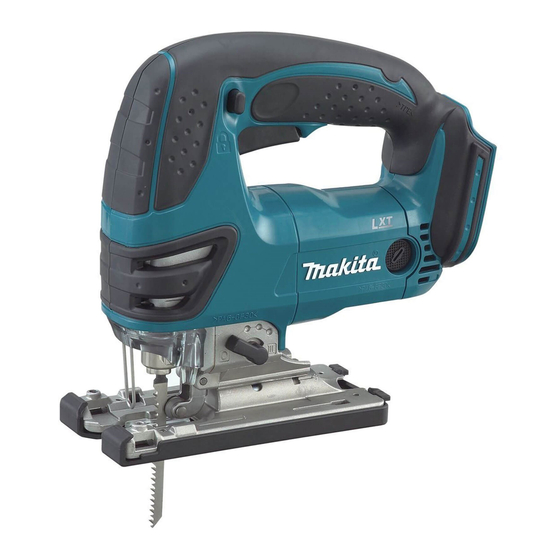
- Page 1 INSTRUCTION MANUAL MANUEL D'INSTRUCTION MANUAL DE INSTRUCCIONES Cordless Jig Saw Scie sauteuse sans fil Sierra Caladora Inalámbrica DJV180 IMPORTANT: Read Before Using. IMPORTANT : Lire avant usage. IMPORTANTE: Lea antes de usar.
-
Page 2: Specifications
ENGLISH (Original instructions) SPECIFICATIONS Model DJV180 Length of stroke 26 mm (1") Max. cutting capacities Wood 135 mm (5-5/16") Mild steel 10 mm (3/8") Aluminum 20 mm (25/32") Strokes per minute 0 - 2,600 /min Overall length 257 mm (10-1/8") Net weight 2.7 - 3.0 kg (6.0 - 6.7 lbs) - Page 3 Personal safety Maintain power tools and accessories. Check for misalignment or binding of moving parts, Stay alert, watch what you are doing and use breakage of parts and any other condition that common sense when operating a power tool. may affect the power tool’s operation. If dam- Do not use a power tool while you are tired or aged, have the power tool repaired before use.
- Page 4 Never service damaged battery packs. Service Symbols of battery packs should only be performed by the manufacturer or authorized service providers. The followings show the symbols used for tool. Follow instruction for lubricating and chang- ing accessories. volts Do not modify or attempt to repair the appli- ance or the battery pack except as indicated in direct current the instructions for use and care.
-
Page 5: Functional Description
18. Keep the battery away from children. SAVE THESE INSTRUCTIONS. ► 1 . Red indicator 2. Button 3. Battery cartridge CAUTION: Only use genuine Makita batteries. CAUTION: Use of non-genuine Makita batteries, or batteries that • Always switch off the tool before installing or have been altered, may result in the battery bursting removing of the battery cartridge. causing fires, personal injury and damage. It will Hold the tool and the battery cartridge firmly •... -
Page 6: Overload Protection
Overload protection NOTE: Depending on the conditions of use and the ambient temperature, the indication may differ slightly This protection works when the tool is operated in a from the actual capacity. manner that causes it to draw an abnormally high cur- NOTE: The first (far left) indicator lamp will blink when rent. In this situation, turn the tool off and stop the appli- the battery protection system works. cation that caused the tool to become overloaded. Then turn the tool on to restart. Selecting the cutting action Overheat protection This protection works when the tool or battery is over-... - Page 7 Release the switch trigger to stop. After use, always press in the lock-off button from A side. Electric brake This tool is equipped with an electric brake. If the tool consistently fails to quickly stop after switch trigger release, have tool serviced at a Makita service center. ► 1 . Tool opener 7 ENGLISH...
-
Page 8: Cover Plate
Keeping that situation, insert the saw blade into the Hex wrench storage blade clamp as far as the two protrusions of the blade can not be seen. ► 1 . Base 2. Hex wrench ► 1 . Blade clamp 2. Jig saw blade 3. Protrusions When not in use, store the hex wrench as shown in the Return the tool opener to its original position. -
Page 9: Dust Extraction
• If the tool is operated continuously until the battery cartridge has discharged, allow the tool to rest for 15 minutes before proceeding with a fresh battery. When cutting curves, advance the tool very slowly. Bevel cutting Then connect a Makita vacuum cleaner to the dust nozzle. CAUTION: • Always be sure that the tool is switched off and the battery cartridge is removed before tilting the base. ► 1 . Dust nozzle 2. Hose for vacuum cleaner... -
Page 10: Plunge Cutting
With the base tilted, you can make bevel cuts at any Cutouts angle between 0° and 45° (left or right). Loosen the bolt on the back of the base with the hex Cutouts can be made with either of two methods A or B. wrench. Move the base so that the bolt is positioned in the center of the bevel slot in the base. -
Page 11: Metal Cutting
Finishing edges ► 1 . Hex wrench 2. Bolt 3. Fence guide 2. Circular cuts To trim edges or make dimensional adjustments, run the blade lightly along the cut edges. Metal cutting Always use a suitable coolant (cutting oil) when cutting metal. Failure to do so will cause significant blade wear. The underside of the workpiece can be greased instead of using a coolant. Rip fence set (optional accessory) CAUTION: •... -
Page 12: Maintenance
Makita genuine battery and charger NOTE: • Some items in the list may be included in the tool package as standard accessories. They may differ from country to country. ► 1 . Limit mark MAKITA LIMITED WARRANTY Remove and check the carbon brushes regularly. Replace when they wear down to the limit mark. Keep Please refer to the annexed warranty sheet for the the carbon brushes clean and free to slip in the holders. most current warranty terms applicable to this product. Both carbon brushes should be replaced at the same If annexed warranty sheet is not available, refer to the time. Use only identical carbon brushes. -
Page 13: Spécifications
FRANÇAIS (Mode d’emploi original) SPÉCIFICATIONS Modèle DJV180 Longueur de frappe 26 mm (1") Capacités de coupe max. Bois 135 mm (5-5/16") Acier doux 10 mm (3/8") Aluminium 20 mm (25/32") Nombre d'impacts par minute 0 - 2 600 /min Longueur totale 257 mm (10-1/8") - Page 14 Lorsque vous utilisez un outil électrique à l’ex- Portez toujours des lunettes à coques de pro- térieur, utilisez un cordon prolongateur conçu tection pour protéger vos yeux contre les bles- pour l’usage extérieur. Les risque de choc élec- sures lors de l’utilisation d’outils électriques. Les lunettes à...
- Page 15 Lors de l’utilisation de l’outil, ne portez pas Consignes de sécurité pour scie de gants de travail en tissu qui risquent de sauteuse sans fil s’enchevêtrer dans l’outil. L’enchevêtrement de gants de travail en tissu dans les pièces en mou- Tenez l’outil électrique par ses surfaces de vement peut entraîner une blessure.
- Page 16 éliminez-la dans un endroit sûr. Respectez la réglemen- tation locale concernant l’élimination de la batterie. 12. N’utilisez les batteries qu’avec les produits spéci- vitesse à vide fiés par Makita. Installer les batteries sur des produits non conformes peut entraîner un incendie, une chaleur excessive, une explosion ou une fuite d’électrolyte. tours ou alternances par minute 13.
-
Page 17: Description Du Fonctionnement
Protection contre la surcharge DESCRIPTION DU Cette protection s’active lorsque l’outil est utilisé d’une FONCTIONNEMENT manière entraînant une consommation anormalement élevée de courant. Le cas échéant, éteignez l’outil et cessez l’application qui a causé la surcharge de l’outil. ATTENTION : Rallumez ensuite l’outil pour redémarrer. - Page 18 à grande du contreplaqué. libérez la gâchette. Après l'utilisation, appuyez toujours orbite sur le bouton de sécurité du côté A. Frein électrique Cet outil est équipé d'un frein électrique. Si à plusieurs reprises l'outil ne s'arrête pas rapidement après le relâchement de la gâchette, faites-le réparer dans un centre de service après-vente Makita. 18 FRANÇAIS...
- Page 19 En maintenant l'ouverture sur cette position, insérez la Allumage de la lampe lame dans le collier de serrage, jusqu'à ce que les deux saillies de la lame ne soient plus visibles. ATTENTION : • Evitez de regarder directement le faisceau lumineux ou sa source. Pour allumer la lampe, appuyez sur la gâchette. Pour l'éteindre, relâchez la gâchette. NOTE : •...
- Page 20 Rangement de la clé hexagonale Dispositif anti-fente ► 1 . Base 2. Clé hexagonale ► 1 . Base 2. Dispositif anti-fente Lorsque vous n'utilisez pas la clé hexagonale, rangez-la Vous pouvez utiliser le dispositif anti-fente pour obtenir de la façon indiquée sur l'illustration pour éviter de des coupes sans fente.
- Page 21 15 minutes avant de poursuivre l'opéra- tion avec une batterie fraîche. Faites avancer l'outil très lentement lors de la coupe de courbes. Coupe en biseau Raccordez ensuite un aspirateur Makita au raccord d'aspiration. ATTENTION : • Assurez-vous toujours que l'outil est hors ten- sion et que la batterie est retirée avant d'incliner la base.
-
Page 22: Coupe En Plongée
Inclinez la base jusqu'à l'angle de coupe en biseau Découpage désiré. L'entaille en V du carter d'engrenages indique l'angle de biseau au moyen de graduations. Serrez Le découpage peut s'effectuer par la méthode A ou B. ensuite le boulon fermement pour fixer la base. A) Perçage d'un trou de départ : ► 1 . Fente en biseau 2. Base 3. Boulon 4. Graduations 5. Encoche en V 6. Carter ► 1 . Trou de départ d'engrenage •... -
Page 23: Coupes Circulaires
Finition des bords ► 1 . Clé hexagonale 2. Boulon 3. Guide de garde 2. Coupes circulaires Pour égaliser les bords ou pour ajuster les dimensions, faites passer la lame légèrement le long des bords coupés. Coupe du métal Utilisez toujours un fluide de refroidissement (huile de coupe) adéquat lors de la coupe du métal. Autrement, cela usera considérablement la lame. -
Page 24: Entretien
Makita le plus près. Pour maintenir la SÉCURITÉ et la FIABILITÉ du pro- duit, les réparations, tout autre travail d'entretien ou de réglage doivent être effectués dans un centre de service Makita agréé ou un centre de service de l'usine Makita, exclusivement avec des pièces de rechange Makita. 24 FRANÇAIS... -
Page 25: Especificaciones
ESPAÑOL (Instrucciones originales) ESPECIFICACIONES Modelo DJV180 Extensión de la carrera 26 mm (1") Capacidad máxima de corte Madera 135 mm (5-5/16") Acero templado 10 mm (3/8") Aluminio 20 mm (25/32") Carreras por minuto 0 - 2 600 cpm Longitud total 257 mm (10-1/8") - Page 26 Cuando utilice una herramienta eléctrica en No permita que la familiaridad adquirida exteriores, utilice un cable de extensión apro- debido al uso frecuente de las herramientas piado para uso en exteriores. La utilización de haga que se sienta confiado e ignore los prin- cipios de seguridad de las herramientas.
- Page 27 Cuando vaya a utilizar esta herramienta, evite Advertencias de seguridad para la usar guantes de trabajo de tela ya que éstos sierra caladora inalámbrica podrían atorarse. Si los guantes de trabajo de tela llegaran a atorarse en las piezas móviles, Sujete la herramienta eléctrica por las superficies esto podría ocasionar lesiones personales.
- Page 28 12. Utilice las baterías únicamente con los pro- batería ductos especificados por Makita. Instalar las baterías en productos que no cumplan con los Antes de utilizar el cartucho de batería, lea requisitos podría ocasionar un incendio, un calen- todas las instrucciones e indicaciones de tamiento excesivo, una explosión o una fuga de...
-
Page 29: Descripción Del Funcionamiento
Consejos para alargar al máximo Para quitar el cartucho de batería, deslícelo de la herra- mienta mientras desliza el botón sobre la parte delan- la vida útil de la batería tera del cartucho. Para colocar el cartucho de batería, alinee la lengüeta Cargue el cartucho de batería antes de que sobre el cartucho de batería con la ranura en la carcasa se descargue completamente. Pare siem- y deslice en su lugar. Inserte por completo hasta que pre la operación y cargue el cartucho de se fije en su lugar con un pequeño clic. Si puede ver el batería cuando note menos potencia en la... - Page 30 Indicación de la capacidad restante Selección de corte de la batería Únicamente para cartuchos de batería con el indicador ► 1 . Palanca de cambio del modo de corte Esta herramienta puede utilizarse en modo de corte con órbita o línea recta (hacia arriba y abajo). El modo ► 1 . Luces indicadoras 2. Botón de verificación de corte con órbita empuja la sierra hacia delante en la carrera de corte y aumenta notablemente la velocidad Oprima el botón de verificación en el cartucho de la...
- Page 31 Freno eléctrico Esta herramienta está equipada con un freno eléc- trico. Si la herramienta dejase de parar enseguida repetidamente después de soltar el gatillo interruptor, ► 1 . Abridor de la herramienta pida a un centro de servicio Makita que le hagan el mantenimiento. 31 ESPAÑOL...
- Page 32 Mantenga esa situación e inserte la hoja de sierra en el Almacenamiento de la llave de Allen sujetador de hoja hasta que las dos protuberancias de (hexagonal) la hoja de sierra no se puedan ver. ► 1 . Sujetador de hoja de sierra 2. Hoja de sierra ► 1 . Base 2. Llave hexagonal caladora 3. Protuberancias Cuando no la utilice, guarde la llave de Allen como se Regrese el abridor de la herramienta a su posición muestra en la figura para evitar que se pierda.
-
Page 33: Extracción De Polvo
► 1 . Base 2. Dispositivo antiastillado Para los cortes libres de astillas, se puede utilizar el dispositivo antiastillado. Para instalar el dispositivo Luego, conecte un aspirador marca Makita a la boquilla antiastillado, mueva la base de la herramienta hacia de polvo. -
Page 34: Corte En Bisel
Encienda la herramienta sin que la hoja de sierra esté Incline la base hasta que se obtenga el ángulo biselado tocando nada y espere hasta que la hoja de sierra deseado. La muesca en V de la caja de engranaje alcance plena velocidad. Después ponga la base hori- indica el ángulo biselado por medio de regulaciones. zontal sobre la pieza de trabajo y mueva la herramienta Luego, apriete el tornillo firmemente para sujetar la hacia delante con cuidado siguiendo la línea de corte base. previamente marcada. NOTA: • Si utiliza la herramienta continuamente hasta descargar el cartucho de batería, deje descan- sar la herramienta durante 15 minutos antes de proceder con una batería fresca. - Page 35 Recortes Acabado de bordes Los recortes pueden hacerse con cualquiera de los dos métodos A o B. A) Perforando de un agujero de inicio: Para recortar bordes o hacer ajustes dimensionales, pase la hoja de sierra ligeramente a lo largo de los bordes cortados. Corte de metales ► 1 . Agujero de inicio Utilice siempre un refrigerante apropiado (lubricante para cuchillas) cuando corte metales.
-
Page 36: Mantenimiento
Después compruebe la herramienta mien- NOTA: tras está en marcha y la operación del freno eléctrico cuando • Siempre utilice hojas de sierra Nº. B-17, B-18, suelte el gatillo interruptor. Si el freno eléctrico no funciona B-26 o B-27 cuando corte círculos o arcos. bien, pida a su centro de servicio Makita local que se lo repare. 36 ESPAÑOL... -
Page 37: Accesorios Opcionales
Para mantener la SEGURIDAD y FIABILIDAD del pro- ducto, las reparaciones, y cualquier otra tarea de man- tenimiento o ajuste deberán ser realizadas en Centros de Servicio Autorizados por Makita, empleando siempre repuestos Makita. ACCESORIOS OPCIONALES PRECAUCIÓN: • Estos accesorios o aditamentos (incluidos o no) están recomendados para utilizar con su herra- mienta Makita especificada en este manual. El empleo de cualesquiera otros accesorios o acoplamientos conllevará un riesgo de sufrir heridas personales. - Page 40 Para reducir la exposición a estos productos químicos: trabaje en un área bien ventilada y póngase el equipo de seguridad indicado, tal como las máscaras contra polvo que están especialmente diseñadas para filtrar partículas microscópicas. Makita Corporation 3-11-8, Sumiyoshi-cho, 885272G931 Anjo, Aichi 446-8502 Japan...
Need help?
Do you have a question about the DJV180 and is the answer not in the manual?
Questions and answers