
Related Manuals for Omega OO650X


Summary of Contents for Omega OO650X
- Page 1 OPERATING AND INSTALLATION INSTRUCTIONS FOR OMEGA 60CM BUILT‐IN ELECTRIC OVENS OO640X OO650X ...
- Page 2 ...
-
Page 3: Table Of Contents
INSTALLATION, OPERATION AND MAINTENANCE INSTRUCTIONS F OR OMEGA BUILT‐IN ELECTRIC OVEN OO640X & OO650X BUILT‐IN ELECTRIC OVEN CONGRATULATIONS Thank you for choosing one of our many fantastic built in ovens. We are confident that you will now be able to meet your cooking needs. Before you use the oven we strongly recommend that you read though the whole user manual which provides the description of this product and the proper use of i ts functions. To avoid the ever‐present risks involved with using an electrical appliance it is vital that the oven is installed correctly and that you read the safety instructions carefully to avoid misuse and hazards. It i s important that you retain these instructions and your proof of purchase along with any other i mportant documents about this product for future reference. Due to continual product development, Omega reserves the right to alter specifications or appearances without notice. CONTENTS SECTION PAGE NO. Important Safety Instructions………….. 4 Appliance Details………………………… 5 ... -
Page 4: Important Safety Instructions
IMPORTANT SAFETY INSTRUCTIONS IMPORTANT: Read the assembly instruction section and safety precautions of this booklet carefully before removing the contents of this carton. This appliance is not intended for use by persons (including children) with reduced physical, sensory or mental capabilities, or lack of experience or knowledge, unless they have been given supervision or instructions concerning the use of the appliance by a person responsible for their safety. Young children should be supervised to insure that they do not play with the appliance. In certain circumstances electrical appliances may be a danger hazard. Do not place heavy objects in or on these appliances, use for storage or let children play/swing from the door. These appliances are designed for cooking food only. This appliance is designed for domestic household use only and for the cooking of domestic food products. Use as a commercial appliance will void the warranty. It should not to be used in a marine environment or o utdoors. This appliance is supplied with a 10 amp plug. If the electrical supply cord is damaged, either when being installed or after installation, it must be replaced by the manufacturer, its service centre or similarly a qualified person in order to prevent a hazard. The electrical connection must be accessible after installation. The appliance must be electrically isolated before any maintenance can be performed. Electrical connection must be made as per local wiring rules and regulations. Do not disconnect the appliance with wet hands or bare feet, and do not disconnect the power cord with extreme force. If the electricity supply is restricted, means of an all‐... -
Page 5: Appliance Details
APPLIANCE DETAILS ELECTRICAL DETAILS: OO640X OO650X OVENS Rated Voltage 220 to 240V ac 50Hz 220 to 240V ac 50Hz Max Rated Inputs 2200W 2300W Supply Connection 10A plug 10A plug This information can be found on the rating plate (data label) affixed to the inside of the door j amb. SIZES: Relevant Sizes: LENGTH (mm) WIDTH (mm) HEIGHT (mm) External Oven size ELECTRICAL CONNECTIONS LOCAL AUTHORITY REQUIREMENTS Installation is only permitted by a licensed electrician, and carried out according to instructions provided ... - Page 6 OVEN LAMP REPLACEMENT The appliance must first be disconnected from the power outlet or turned off at your isolation s witch. Unscrew the glass cover attached to the lamp holder; anti‐clockwise. Unscrew the lamp and replace it with another high‐temperature lamp with the following characteristics: Type: E 14 Voltage: AC220V‐240V Wattage: 15W Temperature rating: 300° Remount the glass cover and reconnect the appliance to the power supply NOTE: Should you experience any difficulty please contact your nearest after‐sales service centre. ...
-
Page 7: Installation
INSTALLATION The adjacent furniture must be able to withstand a minimum temperature rise of 100°C above the ambient temperature of the room it is located in during periods of use. The power supply to the appliance must be cut off before any adjustments or maintenance work is done on it. PREPARATION FOR INSTALLATION AND USE Manufactured with best quality parts and materials, this modern, functional and practical oven will meet y our needs in all respects. Make sure to read the manual to obtain successful results so as not to experience any problems in the future. The information given below contains rules that are necessary for correct positioning and service operations. They should be read without fail, especially by the technician who will position the appliance. CHOOSING A PLACE FOR THE APPLIANCES There are several factors to consider when choosing a place for your oven. Make sure to take into account our recommendations below in order to prevent any problems and dangerous situations which might arise. When choosing a place for the oven, attention should be paid to ensure there are no flammable or c ombustible materials in the close vicinity, such as curtains, oil, cloth etc. which quickly catch f ire. Furniture surrounding the oven or cooktop must be made of materials resistant to temperatures of at least 100 C°. Required changes to wall cabinets and exhaust fans above a built‐in cooktop as well as minimum heights from the oven board are shown below. Accordingly, a range hood should be at a minimum height of 65 cm from the cooktop. If there is no range hood the height should not be less than 70 cm. Refer to the ... - Page 8 INSTALLATION OF BUILT IN OVEN Insert the oven into cabinet partly by pushing it forward. Open the oven door and insert 2 screws into the holes on the oven frame. While the product frame touches the wooden surface of the cabinet, tighten the screws. If the oven is installed below a built‐in hob, the distance between the worktop and the top panel of the oven must be a minimum of 50mm, and the distance between the worktop and the top of the oven control panel must be a minimum of 25mm. The dimensions and material of the cabinet in which the oven will be installed must be correct and resistant t o increases in temperature. In a correct installation, contact with electrical or insulated parts must be prevented. Insulating parts need to be fitted in a way to ensure that they cannot be removed by using any kind of tool. Installing the appliance in the close vicinity of a refrigerator or a deep‐freezer is not recommended as the performance of the above‐mentioned appliances will be negatively affected due to emanating heat. After removing your oven from its packaging, be sure that the oven is not damaged. If you suspect any damage to t he appliance, do not use it; immediately contact an authorised Service Centre. INSTALLATION IN AN ELEVATED CABINET ...
-
Page 9: Operating Instructions
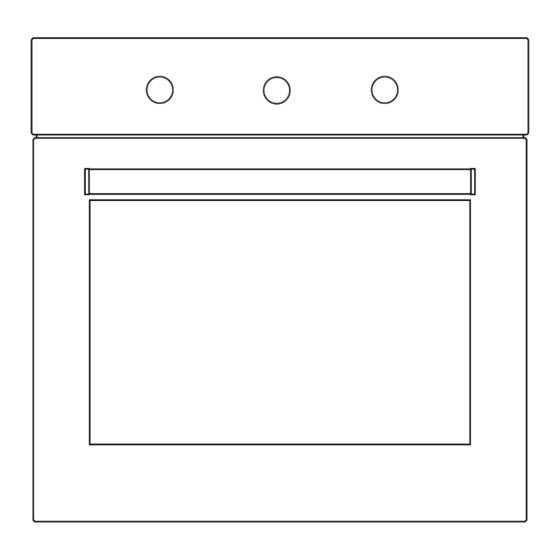
OPERATING INSTRUCTIONS FRONT VIEW: INTERNAL VIEWS: 1. Control Panel. 6. Door. 2. Deep Tray (not available on these models). 7. Light. 3. Rotisserie Set (not available on these models). 8. Internal Wire Rack (not available on these models). - Page 10 OO640X OO650X OVEN FUNCTION CONTROL The oven function control is used to select the different functions. Each is explained in detail further in the manual. To select a function, turn the control knob to the desired oven function and then set the temperature with the thermostat control. OVEN THERMOSTAT CONTROL The oven thermostat control is used to select the desired temperature for cooking. When the temperature inside your oven reaches the value set, the thermostat will cut the circuit and the thermostat light will go off. When the temperature falls below the set value, the thermostat will again be turned o n alongside the thermostat light. It is normal for this to occur during the cooking process, particularly when the door has been opened. OVEN TIMER CONTROL The oven timer control is used to either set the oven into manual mode (no timer) or set up a timer ...
- Page 11 OVEN FUNCTION CONTROL CHART Note: Oven shelves are numbered from 4 at the top down to 1 at the bottom. ...
- Page 12 If you are going to cook using two trays at the same time, while adjusting the cooking temperature, select t he temperature that is the lowest among the levels suitable for your food of choice. Cooking with two trays requires additional cooking time compared to cooking with one tray. Usually, the food o n each tray does not finish at the same time so you may need to take the tray of cooked food out of the oven, a nd continue the cooking operation for the remaining tray. After cooking, turn off the oven function and temperature control knobs and set the timer to off. Take the cooked food out of the oven and place it on a s afe heatproof surface. As the oven will be hot, work near with caution and keep children away from the cooling oven. Conventional Cooking Function (OO650X only) The Conventional function allows heat to radiate evenly from the lower and upper elements into the oven ensuring even cooking of both sides of the food. Adjust the function control so it indicates the conventional Cooking function symbol. Adjust the thermostat control knob of your oven to a temperature recommended o n the cooking table for the cooking operation you wish to perform. Preheating of the oven for about 10 minutes is recommended. Place food in a suitable container, then place into oven and cook for the recommended time. This function is preferred for making cakes (cupcakes, other cakes and sponges), biscuits, pastry, baked pasta ( e.g. lasagne), casseroles and moist dishes, roasts and oven chips. After cooking, turn off the oven function and temperature control knobs and set the timer to off. Take the cooked food out of the oven and place it in a safe heatproof surface. As the oven will be hot, work near with ...
- Page 13 Fan Assist Function (OO650X only): This is the function where the heat coming from the lower and upper heating elements is circulated into the oven by the fan motor and blade. Adjust the function control knob so it indicates the Fan Assist Function symbol and adjust the oven timer to the recommended time for cooking. Adjust the thermostat control knob to the temperature required on the cooking table for the Fan Assist Function and preheat oven for 10 minutes. Based on the conventional function, this combination of features increases the effectiveness of the thermal radiation of the heating e lements through forced air circulation of the heat throughout the oven. This helps prevent food from burning on the surface, allowing the heat to penetrate into the food. Food baked using this function, such as pastry often b rown faster than on the conventional function alone. After cooking, turn off the oven function and temperature control knobs and set the timer to off. Take the cooked food out of the oven and place it on a safe heatproof surface. As the oven will be hot, work near with caution and keep children away from the cooling oven. Maxi‐Grill Function: This function is used for faster grilling and for grills with a lot of food. Adjust the function control knob so it indicates the Maxi‐Grill function symbol. Set the oven’s thermostat control knob to the required temperature. After a preheating period of 10 minutes, put your food into the oven. For grilling, put the food on the rack and sit over the tray. Place the rack on the highest shelf (4). Placing the rack above the oven tray provided will ensure that any marinade, fat or oil dropping from the food will be collected. When grilling, the oven door must be closed. On this function, all of the heating elements/coils of the grill operate. ...
- Page 14 Upper Element with Fan Function (OO650X only): This function is good for reheating small amounts of food or delicate foods by working the fan and the upper heating element at the same time. Adjust the function control knob so it indicates the Upper element with Fan function symbol and adjust the oven timer to the recommended time for cooking. Set the oven’s thermostat control to the required temperature. After a preheating period of 10 minutes, put your food into the oven. Put the food on the rack or the tray. Place the grill/tray on a centre shelf (2‐3). After cooking, turn off the oven function and temperature control knobs and set the timer to off. Take the cooked food out of the oven and place it on a safe heatproof surface. As the oven will be hot, work near with caution and keep children away from the cooling oven. Lower Element with Fan Function (OO650X only): This Lower Heat with fan function will cook food in a slower more delicate process than the Fan Forced equivalent and is recommended for finishing off the cooking of food (in baking dishes or trays) which is already superficially well‐cooked and golden on the top but still soft inside. This is an ideal function for delicate cooking such as quiches, cheesecakes and custards where limited top browning of the food is required. After cooking, turn off the oven function and temperature control knobs and set the timer to off. Take the cooked food out of the oven and place it on a safe heatproof surface. As the oven will be hot, work with caution and keep children away from the cooling oven. Maxi‐Grill with Fan Function (OO640X only): This function will ensure complete, fast and all over grilling by working the fan, the grill and the upper h eating element at the same time. Adjust the function control knob so it indicates the Maxi‐Grill with Fan function ...
-
Page 15: Cleaning
ACCESSORIES It is recommended that you use the containers indicated depending on the food you will cook in your oven. You can also use glass containers, cake pans and special oven trays suitable for use in your oven (available in kitchenware shops). Pay attention to the information given by the supplier for use of this cookware. The information given below should be implemented for enamelled containers. If the food to be cooked does not completely cover the oven tray, if the food is taken out of the deep‐freezer or if the tray is used to collect the dripping juices of the foods during the grill operation, deformation might be observed on the tray over time due to high temperatures forming during the cooking/baking operation. This is a normal, physical state that results during the heat transfer. Do not leave a glass tray or container in a cold environment immediately after cooking in them. Do not place them on cold and wet surfaces. Ensure that they slowly cool off by placing t hem on a dry piece of cloth or wooden board, otherwise, the glass tray or container might break. If you are going to use your oven to grill, we recommend using the grill rack with the tray on a position below. This w ay, splattering and dripping oils will not make the oven interior dirty. To make cleaning easier, add some water into this tray. In a grilling operation, use the shelf in position 4. WIRE GRIDS AND TRAYS Each wire grid and tray comes with a built‐in safety feature to help minimise them being accidentally pulled fully out. This comes in the way as a “step”, positioned partway in from the rear of the wire rack or tray. To fit them into the oven, push the wire grid or tray part way into the oven until the step “catches”, then angle the part over the step & fully insert. To remove, repeat the process in reverse. ... -
Page 16: Troubleshooting
TROUBLESHOOTING If the oven does not operate: The oven may be unplugged from the power source or switched off at the power source. The household fuse has blown or household power supply is off. The Timer (if available) may not set correctly. If the oven does not heat: The heat may not be set correctly with the oven’s temperature setting. If the interior lighting lamp does not light: The lamps are defective. If they are defective, you can change them following the instructions within t his manual. Cooking (if lower‐upper part does not cook equally): Control the shelf locations, cooking period and heat values according to the manual. Unit smoking when first used: This is a result of protective oils being removed and is to be expected with a first use. If you have any further problems with your product, please call your Authorised Service C entre. TRANSPORTATION Keep the original carton of the product and use this packaging if the item needs to be transported. Follow t he transport signs on the carton. ... -
Page 17: Recommended Cooking Times
RECOMMENDED COOKING TIMES LOWER‐UPPER HEAT – (Conventional) LOWER‐UPPER HEAT + FAN (Fan Assist) FOOD Thermosta Rack Cooking Period Thermosta Rack Cooking Period (min) t pos. (°c) pos. (min) t pos (°c) pos. Scones Plain or fruit 2‐3 10‐15 2‐3 10‐15 Cake ‐ Butter cake (deep) 2‐3 2‐3 Cake ‐ Sponge 2‐3 25‐30 2‐3 25‐30 Cake – Cup cakes 2‐3... -
Page 18: Cooking Guides
COOKING GUIDES For optimum cooking keep edges of baking dishes and pans at least 4cm from the sides of the oven. T his allows free heat circulation and ensures even cooking. Where possible remove large cuts of meat 1kg or over from the fridge 1 hour prior to cooking. Allow, t o stand covered and away from direct sun/heat. This process will take the “chill” of the fridge away from t he food and assist in more even cooking. Oven Shelf Location Your Omega oven has five positions of racks for the oven shelves to be positioned depending on your choice of cooking function and size of roasting dishes or containers. These are numbered from 1 (the lowest shelf position) to 4 (the highest shelf position). See diagram in oven manual. To obtain maximum space above and below the shelves, it is recommended that you position trays and dishes i n the following way: When using only 1 shelf, use position/rack 2 or 3 (That’s oven shelf position). When using 2 shelves, use position/rack 1 and 3. Cooking Pizza For the best results when cooking pizza use the Fan forced with Lower Heat Element function. Preheat t he oven for at least 10 minutes. Use a non‐stick pizza pan, ideally one with holes in the base specifically for pizza cooking. ... - Page 19 Grilling Cooking times may vary according to the nature of the foods, their homogeneity and their volume. When cooking a certain food for the first time, it is advisable to choose the lowest temperature and then increase temperature as required. Cakes and Baking Organize the oven shelves while the oven is cold and before preparing a recipe. When baking follow the directions in the recipe however if in doubt as a general rule the food (e.g. cake) is positioned on a shelf that will have the top o f the cake surface as near to the centre of the oven as possible. Preheat oven before preparing the cake or baked items as some baked food does not like to sit waiting for the oven to reach the required temperature. For best results the baked food should go straight into the preheated oven at the correct temperature. ...
- Page 20 Omega products are distributed in Australia by Shriro Australia Pty Ltd. Locked Bag 5002, Kingsgrove NSW 2208 Phone: 1300 795 572 Fax: (02) 9415 5525 Email: service@shriro.com.au Web: www.omegaappliances.com.au ...
Need help?
Do you have a question about the OO650X and is the answer not in the manual?
Questions and answers