Omega OO654X Operating And Installation Instructions
Hide thumbs
Also See for OO654X:
- Operating and installation instructions (21 pages) ,
- Operating and installation instructions (18 pages) ,
- Instruction manual (24 pages)
Advertisement
Table of Contents
- 1 Dear Customer
- 2 Part 1: Presentation and Size of Product
- 3 List of Components
- 4 Safety Warnings
- 5 Part 3: Preparation for Installation and Use
- 6 Part 4: Using the Oven
- 7 Control Panels
- 8 Energy Saving
- 9 Maintenance
- 10 Part 6: Service and Transport
- 11 Information Related to Transport
- Download this manual
Advertisement
Table of Contents

Related Manuals for Omega OO654X


Summary of Contents for Omega OO654X
- Page 1 OO654X OPERATING AND INSTALLATION INSTRUCTIONS OF BUILT-IN OVEN...
-
Page 2: Dear Customer
DEAR CUSTOMER, We thank you and congratulate you on your choice. This new carefully designed product, manufactured with the highest quality materials, has been carefully tested to satisfy all your cooking demands. We would therefore request you to read and follow these easy instructions, which will allow you to obtain excellent results right from the start. - Page 3 Contents 1- Presentation and size of product 2- Warnings 3- Preparation for installation and use 4- Using the oven 5- Cleaning and maintenance of your product 6- Service and Transport...
-
Page 4: Part 1: Presentation And Size Of Product
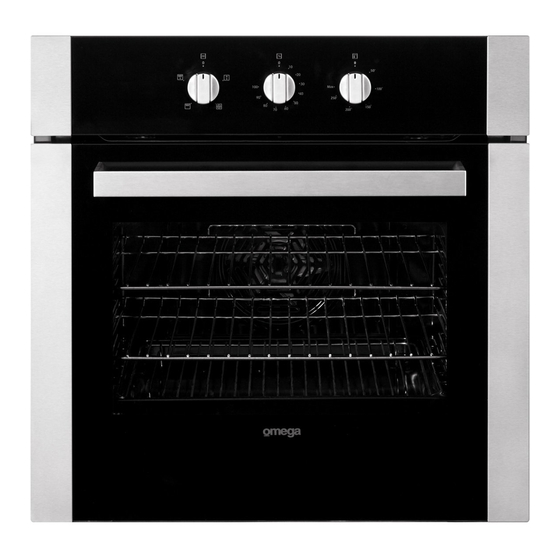
PART 1: PRESENTATION AND SIZE OF PRODUCT LIST OF COMPONENTS : 1- Control panel 8- Wire Grill 2- Handle 9- Racks 3- Oven Door 10- Oven Light 4- Child Lock 11- Turbo Heating Element(behind the plate) 5- Tray 12- Fan (behind the plate) 6- Lower Heating Element (behind the plate) 13- Air Outlet Shutters 7- Upper Heating Element (behind the plate) -
Page 5: Safety Warnings
PART 2 SAFETY WARNINGS READ THESE INSTRUCTIONS CAREFULLY AND COMPLETELY BEFORE USING YOUR APPLIANCE, AND KEEP IT IN A CONVENIENT PLACE FOR REFERENCE WHEN NECESSARY. Safety Warnings - The appliance is not intended for use by persons (including children) with reduced physical, sensory or mental capabilities, or lack of experience and knowledge, unless they have been given supervised or instruction concerning use of the appliance by a responsible person for their safely. - Page 6 - Do not use steam cleaners for cleaning the appliance. - WARNING: Ensure that the appliance is switched off before replacing the lamp to avoid the possibility of electric shock. - CAUTION: Accessible parts may be hot when the cooking or grilling is in use. Young children should be kept away.
- Page 7 During usage - When you first run your oven a certain smell will emanate from the insulation materials and the heater elements. For this reason, before using your oven, run it empty at maximum temperature for 45 minutes. At the same time you need to properly ventilate the environment in which the product is installed.
-
Page 8: Part 3: Preparation For Installation And Use
PART 3: PREPARATION FOR INSTALLATION AND USE Manufactured with best quality parts and materials, this modern, functional and practical oven will meet your needs in all respects. Make sure to read the manual to obtain successful results and not to experience any problems in the future. The information given below contain rules that are necessary for correct positioning and service operations. - Page 9 Product sizes Insert the oven into cabinet by pushing it forward. Open the oven door and insert 2 screws in the holes located on the oven frame. While the product frame touches the wooden surface of cabinet, tighten the screws.
- Page 10 The dimensions and material of the cabinet in which the oven will be installed must be correct and resistant to increases in temperature. In a correct installation, contact with electrical or insulated parts must be prevented. Insulating parts need to be fitted in a way to ensure that they cannot be removed by using any kind of tool.
-
Page 11: Part 4: Using The Oven
PART 4: USING THE OVEN 4.1 CONTROL PANELS Built-in Oven Oven Thermostat Knob Oven Function Control Knob Oven Thermostat Light Oven Operation Light Oven Function Control Knob: To select the desired cooking function, turn the knob to the related symbol (Figure 11). the details of the oven functions have been explained in Table 1 and next part. - Page 12 4.2. USING THE OVEN FUNCTION CONTROL BUTTON Table 1 The oven light, the red warning light and the fan will be turned on. Performs the function of defrosting the frozen foods. The oven’s thermostat and warning lights and the lower and upper heating elements will be switched on.
- Page 13 Lower-Upper Heating Element Function (Static Coking) : In this type of cooking which is described as the traditional method, the heat emanating evenly from the lower and upper resistors into the oven ensures even cooking of the lower and upper side of the food that you are cooking. Adjust the thermostat knob of your oven to a temperature recommended on the cooking table for the cooking operation you will perform.
- Page 14 symbol of this function, adjust the oven timer to the recommended time for cooking and preheat the oven for about 10 minutes. The food placed in a suitable container is put into the oven and the operation is started. This position is position where usually very good results are obtained in baking pastry.
-
Page 15: Energy Saving
ENERGY SAVING During use of electrical cookers, it is required to use saucepans having flat bases. Choose a cookware of proper size. Using a lid will reduce cooking times. Minimize the amount of liquid or fat to reduce cooking times. When liquid starts boiling, reduce the temperature setting. - Page 16 4.3. USING THE MECHANIC TIMER Manual Operation : When you bring the Timer button to the position indicating M as shown on the picture, you can continuously run your oven. When the timer button is in 0 position the oven will not operate(Figure 15). Operating by adjusting the time : Figure 15 Rotate the timer button clockwise to a certain time range between 0...
- Page 17 1-2-3 1-2-3 1-2-3 1-2-3 1-2-3...
- Page 18 4.7. ACCESSORIES USED IN THE OVEN It is recommended that you use the containers indicated on the table depending on the food you will cook in your oven, you can also use glass containers, cake cutters, special oven trays suitable for use in your oven, available in the market. Pay attention to the information given by the manufacturer firm concerning this issue.
- Page 19 PART 5: CLEANING AND MAINTENANCE OF YOUR OVEN 5.1. CLEANING Before starting to clean your oven, be sure that all control buttons are off and your appliance is cooled off. Unplug the appliance. Do not use cleaning materials containing particles that might scratch the enamelled and painted parts of your oven.
-
Page 20: Maintenance
Scrubbing with steel cleaning wires may harm the vitroceramic glass surface. Formation of dust on the surface should be cleaned up using a dampened cloth. Changes in colour which might occur on the ceramic glass surface do not affect the functional structure or permanence of the vitroceramic. -
Page 21: Part 6: Service And Transport
PART 6: SERVICE AND TRANSPORT 6.1. REQUIREMENTS BEFORE CONTAINING TO SERVICE If the oven does not operate: The oven may be plugged off, there has been a black out. On models fitted with a timer, time may not be regulated. If the oven does not heat: The heat may be not adjusted with oven’s heater control switch. - Page 22 - If you wish to discard this product, please contact your local authorities and ask for the correct method of disposal. Omega products are distributed in Australia by Shriro Australia Pty Ltd. Locked Bag 5002, Kingsgrove NSW 2208 Phone: 1300 795 572 Fax: (02) 9415 5525 Email: service@shriro.com.au...
Need help?
Do you have a question about the OO654X and is the answer not in the manual?
Questions and answers