Advertisement
Quick Links
Advertisement

Related Manuals for Manhattan Comfort GRANVILLE NS-501


Summary of Contents for Manhattan Comfort GRANVILLE NS-501
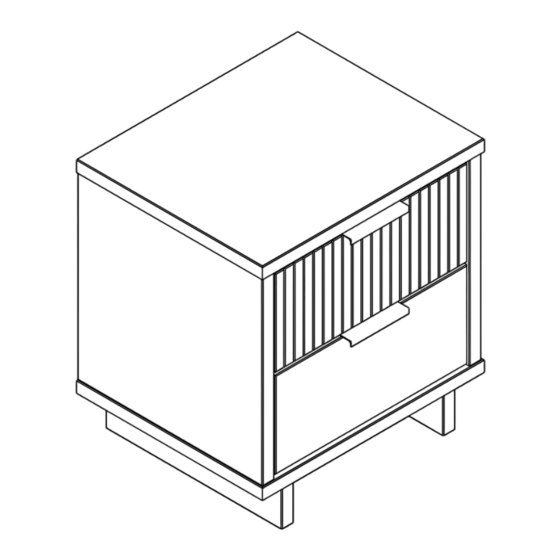
- Page 1 NS-501 REV. 01...
- Page 2 STOP! STOP! Before beginning the assembly process, ensure all boxes and parts have been delivered. FOR BEST RESULTS: •Do not throw away packaging materials until assembly is complete. •Assemble item on a soft surface, such as cardboard or carpet, to protect finish. •Proper assembly requires two people.
- Page 3 Included in this package: 26Lb Top Panel Back Panel Left Side Panel Right Side Panel Bottom Panel Feet Crossbar Foot Top Drawer Front Drawer Back Drawer Right Side Drawer Left Side Top Drawer Support Drawer Bottom Drawer Front...
-
Page 4: Table Of Contents
Included in this package: A x 20 B x 2 C x 2 D x 1 #23857 #PX.017 #CA.002 #2196 E x 8 F x 12 G x 4 H x 4 I x 4 #10385 #1788 #11170 #284 TIPOVER RESTRAINT KIT J x 4 K x 12... -
Page 5: A X 4
Fix the hardware C to part 06 with screw L. Then, attach the parts 06-07 with the hardware A. A x 4 C x 2 L x 4 Fix the part 06 to part 07 with screw L. L x 4... - Page 6 Fix the part 05 to parts 07 with screw G and tool D. G x 4 Attach the parts 03-04 to part 05 with hardware A. Then, fix them with screw H. Pay attention in detail to ensure correct assembling. A x 4 H x 4...
-
Page 7: F X 4
Fix the hardware F to part 01. F x 4 Attach the part 01 to parts 03-04 with hardware A. Then, apply the hardware K and lock it according the example below. Pay attention in detail to ensure correct assembling. A x 4 K x 4... -
Page 8: M X 14
Position correctly part 02 and fix it with the hardware M. Pay attention in detail to ensure correct assembling. M x 14 Fix hardware F to parts 08 and 14. F x 8... - Page 9 Specially to part 08, fix the part 12 with screw I. Please, start by fixing the ends. Then fix the intermediate screws. I x 4 Attach the parts 08 to parts 10-11 with hardware A. Then, apply the hardware K and lock it according the example below. Equaly, the same process is apllied to parts 14-10-11.
- Page 10 Apply the part 13 in the groove of the parts 10-11. TOP DRAWER Attach the part 09 to parts 10-11-13. Then, fix the parts 10-11 to part 09 with screw E. TOP DRAWER E x 8...
- Page 11 Apply the hardware B to parts 08-14. Then, fix them with screw J. TOP DRAWER J x 4 B x 2 Before to fix the Drawers, you must extract the full extension of the Slides, by pulling off. Then, pay attention to the correctly holes according to the next steps.
- Page 12 The Drawers have pre-set holes to help you on fixing them. Set the Drawer on correct position and pre-set holes, carefully. Drawer pre-set holes ATTENTION: extremely necessary a second person helping. Firstly, make sure that the Drawer is correctly positioned according to the detail The correct holes of the Slides must match with the pre-set holes of the Drawers.
- Page 13 Apply the same fixing Drawers process and drawer opening limiter to the other drawer. L x 4 You must install the Tipover Restraint Kit (N) provided, in the rear side of the furniture. Position the hardwares #18256EXP and #20522. Fix them with screw #11179. TIPOVER RESTRAINT KIT #2610 x 1...
- Page 14 Approach the furniture as close as possible to the wall. Then, mark with a pencil where you should drill the wall to put in the hardware. Use a Ø8mm drill bit to drill the wall. Put in the hardware #16973 to the hole that you drilled on the wall. Then, position the hardwares #18256EXP and #20522.
- Page 15 WARRANTY POLICY All Manhattan Comfort furniture products are warranted, to the original purchaser at the time of purchase and for a period of 30 days thereafter. Our warranty is limited to new products purchased in factory sealed cartons. This war - ranty is valid in the United States of America and Canada.
Need help?
Do you have a question about the GRANVILLE NS-501 and is the answer not in the manual?
Questions and answers