Table of Contents
Advertisement
Available languages
Available languages
Quick Links
VIWLF128-B2
INSTRUCTION MANUAL
Texto en español, página 12
Texte français page 14
WE'RE HERE TO HELP
Want to watch a video that
shows how easy this is?
Watch it now at:
SANUS.com/3151
Deutscher Text Seiten 16
Nederlandse tekst op pagina 18
Get it right the first time.
HeightFinder™ shows you
where to drill.
Use it now:
SANUS.com/2567
Svensk text sida 20
Русский текст: стр. 22
Our live install experts are
standing by to help.
中文文字说明请参见第 24 页
日本語は 26 ページ
Call us at:
US: +1 (800) 359-5520
EMEA: +31 (0) 495 580 852
UK: +44 (0) 800 056 2853
Advertisement
Table of Contents

Related Manuals for LEGRAND SANUS VIWLF128-B2


Summary of Contents for LEGRAND SANUS VIWLF128-B2
- Page 1 VIWLF128-B2 INSTRUCTION MANUAL Texto en español, página 12 Deutscher Text Seiten 16 Svensk text sida 20 中文文字说明请参见第 24 页 Texte français page 14 Nederlandse tekst op pagina 18 日本語は 26 ページ Русский текст: стр. 22 WE’RE HERE TO HELP Want to watch a video that Get it right the first time.
-
Page 2: Wall Construction
IMPORTANT SAFETY INSTRUCTIONS – PLEASE READ MANUAL PRIOR TO USE – SAVE THESE INSTRUCTIONS WARNING: Avoid potential personal injuries and property damage! ● DO NOT INSTALL THIS MOUNT IN A FIREWALL (The wall between a garage and a living space, or the wall between two condominiums or occupancies sharing a wall). Contact your local building inspector before cutting a hole in the drywall if unsure. -
Page 3: Before You Begin
Dimensions TV INTERFACE 100.0 23.6 600.0 15.7 100.0 400.0 WALL PLATE TOP VIEW - EXTENDED SIDE VIEW - EXTENDED 28.0 710.6 16.0 406.4 196.9 63.5 15.5 20.8 393.7 529.0 67° 67° 4° 15° SIMULATED 65" 18.1 DOWN 460.8 FLAT SCREEN TV FULLY ASSEMBLED MOUNT TOP VIEW - RETRACTED SIDE VIEW RETRACTED... -
Page 4: Supplied Parts And Hardware
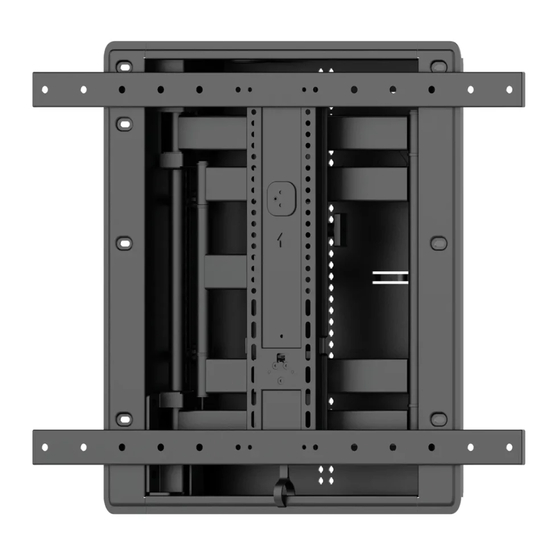
Supplied Parts and Hardware WARNING: This product contains small items that could be a choking hazard if swallowed. Before starting assembly, verify all parts are included and undamaged. If any parts are missing or damaged, do not return the damaged item to your dealer; contact Customer Service. Never use damaged parts! NOTE: Not all hardware included will be used. - Page 5 STEP 1 Attach TV Brackets to TV 1-1 Select TV Screw Diameter 1-2 Select TV Screw Length and Spacers Only one screw size fits your TV. NO SPACER SPACER NEEDED • Flat Back TV • Flat Back TV • Rounded or Irregular Back TV with extra space needed [for deep inset holes or cable interference] [TV brackets NOT resting flat on your TV]...
-
Page 6: Wood Stud Installation
Wood Stud Installation STEP 2 Attach The In-wall Box CAUTION: Avoid potential personal injury or property damage! ● Drywall covering the wall must not exceed 5/8 in. (16 mm) ● Minimum wood stud size: nominal 2 x 4 in. (51 x 102 mm) actual 1½ x 3½ in. (38 x 89 mm) ●... - Page 7 2 ½ in. (63 mm) 1/8 in. (3 mm)
- Page 8 STEP 3 Hang your TV onto The In-wall Box 3-1 Attach Arm Assembly to the In-wall Box NOTE: The top two screws will not seat fully - tighten until snug. 3-2 Attach TV to Arm Assembly HEAVY! You may need assistance with this step. CAUTION: Avoid potential injuries or property damage! Locking screw...
-
Page 9: Manage Cables
Manage Cables IMPORTANT: Fully extend arm assembly to ensure enough slack in cables. Route your cables through the arm assembly and secure with clips IMPORTANT: Be sure cables are not in a position to be pinched when mount is in motion. Install Components Junction Box (Not Included) WARNING:... -
Page 10: Tilt Adjustment
TV Adjustments TILT ADJUSTMENT Your TV should adjust easily when moved, then stay in place. If your TV is too loose or too tight, adjust the side tension knob NOTE: Once your TV is in place, tighten the tension knob to prevent unwanted movement. -
Page 11: Removing The Tv
REMOVING THE TV HEAVY! You may need assistance with this step. REMOVING THE ARM REMOVING THE BOX... -
Page 12: Instrucciones Importantes De Seguridad
INSTRUCCIONES IMPORTANTES DE SEGURIDAD: ESPAÑOL GUARDE ESTAS INSTRUCCIONES Y LEA TODO EL MANUAL ANTES DE UTILIZAR ESTE PRODUCTO. ESTAMOS A SU DISPOSICIÓN PARA AYUDARLE ¿Desea ver un vídeo que muestra lo fácil que será este proyecto de bricolaje? Puede verlo en: SANUS.com/3151 SANUS.com/2567 Acierte a la primera. - Page 13 1-2 Seleccione la longitud de los tornillos y los espaciadores del televisor SIN ESPACIADOR • Televisor con parte posterior plana [los soportes del televisor se apoyan planos sobre su televisor] Utilice tornillos de televisor cortos . No es necesario usar espaciadores.
-
Page 14: Avant De Commencer
INFORMATIONS IMPORTANTES CONCERNANT LA SÉCURITÉ FRANÇAIS – CONSERVEZ CES INSTRUCTIONS – VEUILLEZ LIRE ATTENTIVEMENT LE MANUEL AVANT D'UTILISER CE PRODUIT NOUS SOMMES LÀ POUR VOUS AIDER SANUS.com/3151 Souhaitez-vous voir une vidéo démontrant à quel point cette procédure est facile à effectuer ? Rendez-vous maintenant sur : Réussissez du premier coup ! HeightFinder™... - Page 15 1-2 Sélectionnez la longueur des vis et les entretoises pour le téléviseur SANS ENTRETOISE • Téléviseur au dos plat [Les pattes de fixation du téléviseur sont posées à plat sur votre téléviseur] Utilisez des vis de téléviseurs courtes . Les entretoises ne sont pas nécessaires.
-
Page 16: Wichtige Sicherheitshinweise
WICHTIGE SICHERHEITSHINWEISE DEUTSCH – BEWAHREN SIE DIESE HINWEISE SORGFÄLTIG AUF – LESEN SIE VOR DEM GEBRAUCH DES PRODUKTS BITTE DAS GESAMTE HANDBUCH WIR SIND FÜR SIE DA Möchten Sie sich ein Video ansehen, das zeigt, wie einfach dieses Heimwerkerprojekt ist? Schauen Sie rein auf: SANUS.com/3151 Machen Sie es gleich richtig. - Page 17 1-2 Wählen Sie die Schraubenlänge und die Distanzscheiben für den Fernseher aus KEINE DISTANZSCHEIBE • Flachfernseher [TV-Halterungen flach auf Ihren Fernseher legen] Verwenden Sie kurze Schrauben für den Fernseher . Distanzscheiben nicht erforderlich DISTANZSCHEIBEN ERFORDERLICH • Flachfernseher mit Extra-Distanzscheibe erforderlich [für tiefe Einschublöcher oder störende Kabel] •...
-
Page 18: Belangrijke Veiligheidsinstructies
BELANGRIJKE VEILIGHEIDSINSTRUCTIES NEDERLANDS – BEWAAR DEZE INSTRUCTIES – LEES DE VOLLEDIGE HANDLEIDING VOORAFGAAND AAN HET GEBRUIK WIJ STAAN VOOR U KLAAR Wilt u een video bekijken die u toont hoe gemakkelijk dit doe-het-zelf-project is? Bekijk het nu op: SANUS.com/3151 Doe het in een keer goed. HeightFinder™ laat u zien waar u moet boren. Bekijk het op: SANUS.com/2567 Onze installatie-experts in de VS staan klaar om u te helpen. - Page 19 1-2 De schroeflengte en afstandhouders voor de tv selecteren GEEN AFSTANDHOUDER • TV met vlakke achterkant [tv-beugels liggen plat op uw tv] Gebruik korte tv-schroeven . Afstandhouders zijn niet vereist. AFSTANDHOUDER VEREIST • Tv met een vlakke achterkant met extra benodigde ruimte vereist [voor diepe inzetgaten of kabelbelemmeringen] •...
-
Page 20: Viktiga Säkerhetsanvisningar
VIKTIGA SÄKERHETSANVISNINGAR SVENSKA – SPARA DESSA ANVISNINGAR – LÄS HELA BRUKSANVISNINGEN INNAN DU ANVÄNDER DENNA PRODUKT VI ÄR HÄR FÖR ATT HJÄLPA DIG SANUS.com/3151 Vill du titta på ett videoklipp som visar hur enkelt det här Gör-det-själv-projektet kommer att bli? Titta på... - Page 21 1-2 Välja skruvlängd och distansbrickor för TV:n INGEN DISTANSBRICKA • Flatback-TV [TV-fästena ligger platt på TV:n] Använd korta TV-skruvar . Distansbrickor ej nödvändigt. DISTANSBRICKA KRÄVS • Flatback-TV med extra utrymmeskrav [för djupa hål eller kabelstörning] • TV med rundad eller oregelbunden baksida [TV-fästena ligger INTE platt mot TV:n] Använd långa TV-skruvar och distansbrickor...
-
Page 22: Важные Инструкции По Технике Безопасности
ВАЖНЫЕ ИНСТРУКЦИИ ПО ТЕХНИКЕ БЕЗОПАСНОСТИ РУССКИЙ – СОХРАНИТЕ ЭТИ ИНСТРУКЦИИ – ПЕРЕД ЭКСПЛУАТАЦИЕЙ ИЗДЕЛИЯ ПОЛНОСТЬЮ ПРОЧТИТЕ ДАННОЕ РУКОВОДСТВО МЫ ЗДЕСЬ, ЧТОБЫ ПОМОЧЬ ВАМ! SANUS.com/3151 Хотите посмотреть видео, демонстрирующее, как просто это сделать самому? Посмотрите его прямо сейчас: Сделайте все правильно с первого раза. HeightFinder™ покажет вам, где сверлить. См. - Page 23 1-2 Выбор длины винтов для телевизора и прокладок БЕЗ ПРОКЛАДОК • Телевизор с плоской стенкой [телевизионные кронштейны плоско прилегают к телевизору] Используйте короткие винты для телевизора . Прокладки не нужны. ПРОКЛАДКИ НЕОБХОДИМЫ • Телевизор с плоской стенкой, когда требуется дополнительное пространство [если...
- Page 24 中文 重要安全说明 – 保存这些说明 – 使用本产品之前,请阅读完本说明书 随时随地的帮助 3151 想要通过视频了解如何轻松完成此 DIY 项目? 立即观看:SANUS.com/ 确保安装一举成功。HeightFinder™ 可提供具体的钻孔位置。 访问以下网址了解详细信息:SANUS.com/2567 我们在美国的安装专家可随时提供帮助。 若需帮助请致电: US]: +1 (800)-359-5520 [EMEA]: +31 (0) 495 580 852 [UK]:+44 (0) 800 056 2853 在开始安装之前,我们首先来确认此支架是否适合您! 您的电视机 否 — 适合! (包括配件) 61.2 kg 此支架不兼容。访问 MountFinder.Sanus.com 或致电 [US]: +1 (800)-359-5520 [EMEA]: +31 (0) 495 580 852 是...
- Page 25 1-2 选择电视机螺钉长度和隔圈 无需隔圈 • 后部平直电视机 [电视机托架平放在电视机上] 使用较短的电视机螺钉 。 无需使用隔圈 。 需要隔圈 • 需要额外空间 [因应嵌孔较深或线缆较多的情况] 的后部平直电视机 • 圆背形或背面不规则形电视机 [电视机托架无法紧贴在电视机上] 使用较长的电视机螺钉 和隔圈 ,以便在电视机和电视机托架之间创造额外的空间。 1-3 安装电视机托架 警告: 避免潜在人身伤害和财产损毁!请勿在此步骤中使用电动工具。只需将螺钉 和 拧紧到足以使电视机托架 固定到电视机上即可。请勿过度紧固螺丝。 步骤 2 木墙柱安装 将壁板安装到墙壁上 第 6 页 ● ● 注意: 墙上覆盖的干式墙不能超过 1.5 cm (5/8 in.)。 最小木墙柱尺寸:标称...
- Page 26 安全のための重要な説明 日本語 – この説明書を保管しておいてください – 本製品を使用する前に、 説明書全体をよくお読みください 便利な情報サイ トとお問い合わせ先 取り付け手順をわかりやすく説明したビデオをご覧いただけます。 次のサイトにアクセスしてください : SANUS.com/3151 一度で正しく取り付けられるように、 HeightFinder™で穴を開ける場所を確認できます。 次のサイトをご覧ください : SANUS.com/2567 弊社の米国の専門技術者が、 取り付けのご相談に応じます。 電話 : US]: +1 (800)-359-5520 [EMEA]: +31 (0) 495 580 852 [UK]:+44 (0) 800 056 2853 作業を始める前に、 このマウントがお使いのテレビに適しているかどうかを確認します。 いいえ — 最適です ! 設置するテレビ...
- Page 27 1-2 適切な長さのネジとスペーサーを選ぶ スペーサーなし • 背面が平らなテレビ [テレビブラケットをテレビに直接取り付ける] 短いネジ を使用します。スペーサー は不要です。 スペーサーが必要 • 背面の平らなテレビ (追加の空間を必要とするもの) [ネジ穴が深い、またはケーブルが干渉する場合] • 背面が丸みを帯びている等、平らでないテレビ [テレビブラケットをテレビ背面に平行に取り付けられない場合] 長いネジ とスペーサー で、テレビとテレビブラケットの間に隙間を作ります。 1-3 壁掛けブラケットを組み立てる 注意: 負傷したり壁面を傷付けたりしないように注意してください。この手順には、電動工具を使用しないでください。 ネジ と は、テレビブラケット をテレビに固定するために必要なだけ締めてください。ネジを締めすぎないでください。 木製スタ ッ ド壁への取り付け 手順2 ウォールプレートを壁に取り付ける 6 ページ ● ● 注意: 負傷したり壁面を傷付けたり しないように注意してください。 壁面を覆う石膏ボードは1.5 cm (5/8 インチ)...
- Page 28 SANUS.com Legrand AV Inc. and its affiliated corporations and subsidiaries (collectively, “Legrand”), intend to make this manual accurate and complete. However, Legrand makes no claim that the information contained herein covers all details, conditions, or variations. Nor does it provide for every possible contingency in connection with the installation or use of this product. The information contained in this document is subject to change without notice or obligation of any kind.
Need help?
Do you have a question about the SANUS VIWLF128-B2 and is the answer not in the manual?
Questions and answers