Advertisement
Quick Links
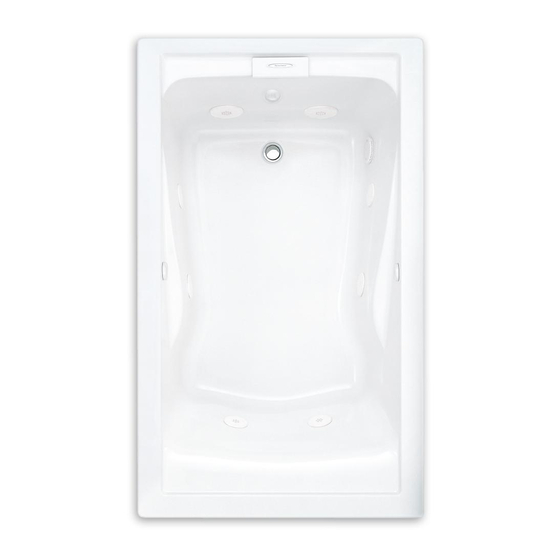
INSTALLATION & OPERATION GUIDE FOR
MODEL 2422L / V
MODEL 6060LC / VC / LCE
MODEL 2771L / V
MODEL 2645L / V
MODEL 7236L / V
MODEL 2425L / V - LHO
MODEL 2425L / V - RHO
MODEL 2908L
MODEL 2711L
MODEL 2773L
MODEL 2774L
MODEL 2775L
MODEL 2732L
THANK YOU...
for selecting an American Standard bath. Your new bath is shipped to you after careful inspection. The whirlpool version
is completely assembled with pump, motor, and system piping. All you need to finish the whirlpool installation are your
selected fittings and electrical connections.
To ensure maximum performance and pleasure from this product, please follow the instructions and cautions.
FOR AFTER-SALES SERVICE CALL 1 (800) 442-1902 WEEKDAYS.
© AS Americas Inc. 2014
All product names listed herein are trademarks
of AS America Inc. unless otherwise noted.
EVERCLEAN
WHIRLPOOLS AND BATHTUBS
/ EVOLUTION
®
5' x 32"
CORNER
5' x 36"
OVAL
6' x 36"
5' x 32" IA-LHO
5' x 32" IA-RHO
REMINISCENCE
ELLISSE
CADET
CADET
CADET
5' x 32"
1
®
®
®
6' x 36"
®
6' x 42"
®
CORNER
®
753737-100 Rev. J
Advertisement

Related Manuals for American Standard EverClean 6060LCE


Summary of Contents for American Standard EverClean 6060LCE
- Page 1 THANK YOU... for selecting an American Standard bath. Your new bath is shipped to you after careful inspection. The whirlpool version is completely assembled with pump, motor, and system piping. All you need to finish the whirlpool installation are your selected fittings and electrical connections.
- Page 2 TABLE OF CONTENTS: Safety Instructions................Page 3 General Information................Page 4 Optional Components................Page 4 Specifications..................Page 5 Roughing-in Reference..............Page 6-9 Framing and Support Instructions.............Page 10 Mounting Instructions.................Page 11 Electrical Connections...............Page 12 6060LC/VC Corner EZ-Install Heater..........Page 13 Operation..................Page 14-15 Drain Connection and System Test...........Page 16 Care and Cleaning..........
- Page 3 Use this unit only for its intended use as described in this manual. Do not use any attachments not recommended by American Standard. The unit must be connected only to a supply circuit that is properly protected by a ground-fault circuit-interrupter (GFCI).
- Page 4 For electrical requirements, refer to section titled “Whirlpool Electrical Installation Instructions” . Check for availability of optional American Standard wall tiling bead (required for recess installation). Protect all finished surfaces of the whirlpool during construction and installation using a drop cloth.
- Page 5 SPECIFICATIONS: SIDE VIEW END VIEW DRAIN / OVERFLOW GENERAL SPECIFICATIONS FOR EVERCLEAN / EVOLUTION WHIRLPOOLS AND BATH TUBS Description Dimensions Drain / Height to Cut Out Rough-In Tub Edge to Weight with Product Apron / Heater Ready Gallon to Whirlpool L-W-H Overflow Underside...
- Page 6 ROUGHING-IN REFERENCES 5' x 32" (MODEL 2422L / V) 60" (1524mm) 13-3/4" (349mm) 3" (76mm) 32" 9" (813mm) (229mm) CUT OUT IN FLOOR FOR DRAIN 7-3/4" (197mm) PROVIDE ACCESS TO PUMP FOR 3-1/4" SERVICING (83mm) 11" ON ALL C/L OF DRAIN OUTLET (279mm) INSTALLATIONS 6' x 36"...
- Page 7 ROUGHING-IN REFERENCES OVAL (MODEL 2645L / V) 66" (1676mm) 11-1/4" (286mm) 1-3/4" (44mm) 18" (457mm) 36" 9" (914mm) (229mm) CUT OUT IN FLOOR FOR DRAIN PROVIDE 3" (76mm) ACCESS TO PUMP FOR 5-3/8" (137mm) SERVICING 8-1/4" C/L OF DRAIN OUTLET ON ALL (210mm) INSTALLATIONS...
- Page 8 ROUGHING-IN REFERENCES CADET CORNER (MODEL 2775L) 9" X 12" 42-1/2" (229 X 305mm) (1080mm) CUTOUT IN FLOOR FOR DRAIN 42-3/8" (1076mm) 60" 6-1/2" (1524mm) (165mm) 2-3/4" REF. (70mm) PROVIDE ACCESS TO PUMP FOR SERVICING ON ALL INSTALLATIONS PUMP 11" (279mm) 42-1/2"...
- Page 9 ROUGHING-IN REFERENCES CADET 6' x 42" (MODEL 2774L) 72" (1829mm) 12" (305mm) FINISHED WALL PROVIDE ACCESS TO PUMP FOR 9" SERVICING (229mm) ON ALL INSTALLATIONS 42" PUMP (1067mm) CUTOUT IN FLOOR 21" FOR DRAIN (533mm) (2) AIR VALVES 2-1/4" (57mm) (8) JETS C/L OF DRAIN OUTLET CADET 6' x 36"...
- Page 10 OF BATH MUST SEALANT (610 mm) BE SUPPORTED BY STUD WALL OR ACCESS PANEL MUST BE LOCATED AMERICAN STANDARD ON THE SAME SIDE AS THE MOTOR. ACCESS PANEL MUST BE LOCATED APRON KIT BATH ON THE SAME SIDE AS THE MOTOR.
- Page 11 TYPICAL FLANGE MOUNTING DETAIL SUGGESTED WHIRLPOOL / BATH TYPICAL INSTALLATION - INSTALLATION METHOD CORNER WOOD STUD STUDS WATERPROOF DRYWALL OR CEMENT BOARD TILE ROOFING NAIL SEALANT 19-1/2 (495mm) 1 x 3 (25 x 76mm) WOOD STRINGER FULL LENGTH STEEL STEEL STUD STUDS WHIRLPOOL...
- Page 12 WHIRLPOOL ELECTRICAL INSTALLATION INSTRUCTIONS All wiring must be performed by a licensed electrician in accordance with the national electrical code and all other applicable codes. WARNING: When using electrical products, basic precautions should always be observed, including the following: 1. DANGER: RISK OF ELECTRIC SHOCK! Connect only to a circuit protected by a ground-fault circuit interrupter. 2.
- Page 13 For 6060LC/VC Corner Only OPERATION Fig. 1 WARNING: Prior to operation, review the Important Safety Instructions listed at the beginning of this instruction manual. Once the heater is installed and the whirlpool pump is operating, the heater is totally automatic. The heater will help maintain the temperature of the water in the bath.
- Page 14 OPERATION: NOTE: Each whirlpool is shipped from the factory with an air actuator on/off switch and pump with attached power supply cord. OPERATING THE SYSTEM WITHOUT WATER (DRY RUNNING) WILL CAUSE PUMP DAMAGE AND VOID THE WARRANTY. Always fill the whirlpool before operating the pump. The air switch is mounted either on the deck or side wall of the tub.
- Page 15 Adjustable Flow Clean Jet™: The water flow action may be adjusted from vigorous to soft by rotating the nozzle clockwise for vigorous massage and counter-clockwise for soft massage. NOTE: You may balance the air volume control and nozzle adjustment for the most desirable condition. Large Jet Small Jet Softer Massage...
- Page 16 DRAIN CONNECTION AND SYSTEM TEST Using recommended drain assembly, connect whirlpool drain to waste line in accordance with the drain assembly instructions. Tighten all drain joints securely. Check the pump couplings and make sure they are hand-tight. Clean the whirlpool and fill with water to a point 2"...
- Page 17 AS America (“American Standard”) warrants to the original consumer purchaser that it will, at its option, repair or replace this whirlpool or any of its parts that are found by American Standard, in its sole judgment, to be defective under normal residential use and maintenance so long as it is owned by the original consumer purchaser.
- Page 18 Unawareness of impending hazard d. Fetal damage in pregnant women e. Physical inability to exit the bathtub SAVE THESE INSTRUCTIONS © American Standard Inc. 2007 753555-100 Rev. E All product names listed herein are trademarks of American Standard Inc. unless otherwise noted.
- Page 19 OPERATION WARNING: Prior to operation, review the Important Safety Instructions listed at the beginning of this instruction manual. Fig. 1 Once the heater is installed and the whirlpool pump is operating, the heater is totally automatic. The heater will help maintain the temperature of the water in the bath.
- Page 20 INSTALLATION INSTRUCTIONS To ensure that you have received the proper heater designed to operate specifically with your bathtub, locate the bathtub part number within the approved list located on the heater assembly. If you cannot locate the specific bathtub part number, do not install the heater assembly until the proper heater is received.
- Page 21 HOTLINE FOR HELP For toll-free information and answers to your questions, call 1 (800) 442-1902 weekdays: 8:00a.m. to 6:00p.m. Eastern Time Product names listed herein are trademarks of American Standard Inc. © American Standard Inc. 2007 753555-100 Rev.E 85-0049AEZ Rev.6...
- Page 22 Installation Instructions LIFETIME UNIVERSAL DRAIN 1599.500.XXX OVER THE RIM DRAIN AND STANDARD DRAIN BATH WASTE AND OVERFLOW WITH TOE TAPPER DRAIN PLUG Thank you for selecting American-Standard...the benchmark of fine quality for over 100 years. To ensure that your installation proceeds smoothly--please U.S.
- Page 23 INSTALL DRAIN PLUG AND ELL (STANDARD AND OVER-THE-RIM DRAINS) Apply putty to underside of DRAIN PLUG (1) and drop into PUTTY drain outlet. BATH DRAIN OUTLET Slip RUBBER WASHER (2) on from below and thread DRAIN PLUG (1) into DRAIN ELL ASSEMBLY (3). NOTE: TUB IS SHOWN CUT AWAY FOR CLARITY OF INSTALLATION.
- Page 24 Align the ESCUTCHEON (4) with the RETAINING PLATE (1) and push onto RETAINING PLATE (1) until the ESCUTCHEON (4) snaps into place. Peel protective tape from the AMERICAN STANDARD LOGO (5). Align LOGO (5) and press into place. When you are satisfied with the overall fit of the drain, go back and tighten all joints to make a water tight seal.
- Page 25 ABOVE FLOOR OUTLET INSTALLATION (OVER-THE-RIM DRAIN) Note: Waste outlet can be installed either above the floor or below floor. Fig.1. For above floor drain outlet, Rotate DRAIN TEE ASSEMBLY (1) 90 degrees so TAILPIECE (2) faces out the back from tub as shown. TYPICAL ABOVE FLOOR INSTALLATION ROUGH FLOOR...
- Page 26 LIFETIME UNIVERSAL DRAIN OVER THE RIM DRAIN AND STANDARD DRAIN PRODUCT NUMBER 1599.500.XXX 753744-0070A AM. STD. BUBBLE LOGO 754012-XXX0A OVERFLOW ESCUTCHEON W/BUBBLE LOGO 754040-0070A OVERFLOW HOLD 754009-0070A RING REPAIR KIT RETAINING PLATE WITH SCREWS 754041-XXX0A 753986-0070A OVERFLOW CAP OVERFLOW FITTING REPAIR KIT 754068-0070A OVERFLOW FITTING...
Need help?
Do you have a question about the EverClean 6060LCE and is the answer not in the manual?
Questions and answers