Table of Contents
Advertisement
Quick Links
Operating instructions
NIR analyzer
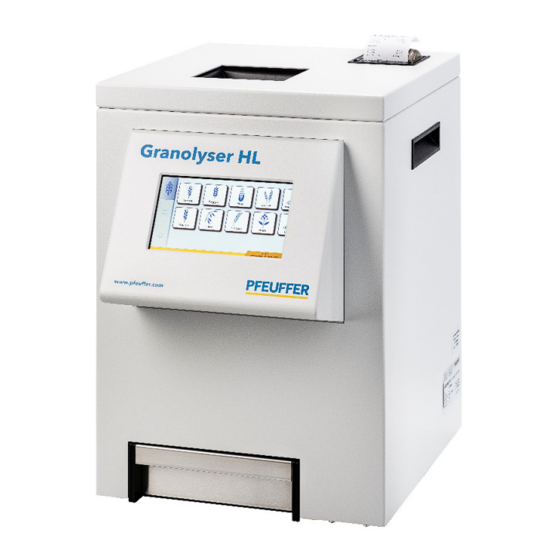
Granolyser® / Granolyser® HL
S/N 1181 . . . .
from software version 1.0.2.3
PFEUFFER GmbH
Flugplatzstraße 70
Revision 3/05.04.2023
97318 Kitzingen
Translation of the original operating instructions
GERMANY
Phone: +49 9321 9369-0
info@pfeuffer.com
Item number operating instructions:
1180 9011
www.pfeuffer.com
Artikelnummer Betriebsanleitung:
Advertisement
Table of Contents

Related Manuals for Pfeuffer Granolyser


Summary of Contents for Pfeuffer Granolyser
- Page 1 Operating instructions NIR analyzer Granolyser® / Granolyser® HL S/N 1181 ..from software version 1.0.2.3 PFEUFFER GmbH Flugplatzstraße 70 Revision 3/05.04.2023 97318 Kitzingen Translation of the original operating instructions GERMANY Phone: +49 9321 9369-0 info@pfeuffer.com Item number operating instructions: 1180 9011 www.pfeuffer.com...
- Page 2 Operating instructions in electronic format The original operating instructions (German) and translations of the original operating instructions can be requested as PDF files by e-mail from Pfeuffer GmbH. Specifying the correct type designation and serial number is important for further processing! ©...
-
Page 3: Table Of Contents
Sequence of functions ........................19 Reference methods for calibration ....................19 Products and measuring ranges ....................... 20 Operation ..........................21 Preparation of a sample ........................21 Drawer mechanism .......................... 22 Revision 3 | Granolyser / Granolyser HL operating instructions 3 | 46... - Page 4 Renewing the internal fuse ......................43 Exchanging the thermal paper roll in the printer ................44 Supplements, accessories and spare parts ................45 Emergency ..........................46 Dismantling and disposal ....................... 46 4 | 46 Granolyser / Granolyser HL operating instructions | Revision 3...
-
Page 5: Introduction
Pfeuffer GmbH, is regarded as not in accordance with the designated use. Pfeuffer GmbH will not be liable for any damage resulting from this! The risk is the responsibility of the owner alone. is only allowed to be taken into operation if it can be ensured that all RANOLYSER safety instruments are functioning. -
Page 6: Declaration Of Conformity
DIN EN 61010-1:2020-03 DIN EN 61000-6-2:2019-11 DIN EN 61000-6-3:2011-09+A1:2012-11 DIN EN 61326-1:2013 (EN 61326-1:2013) EN IEC 63000:2018 Any modification to the GRANOLYSER not agreed with us shall result in this declaration becoming null and void. Kitzingen, _______________________ __________________________________ Lothar Pfeuffer, General Manager... -
Page 7: Structural Features Of The Danger Notes
Introduction Structural features of the danger notes The operating instructions from Pfeuffer GmbH contain instructions that you must comply with for your personal safety as well as to avoid damage to property. The instructions for your personal safety are highlighted by a warning triangle. -
Page 8: Pictograms In The Operating Instructions
Pfeuffer GmbH Tel. +49 9321 969-0 Flugplatzstraße 70 info@pfeuffer.com 97318 Kitzingen www.pfeuffer.com Granolyser NIR Analysegerät/NIR analyzer 11810000 Baujahr/YOM 0000 Spannung/Voltage 0000 Leistung/Power 0000 Sicherung/Fuse 0000 Made in Germany 8 | 46 Granolyser / Granolyser HL operating instructions | Revision 3... -
Page 9: Safety
Mains cable connection – power connector (IEC 60320 C14) The connection for the mains cable (IEC 60320 C14 power connector) is located on the rear of the instrument below the main switch. Revision 3 | Granolyser / Granolyser HL operating instructions 9 | 46... -
Page 10: Electrical Connections
Make sure the installation height is sufficient (according to the stature of the operating personnel). Use a suitable base for this (e.g. table) so that the operating personnel can reach the drawer ergonomically. 10 | 46 Granolyser / Granolyser HL operating instructions | Revision 3... -
Page 11: Operating And Maintenance Personnel
An individual who, due to his/her relevant specialist training and/or experience, is capable of recognizing risks and avoiding dangers that may occur during use of the product. (Definition according to DIN EN 82079-1:2013-06) Revision 3 | Granolyser / Granolyser HL operating instructions 11 | 46... -
Page 12: General Safety Notes
TRLV = Technische Regel zur Lärm- und Vibrations-Arbeitsschutzverordnung = Technical rule for the noise and vibration occupational health and safety ordinance TRGS = Technische Regel für Gefahrstoffe = Technical rule for hazardous substances 12 | 46 Granolyser / Granolyser HL operating instructions | Revision 3... -
Page 13: Safety Tests
Safety Safety tests Pfeuffer GmbH carried out the following safety tests at the factory: Testing and checking according to DIN EN 60204-1: Check that the electrical equipment is in compliance with the technical documentation. • • Continuous connection of the protective earth system •... -
Page 14: Technical Data
Temperature storage and transport -10 °C to +60 °C Temperature measurement +10 °C to +40 °C Atmospheric humidity 20 % to 80 % non-condensing Installation requirement Flat and vibration-free table surface 14 | 46 Granolyser / Granolyser HL operating instructions | Revision 3... -
Page 15: Delivery, Transport And Storage
IEC 60320 C13), cleaning brush, operating and expert instructions. 4.2 Transport and packaging Systems, machines and instruments from Pfeuffer GmbH are carefully tested and packaged prior to dispatch, however it is not possible to exclude the risk of damage during transport. - Page 16 Lower part (PE foam padding) Cardboard box If possible, use the original packaging and the original packaging material. If neither is available any longer, request new packaging from Pfeuffer GmbH. 16 | 46 Granolyser / Granolyser HL operating instructions | Revision 3...
-
Page 17: Installation And Commissioning
Connect the plug of the mains cable to a suitably earthed socked with protective earth conductor. Switch on the via the main switch position I (ON). RANOLYSER Observe the information on operation in chapter 7. Revision 3 | Granolyser / Granolyser HL operating instructions 17 | 46... -
Page 18: Function
RJ45 interface for connecting to a network, hub, switch or router 2 USB interfaces See also important notice in chapter 2.3. Connection for an optional adapter (USB to serial COM port), USB data memory, barcode scanner, etc. 18 | 46 Granolyser / Granolyser HL operating instructions | Revision 3... -
Page 19: Sequence Of Functions
NOTICE DIN EN ISO 7971-3 (Cereals – Determination of bulk density, Part 3 – Routine method) specifies various equations for the analysis, and these are applied by Pfeuffer GmbH. For durum, triticale and spelt the wheat equation is used. The bulk density (hectoliter weight) result of the G... -
Page 20: Products And Measuring Ranges
Sedimentation index In the original substance In dry matter Oil content at 9 % moisture* * The moisture reference value 9 % can be set, see expert instructions. 20 | 46 Granolyser / Granolyser HL operating instructions | Revision 3... -
Page 21: Operation
As well as this, the owner must ensure that all the information in these operating instructions regarding carrying out measurements is complied with. Pfeuffer GmbH will not accept liability for damage caused by incorrect measurement results. In order to reduce energy consumption and heat generation, the screen is darkened after approx. -
Page 22: Drawer Mechanism
To guarantee that the drawer mechanism functions properly, there are two magnets on the back of the drawer. Regularly check that the magnets are firmly attached. Figure 5: G drawer Figure 6: G HL drawer RANOLYSER RANOLYSER Item Designation Magnets 22 | 46 Granolyser / Granolyser HL operating instructions | Revision 3... -
Page 23: Switch On Granolyser - Warm-Up Phase
7.4 Start menu product selection Product selection Scroll product selection to left and right Display time and date Information, operating instructions and messages are displayed in dialog boxes. Revision 3 | Granolyser / Granolyser HL operating instructions 23 | 46... -
Page 24: Carrying Out A Measurement
Start measurement The text fields for entering the sample ID and the customer ID can be disabled in the measurement settings menu, see chapter 7.7.5.1. 24 | 46 Granolyser / Granolyser HL operating instructions | Revision 3... - Page 25 If this symbol next to the input fields is active, you can repeat the measurement with the sample ID or the customer ID. Put the product in the drawer back into the GRANOLYSER. Tap on this symbol and the previous ID is taken over and displayed. The measurement starts automatically.
-
Page 26: Display Measurement Result
If products are very moist, there is a possibility of condensation buildup, mold or fermentation. Clean the filling funnel and the drawer regularly to prevent mixing samples together. The operating company must provide hazard and disposal information. 26 | 46 Granolyser / Granolyser HL operating instructions | Revision 3... - Page 27 EEC bulk density according to directive 71/347/EEC and may not be used in legal transactions. Display of red cross symbol † after the result value, see chapter 9. Revision 3 | Granolyser / Granolyser HL operating instructions 27 | 46...
-
Page 28: Settings Menu
The selected language has a blue background. 7.7.2 Time Set the date and time by scrolling up or down. Save settings Select time zone and activate time server, see expert instructions. 28 | 46 Granolyser / Granolyser HL operating instructions | Revision 3... -
Page 29: User Selection
Generates the print preview on the right-hand side. Test printout (without measurement results) Insert another logo and change text, see expert instructions. Revision 3 | Granolyser / Granolyser HL operating instructions 29 | 46... -
Page 30: Measurement Settings
USB keyboard is connected to the instrument. Note that if a USB barcode scanner is connected, password entry is then not possible (e.g. during user selection). 30 | 46 Granolyser / Granolyser HL operating instructions | Revision 3... -
Page 31: Data Transfer
Operation 7.7.6 Data transfer During the data transfer, a folder with the name "Granolyser" is automatically created on the USB stick. This is where the exported files can then be found. ̶ Measurement results File "Exp-1181XXXX.csv" containing all of the measurement results on the instrument is automatically created on your USB data memory. -
Page 32: Service Menu
Please note that existing data on the USB data memory will be overwritten during a new transfer! Install update, see expert instructions. 7.7.7 Service menu Display brightness Here you can set the display brightness. Further functions, see the expert instructions. 32 | 46 Granolyser / Granolyser HL operating instructions | Revision 3... -
Page 33: Imprint
If you move the button outside the screen where it is no longer accessible, the will RANOLYSER restart. The button will then be returned to its default position. Revision 3 | Granolyser / Granolyser HL operating instructions 33 | 46... -
Page 34: Printing Measurement Results
Confirm Cancel NOTICE The measurement results are printed one after the other on the integrated thermal printer, which can lead to increased paper consumption! 34 | 46 Granolyser / Granolyser HL operating instructions | Revision 3... -
Page 35: Transferring Measurement Results
Only now may the USB data memory be removed! A folder with the name "Granolyser" is automatically created on the USB data memory. The CSV file containing the measurement results "Exp-1181XXXX.csv" can then be found in this folder. The X's... -
Page 36: Switch Off Granolyser
Table 2: Explanation of the column names 7.9 Switch off RANOLYSER Switch OFF the using the main switch (position 0). RANOLYSER 36 | 46 Granolyser / Granolyser HL operating instructions | Revision 3... -
Page 37: Maintenance And Cleaning
Do not use any sharp objects or tools for cleaning. Only use objects that are expressly intended for this purpose. During cleaning, make sure that no water, steam or dust can penetrate the electronics area. Revision 3 | Granolyser / Granolyser HL operating instructions 37 | 46... -
Page 38: Housing
Carefully with a clean, dry and lint-free cloth or a moist screen Touchscreen cleaning cloth. Pfeuffer GmbH recommends a complete cleaning or covering of the instrument before a longer standstill, in order to preserve the operational readiness of the RANOLYSER 8.1.2 Variant HL –... -
Page 39: Printer
Only through regular checks (visual inspection) can damage to the instrument caused during use be detected early and reliably. If you are unsure whether your instrument is still completely ready for use, Pfeuffer GmbH's professional service team will be pleased to assist you. -
Page 40: Inspection Interval And Function Test
Never touch a damaged cable (e.g. cable that has been cut into, insulation damaged etc.) Disconnect the cable from the electrical power supply immediately. Replace the cable with a new one. 40 | 46 Granolyser / Granolyser HL operating instructions | Revision 3... -
Page 41: Malfunctions - Causes And Rectification
Appropriate tools and test instruments must be provided to these personnel. If the specified measures do not prove successful, contact Pfeuffer GmbH. It is important for all questions to specify the correct type designation, serial number and year of manufacture. -
Page 42: Status Messages
No measurement is possible. Switch the instrument off and on again using the main switch. If the fault has not been remedied, contact Pfeuffer GmbH. 42 | 46 Granolyser / Granolyser HL operating instructions | Revision 3... -
Page 43: Renewing The Internal Fuse
Insert the plug connection back into the mains switch. The is ready for operation. RANOLYSER Item Designation Mains switch Pull out the plug connection. Glass micro fuse Plug connection Figure 9: Exchanging the internal fuse Revision 3 | Granolyser / Granolyser HL operating instructions 43 | 46... -
Page 44: Exchanging The Thermal Paper Roll In The Printer
The printer is ready to operate again. Figure 10: Changing the thermal paper roll Item Designation Open the flap Insert paper roll Close the flap Tear off surplus paper 44 | 46 Granolyser / Granolyser HL operating instructions | Revision 3... -
Page 45: Supplements, Accessories And Spare Parts
Installing and/or using such products can therefore result in the design properties of being negatively impaired. RANOLYSER Pfeuffer GmbH cannot be held liable for damage attributable to the use of non-genuine parts and non-genuine accessories. Standard parts can be obtained from the dealer. -
Page 46: Emergency
Disposal with the household garbage is forbidden! The must be RANOLYSER disposed of in accordance with the applicable local environmental regulations directive for electrical and electronic equipment waste WEEE 2012/19/EU). 46 | 46 Granolyser / Granolyser HL operating instructions | Revision 3...
Need help?
Do you have a question about the Granolyser and is the answer not in the manual?
Questions and answers