BlacklineSafety G7 User Manual
Hide thumbs
Also See for G7:
- Technical user's manual (86 pages) ,
- User manual (36 pages) ,
- Manual (10 pages)
Table of Contents
Advertisement
Quick Links
Advertisement
Table of Contents

Related Manuals for BlacklineSafety G7


Summary of Contents for BlacklineSafety G7
- Page 1 Technical User Manual...
-
Page 3: Table Of Contents
GAS DETECTION ............................. 21 BUMP TEST ..............................21 CALIBRATION .............................. 23 BUMP TEST AND CALIBRATION REMINDER WINDOW ..............24 BUMP TEST AND CALIBRATION LOCK ....................24 ZERO SENSORS ............................25 PID TARGET GASES ........................... 25 3 | | G7 TECHNICAL USER MANUAL... - Page 4 GAS ALERT COUNTDOWN ........................26 USING G7 SENSORS IN COLD WEATHER ..................... 27 GAS ALARMS AND ALERTS .......................... 28 YELLOW WARNING ALARM GAS FEATURES ..................28 Low Warning Alarm for Gas ........................ 28 Sensor Under Limit ..........................29 Sensor Error ............................29 Pump Block .............................
- Page 5 OVER-THE-AIR (OTA) FIRMWARE UPDATES ..................52 SUPPORT ................................. 53 LEARN MORE .............................. 53 CUSTOMER CARE............................53 SPECIFICATIONS ............................. 54 DETAILED SPECIFICATIONS ........................54 LEGAL NOTICES AND CERTIFICATIONS ....................56 LEGAL NOTICES ............................56 INTRINSICALLY SAFE CERTIFICATION ....................58 5 | | G7 TECHNICAL USER MANUAL...
-
Page 6: Overview
Blackline Live™ web portal application, your monitoring account and your G7. G7 devices require an active service plan in order to connect to the Blackline Safety Network. Depending on your needs and requirements, various service plan options are available such as 24/7 safety monitoring by Blackline’s Safety Operations Center and two-way voice... - Page 7 If users have only been given access to specific groups of devices, they will only see data attached to those particular devices. 7 | | G7 TECHNICAL USER MANUAL...
-
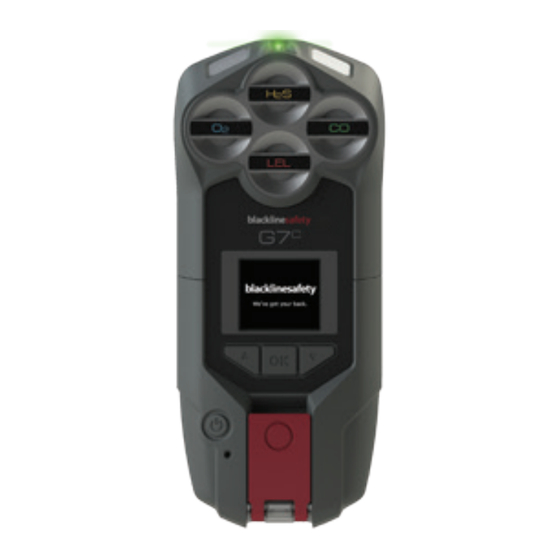
Page 8: G7 Models
There are two G7 models: G7c and G7x. The main difference between them is how they connect to the Blackline Safety Network. If you are unsure of which G7 model you have refer to the logo on the front of your device. G7c works anywhere with 3G/4G cellular G7x works in conjunction with Blackline’s G7... -
Page 9: Device Comparison
Multi-gas detection Pump enabled Low warning alarm for gas Under limit alarm for gas High alert for gas STEL alert for gas TWA alert for gas Over limit alert for gas *G7c devices only 9 | | G7 TECHNICAL USER MANUAL... -
Page 10: What's In The Box
Certification and support card Single-gas or Multi-gas cartridges If you have a single-gas or multi-gas cartridge you will also receive: Single-gas or multi-gas calibration cap (depending on your cartridge) Calibration gas tubing 10 | | G7 TECHNICAL USER MANUAL... -
Page 11: Hardware Details
HARDWARE DETAILS 11 | | G7 TECHNICAL USER MANUAL... -
Page 12: Interaction
INTERACTION HOW IT WORKS Interacting with G7 is easy with its high-visibility LCD display and three-button menu system. OK button Up and down arrow buttons Press OK to enter the main menu on the Press up or down to navigate the menu. -
Page 13: Operation
G7.A solid red light at the bottom of the device confirms your G7 is charging. The LCD screen will let you know when it is fully charged, which can take up to four hours. -
Page 14: Power Off
How do I power on G7x? Press and hold the power button on your G7 Bridge to turn it on first and wait for the blinking green connectivity light to turn solid, it takes approximately two minutes for G7 Bridge to connect to the Blackline Safety Network. -
Page 15: Using G7'S Convenience Features
If G7 is being used in an area where cellphones are not permitted, these features will ensure users do not need to carry multiple devices in the field — G7 can act as an all-in-one solution. - Page 16 To change the information displayed in G7’s main status screen banner: 1. Press the OK button to open the main menu. 2. Use the up and down arrows to navigate to Settings and press OK to select. Scroll to the “Banner” option. You should see what the banner is currently set to.
-
Page 17: Timer
If you would no longer like to use a manual offset, select the “Auto” option from the Time settings menu and G7 will go back to using cellular information to determine the local time. Displaying the local time on G7x The local time feature on G7x requires a connection to a bridge running 3.450 or later in order... -
Page 18: Stopwatch
How to stop the timer alarm When the timer counts down to 0, G7 will go into an information alarm to inform the user to check the screen. Press and hold the up and down • arrows for three beeps to silence the alarm and clear the timer. - Page 19 1. While on the “Stopwatch” screen, press the OK button to pause. Press OK again to resume the stopwatch. 2. To reset the watch back to zero, press OK to stop the stopwatch, and then the up arrow to reset. 19 | | G7 TECHNICAL USER MANUAL...
-
Page 20: Viewing G7'S Assigned User
G7 can be assigned a team member in Blackline Live. In the G7 configuration profile, there is also the option to display the assigned user on the device, which allows you to identify which device belongs to which user. G7 does not have to be assigned a user to function as gas detector. -
Page 21: Gas Detection
11. Turn gas off when prompted on your G7 screen. 12. Press the OK button to complete bump test. 13. G7 will let you know if the bump test has passed or failed, and when your next bump test is due. - Page 22 14. Remove the calibration cap and let your G7 sit until the readings stabilize and your G7 has returned to baseline. NOTE: If you see a bump test fail message on your LCD screen, try the bump test again. If the error persists, please contact our Customer Care team.
-
Page 23: Calibration
11. Turn gas off when prompted on your G7 screen. 12. Press the OK button to complete calibration. 13. G7 will let you know if the calibration has passed or failed, and when your next calibration is due. 14. Remove the calibration cap and let your G7 sit until the readings stabilize and your G7 is calibrated. -
Page 24: Bump Test And Calibration Reminder Window
If a bump test or calibration becomes due during your shift (not on startup), the device will not lock. This is a safety hazard, since the user will not be able to use G7 to call for help. The device will go into a yellow warning alarm for bump test or calibration due, and the message will display in the banner, but the device will remain fully functional. -
Page 25: Zero Sensors
What is zeroing? If G7 is not reading zero and you know you are in an atmosphere with no gas, your gas sensor readings may have shifted. If this happens, it is best to calibrate your sensors. If you are unable to preform a calibration, you can zero your sensors to reset the baseline. -
Page 26: Gas Alert Countdown
In both of these places, G7’s screen will display the target gas’ name, as well as its correction factor. GAS ALERT COUNTDOWN This feature will make it easier to prevent false alarms from being delivered to monitoring services. Gases like CO and O2 can spike and dip very quickly, setting G7 into high gas alarm even when gas levels go back to normal. -
Page 27: Using G7 Sensors In Cold Weather
Countdown. USING G7 SENSORS IN COLD WEATHER G7 is rated to operate down to -20°C (-4°F). G7 will function in temperatures colder than this for short periods of time, but Blackline does not recommend letting the device’s internal temperature drop below -20°C (-4°F). -
Page 28: Gas Alarms And Alerts
GAS ALARMS AND ALERTS Once you have completed a bump test and calibration, G7 is ready to monitor and notify you of gas exposure. Gas detection alarms will notify you with either a yellow warning alarm or a red alert depending on the gas level measured. -
Page 29: Sensor Under Limit
Not all sensors can be zeroed, example: LEL sensor. SENSOR ERROR If a gas sensor stops working for any reason, G7 will inform you with a yellow warning alarm. An X on your LCD screen will indicate which sensor or sensors are generating the error message. -
Page 30: Red Alert Gas Features
SHORT TERM EXPOSURE LIMIT (STEL) ALERT An alert will be triggered when G7 detects you have reached the STEL configured by your safety supervisor. STEL refers to the gas concentration that you can be continuously exposed to for a configurable time frame without suffering adverse health effects. - Page 31 NOTE: STEL, LEL and peak readings are reset on power cycle. To have G7 resume readings instead, this setting can be configured in G7’s configuration profile in Blackline Live. What do I do in the case of a red alert? Evacuate the area and follow your emergency safety protocol.
-
Page 32: Configuration Modes
Configuration modes are customized in the G7 configuration profile on Blackline Live. Each profile supports up to a total of five modes. These modes allow G7 to temporarily change its behavior for different situations, and can be turned on and off through G7’s interface. -
Page 33: Entering A Mode
ENTERING A MODE To use a mode, it must first be enabled in G7’s configuration profile on Blackline Live. Enter a mode from G7’s main menu or main status screen. How do I enter a mode from the modes menu? 1. - Page 34 After this time period has elapsed, you will be asked if you would like to continue in this mode. If you select Yes, your mode will be extended. If you select No, G7 will return to normal operation. If you do not make a selection within 30 seconds, G7 will automatically return to normal operation.
-
Page 35: Cartridges
CARTRIDGES GAS CARTRIDGE REPLACEMENT PROGRAM If you have an uninterrupted service plan for your G7 gas cartridge, Blackline will replace expired cartridges for you free of charge. To inquire about or request new cartridges, please contact our Customer Care team or your distributor. -
Page 36: Lel Sensor Precautions
Replacing filters Replacing filter for G7 Multi-gas (diffusion) cartridge LEL SENSOR PRECAUTIONS For safety reasons this equipment must be operated and serviced by qualified personnel only. Read and understand the instruction manual completely before operating or servicing. High off-scale readings may indicate an explosive concentration. -
Page 37: Lel Latching Alarm
The device user must manually cancel the alarm by pressing and holding on the G7’s up and down arrow buttons for three seconds. If the LEL gas alarm is not canceled by the device user, it will continue until the battery is depleted. -
Page 38: Multi-Gas Pump Cartridge
When a pump cartridge is attached to G7, you can see the pump status screen by pressing the up or down arrow from G7’s main screen. Here you can see if pump is on or off, your hose length, flow rate and sample time (if enabled). - Page 39 When you are in a pumped mode, you can perform a manual block test at any time by plugging G7’s inlet. This will cause G7 to go into yellow warning alarm, and your screen will let you know that your pump is blocked. Unplug your inlet, and if the warning alarm silences, you know that your equipment is safe to use.
-
Page 40: Pump Options
PUMP OPTIONS Settings for pump can be found in G7’s main menu, under Settings > Pump options. What is the sample timer? The sample timer is the amount of time it takes for one air sample to be pumped to your sensors. -
Page 41: Real-Time Features
(example: five minutes). Bump Test Reminder When gas sensors are due for a bump test, G7 will go into an information alarm and display a message on the LCD screen. The bump test schedule depends on your company’s safety policy. - Page 42 For calibration instructions, see How do I perform a calibration? Timer If the timer counts down to 0, G7 will go into an information alarm to inform the user to check the screen. Press and hold the up and down arrows for three beeps will silence the alarm and clear the timer.
-
Page 43: Yellow Warning Alarm Features
Where do I see messages? Your device can receive messages from monitoring personnel via Blackline Live. When there is an incoming message, G7 will inform you with a yellow warning alarm. How do I send a message? You can choose from a list of 10 pre-programmed messages to send to monitoring personnel. - Page 44 If you have a G7c with a voice-enabled service plan, your speakerphone will automatically answer a call from monitoring personnel. G7 will inform you of an incoming call with a yellow warning alarm and you will hear a beep signifying the two-way voice call has been connected.
-
Page 45: Yellow Pending Alarm Features
The check-in countdown is displayed at the top right of the LCD screen. At the end of the timer, your G7 will initiate a yellow pending alarm to confirm you are safe. The check-in timer and pending alarm time are configurable. -
Page 46: Red Alert Features
RED ALERT FEATURES Fall Detected If your device detects a fall and you have not responded to the yellow pending alarm, G7 will communicate a red alert to monitoring personnel. The fall detection sensitivity is configurable. No-Motion Detected If you are not moving and you have not responded to the yellow pending alarm, G7 will communicate a red alert to monitoring personnel. - Page 47 G7 screen. 2. Press and hold the up and down arrow buttons at the same time to mute the sound and vibration. This does not cancel the red alert sent to monitoring personnel. 47 | | G7 TECHNICAL USER MANUAL...
-
Page 48: Liveresponse Light
In the case that a silent SOS alert is sent, the blue LiveResponse light will not shine. Instead, G7 can be configured to vibrate to let you know that remote monitoring personnel are responding by following your team’s emergency protocol. -
Page 49: Receiving
40, the first digit is 4. 5. Press OK. 6. Use the up and down arrow to enter the second digit of your channel. For example, for channel 40, the second digit is 0. 49 | | G7 TECHNICAL USER MANUAL... -
Page 50: Changing Volume
OK when the current PTT channel shows. CHANGING VOLUME Changing the volume of incoming calls can be done from G7’s main screen or the PTT channel menu. Changing your PTT volume only affects incoming calls, and won’t change the way G7’s alerts sound. - Page 51 5. Put your audio accessory into pairing mode as per its instructions. 6. Select your audio accessory from the list. 7. G7 will give you a successful connection message when your device is connected, and you will see an audio accessory icon in the info bar of G7c’s main screen.
-
Page 52: Over-The-Air (Ota) Firmware Updates
When a firmware update is released, G7 will gradually download the update whenever it is on and connected to a cellular network. G7 will be ready to install the firmware update when the download is complete. This will not interfere with normal G7 use. -
Page 53: Support
SUPPORT LEARN MORE Visit support.BlacklineSafety.com to find support and training materials for G7. CUSTOMER CARE For technical support, contact our Customer Care team. North America (24 hours) Toll Free: 1-877-869-7212 | support@blacklinesafety.com United Kingdom (8am-5pm GMT) +44 1787 222684 | eusupport@blacklinesafety.com... -
Page 54: Specifications
Standard G7 safety features G7x wireless radio Fall detection and No-motion detection: Tri-axis accelerometer, tri-axis gyro, Works with G7 bridge satellite base station Radio: 902. 0 –928. 0 MHz, 1 Watt software processing, configurable sensitivity, configurable time for no- Antenna: Internal motion SOS latch: Pull latch to trigger SOS alert Radio link range: 2 km (1. - Page 55 Pumped 0–25% vol 0.1% vol electrochemical Ozone (O3) Electrochemical 0-1 ppm 0.01 ppm Photoionisation (PID) 0–6,000 ppm 0.1 ppm (0–100 ppm), 2 ppm (100–6,000 ppm) Sulphur dioxide (SO2) Electrochemical 0–100 ppm 0.1 ppm 55 | | G7 TECHNICAL USER MANUAL...
-
Page 56: Legal Notices And Certifications
Warranty Your G7 device is warranted against defects in materials and workmanship for up to two years from date of purchase. For further details regarding your Blackline warranty, please refer to your terms and conditions of service. - Page 57 Blackline products contain a non-replaceable internal lithium-ion battery pack. Seek advice from your local electronics recycling authority regarding the disposal of your device. Do not dispose Blackline products in your household trash. 57 | | G7 TECHNICAL USER MANUAL...
-
Page 58: Intrinsically Safe Certification
INTRINSICALLY SAFE CERTIFICATION 58 | | G7 TECHNICAL USER MANUAL... - Page 59 Support.BlacklineSafety.com Rev. 32-1...
Need help?
Do you have a question about the G7 and is the answer not in the manual?
Questions and answers