BlacklineSafety G7 Technical User's Manual
Hide thumbs
Also See for G7:
- User manual (59 pages) ,
- Technical user's manual (48 pages) ,
- Manual (10 pages)
Table of Contents
Advertisement
Quick Links
Advertisement
Table of Contents

Related Manuals for BlacklineSafety G7


Summary of Contents for BlacklineSafety G7
- Page 1 Technical User Manual...
-
Page 2: Table Of Contents
G7 LCD DISPLAY ..........................17 3.3.1 Home Screen ............................17 3.3.2 Main Menu.............................. 17 3.3.3 G7 Main Menu ............................17 3.3.4 G7 Quick Select Menu ......................... 18 ©2023 Blackline Safety Corp G7 Technical User Manual | 2 Rev. 33 2023-04-26... - Page 3 SETTING CALIBRATION AND BUMP TEST REMINDERS ............49 SETTING CALIBRATION AND BUMP TEST LOCKS ..............50 7.10 CONFIGURING THE G7 GAS ALERT COUNTDOWN ..............50 7.11 USING THE G7 MULTI-GAS PUMP CARTRIDGE ................. 51 3 | G7 Technical User Manual ©2023 Blackline Safety Corp...
- Page 4 8 FEATURES ....................54 USING G7’S CONVENIENCE FEATURES ..................54 8.1.1 Displaying Local Time in Banner......................55 8.1.2 Setting Local Time on G7 ........................56 8.1.3 Using the Timer ............................. 58 8.1.4 Using the Stopwatch ..........................60 PUSH-TO-TALK (PTT) (G7C ONLY) ....................61 8.2.1...
- Page 5 WIRELESS SPECIFICATIONS ......................81 13.3 GAS SENSOR SPECIFICATIONS ....................84 14 LEGAL NOTICES AND CERTIFICATIONS ..........85 LEGAL NOTICES ..........................85 14.1 INTRINSICALLY SAFE CERTIFICATION ..................86 5 | G7 Technical User Manual ©2023 Blackline Safety Corp 2023-04-26 Rev. 33...
- Page 6 Calibrations must only be performed in areas free of flammable gases. WARNING: To ensure optimum device connectivity, do not cover G7 with clothing. WARNING: Do NOT power off G7 if the blue LiveResponse light is on. WARNING: Only perform bump tests in a known clean environment. WARNING: G7 will NOT monitor during the firmware update installation process.
-
Page 7: G7 Overview
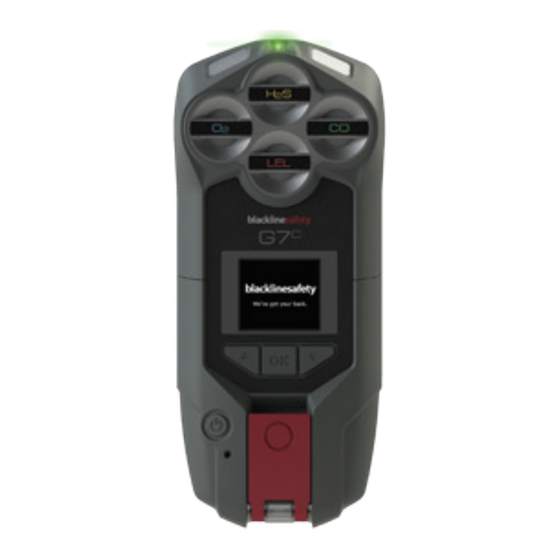
North America, Australia, New Zealand, and South America (excluding Brazil). If you are unsure of which G7 model you have, refer to the logo on the front of your device. 1.1 WHAT’S IN THE BOX G7 comes with: G7 personal safety monitoring device •... -
Page 8: Hardware Details
1.2 HARDWARE DETAILS Front Back ©2023 Blackline Safety Corp G7 Technical User Manual | 8 Rev. 33 2023-04-26... -
Page 9: Blackline Safety Service Plans
Blackline 24/7 Live Monitoring. 1.4.2 BLACKLINE LIVE Blackline Live monitors your G7 devices and allows you to access reports and, depending on your plan, business analytics insights. Blackline Live also allows you to create and customize configuration profiles that determine how a device, or a group of devices, operates in the field. -
Page 10: Communication Intervals
During a High Urgency Event After a High Urgency Event 5 min Immediately (within ~3 5 min seconds) 30 min Immediately (within 5 5 min for 1 hr minutes) ©2023 Blackline Safety Corp G7 Technical User Manual | 10 Rev. 33 2023-04-26... -
Page 11: G7 Cartridges
√ High gas notification √ √ √ STEL notification √ √ √ TWA notification √ √ √ Over limit (OL) √ √ √ notification *G7c devices only 11 | G7 Technical User Manual ©2023 Blackline Safety Corp 2023-04-26 Rev. 33... -
Page 12: Cartridges And Extreme Weather
2.2 CARTRIDGES AND EXTREME WEATHER G7 is rated to operate in weather conditions as low as -20°C (-4°F). G7 will function in temperatures colder than this for short periods of time, but Blackline Safety does not recommend letting the device’s internal temperature drop below -20°C (-4°F). -
Page 13: Cartridge Maintenance
2.4 CARTRIDGE MAINTENANCE 2.4.1 GAS CARTRIDGE REPLACEMENT PROGRAM If you have an uninterrupted service plan for your G7 gas cartridge, Blackline will replace expired cartridges for you free of charge. To inquire about or request new cartridges, please contact our Technical Support team or your distributor. -
Page 14: Changing Cartridges
Using a Phillips #1 screwdriver, remove the screws on each side of the device. Pull up on the cartridge. Slide a new cartridge onto G7, ensuring the cartridge clicks into place. Replace the screws into each side of the device. -
Page 15: Operation
3 OPERATION Interacting with G7 is easy with its high-visibility LCD display and push button menu system. NOTE: This manual describes all available options. Your screen may be different depending on your device’s configuration. For more information, contact your Blackline Live administrator. -
Page 16: Powering On G7
NOTE: You must power on G7 Bridge before powering on G7x. Press and hold the power button on G7 Bridge and wait for the blinking green connectivity light to turn solid. It takes approximately two minutes for G7 Bridge to connect to Blackline Live. -
Page 17: G7 Lcd Display
3.3.2 MAIN MENU The Main menu provides access to all your available G7 features. NOTE: The available items in the main menu depend on how the G7 is configured through Blackline Live. 3.3.3 G7 MAIN MENU To launch the Main menu: From the Home screen, press the OK button. -
Page 18: G7 Quick Select Menu
Insert the micro-USB plug into the removable charging clip. Slide the clip onto the charging port at the bottom of your G7, ensuring that the tabs on the charging clip are lined up correctly on the device. ©2023 Blackline Safety Corp G7 Technical User Manual | 18 Rev. -
Page 19: Operational Notifications
To allow you to read and understand notifications, and to avoid accidentally muting the notification, there is a 2-second delay on your ability to acknowledge full screen notifications. 19 | G7 Technical User Manual ©2023 Blackline Safety Corp 2023-04-26 Rev. 33... -
Page 20: Operational Notification Types
The low battery notification is activated when G7 detects that it is operating below the configured low battery threshold. G7 will remain in low battery status until it is charged above the configured threshold. - Page 21 Blackline Live for the configured time interval (e.g., 5 minutes). Bump test due The bump test due notification is activated when G7 is overdue for a bump test. Following the bump test due notification, a message will display in the banner until the device is successfully bump tested.
- Page 22 Pairing needed (G7x only) The pairing needed notification is activated when G7x does not have a network key to connect to G7 Bridge. For more information on connecting G7x to G7 Bridge, refer to the G7 Bridge Technical User Manual.
-
Page 23: Low Urgency Notifications
To respond to pending (potential fall, potential no-motion, check-in request) notifications: Press and hold the red latch until all light, sound, and vibration patterns clear. 23 | G7 Technical User Manual ©2023 Blackline Safety Corp 2023-04-26 Rev. 33... -
Page 24: Low Urgency Notification Types
Potential fall detected The fall detected notification is configurable by your Blackline Live administrator. The potential fall detected notification is activated when your G7 detects a sudden change in position. NOTE: If your device detects a potential fall and you have not responded to the low urgency potential fall detected notification, your device activates a high urgency fall detected notification. - Page 25 G7 will inform you of an incoming call with a low urgency notification and you will hear a beep signifying the two-way voice call has been connected. In a noisy environment, it may be necessary to remove the device from your clothing and hold it near your ear, as you would a two-way radio.
- Page 26 To resolve the UL event, Blackline Safety recommends that you calibrate your device. For more information on calibration, refer to Calibrating ©2023 Blackline Safety Corp G7 Technical User Manual | 26 Rev. 33 2023-04-26...
-
Page 27: High Urgency Notifications
Press and hold the up and down arrow buttons at the same time to mute the sound and vibration. This does not cancel the alert in Blackline Live. 27 | G7 Technical User Manual ©2023 Blackline Safety Corp 2023-04-26 Rev. 33... -
Page 28: High Urgency Notification Types
Both the check-in timer and pending notification time can be configured. If you do not check-in during the low urgency check-in notification, your device activates a high urgency missed check-in notification. ©2023 Blackline Safety Corp G7 Technical User Manual | 28 Rev. 33 2023-04-26... - Page 29 G7 is equipped with a high gas countdown timer that is configurable (enabled/disabled) by your Blackline Live administrator. Enabling the countdown timer can help reduce the frequency of false high gas event notifications.
- Page 30 Short term exposure limit (STEL) The sensor short term exposure limit (STEL) notification is activated when G7 detects you have reached the STEL configured by your Blackline Live administrator. STEL refers to the gas concentration that you can be continuously exposed to for a configurable time frame (default: 15 minutes) without suffering adverse health effects.
- Page 31 The SOS alert notification is configurable by your Blackline Live administrator. Your device can be configured to send a silent SOS alert notification that does not activate your device's light, sound, and vibration indicators. 31 | G7 Technical User Manual ©2023 Blackline Safety Corp 2023-04-26 Rev. 33...
-
Page 32: Live Response
Depending on your response protocol, a G7c with voice enabled service plan will automatically connect your speaker phone to monitoring personnel. If a silent SOS alert is sent, the blue LiveResponse light will not illuminate. Instead, G7 can be configured to vibrate to let you know that remote monitoring personnel are responding by following your team’s emergency protocol. - Page 33 IMPORTANT: Do not turn on the gas cylinder until G7 indicates you should do so. From the Home screen, press the OK button to open G7's Main menu. 33 | G7 Technical User Manual ©2023 Blackline Safety Corp 2023-04-26 Rev.
- Page 34 OK button to select or clear the checkbox for each sensor. G7 will begin to count down from 60. Attach the calibration cap to your device and apply the gas within this time window.
-
Page 35: Calibrating G7
G7 will let you know if the bump test has passed or failed, and when your next bump test is due. Remove the calibration cap and let your G7 sit until the readings stabilize and your G7 has returned to baseline. - Page 36 You can manually calibrate your G7 by applying the target gas to your gas sensors. To manually calibrate G7, you will need a calibration cap (ACC-S-CAL, ACC-Q-CAL) and tube (ACC-T2). Alternatively, you can calibrate using G7 Dock (DOCK-P-NA/DOCK-P-EU). For more...
- Page 37 G7 performs an automatic audio and visual assessment to test vibration and lights. Select Start zeroing by pressing the OK button. G7 zeros the sensors before the calibration starts. IMPORTANT: Do not clear any checkboxes before zeroing. If you are not calibrating all sensors at the same time (i.e., you are only...
-
Page 38: Calibrating G7 Clo Sensors
Allow the residual gas to clear, and then disconnect the cap from your G7. G7 will let you know if the calibration has passed or failed, and when your next calibration is due. If you see a calibration fail message on your LCD screen, try the calibration again. -
Page 39: Calibrating G7 Osensors
7.5 ZEROING G7 If G7 is not reading zero and you know you are in an atmosphere with no gas, G7’s baseline may have shifted and the sensors may need to be zeroed. If you can calibrate your device, it is best practice to do so, but you can manually zero your sensors if you are unable to calibrate. -
Page 40: Accessing Gas Sensor Settings
7.6.1 ACCESSING THE GAS INFO MENU To access the Gas Info menu: From the Home screen, press the OK button to open G7's Main menu. Using the up and down arrow buttons, scroll through the menu and select Gas Options by pressing the OK button. The Gas info menu opens. -
Page 41: Viewing Gas Sensor Information
If your device sensor did not successfully complete the calibration or bump, the status displays as FAILED. Press the OK button to close the screen and return to the Gas info menu. 41 | G7 Technical User Manual ©2023 Blackline Safety Corp 2023-04-26 Rev. 33... -
Page 42: Viewing And Resetting Gas Readings
From the Gas info menu, scroll through the menu and select Peak readings by pressing the OK button. The Peak readings screen opens, displaying the logged peak readings (gas events) for your device. ©2023 Blackline Safety Corp G7 Technical User Manual | 42 Rev. 33 2023-04-26... - Page 43 You can manually reset the STEL value for your devices using the Gas info menu. Press the OK button to close the screen and return to the Gas info menu. 43 | G7 Technical User Manual ©2023 Blackline Safety Corp 2023-04-26 Rev. 33...
- Page 44 To confirm the reset, select Yes by pressing the up arrow button. To exit the workflow, select No by pressing the down arrow button. The STEL and TWA screens are reset to zero (0). ©2023 Blackline Safety Corp G7 Technical User Manual | 44 Rev. 33 2023-04-26...
-
Page 45: Configuring Lel Latching
Photoionization detector (PID) sensors can be used to detect a large range of gases. A target gas refers to the specific gas you are using trying to detect. G7’s readings will be adjusted based on the target gas it is configured to detect. -
Page 46: Configuring Gas Detection Modes
G7’s PID sensor target gas is set from the configuration profile in Blackline Live. For more information, contact your Blackline Safety administrator. To view G7’s PID configured target gas: From the Gas info menu, scroll through the menu and select VOC target by pressing the OK button. - Page 47 If you select No, G7 will return to normal operation. • If you do not make a selection within 30 seconds, G7 will automatically return to • normal operation. If you have a check-in timer enabled, G7 will immediately ask you to check in.
- Page 48 Select Yes by pressing the up arrow button. NOTE: If the mode selected uses a pump, G7 will test the pump flow before entering the mode. Follow the steps on G7’s screen to complete the block test, blocking and unblocking the gas flow when prompted by your device.
-
Page 49: Setting Calibration And Bump Test Reminders
If you have set up a two-hour bump test/calibration reminder window and start your shift two hours early, G7 will notify you that the bump test is due on start-up because the bump test is due within this two-hour window. As a result, you avoid a bump test due event while in the field. -
Page 50: Setting Calibration And Bump Test Locks
If the bump test or calibration lock is enabled and becomes due during your shift, your device will not lock as long as it is not power cycled. Your G7 will notify you that a bump test or calibration is due and a message will display in the banner, but the device will remain fully functional. -
Page 51: Using The G7 Multi-Gas Pump Cartridge
Blackline Live but will not appear as an alert in the Alerts list. 7.11 USING THE G7 MULTI-GAS PUMP CARTRIDGE G7’s multi-gas pump cartridge is a plug-and-play cartridge that you can attach to G7. The pump cartridge allows you to actively test different areas prior to entering (e.g., down manholes) to determine if the environment is safe. - Page 52 Select OK to cancel the test at any time. If the pump block test fails, check G7’s tubing and try to activate the mode again. When the test is complete, the main screen color scheme will invert and the banner ( ) will indicate you are in the mode selected.
- Page 53 When you are in a pumped mode, you can perform a manual block test at any time by plugging G7’s inlet. This will cause G7 to go into low urgency status, and your screen will let you know that the pump is blocked. Unplug the inlet. If the device returns to OK status, you know that your device is safe to use.
-
Page 54: Features
Stopwatch If G7 is being used in an area where cellphones are not permitted, these features will ensure users do not need to carry multiple devices in the field — G7 can act as an all-in-one solution. Convenience features are available from both the main menu and the quick-select menu. -
Page 55: Displaying Local Time In Banner
The banner can display the check-in timer or the local time. By default, if your G7 fleet is configured with the check-in timer enabled, the screen will display the check-in timer. -
Page 56: Setting Local Time On G7
The following example used +1:30 as the offset. Determine the offset relative to GMT for your local time zone. From the Home screen, press the OK button to open G7's Main menu. Using the up and down arrow buttons, scroll through the menu and select Time by pressing the OK button. - Page 57 Select Yes to confirm and change. Select Edit to make changes to the time offset entered. Select No to cancel the workflow and return to the Time settings menu. G7’s Home screen will display the local time, including offset, in the banner. To stop using a manual time zone offset: From the Home screen, press the OK button to open G7's Main menu.
-
Page 58: Using The Timer
Displaying the local time on G7x The local time feature on G7x requires a connection to a G7 Bridge running firmware version 3.450 or higher to use the Auto time setting. If G7x has not connected to a bridge since starting up, or if it is connected to a bridge running earlier firmware, a blank time (- -:- -) will be displayed. - Page 59 Timer, and then select Yes when prompted. To silence the timer notification: When the timer counts down to zero, G7 will go into a notification to inform the user to check the screen. Press and hold the up and down arrow buttons to silence the sound and clear the timer.
-
Page 60: Using The Stopwatch
To exit the screen, select Back by pressing the down arrow button. The stopwatch will continue to increment. Once the stopwatch starts counting, select to stop the stopwatch. Select Reset to set the stopwatch back to zero. ©2023 Blackline Safety Corp G7 Technical User Manual | 60 Rev. 33 2023-04-26... -
Page 61: Push-To-Talk (Ptt) (G7C Only)
6 inches from your mouth. NOTE: If you are using an O sensor, be sure that you are talking into G7’s microphone, not the cartridge, as this could interfere with the sensor. When you ar finished talking, release the latch. G7 allows PTT messages up to 30 seconds in length. -
Page 62: Changing Ptt Channels
Use the up and down buttons to select the first digit of your channel by pressing the OK button. In the example shown, the first digit, 0, is selected. ©2023 Blackline Safety Corp G7 Technical User Manual | 62 Rev. 33 2023-04-26... - Page 63 The channel selected will display on the G7 screen. To change the PTT channel to receive only or all call: From the Home screen, press the OK button to open G7's Main menu. Using the up and down arrow buttons, scroll through the menu and select PTT channels by pressing the OK button.
-
Page 64: Changing Ptt Volume
The channel selected will display on the G7 screen. 8.2.3 CHANGING PTT VOLUME You can change the volume of incoming calls from G7’s main screen or the PTT channel menu. Changing the PTT volume only affects incoming calls and will not change G7’s notification sounds. -
Page 65: Ptt Audio Accessories
Use the up and down buttons to set G7’s PTT volume to the desired level and press the OK button. 8.2.4 PTT AUDIO ACCESSORIES G7c is equipped with audio accessory pairing for use with PTT. All settings for audio devices can be found in G7’s Main menu, under Accessories >... - Page 66 If it does not, you can reconnect to your accessory from the audio pairing menu. From the Home screen, press the OK button to open G7's Main menu. Using the up and down arrow buttons, scroll through the menu and select Accessories by pressing the OK button.
-
Page 67: Using Messaging (G7C Only)
Message inbox by pressing the OK button. The Messages list opens. Using the up and down arrow buttons, scroll through the menu a message and select by pressing the OK button. 67 | G7 Technical User Manual ©2023 Blackline Safety Corp 2023-04-26 Rev. 33... -
Page 68: Sending Messages To Blackline Live
Using the up and down arrow buttons, scroll through the menu and select Send a message by pressing the OK button. The Messages list opens. ©2023 Blackline Safety Corp G7 Technical User Manual | 68 Rev. 33 2023-04-26... -
Page 69: Device Settings
Messages menu. 9 DEVICE SETTINGS 9.1 ACCESSING DEVICE SETTINGS FOR G7 The G7 Device settings menu allows you to access device information (read only), overwrite certain configuration profile defaults (clock, language), and perform advanced operations. To access the Device settings menu: From the Home screen, press the OK button to open G7's Main menu. -
Page 70: Banner Menu
The Device settings menu opens. 9.2 BANNER MENU The banner can display the check-in timer or the local time. By default, if your G7 fleet is configured with the check-in timer enabled, the screen will display the check-in timer. To view and update your device’s banner: Using the up and down arrow buttons, scroll through the Device settings menu and select Banner by pressing the OK button. -
Page 71: Pump Options Menu
Using the up and down arrow buttons, scroll through the menu and select Sample time by pressing the OK button. NOTE: The Pump options menu will display the item’s current selected setting (ON or OFF). 71 | G7 Technical User Manual ©2023 Blackline Safety Corp 2023-04-26 Rev. 33... -
Page 72: Configuring Tube (Hose) Length
9.4.2 CONFIGURING TUBE (HOSE) LENGTH Tube (hose) length describes length of the tubing attached to the G7 pump cartridge. This value is customizable from the pump options menu, and factors in to sample time. G7’s multi-gas pump cartridge supports maximum tube lengths of: 100 ft of 0.188”... -
Page 73: Advanced Device Information
Pump options menu. 10 ADVANCED DEVICE INFORMATION The Advanced information menus provide detailed information that can be used for quickly troubleshooting your device. The G7 Advanced info menu allows you to access advanced information (read only) including: Device info Beacons •... -
Page 74: Device Info Menu
The Device info screen opens, displaying your device’s settings. Use the up and down arrow buttons to scroll through the Device info screen. To return to the Advanced info menu, press the OK button. ©2023 Blackline Safety Corp G7 Technical User Manual | 74 Rev. 33 2023-04-26... -
Page 75: User Info Menu
Using the up and down arrow buttons, scroll through the Advanced info menu and select GPS location by pressing the OK button. The GPS location info screen opens. 75 | G7 Technical User Manual ©2023 Blackline Safety Corp 2023-04-26 Rev. 33... -
Page 76: Beacons Menu
OK button. The Beacon info screen opens, displaying information related to the selected beacon. To return to the Advanced info menu, press the OK button. ©2023 Blackline Safety Corp G7 Technical User Manual | 76 Rev. 33 2023-04-26... -
Page 77: Communications (Comm) Info Menu
When a firmware update is released, G7 will gradually download the update whenever it is on and connected to a cellular network. G7 will be ready to install the firmware update when the download is complete. This will not interfere with normal G7 use. -
Page 78: Automatic Installation
Blackline Support site. If you have any questions, please contact the Blackline Safety Technical Support team. 11.3 G7X FIRMWARE UPDATE KITS OTA firmware updates are only available for G7 Bridge when it is brought into cellular range. If G7 Bridge cannot be removed from satellite-only reception, contact the Blackline Safety Technical Support team to receive a firmware update kit. -
Page 79: Support
12 SUPPORT 12.1 LEARN MORE Visit support.blacklinesafety.com to find support and training materials for G7. 12.2 TECHNICAL SUPPORT Contact our Technical Support team for assistance. North America (24 hours) Toll Free: 1-877-869-7212 support@blacklinesafety.com United Kingdom (8am-5pm GMT) +44 1787 222684 eusupport@blacklinesafety.com... -
Page 80: Specifications
G7: two years limited warranty. 50ft x 0.125” diameter (15.25m x 3.17mm) Cartridges: lifetime with service plan Blackline Complete: three year operating lease with three year warranty ©2023 Blackline Safety Corp G7 Technical User Manual | 80 Rev. 33 2023-04-26... -
Page 81: Wireless Specifications
Receiver type 72-channel Assisted-GNSS Accuracy 5 meters, CEP 50%, 24 hours stationary sky-view Antenna Internal Indoor location Blackline Safety location beacons technology Location update 5 minutes frequency 81 | G7 Technical User Manual ©2023 Blackline Safety Corp 2023-04-26 Rev. 33... - Page 82 Receiver type 72-channel Assisted-GNSS Accuracy 5 meters, CEP 50%, 24 hours stationary sky-view Antenna Internal Indoor location Blackline Safety location beacons technology Location update 5 minutes frequency ©2023 Blackline Safety Corp G7 Technical User Manual | 82 Rev. 33 2023-04-26...
- Page 83 Receiver type 72-channel Assisted-GNSS Accuracy 5 meters, CEP 50%, 24 hours stationary sky-view Antenna Internal Indoor location Blackline Safety location beacons technology Location update 15 minutes frequency 83 | G7 Technical User Manual ©2023 Blackline Safety Corp 2023-04-26 Rev. 33...
-
Page 84: Gas Sensor Specifications
0.1 ppm NOTE: Check with Blackline for approval status. All specifications are subject to change. *Not all sensors work with the pump cartridge. **Dependent on correction factor. ©2023 Blackline Safety Corp G7 Technical User Manual | 84 Rev. 33 2023-04-26... -
Page 85: Legal Notices And Certifications
(2) cet appareil doit accepter toute interférence reçue, y Warranty compris les interférences pouvant provoquer un mauvais Your G7 device is warranted against defects in materials and fonctionnement du dispositive. workmanship for up to two years from date of purchase. For further L’... -
Page 86: Intrinsically Safe Certification
II 1 G -20°C ≤ Tamb ≤ +55°C Base unit P/N “G7*-#” (* = c, x, or blank; # = NA, EU, AZ) Gas cartridge: Standard P/N “Z” | Single-gas P/N “S-#” | Multi-gas P/N “Q-###” | Pump Module P/N “p-###” (# = Electro chemical sensor identifier or “X”...
Need help?
Do you have a question about the G7 and is the answer not in the manual?
Questions and answers