
Related Manuals for Delta R4E


Summary of Contents for Delta R4E
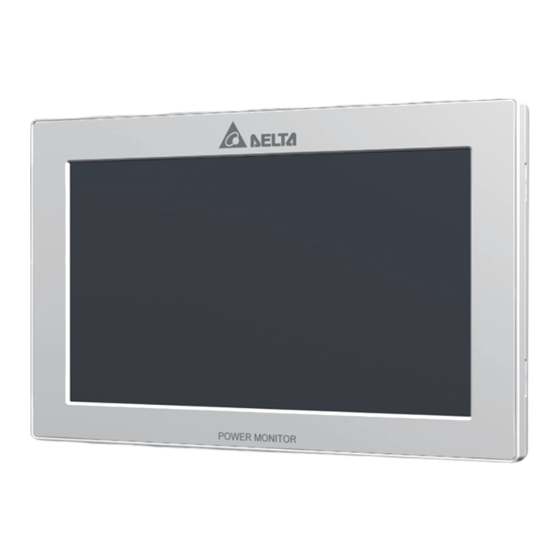
- Page 1 The power behind competitiveness Delta Power Monitor Installation Manual (for energy storage system.) www.deltaww.com...
-
Page 3: Table Of Contents
Contents ■Introduction■ Precautions for Your Safety Essential Points for Safety Precautions for Use 1.Preparation before construction 1.1.Scope of Delivery 1.2.Creating Voltage Detection Cables 1.3.Dimension 1.4.Descriptions and Functions of Parts and Components 2.Installation ( Wired) ... -
Page 4: Introduction
This Instruction Manual provides precautions with the following notations and symbols for safe use of the Power Monitor Set (for energy storage system.) (Power Monitor: R4E; Power Meter: P1E / P3E; Wireless Communication Unit: N1E; Wireless Communication Unit for Inverter: N2E; and USB Wireless Module). - Page 5 Introduction Warning Install the power meter out of the reach of children. Although small, there is a risk of electric shock. Do not allow any fire producing objects to be near the Product, or apply any spray, including combustible gases, to the Product. The Product may ignite or explode in the unlikely event such an occurrence takes place.
-
Page 6: Essential Points For Safety
5. Do not install the Product in any place that is prevented from having air flow, such as inside closets or under stairs. 6. Install the Product with the “DELTA” logo facing up when installing the Power Monitor on a wall. When not installed on a wall, set the Product on the Wall Surface/Desktop Mounting Plate when using the Product. -
Page 7: Precautions For Use
Introduction Precautions for Use 1. The Product is not a specified measuring instrument that passed any certification criteria of any designated accreditation organization as prescribed by the Measurement Act. The Product may only be used to provide a rough indication on the amount of power. 2. - Page 8 Introduction 6. Do not install the Product in following types of locations: a) A location with severe fluctuation of temperature. b) A location that is exposed to sea breeze (excluding the Wireless Communication Unit for Inverter). c) A location that is exposed to volatile, combustible, corroding or toxic gases. d) A location exposed to direct sun light.
-
Page 9: Preparation Before Construction 1.1.Scope Of Delivery
Preparation before construction 1.Preparation before construction 1.1.Scope of Delivery Verify that following items are available for use prior to using this feature. ■ Wired Set (S4E_1P) Product name Shape Remarks Power Monitor 1 unit POWER MONITOR This is a plate used to install Wall Surface / 1 pc the Product on a wall or on a... - Page 10 Preparation before construction Product name Shape Remarks 6 pin connector 1 pc Connect to the main unit. CT sensor 1 pc (Φ16 ) CT sensor cable ( 2m ) 1 pc Quick installation guide copy...
- Page 11 Preparation before construction ■ Wired Set (S4E_3P) Product name Shape Remarks Power Monitor 1 unit POWER MONITOR This is a plate used to install Wall Surface / 1 pc the Product on a wall or on a Desktop Mounting Plate desk. These are wood screws for Wood screws (+) for Wall Surface / Desktop Mounting Plate...
- Page 12 Preparation before construction Product name Shape Remarks 6 pin connector 1 pc Connect to the main unit. CT sensor 3 pcs (Φ16 ) CT sensor cable ( 2m ) 1 pc Quick installation guide copy...
- Page 13 Preparation before construction ■ Wireless Set (S4E_WiFi) Product name Shape Remarks The unit converts the Inverter Wireless Communication Unit 1unit into a wireless communication for Inverter system. This is an antenna that is Wireless Communication Unit 1pc mounted on the Wireless Antenna for Inverter Communication Unit for Inverter.
-
Page 14: Creating Voltage Detection Cables
Preparation before construction 1.2.Creating Voltage Detection Cables This section explains the creation of voltage detection cables. ■ Creation Method 1. Prepare VCTF cables (cable diameter 1.25mm 2. Process the cable so that its bare exposed length before machining is 5.5mm to 5.6mm. (See diagram below.) 3. -
Page 15: Dimension
Preparation before construction 1.3.Dimension ■ 7-inch Power Monitor ■ Wall Surface / Desktop Mounting Plate 32mm 190mm 58mm 25mm 40mm 35mm POWER MONITOR ■ Power Meter ■ Power Meter (P1E) (P3E) 66.5mm 66.5mm 47.3mm 70mm 93mm ■ DIN Rall ■ Stopper 7.5mm 100mm 35mm... - Page 16 Preparation before construction ■ CT sensor ・ CT sensor cable 31mm 18.5mm 29mm 150mm 44.5mm 30mm Φ16 2000mm 150mm ● Wireless Set ■ Wireless Communication Unit 82.6mm 33.3mm 66.5mm 28mm 13mm Φ9.5mm 62.7mm 93mm ■ Wireless Communication Unit for Inverter 63.1mm 167mm 74mm...
-
Page 17: Descriptions And Functions Of Parts And Components
Preparation before construction 1.4.Descriptions and Functions of Parts and Components Important Do not connect a telephone line or household LAN cable to the LAN termin al. ■ Power Monitor ⑧ Front Back Side ① ④ ④ USB 1 ② USB 2 CAN-L CAN-H RS485-B... - Page 18 Preparation before construction ■ Power Meter & Wireless Communication Unit (P1E & N1E) (The figure depicts a situation where the Meter and the Wireless Communication Unit have been connected and the Antenna has been oriented upwards.) ⑥ Front Side ② ①...
- Page 19 Preparation before construction ■ Power Meter & Wireless Communication Unit (P3E & N1E) (The figure depicts a situation where the Meter and the Wireless Communication Unit have been connected and the Antenna has been oriented upwards.) ⑥ Front Side ① ⑤...
- Page 20 Preparation before construction ■ USB Wireless Module (Wireless Set) ① ② ③ ① USB insertion slot This is installed on the USB terminal of the Power Monitor. ② Button Not used. ③ Operation LED lamp Blue light blinking : Standby Blue light on : Normal operation...
- Page 21 Preparation before construction ■ Wireless Communication Unit for Inverter (The figure depicts a situation where the antenna has been installed.) (Wireless Set) ③ ④ ② ⑤ ① ① Wireless Communication Unit Antenna for Inverter This is the antenna used to perform wireless communication with the Power Monitor. The antenna can be detached from the main unit.
-
Page 22: Installation(Wired
Installation(Wired) 2.Installation(Wired) 2.1.Installation order 「Mounting the Installation Unit, Wireless Communications Unit, and DIN Rail」 「Setting Power Monitor and Cable」 「Default Settings」 One Point ・Please set connection ID before connect to the Inverters. The ID of inverters must be different. ・The ID range is 1~3. -
Page 23: System Diagram
Installation(Wired) 2.2.System Diagram ■ Connection example (P1E) Utility Grid PV Panel PV Panel L(Grid) N(Grid) INV. 1 L CT INV. 2 INV. 3 Power Meter L(Grid) N(Grid) L(Load) N(Load) Backup Power Loads AC Loads Power Monitor 6 PIN connector Battery Box Battery Box... - Page 24 Installation(Wired) Utility Grid L1 L2 L3 N ■ Connection example (P3E) L1(Grid) L2(Grid) PV Panel PV Panel L3(Grid) N(Grid) INV. 1 L1L2 L3 INV. 2 INV. 3 Power Meter L(Grid) N(Grid) L(Load) N(Load) Backup Power Loads AC Loads Power Monitor 6 PIN connector Battery Box...
-
Page 25: Mounting The Installation Unit, Wireless Communications Unit, And Din Rail
Installation(Wired) 2.3.Mounting the Installation Unit, Wireless Communications Unit, and DIN Rail (1) Remove the protective cover from the power input terminal block on the power meter. (2) Use wooden screws for the enclosed DIN rail to mount the DIN rail horizontally to the perpendicular site. ... -
Page 26: Current Transformer Installation (Danger)
Installation(Wired) 2.4.Current Transformer installation (DANGER) ■ P1E 1. The CT can be opened. 2. Take the CT clip on the Line conductor wire. 3. Take note of the direction of CT installation. Arrow symbol means utility grid. Energy meter of the electric utility company CT label direction... - Page 27 Installation(Wired) ■ P3E 1. The CT can be opened. 2. Take the CT clip on the Line conductor wire. 3. Be care the CT label direction, arrow symbol means utility grid. Energy meter of the electric utility company CT label direction Main Breaker 4.
-
Page 28: Data Communication Setup
Terminal resistance port short 4. Connect the RS-485 to the meter port. 5. You can now use the Delta monitor to access and display the data. Please refer to the Default Settings (page 32) or connection setting (page 59) for more information. -
Page 29: Setting The Communications Unit
Installation(Wired) 2.6.Setting the Communications Unit ■ Cable ・ Make sure to use RS-485 cable. Prepare 0.3 to 0.5mm x single wire, 2 cores (twin wires rather than 1 pair) shielded cable (rated temperature: 80ºC to 85ºC). ・ Read the inverter installation and maintenance manuals while working. ... - Page 30 Installation(Wired) ■ Using 2 or more inverters (1) Remove the communications connectors from the inverter, and thread the cables through the waterproof gasket. (2) Hold down the top of the terminal block on the communications connectors, and insert the cables connected to the power monitor as follows: 3 DATA+, 4 Data-.
-
Page 31: Setting Power Monitor And Cable
Installation(Wired) 2.7.Setting Power Monitor and Cable ・ Process the cable before use. Φ5~6 Cable Φ0.6~0.8 40mm ・ Creating 6-pin connectors Hold down the enclosed 6-pin connector ①, and insert the cable. ① When the connectors are complete, connect to the main unit. ... -
Page 32: Default Settings
Installation(Wired) 2.8.Default Settings (1) Insert the 6-pin connector into the Power Monitor. (2) After startup, the language selection screen will be displayed, so select the language to be used. Language selection screen (3) The connection setting start screen will be displayed, so touch the [Yes] button. 接続設定開始画面... - Page 33 Installation(Wired) Select the date frame. The date selection screen will be displayed. Select the date that you want to set. Touch the time frame for the time. The time selection screen will be displayed. Select the time that you want to set. 日付選択画面...
- Page 34 Installation(Wired) (5) When the time settings are finished, the connection setting will be displayed, so make the connection setting. If using wires, select as the connection method, and then enable the No. field of the power meter and the No. field of the ID number set on the inverter, and press the [Save] button. connection setting screen (enabled) (Example shows inverter ID 1 enabled) ...
-
Page 35: Installation(Wireless
Installation(Wireless) 3.Installation(Wireless) 3.1.Installation order 「Mounting the Installation Unit, Wireless Communications Unit, and DIN Rail」 「Setting the Inverter Wireless Communications Unit」 「Default Settings」 Warning Before starting work, make sure to turn OFF all DC switches, operations switches, and solar generator breakers. Although small, there is a risk of injury due to electric shock. -
Page 36: System Diagram
Installation(Wireless) 3.2.System Diagram ■ Connection example (P1E) Utility Grid PV Panel PV Panel L(Grid) N(Grid) INV. 1 L CT INV. 2 INV. 3 Power Meter L(Grid) N(Grid) L(Load) N(Load) Backup Power Loads AC Loads Power Monitor POWER MONITOR Battery Box Battery Box... - Page 37 Installation(Wireless) Utility Grid L1 L2 L3 N ■ Connection example (P3E) L1(Grid) L2(Grid) PV Panel PV Panel L3(Grid) N(Grid) INV. 1 L1L2 L3 INV. 2 INV. 3 Power Meter L(Grid) N(Grid) L(Load) N(Load) Backup Power Loads AC Loads Power Monitor POWER MONITOR Battery Box Battery Box...
-
Page 38: Mounting The Installation Unit, Wireless Communications Unit, And Din Rail
Installation(Wireless) 3.3.Mounting the Installation Unit, Wireless Communications Unit, and DIN Rail (1) Remove the protective cover from the power input terminal block on the power meter. (2) Use wooden screws for the enclosed DIN rail to mount the DIN rail horizontally to the perpendicular site. ... - Page 39 Installation(Wireless) (5) Hang the hooks ① on the lower back of the power meter and the wireless communications unit at the bottom of the DIN rail. (6) Hang the hooks on the top of the power meter ② on the DIN rail to secure. ②...
-
Page 40: Current Transformer Installation (Danger)
Installation(Wireless) 3.4.Current Transformer installation (DANGER) ■ P1E 1. The CT can be opened. 2. Take the CT clip on the Line conductor wire. 3. Take note of the direction of CT installation. Arrow symbol means utility grid. Energy meter of the electric utility company CT label direction... - Page 41 Installation(Wireless) ■ P3E 1. The CT can be opened. 2. Take the CT clip on the Line conductor wire. 3. Be care the CT label direction, arrow symbol means utility grid. Energy meter of the electric utility company CT label direction Main Breaker 4.
-
Page 42: Setting The Inverter Wireless Communications Unit
Installation(Wireless) 3.5.Setting the inverter Wireless Communications Unit (1) Mount the inverter wireless communications unit antenna Mount the inverter wireless communications unit antenna to the enclosed inverter wireless communications unit by rotating in the direction of the arrow. ※Rotate until there is no gap between the inverter wireless communications unit antenna and the inverter wireless communications unit. - Page 43 Installation(Wireless) (2) Replace the inverter communications port with the enclosed inverter wireless communications unit. ① Loosen the two screws on the inverter communications port, and pull out. ※ Be careful not to touch the PCB. ※ Be careful not to lose the screws. Communications port Do not remove while operations are still...
- Page 44 Installation(Wireless) ② Insert N2, and use 2 screws to fix N2. ※Please do not collision Do not remove while operations are still underway Installation method for N2. Wireless Communication Unit for Inverter...
-
Page 45: Setting The Usb Wireless Module
Installation(Wireless) 3.6.Setting the USB Wireless Module (1) Remove the protective cover from the (upper) USB1 unit. (2) Mount the USB wireless module for the power monitor to the (upper) USB1 terminal. Operations lamp (3) Connect the AC adapter for the power monitor. ... -
Page 46: Default Settings
Installation(Wireless) 3.7.Default Settings (1) After startup, the language selection screen will be displayed, so select the language to be used. Language selection screen (2) The connection setting start screen will be displayed, so touch the [Yes] button. 接続設定開始画面 connection setting start screen ... - Page 47 Installation(Wireless) Select the date frame. The date selection screen will be displayed. Select the date that you want to set. Touch the time frame for the time. The time selection screen will be displayed. Select the time that you want to set. 日付選択画面...
- Page 48 Installation(Wireless) (4) When the time settings are finished, the connection setting will be displayed, so make the connection setting. If using a wireless configuration, select as the connection method, and touch the inverter serial number frame. The keyboard will be displayed. Enter the inverter serial number.
- Page 49 Installation(Wireless) (6) Touch the number for the connected inverter and the enabled power meter checkboxes, enable the checkboxes, and touch the [Save] button. 接続設定画面 (チェック入り) Connection setting screen (enabled) (7) The reconfirm screen will be displayed, so when the settings are finished, click the [Save] button. The "connection setting complete"...
-
Page 50: Installation Method
Installation Method 4.Installation Method The Power Monitor may be mounted on a desktop or on a wall surface for use. “Wall Installation”, “Desktop Installation” and “Guiding the AC Adapter Cable” are respectively explained in this chapter. * Communication status between the Inverter and the Meter must be verified prior to installation, in order to use wireless communication for the Power Monitor. -
Page 51: Desktop Installation
Installation Method 4.2.Desktop Installation A ② ① ● Desktop installation method ① Insert the Wall Surface / Desktop Mounting Plate in the insertion slot for anchoring the Desktop Mounting Plate at the lower section of the main unit, being careful about the direction the plate is facing. -
Page 52: Description Of The Screen Display
Description of the screen display 5.Description of the screen display 5.1.Home Screen This is the Home screen of the monitor. Illustrations and icons displayed on this screen are explained. ① ② ③ ④ ⑤ ⑥ ⑦ ⑧ ⑨ ⑩ ⑫ ⑪... - Page 53 Description of the screen display ④ Error icon An error icon is displayed to indicate that one or more errors are occurring. The Error icon is ordinarily not displayed, and is displayed when one or more errors occur. Refer to “7. Something Seems Wrong (Troubleshooting)” (Page 85) for details. ⑤...
- Page 54 Description of the screen display ⑬ Flow of electricity Power generating: The “ ” symbol flows from left to right between power generation and consumption. → → Power selling: The “ ” symbol flows from left to right between consumption and power feed-in.
-
Page 55: Operation Screens
Description of the screen display 5.2.Operation Screens The display screen of the Power Monitor changes in the following manner, according to touch panel operations and connection setting. Display details and operations of respective screen are described in the “Display Functions” section. One Point ・... -
Page 56: Reset Method
Description of the screen display 5.3.Reset Method ■ Reset the power monitor Insert an electrically-isolated rod-shaped object with a slender tip into the reset hole on the base of the unit to push the reset button. The device will be reset. ※... - Page 57 Description of the screen display ■ The reset method for N2. 2014.12.13 13:50 ► Meter Status: Normal Energy Log PV►1022W Load►1695W Event Log Inverter Info. BT◄1100W Grid►1573W General Settings Operation Mode Password Function Settings **** Install Settings ► ► Inverter ID: Insulation: Country: Germany LV...
-
Page 58: Service Mode
Service Mode 6.Service Mode 6.1.Entering or Exiting Service Mode Touch the home screen in the following order to enter service mode. Procedure: Touch top left once→Touch top right twice→Touch top left once (Make sure to complete the operation within 5s.) ※ If you make a mistake during the touch operation, touch the center of the screen once to cancel. Perform the operation again from the start. -
Page 59: Exclusive Service Mode Functions
Service Mode 6.2.Exclusive Service Mode Functions Service mode provides setting functions such as inverter connection, grid values, time, maintenance, etc. ■ Connection setting (wired models) Use service mode to make the connection setting. ※ During initial monitor startup, the connection setting screen is displayed automatically, but from the second time onwards, it is necessary to switch to service mode to make the connection settings. - Page 60 Service Mode (3) Check the connection status and connection log page under "Inverter status" and "Information". (4) When the settings are complete, return to normal mode using "■Exiting service mode" (page 58). [Replacing the Inverters] Make the settings as described below if replacing a malfunctioning inverter. The amount of power generated by the additional inverters cannot be measured unless the following settings are made.
- Page 61 Service Mode ■ Connection setting (wireless models) Make the connection setting if expanding or replacing inverters, or if replacing the power meter or wireless communications unit. ※ During initial power monitor startup, the connection setting start screen is displayed automatically, but from the second time onwards, it is necessary to switch to service mode to make the connection ...
- Page 62 Service Mode (3) When the settings are complete, the "Home screen" will be displayed. As processing is implemented immediately after the settings are made, a " " icon is displayed, so check the following details 1 to 3 mins later. ...
- Page 63 Service Mode (5) Touch the number for the inverter to be replaced and the enabled power meter checkboxes, enable the checkboxes, and touch the [Save] button. (6) The settings complete dialog box will be displayed, so touch the [Yes] button. 接続設定画面...
- Page 64 Service Mode (4) Touch the frame for the serial number of the power meter. The keyboard will be displayed. Enter the power meter serial number. After entering, touch the button. ※ Use alphanumeric characters to enter the serial number. Not case sensitive. 接続設定画面...
- Page 65 Service Mode ■ Grid Setting ⑥ ① ② ③ ④ ⑤ ①Use service mode to set grid values. For the details of grid values, see the inverter Operation and Installation Manual. The grid setting page cannot be set in normal mode. ②...
- Page 66 Service Mode ■ Time (1)Select the date frame. The date selection screen will be displayed. Select the date that you want to set. (2)Touch the time frame for the time. The time selection screen will be displayed. Select the time that you want to set. Date selection screen Time selection screen (3)Touch the...
- Page 67 Service Mode (4)The time change dialog box will disappear, and the time change confirmation dialog box will be displayed. Touch the [Yes] button once again. Time change confirmation dialog box ■ Time (Time Synchronous) Enable:Click to enable time synchronization Server:Fill in sever IP or URL which is going to perform time synchronization Time Zone:Choose time zone Period:Choose interval between each time synchronization Operating method...
- Page 68 Service Mode ■ Screen setting ① ② ③ ④ ⑤ ⑥ ⑦ ⑧ ⑨ ① Home screen Touch the frame of the Home screen to select the Home screen. Setting range: Screen 1 and Screen 2 (default setting is “Screen 1”). Home screen selection ②Slideshow photo selection Files can be saved from USB memory onto the monitor.
- Page 69 Service Mode Folder Selection screen ③ Slide interval The screen switching time of the slideshow can be set (5, 10, 20 and 30 seconds). The default setting is 10 seconds. * It may take some time to display larger files. ...
- Page 70 Service Mode ⑨ A change is confirmed. * None of the settings will change until the “Save” button is touched at the end. Caution is required. Touch to turn off the dialog box. Screen Change dialog box Operating method ・In the Home screen, touch →...
- Page 71 Service Mode ■ Operation Mode ⑥ ① ② ③ ④ ⑤ ① Mode Hybrid inverter has 6 normal operation modes for users to choose. Each mode has different behavior between PV, battery, grid, and home load. The following are the description of these modes. ...
- Page 72 Service Mode Self-consumption mode Self-consumption mode is standard hybrid inverter mode. In this mode, PV power is supplied in following priority : 1. Supply for home load. 2. Charge the battery until it is full. 3. Feed-in the remaining power to grid. When there is no PV power, battery starts to discharge and supply home load until it’s empty.
- Page 73 Service Mode Peak cut mode When home load consumption exceeds the Peak Cut Power you set in Function Setting page, battery will discharge to assist the power usage. PV Array Electrical Grid Hybrid Inverter Input Input or output Battery Home Load Charge or Output discharge...
- Page 74 Service Mode Selling First mode Selling first mode is a standard PV inverter mode combining with 6 time settings. In normal operation, power generated by PV array will all feed-in to home load and grid. If users have set the time settings, inverter will change behavior in these time intervals. Please refer to page 80 chapter for more detail about time settings.
- Page 75 Service Mode Charge first mode In this mode, PV power is supplied for battery charging first. After battery is fully charged, the remaining PV power then feed-in to home load and grid. Battery will not discharge in this mode even if there is no PV power. PV Array Electrical Grid Hybrid Inverter...
- Page 76 Service Mode Discharge First mode In this mode, battery will not be charged any more. All the PV power is feed-in to home load and grid. Battery keeps discharging when there is no PV power until it is empty. PV Array Electrical Grid Hybrid Inverter Input...
- Page 77 Service Mode Without BT mode If your battery was damaged for some reason, you can disconnect the battery wiring and choose without BT mode. In this mode, hybrid inverter acts like a basic grid-tie PV inverter. PV Array Electrical Grid Hybrid Inverter Input Input or...
- Page 78 Service Mode Special Modes In addition to the 5 modes above, hybrid inverter still have 3 special modes. These modes cannot be enabled by user but will be enabled automatically by inverter in some special condition. ・Standalone mode Hybrid inverter changes to standalone mode automatically during a power outage occur. At this time, grid side is disconnected by inverter and home load are supported by PV and battery power as much as possible.If the battery is not connected, only when there has sufficient PV power can inverter enter standalone mode.
- Page 79 Service Mode ・Forced charge mode Although battery stops any action when SOC (state of charge) reach 0%, the self-discharge phenomenon may still causing SOC lower than 0%. At this time, hybrid inverter will force battery charging from PV power and grid power until the battery SOC reaching 30%.
- Page 80 Service Mode ② SOC Limit You can assign the lower limit of battery SOC. Battery will stop discharging when its SOC reach this limit. ③ Peak Cut Power Peak cut power is used in peak cut mode. You can assign the peak power of home load ...
- Page 81 You can back up and restore data to the Power Monitor. Not displayed in normal mode. For maintenance by Delta. You can back up the data of the Power Monitor to USB. Restores the backup data from USB to the Power Monitor.
- Page 82 Service Mode ■ Communication Communication page is unnecessary to set. It is used to connect other devices by Ethernet. are protocols for other industry to use. Internet setting for the Power Monitor. Need some knowledge of network management to setting.
- Page 83 The supplementary domain name when a suitable domain name is specified. ⑦ Host Name You can assign a suitable Power Monitor name. The default value is DELTA. No particular settings are required. ⑧ Touch the button to save setting and display the dialog box, and then touch the button.
- Page 84 Service Mode ■ Power Suppression ② ① ③ ④ ① Date Year: Year is displayed according to the Gregorian calendar. The year can be changed with a touch. Month: Month is displayed. The month can be changed with a touch. ...
-
Page 85: When Something Seems Wrong (Troubleshooting)
When Something Seems Wrong (Troubleshooting) 7.When Something Seems Wrong (Troubleshooting) 7.1.Error Displays ■ Icons are displayed on the Home screen when an error, malfunction or suppression occurs. ③ ② ① ① Communication Malfunction icon This icon is displayed when the communication with the Inverter or the Meter is not available. Icon Operating mode Description... - Page 86 When Something Seems Wrong (Troubleshooting) ③ Suppression icon Displayed when the Inverter is being suppressed. Icon Operating mode Description Temperature elevation The internal temperature of the Inverter has reached a high suppression level. The output of the Inverter is being suppressed. The voltage of the commercial power system has reached Voltage elevation a high level while the Inverter was in operation.
-
Page 87: Troubleshooting
When Something Seems Wrong (Troubleshooting) 7.2.Troubleshooting ■ Responsive actions that should be taken in cases where the following symptoms occur are described. Symptom Verification details Responsive action “Battery Under Voltage” Please check if wiring to the battery is reversed. Since reversed wiring may appears in Error Events If the issue cannot be cleared, please contact with cause battery voltage lower... - Page 88 When Something Seems Wrong (Troubleshooting) Symptom Verification details Responsive action The power display values appear to be incorrect. There are instances that the values do not Alternatively, the values necessarily match up with the values that can be for the power generated, derived with these equations, due to effects from Verify that the displayed power consumption and...
-
Page 89: Wireless Communications Problems
When Something Seems Wrong (Troubleshooting) 7.3.Wireless Communications Problems Normally, if wireless communications are disabled for some reason, repeat connections are remade automatically, but if no connection is made even after a long time has elapsed, respond as described below. ● If the communications error icon [ ] is displayed on the home screen, a communications error between the inverter and the Power meter will be displayed. - Page 90 When Something Seems Wrong (Troubleshooting) ■ If "XXXXXXX device connection setting failed" is displayed in the connections log explanation ● If "Power meter (model/serial number) connection setting failed" is displayed Cause Measures The communications Check that the USB wireless module has not been disconnected. status icon is not displayed If unplugging and reinserting the cable does not resolve the error, on the power monitor...
- Page 91 When Something Seems Wrong (Troubleshooting) ● If "Inverter (model/serial number) connection setting failed" is displayed Measures Cause The communications Check that the USB wireless module has not been disconnected. status icon is not displayed If unplugging and reinserting the cable does not resolve the error, on the power monitor.
- Page 92 When Something Seems Wrong (Troubleshooting) ■ If "Disconnected from XXXXXXX device" or "XXXXXXX device unable to connect within set time" is displayed in the connections log explanation. ● If "Power meter (model/serial number" is disconnected" or "Power meter (model/serial number) unable to connect within set time"...
- Page 96 20170607...
Need help?
Do you have a question about the R4E and is the answer not in the manual?
Questions and answers